The Cookie That Captured My Heart
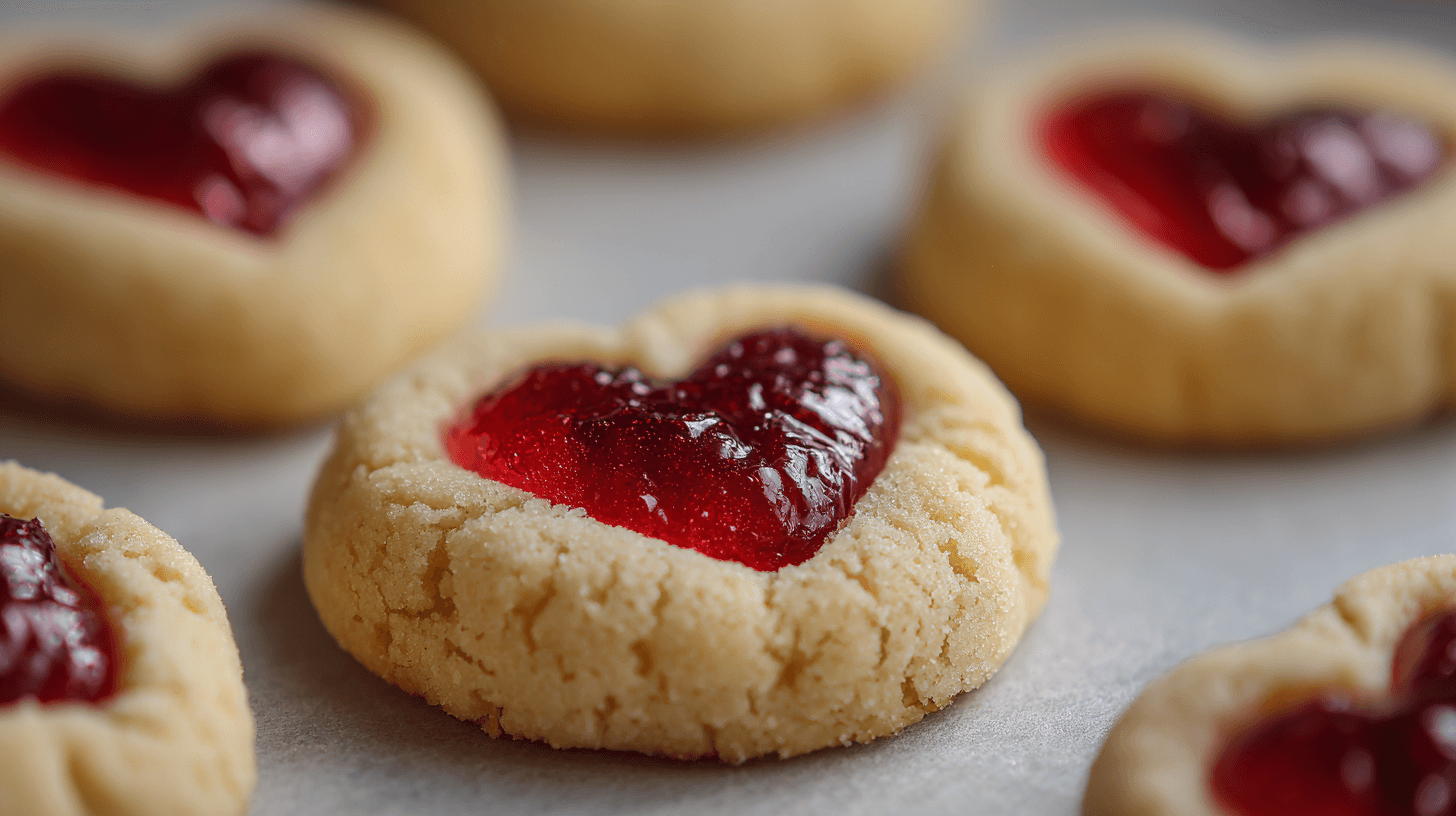
I still remember the first time I made these Thumbprint Heart Cookies—it was for a cookie exchange party, and I wanted to create something that was both beautiful and delicious. Traditional thumbprint cookies are wonderful, but I wanted to add a romantic twist. By using my thumb to create heart-shaped indentations instead of circles and filling them with vibrant raspberry jam, I created cookies that were not only scrumptious but also absolutely adorable. They were the hit of the party, and I’ve been making them ever since for every occasion that calls for a little extra love.
What makes these thumbprint heart cookies so special is their versatility. The chocolate version adds rich cocoa flavor to the buttery cookie base, while the classic vanilla version offers a lighter, more delicate option. Both variations create the perfect vessel for that jewel-like dollop of jam in the center. Whether you choose raspberry, strawberry, or another favorite flavor, these heart cookies become miniature edible valentine cards.
Why Thumbprint Heart Cookies Are a Baking Must-Have
The genius of thumbprint heart cookies lies in their simplicity and impact. The basic technique—creating an indentation in a cookie before baking and filling it with jam—is straightforward enough for beginners, yet the results look professionally crafted. The heart shape elevates them from everyday cookies to special occasion treats without requiring any complex decorating skills.
I’ve discovered that these cookies work beautifully for numerous occasions beyond Valentine’s Day. They’re perfect for weddings (use jam colors that match the wedding theme), baby showers (pink or blue jam), anniversaries, or simply as an “I love you” surprise. The combination of tender, buttery cookie with the sweet-tart jam creates a flavor profile that appeals to almost everyone.
Essential Ingredients for Thumbprint Heart Cookies
Creating perfect thumbprint heart cookies requires quality ingredients and proper technique. Here’s what you’ll need:
For Chocolate Thumbprint Heart Cookies:
- 1 cup (2 sticks) unsalted butter, softened
- 2/3 cup granulated sugar
- 2 large egg yolks
- 2 teaspoons vanilla extract
- 2 cups all-purpose flour
- 1/3 cup unsweetened cocoa powder
- 1/4 teaspoon salt
- 3/4 cup raspberry jam or preserves (or your favorite flavor)
- Powdered sugar for dusting
For Classic Vanilla Thumbprint Heart Cookies:
- 1 cup (2 sticks) unsalted butter, softened
- 2/3 cup granulated sugar
- 2 large egg yolks
- 2 teaspoons vanilla extract
- 1/4 teaspoon almond extract (optional but recommended)
- 2 1/4 cups all-purpose flour
- 1/4 teaspoon salt
- 3/4 cup strawberry or cherry jam
- Powdered sugar for dusting
Optional Add-ins:
- 1 teaspoon espresso powder (for chocolate version, to intensify chocolate flavor)
- 1 tablespoon lemon zest (for vanilla version, for brightness)
- White chocolate for drizzling
- Colored sugar for coating before baking
Step-by-Step Instructions for Perfect Thumbprint Heart Cookies
Preparing Your Dough
Begin by preheating your oven to 350°F (175°C) and lining two large baking sheets with parchment paper or silicone baking mats.
In a large mixing bowl, cream the softened butter and sugar together using an electric mixer on medium speed until light and fluffy, about 3-4 minutes. This creaming process incorporates air into the dough, creating a tender cookie texture.
Add the egg yolks and vanilla extract (and almond extract if using for vanilla cookies), beating until well combined and smooth. Scrape down the sides of the bowl to ensure everything is evenly mixed.
Mixing Dry Ingredients
In a separate bowl, whisk together the flour, cocoa powder (if making chocolate version), and salt. This ensures the dry ingredients are evenly distributed before adding them to the wet mixture.
Gradually add the dry ingredients to the butter mixture, mixing on low speed just until the dough comes together. Don’t overmix—this can lead to tough cookies.
Shaping the Cookies
Scoop the dough using a tablespoon or small cookie scoop (about 1 tablespoon of dough per cookie) and roll into smooth balls between your palms. Place them on the prepared baking sheets, spacing them about 2 inches apart.
Here’s where the magic happens: instead of simply pressing your thumb straight down to create a circular indentation, press at a slight angle and make a second impression right next to the first, creating a heart shape. It takes a little practice to get the perfect heart shape, but even imperfect hearts are charming!
If the heart shape is tricky, an alternative method is to use a small heart-shaped measuring spoon or the end of a wooden spoon handle dipped in flour to create the indentation.
Baking the Heart Cookies
Bake for 12-15 minutes, until the cookies are set but not overly browned. The chocolate version will be slightly harder to judge for doneness visually, so look for a matte finish on top.
Remove from the oven and immediately re-press the indentations if they’ve puffed up during baking (they often do). A small spoon or your thumb can gently reshape them while the cookies are still hot and pliable.
Filling with Jam
Allow the cookies to cool on the baking sheet for 5 minutes, then carefully spoon jam into each heart-shaped indentation. Don’t overfill—about 1/2 teaspoon per cookie is perfect. The jam will spread slightly as it settles.
Transfer the cookies to a wire rack to cool completely. As they cool, the jam will set into that beautiful jewel-like finish.
Finishing Touches
Once completely cool, dust the thumbprint heart cookies lightly with powdered sugar using a fine-mesh sieve. The white sugar creates a beautiful contrast against both the chocolate and vanilla cookies, and gives them a snow-dusted, romantic appearance.
Nutritional Information
Per serving (1 cookie):
- Calories: 95
- Total Fat: 5g
- Saturated Fat: 3g
- Cholesterol: 25mg
- Sodium: 25mg
- Total Carbohydrates: 12g
- Dietary Fiber: 0.5g
- Sugars: 6g
- Protein: 1g
Note: Nutritional values are approximate and based on chocolate version with raspberry jam.
Presentation and Serving Suggestions
The visual appeal of these thumbprint heart cookies makes them perfect for gift-giving and special presentations:
Gift Packaging: Arrange the cookies in a decorative tin or box lined with tissue paper. Layer them carefully with parchment paper between layers to prevent sticking. Tie with a beautiful ribbon and attach a handwritten note.
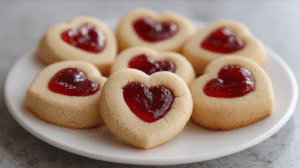
Cookie Platters: Create a stunning display by arranging both chocolate and vanilla versions together on a white platter. The contrast between dark chocolate cookies with red jam and pale vanilla cookies with pink jam is visually striking.
Individual Servings: Place each cookie in a small paper cupcake liner and arrange in a pretty basket for a tea party or shower.
Dessert Tables: These heart cookies look gorgeous on tiered stands for weddings, showers, or Valentine’s Day celebrations. Surround them with fresh flowers or rose petals for extra romance.
Flavor Variations and Creative Combinations
Jam and Preserve Options
Berry Variations:
- Classic raspberry preserves (my personal favorite)
- Strawberry jam for a sweeter flavor
- Blackberry jam for depth
- Mixed berry for complexity
- Blueberry preserves for a unique color
Fruit Preserves:
- Apricot jam with vanilla cookies
- Cherry preserves with chocolate cookies
- Fig jam for sophistication
- Peach preserves for summer
- Lemon curd for tanginess
Specialty Fillings:
- Nutella for chocolate lovers
- Caramel for richness
- Dulce de leche for indulgence
- Apple butter for fall
- Pumpkin butter for autumn festivities
Cookie Dough Variations
Chocolate Variations:
- Use dark cocoa powder for intense chocolate flavor
- Add mini chocolate chips to the dough
- Mix in a tablespoon of espresso powder
- Use dark chocolate for sophistication
- Add a pinch of cayenne for Mexican chocolate flavor
Vanilla Variations:
- Add lemon or orange zest for citrus notes
- Mix in ground almonds for nuttiness
- Add cardamom for exotic flavor
- Use brown sugar instead of white for deeper flavor
- Add chopped pistachios or almonds
Creative Flavor Combinations:
- Lavender vanilla cookies with blueberry jam
- Earl Grey tea cookies with lemon curd
- Hazelnut cookies with chocolate spread
- Coconut cookies with pineapple preserves
- Gingerbread spiced cookies with apple butter
Storage and Make-Ahead Tips
Room Temperature Storage
Store thumbprint heart cookies in an airtight container at room temperature for up to 5 days. Layer them between sheets of parchment paper to prevent sticking. They actually taste even better the next day as the jam settles and the flavors meld.
Refrigeration
While not necessary, refrigerated heart cookies stay fresh for up to 10 days. Bring to room temperature before serving for the best texture and flavor.
Freezing Options
Unbaked Dough: Roll the dough into balls and freeze on a baking sheet. Once frozen solid, transfer to freezer bags. They’ll keep for up to 3 months. Bake directly from frozen, adding 2-3 minutes to the baking time. Create thumbprints immediately after baking while still hot.
Baked Cookies (Before Adding Jam): Freeze baked cookies without jam for up to 3 months. Thaw and warm slightly in the oven, then add jam while still warm.
Fully Assembled Cookies: While possible to freeze completed cookies, the jam texture may change slightly upon thawing. If freezing assembled cookies, layer carefully with parchment paper and freeze for up to 2 months.
Make-Ahead Strategy
The dough can be made up to 3 days in advance and refrigerated. Let it come to room temperature for 15-20 minutes before shaping to make it easier to work with. You can also shape the cookies, create the thumbprints, and refrigerate overnight before baking.
Troubleshooting Common Issues
Cookies Spread Too Much: This usually means the butter was too soft or the dough was too warm. Chill the shaped cookies for 15 minutes before baking if they’re spreading excessively.
Jam Bubbles Over: You’ve likely overfilled the indentations. Use less jam (about 1/2 teaspoon) and don’t press the thumbprint too deep.
Thumbprints Puff Up During Baking: This is normal. Immediately re-press them when you remove the cookies from the oven while they’re still hot and pliable.
Cookies Are Too Hard: You may have overbaked them or overmixed the dough. Bake just until set, and mix the dough only until ingredients are combined.
Heart Shape Isn’t Clear: Practice makes perfect! Try using a small heart-shaped tool instead of your thumb, or make two overlapping circles to create the heart shape.
Jam Looks Dull: Heat the jam slightly before filling to make it glossy. You can also brush it with a light corn syrup wash after filling for extra shine.
Frequently Asked Questions About Thumbprint Heart Cookies
Q: Can I make these cookies gluten-free? A: Yes! Substitute the all-purpose flour with a 1:1 gluten-free baking flour blend. The texture will be slightly different but still delicious.
Q: Why do my cookies crack? A: This happens when the dough is too dry. Add a teaspoon of milk or cream if the dough seems crumbly.
Q: Can I use salted butter? A: You can, but omit the added salt in the recipe to prevent overly salty cookies.
Q: How do I make perfectly round cookie balls? A: Roll the dough between your palms with gentle, even pressure. Using a cookie scoop ensures uniform size.
Q: Can children help make these? A: Absolutely! The thumbprint part is perfect for little helpers (though the oven work should be adult-supervised).
Q: What if I don’t have egg yolks? A: You can use 1 whole egg instead of 2 yolks, though the cookies will be slightly less rich and tender.
Q: Can I add food coloring to the dough? A: Yes! Gel food coloring works best and won’t alter the dough’s consistency.
Q: Why are my cookies flat? A: Make sure your butter is softened but not melted, and ensure you’re measuring flour correctly (spoon and level, don’t pack).
Conclusion: Your New Favorite Heart Cookies
These Thumbprint Heart Cookies have become one of my most-requested recipes, and it’s easy to see why. They combine nostalgic charm with elegant presentation, classic flavors with creative possibilities, and simple techniques with impressive results. Whether you choose the rich chocolate version or the delicate vanilla option, you’re creating more than just cookies—you’re baking love into every heart-shaped indentation.
What I love most about these heart cookies is how they make people feel. There’s something about receiving a homemade cookie shaped like a heart that touches people in a way store-bought treats simply can’t. They say “I care enough to spend time making something special just for you.” In our fast-paced world, that message is more valuable than ever.
The versatility of this recipe means you’ll return to it again and again throughout the year. Valentine’s Day is the obvious occasion, but these thumbprint heart cookies shine at weddings, anniversaries, Mother’s Day, bridal showers, or any time you want to spread a little love. With different jam flavors and cookie variations, you can customize them for any taste preference or color scheme.
My Personal Cooking Tip
Here’s my secret for the most beautiful, professional-looking thumbprint heart cookies: use the double thumb press technique. Press your thumb at a slight angle to create one half of the heart, then make a second impression right next to it at the opposite angle. The two impressions together form a perfect heart shape. If this feels tricky, a heart-shaped measuring spoon dipped in flour works wonderfully too. Also, don’t be afraid to re-press the indentations right after baking—this is your last chance to perfect that heart shape before the cookies set. Finally, warming your jam slightly (about 10 seconds in the microwave) before filling makes it easier to work with and gives it a beautiful glossy finish. And here’s a bonus tip: make extra cookies without jam and freeze them. That way, you can quickly bake and fill fresh cookies whenever you need a last-minute gift or sweet surprise. The combination of planning ahead and fresh-filled cookies creates the best of both worlds. Happy baking, and may your cookies always be filled with love!
Print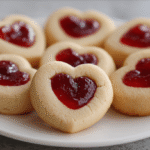
Thumbprint Heart Cookies Recipe
Description
The genius of thumbprint heart cookies lies in their simplicity and impact. The basic technique—creating an indentation in a cookie before baking and filling it with jam—is straightforward enough for beginners, yet the results look professionally crafted. The heart shape elevates them from everyday cookies to special occasion treats without requiring any complex decorating skills.
I’ve discovered that these cookies work beautifully for numerous occasions beyond Valentine’s Day. They’re perfect for weddings (use jam colors that match the wedding theme), baby showers (pink or blue jam), anniversaries, or simply as an “I love you” surprise. The combination of tender, buttery cookie with the sweet-tart jam creates a flavor profile that appeals to almost everyone.
Ingredients
Essential Ingredients for Thumbprint Heart Cookies
Creating perfect thumbprint heart cookies requires quality ingredients and proper technique. Here’s what you’ll need:
For Chocolate Thumbprint Heart Cookies:
- 1 cup (2 sticks) unsalted butter, softened
- 2/3 cup granulated sugar
- 2 large egg yolks
- 2 teaspoons vanilla extract
- 2 cups all-purpose flour
- 1/3 cup unsweetened cocoa powder
- 1/4 teaspoon salt
- 3/4 cup raspberry jam or preserves (or your favorite flavor)
- Powdered sugar for dusting
For Classic Vanilla Thumbprint Heart Cookies:
- 1 cup (2 sticks) unsalted butter, softened
- 2/3 cup granulated sugar
- 2 large egg yolks
- 2 teaspoons vanilla extract
- 1/4 teaspoon almond extract (optional but recommended)
- 2 1/4 cups all-purpose flour
- 1/4 teaspoon salt
- 3/4 cup strawberry or cherry jam
- Powdered sugar for dusting
Optional Add-ins:
- 1 teaspoon espresso powder (for chocolate version, to intensify chocolate flavor)
- 1 tablespoon lemon zest (for vanilla version, for brightness)
- White chocolate for drizzling
- Colored sugar for coating before baking
Instructions
Step-by-Step Instructions for Perfect Thumbprint Heart Cookies
Preparing Your Dough
Begin by preheating your oven to 350°F (175°C) and lining two large baking sheets with parchment paper or silicone baking mats.
In a large mixing bowl, cream the softened butter and sugar together using an electric mixer on medium speed until light and fluffy, about 3-4 minutes. This creaming process incorporates air into the dough, creating a tender cookie texture.
Add the egg yolks and vanilla extract (and almond extract if using for vanilla cookies), beating until well combined and smooth. Scrape down the sides of the bowl to ensure everything is evenly mixed.
Mixing Dry Ingredients
In a separate bowl, whisk together the flour, cocoa powder (if making chocolate version), and salt. This ensures the dry ingredients are evenly distributed before adding them to the wet mixture.
Gradually add the dry ingredients to the butter mixture, mixing on low speed just until the dough comes together. Don’t overmix—this can lead to tough cookies.
Shaping the Cookies
Scoop the dough using a tablespoon or small cookie scoop (about 1 tablespoon of dough per cookie) and roll into smooth balls between your palms. Place them on the prepared baking sheets, spacing them about 2 inches apart.
Here’s where the magic happens: instead of simply pressing your thumb straight down to create a circular indentation, press at a slight angle and make a second impression right next to the first, creating a heart shape. It takes a little practice to get the perfect heart shape, but even imperfect hearts are charming!
If the heart shape is tricky, an alternative method is to use a small heart-shaped measuring spoon or the end of a wooden spoon handle dipped in flour to create the indentation.
Baking the Heart Cookies
Bake for 12-15 minutes, until the cookies are set but not overly browned. The chocolate version will be slightly harder to judge for doneness visually, so look for a matte finish on top.
Remove from the oven and immediately re-press the indentations if they’ve puffed up during baking (they often do). A small spoon or your thumb can gently reshape them while the cookies are still hot and pliable.
Filling with Jam
Allow the cookies to cool on the baking sheet for 5 minutes, then carefully spoon jam into each heart-shaped indentation. Don’t overfill—about 1/2 teaspoon per cookie is perfect. The jam will spread slightly as it settles.
Transfer the cookies to a wire rack to cool completely. As they cool, the jam will set into that beautiful jewel-like finish.
Finishing Touches
Once completely cool, dust the thumbprint heart cookies lightly with powdered sugar using a fine-mesh sieve. The white sugar creates a beautiful contrast against both the chocolate and vanilla cookies, and gives them a snow-dusted, romantic appearance.
Nutritional Information
Per serving (1 cookie):
Calories: 95
Total Fat: 5g
Saturated Fat: 3g
Cholesterol: 25mg
Sodium: 25mg
Total Carbohydrates: 12g
Dietary Fiber: 0.5g
Sugars: 6g
Protein: 1g
Note: Nutritional values are approximate and based on chocolate version with raspberry jam.
Presentation and Serving Suggestions
The visual appeal of these thumbprint heart cookies makes them perfect for gift-giving and special presentations:
Gift Packaging: Arrange the cookies in a decorative tin or box lined with tissue paper. Layer them carefully with parchment paper between layers to prevent sticking. Tie with a beautiful ribbon and attach a handwritten note.
Cookie Platters: Create a stunning display by arranging both chocolate and vanilla versions together on a white platter. The contrast between dark chocolate cookies with red jam and pale vanilla cookies with pink jam is visually striking.
Individual Servings: Place each cookie in a small paper cupcake liner and arrange in a pretty basket for a tea party or shower.
Dessert Tables: These heart cookies look gorgeous on tiered stands for weddings, showers, or Valentine’s Day celebrations. Surround them with fresh flowers or rose petals for extra romance.
Flavor Variations and Creative Combinations
Jam and Preserve Options
Berry Variations:
Classic raspberry preserves (my personal favorite)
Strawberry jam for a sweeter flavor
Blackberry jam for depth
Mixed berry for complexity
Blueberry preserves for a unique color
Fruit Preserves:
Apricot jam with vanilla cookies
Cherry preserves with chocolate cookies
Fig jam for sophistication
Peach preserves for summer
Lemon curd for tanginess
Specialty Fillings:
Nutella for chocolate lovers
Caramel for richness
Dulce de leche for indulgence
Apple butter for fall
Pumpkin butter for autumn festivities
Cookie Dough Variations
Chocolate Variations:
Use dark cocoa powder for intense chocolate flavor
Add mini chocolate chips to the dough
Mix in a tablespoon of espresso powder
Use dark chocolate for sophistication
Add a pinch of cayenne for Mexican chocolate flavor
Vanilla Variations:
Add lemon or orange zest for citrus notes
Mix in ground almonds for nuttiness
Add cardamom for exotic flavor
Use brown sugar instead of white for deeper flavor
Add chopped pistachios or almonds
Creative Flavor Combinations:
Lavender vanilla cookies with blueberry jam
Earl Grey tea cookies with lemon curd
Hazelnut cookies with chocolate spread
Coconut cookies with pineapple preserves
Gingerbread spiced cookies with apple butter