My grandmother’s rhubarb patch was legendary in our small Minnesota town. Every May, she’d send me out with a basket to harvest those tart pink stalks, and by afternoon, her kitchen would smell like pure heaven. Of all the rhubarb desserts she made – and trust me, there were many – these rhubarb custard bars were always the first to disappear from the church potluck table.
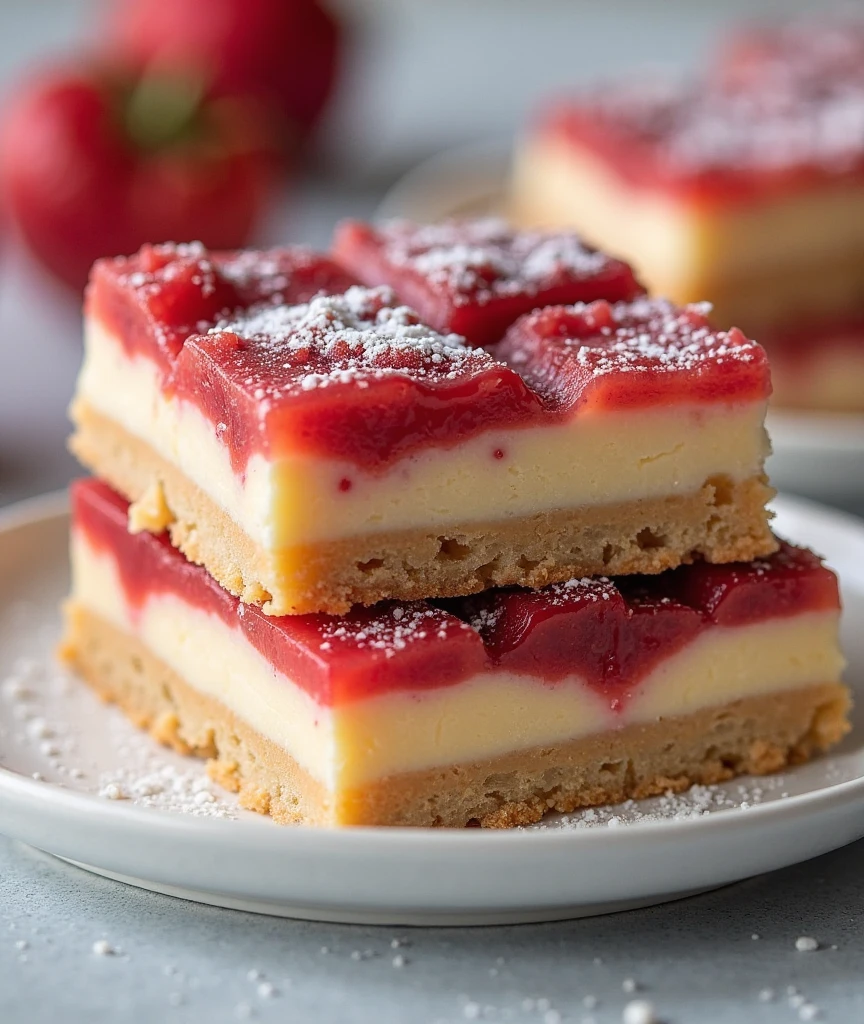
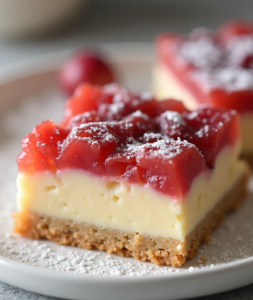
I’ve been making Grandma’s recipe for over fifteen years now, with just a few tweaks I’ve learned along the way. These bars strike the perfect balance between sweet and tangy, with a buttery shortbread crust, silky smooth custard middle, and that gorgeous ruby-red rhubarb topping that screams spring. The best part? They’re actually easier to make than most people think, and they freeze beautifully for those times when you need an impressive dessert on short notice.
Why Rhubarb Custard Bars Beat Regular Rhubarb Pie Every Time
Don’t get me wrong – I love a good rhubarb pie. But these bars? They’re superior in almost every way. First, there’s no rolling out pie dough or worrying about soggy bottoms. Second, they’re infinitely more portable (hello, perfect picnic dessert). And third, that custard layer adds a creamy richness that transforms the tart rhubarb into something absolutely divine.
The genius of this recipe lies in its three distinct layers that somehow meld together into dessert perfection. You’ve got the sturdy shortbread base that won’t get soggy, the smooth custard that balances the rhubarb’s tartness, and that beautiful ruby topping that makes everyone think you’re some kind of baking wizard.
Everything You Need (And Why Each Ingredient Matters)
shortbread crust:
- 2 cups all-purpose flour
- 1/2 cup powdered sugar
- 1 cup cold butter, cubed
- 1/4 teaspoon salt
custard layer:
- 4 large eggs, room temperature
- 1 1/2 cups granulated sugar
- 1/4 cup all-purpose flour
- 1/2 cup heavy cream
- 1 teaspoon vanilla extract
- Pinch of salt
rhubarb topping:
- 4 cups fresh rhubarb, diced into 1/2-inch pieces
- 1/2 cup granulated sugar
- 2 tablespoons cornstarch
- 1 tablespoon lemon juice
- Powdered sugar for dusting (optional, but pretty)
Important ingredient notes: Fresh rhubarb is absolutely crucial here. Frozen rhubarb releases too much liquid and will make your bars soggy. Look for stalks that are firm and brightly colored – the redder the better for that gorgeous color. And please, use real butter in the crust. Margarine just won’t give you that rich, buttery flavor that makes these bars special.
Step-by-Step Instructions (With All My Secret Tips)
Step 1: Master the Shortbread Base Preheat your oven to 350°F and line a 9×13 inch pan with parchment paper, leaving some overhang for easy removal. In a food processor, pulse together flour, powdered sugar, and salt. Add the cold butter pieces and pulse until the mixture looks like coarse crumbs with some pea-sized butter pieces.
Press this mixture firmly into your prepared pan. I use the bottom of a measuring cup to get it really even and packed down. Bake for 18-20 minutes until the edges are just barely golden. Don’t overbake – you want it set but not brown.
Step 2: Prepare Your Rhubarb While the Crust Bakes Dice your rhubarb into uniform pieces – this ensures even cooking. Toss with the sugar, cornstarch, and lemon juice. The cornstarch is crucial here; it helps thicken the rhubarb juices so they don’t make your custard watery. Let this mixture sit while you make the custard.
Step 3: Create That Silky Custard In a large bowl, whisk the eggs until smooth. Add the sugar and whisk until well combined. Stir in the flour (make sure there are no lumps), then gradually whisk in the cream and vanilla. The key here is to whisk constantly – you don’t want scrambled eggs in your custard.
Step 4: Layer Like a Pro Pour the custard mixture over your hot crust – yes, hot! This helps the layers bond together. Distribute the rhubarb mixture evenly over the custard. Don’t worry if it looks like a lot of rhubarb; it’ll cook down beautifully.
Step 5: The Baking Magic Bake for 40-45 minutes until the custard is set and the rhubarb is tender. The center should barely jiggle when you shake the pan. If the top starts getting too brown, tent it with foil for the last 10 minutes.
Step 6: The Hardest Part – Waiting Let the bars cool completely in the pan before cutting. I know it’s torture, but cutting them while warm will result in a gooey mess. Once cooled, use the parchment overhang to lift them out, then cut into squares with a sharp knife.
Pro Tips I’ve Learned from Years of Making These
Room temperature eggs are key: Cold eggs don’t incorporate well and can make your custard lumpy. Take them out of the fridge about an hour before baking.
Don’t skip the parchment paper: Trust me on this one. I’ve tried greasing the pan instead, and it’s a nightmare to get clean bars out.
Uniform rhubarb pieces: This might seem fussy, but evenly sized pieces cook at the same rate. Nobody wants crunchy rhubarb alongside mushy pieces.
Test for doneness: The custard should be set but still have a slight jiggle in the center. It continues cooking from residual heat as it cools.
Clean cuts: Wipe your knife between cuts for those picture-perfect edges that make everyone think you’re a professional baker.
Variations That Never Disappoint
Strawberry Rhubarb Bars: Replace 1 cup of rhubarb with sliced fresh strawberries. It’s like spring in bar form.
Ginger Rhubarb Bars: Add 1 teaspoon of fresh grated ginger to the rhubarb mixture. The warmth of ginger complements rhubarb beautifully.
Almond Custard Version: Replace the vanilla with almond extract in the custard. Use just 1/2 teaspoon – almond extract is potent.
Crumb Top Bars: Save some of the crust mixture and sprinkle it over the rhubarb before baking for a streusel-like topping.
When to Serve These Show-Stoppers
These bars are incredibly versatile and perfect for:
- Mother’s Day brunch (they’re elegant enough for special occasions)
- Church potlucks and bake sales (they transport beautifully)
- Spring picnics and barbecues
- Afternoon tea with friends
- Any time you want to impress without stress
They’re also fantastic for entertaining because you can make them a day ahead – they actually taste better after the flavors have had time to meld.
Storage and Make-Ahead Magic
One of the best things about these bars is how well they keep. Store covered in the refrigerator for up to 5 days. They’re delicious straight from the fridge, but I prefer them at room temperature when the custard is at its silkiest.
For longer storage, these freeze beautifully for up to 3 months. Cut them into individual portions, wrap in plastic wrap, then store in a freezer bag. Thaw overnight in the refrigerator before serving.
You can even make them completely ahead for parties. Just cover tightly with plastic wrap and refrigerate. Dust with powdered sugar right before serving for that fresh-baked look.
Troubleshooting Common Issues
Soggy crust: This usually means your rhubarb released too much liquid. Make sure you’re using fresh rhubarb and don’t skip the cornstarch in the rhubarb mixture.
Curdled custard: Your eggs were too cold or you added the cream too quickly. Always use room temperature eggs and whisk constantly.
Bars falling apart: You probably cut them too soon. They need to cool completely to set properly.
Overly tart: Some rhubarb is more tart than others. Next time, add an extra 2-3 tablespoons of sugar to the rhubarb mixture.
Why This Recipe Works Every Single Time
The secret to these bars’ success is in the balance of textures and flavors. The buttery crust provides richness and stability, the custard adds creaminess that tames the rhubarb’s tartness, and the rhubarb brings that bright, tangy flavor that makes your taste buds dance.
Plus, the technique is pretty foolproof. Unlike pie-making, which can be intimidating, this recipe uses simple mixing methods that even novice bakers can master. The visual payoff is huge too – these bars look like they came from a fancy bakery.
The Sweet Conclusion
After making these rhubarb custard bars hundreds of times over the years, I can confidently say they’re my go-to spring dessert. They’re sophisticated enough for dinner parties but comforting enough for family dinners. They showcase rhubarb’s unique flavor without being overwhelmingly tart, and they’re just plain beautiful on a plate.
Every time I make them, I think of my grandmother and her legendary rhubarb patch. She’d be proud to know her recipe is still bringing joy to people, one perfectly balanced bite at a time.
Ready to create some spring magic in your kitchen? Head to the store for some fresh rhubarb – your taste buds (and everyone at your next gathering) will thank you.