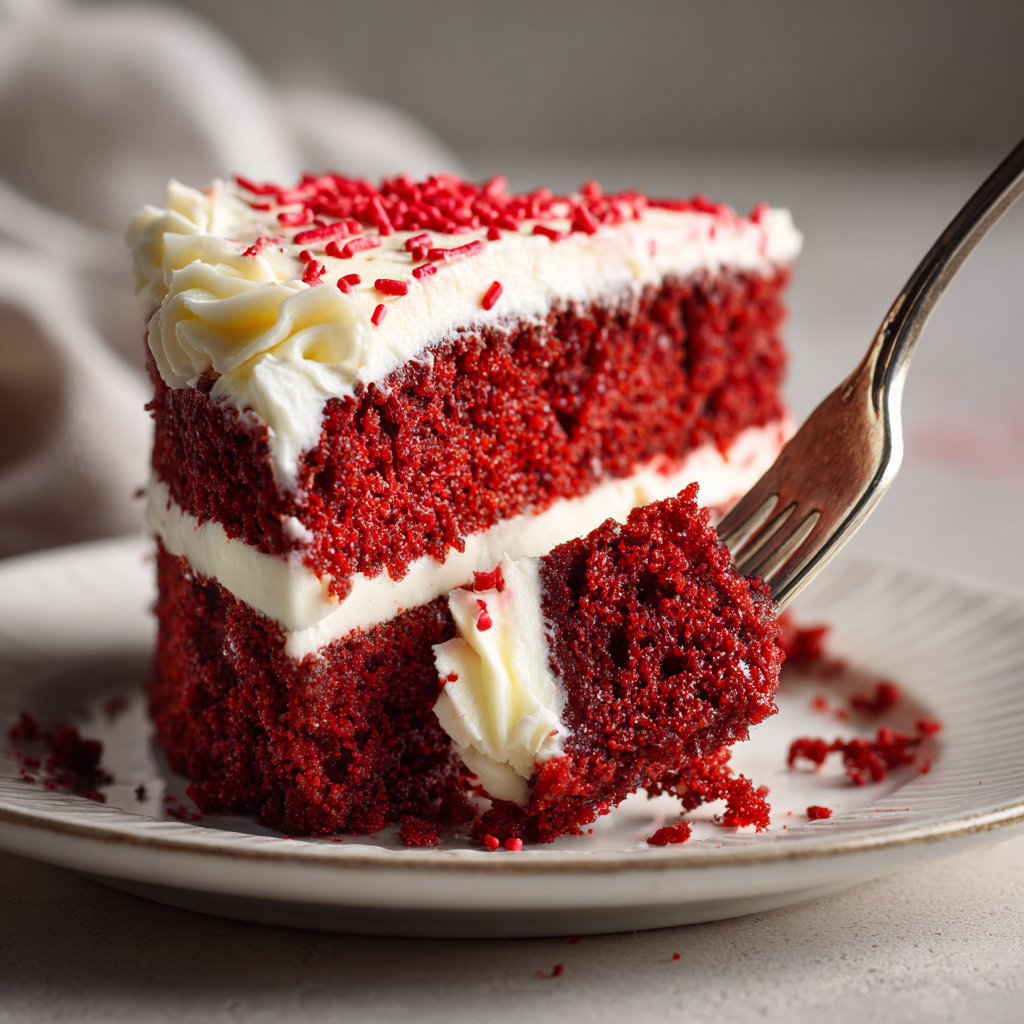
There’s something magical about the way a slice of red velvet cake catches the light—that deep crimson crumb peeking through snowy cream cheese frosting like a beautiful secret waiting to be discovered. And what better time to unveil this stunning red velvet cake recipe than Halloween, when the dramatic colors perfectly capture the season’s mysterious allure?
As October’s crisp air settles in and jack-o’-lanterns begin to glow on porches across America, many of us find ourselves reaching for red velvet cake recipes that feel both comforting and celebratory. This red velvet cake recipe isn’t just a dessert—it’s a conversation starter, a memory maker, and quite possibly the most photogenic addition to your Halloween spread.
Red Velvet Cake Recipe Origins: America’s Most Beloved Mysterious Cake
Red velvet cake recipe has enchanted Americans since the 1920s. Its origins remain delightfully mysterious. Some say it was born in New York’s Waldorf-Astoria Hotel ballrooms. Others trace its roots to the South, where buttermilk and cocoa created magic.
Homemade Red Velvet Cake Innovation
This cake became a symbol of celebration and sophistication during tough times. During the Great Depression, clever bakers discovered something amazing. The natural chemical reaction between cocoa powder and acidic ingredients created a subtle reddish hue. Buttermilk and vinegar were the secret ingredients that made this possible.
Classic Red Velvet Recipe Hollywood Influence
When food coloring became widely available, bakers enhanced this natural tint. They created the dramatic red we associate with the cake today. For those who remember “Steel Magnolias” (1989), red velvet holds special meaning. Dolly Parton’s character declared it her “signature cake.” This introduced a whole new generation to this Southern treasure.
Best Red Velvet Cake Recipe for Halloween’s Hidden Gem
Pumpkin spice gets all the autumn attention. However, red velvet cake is Halloween’s best-kept secret. What could be more perfect for a season celebrating mystery and drama?
Perfect Halloween Red Velvet Colors
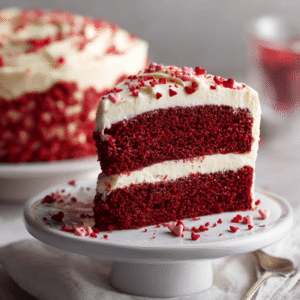
The cake’s deep red interior provides spooky elegance. The pristine white frosting creates striking contrast. It photographs beautifully under flickering candlelight. These colors naturally complement Halloween’s dramatic aesthetic.
Moist Red Velvet Cake Halloween Treat
Unlike overly sweet Halloween candies, red velvet offers sophisticated flavor notes. These appeal to adult palates. The subtle chocolate undertones shine through. Tangy buttermilk richness adds complexity. Slight cocoa bitterness balances sweetness perfectly. This creates a taste experience that pairs beautifully with autumn evenings.
Easy Red Velvet Cake Recipe Science
Understanding your ingredients makes you a better baker. After decades of baking, I’ve learned this truth. Knowing the “why” behind each component helps you troubleshoot problems.
Red Velvet Cake Recipe Ingredients & Instructions
Red Velvet Cake Ingredients:
- 2½ cups all-purpose flour, plus more to dust pans
- 2 Tbsp unsweetened cocoa powder
- 1 tsp baking soda
- ½ tsp salt
- ½ cup unsalted butter, room temperature
- 1½ cups granulated sugar
- 2 tsp vanilla extract
- 2 large eggs, room temperature
- ¾ cup vegetable oil or light olive oil
- 1 cup low-fat buttermilk, room temperature
- 1 tsp white distilled vinegar
- ½ tsp red gel food coloring
Cream Cheese Frosting Ingredients:
- 1½ cups (¾ lb) unsalted butter, room temperature
- 8 oz cream cheese, room temperature
- 4 cups (1 lb) powdered sugar
- 1 Tbsp real vanilla extract
- ⅛ tsp or generous pinch of salt
Red Velvet Cake Instructions:
1. Prepare: Preheat oven to 350°F. Grease two 9-inch round pans with butter and dust with flour.
2. Mix dry ingredients: In a medium bowl, whisk together flour, cocoa powder, baking soda, and salt.
3. Cream butter and sugar: In a large bowl, cream butter and granulated sugar until light and fluffy (4-5 minutes). Add vanilla and eggs one at a time, beating well after each addition.
4. Add oil: Slowly stream in oil while mixing until well combined.
5. Alternate wet and dry: Add flour mixture in three additions, alternating with buttermilk in two additions. Begin and end with flour. Mix just until combined.
6. Add color: In a small bowl, mix vinegar and food coloring. Fold into batter until evenly distributed.
7. Bake: Divide batter evenly between prepared pans. Bake 28-32 minutes, rotating halfway through. Test with toothpick – should come out with few moist crumbs.
8. Cool: Cool in pans 10 minutes, then turn out onto wire racks to cool completely.
Cream Cheese Frosting Instructions:
1. Beat butter: Beat butter until light and fluffy.
2. Add cream cheese: Beat in cream cheese until completely smooth.
3. Add sugar: Gradually add powdered sugar, one cup at a time, beating well after each addition.
4. Finish: Beat in vanilla and salt until smooth. Adjust consistency with milk if too thick, or refrigerate if too soft.
Red Velvet Cake Flour Foundation
We’re using 2½ cups of all-purpose flour. This provides perfect structure without making the cake dense. Always measure flour correctly. Spoon it into your measuring cup and level it off. Too much flour creates heavy, dry cake that lacks the tender crumb red velvet is famous for.
Red Velvet Cocoa Powder Double Duty
Those 2 tablespoons of unsweetened cocoa powder aren’t just for flavor. They’re crucial for the cake’s signature color reaction. Natural compounds in cocoa react with acidic ingredients. This enhances both flavor and that subtle reddish tint. The tint makes food coloring so effective.
Southern Red Velvet Buttermilk Acid Test
Buttermilk and vinegar aren’t just old-fashioned ingredients. They’re flavor enhancers and texture creators. The acidity tenderizes gluten in flour. This creates that impossibly soft, fine crumb. It also reacts with baking soda to provide gentle lift. Plus, it contributes to the cake’s tangy complexity.
Red Velvet Layer Cake Butter Plus Oil
We’re using both butter and oil in this recipe. There’s good reason for this combination. Butter provides flavor and helps create structure. Oil keeps the cake incredibly moist. This dual-fat approach ensures your cake stays tender for days. Perfect for make-ahead Halloween entertaining.
Red Velvet Cake Recipe: Mastering the Perfect Step-by-Step Success
Red Velvet Cake from Scratch Kitchen Prep
Start by preheating your oven to 350°F and preparing your pans. I recommend using two 9-inch round pans, greased with butter and dusted with flour. This old-school method creates a protective barrier that ensures easy release. This prevents sticking when you’re presenting a show-stopping cake.
Red Velvet Cake Ingredients Room Temperature Rule
Room temperature ingredients are non-negotiable for red velvet success. Cold eggs and buttermilk can cause your butter mixture to seize. This creates lumps that no amount of mixing will smooth out. Therefore, plan ahead and remove your eggs and buttermilk from the refrigerator at least an hour before baking.
Perfect Red Velvet Batter Creation
Begin by whisking together your dry ingredients. Combine flour, cocoa powder, baking soda, and salt. This ensures even distribution. It prevents cocoa powder clumps that create bitter spots.
In a separate large bowl, cream butter and granulated sugar together. Beat until light and fluffy. This takes about 4-5 minutes with an electric mixer. This step incorporates air into your batter. It contributes to the cake’s tender texture.
Adding Eggs and Vanilla
Add vanilla extract and eggs one at a time. Beat well after each addition. This ensures proper emulsification. Room temperature eggs blend more easily into the mixture.
Red Velvet Recipe Oil Streaming Technique
Here’s where the magic happens. Slowly stream in your oil while mixing. This might seem unusual. But this technique creates the moistest red velvet cake you’ve ever tasted. The oil coats flour proteins. This prevents overdevelopment and ensures tenderness.
Moist Red Velvet Alternating Method
Now for the alternating method. This separates good bakers from great ones. Add your flour mixture in three additions. Alternate with buttermilk in two additions. Begin and end with flour. Mix just until combined. Overmixing develops gluten, creating tough cake.
Red Velvet Food Coloring Final Flourish
Mix your vinegar and food coloring in a small bowl. This prevents streaking. Fold it into your batter just until evenly distributed. The batter should be gorgeous deep red. Like autumn leaves or Halloween decorations.
Red Velvet Cake Baking to Perfection
Divide the batter evenly between your prepared pans. A kitchen scale makes this foolproof. But you can eyeball it if needed. Bake for 28-32 minutes. Rotate the pans halfway through for even browning.
Red Velvet Cake Testing for Doneness
The cakes are done when a toothpick inserted in the center comes out clean. It should have just a few moist crumbs clinging to it. Let the cakes cool in their pans for 10 minutes. Then turn them out onto wire racks.
Proper Cooling Technique
This brief cooling prevents breaking. It also ensures the cakes don’t become soggy from trapped steam. Complete cooling is essential before frosting.
Cream Cheese Frosting for Red Velvet Cake Recipe
While your cakes cool completely, let’s create frosting magic. This isn’t just any cream cheese frosting. It’s the silky, tangy, perfectly pipeable frosting that transforms good cake into unforgettable dessert.
Red Velvet Frosting Temperature is Everything
Start with room temperature ingredients. This cannot be emphasized enough. Cold cream cheese creates lumps. Too-warm ingredients create runny frosting. Both problems are easily avoided. Both cream cheese and butter should yield slightly to pressure. But they shouldn’t be soft or greasy.
Cream Cheese Frosting Perfect Technique
Beat the butter until light and fluffy. Then add cream cheese and beat until completely smooth. Gradually add powdered sugar, one cup at a time. Beat well after each addition. Finish with vanilla extract and that crucial pinch of salt.
Achieving Perfect Consistency
Salt balances sweetness and enhances all other flavors. The result should be smooth, creamy frosting. It should hold its shape when piped. But it should spread beautifully when smoothed. If it’s too soft, refrigerate for 15-20 minutes. Too stiff? Add a tablespoon of milk or cream.
Halloween Red Velvet Cake Presentation Ideas That Wow
Red velvet’s dramatic appearance makes it naturally Halloween-appropriate. However, a few simple touches can transform it into the centerpiece of your spooky celebration.
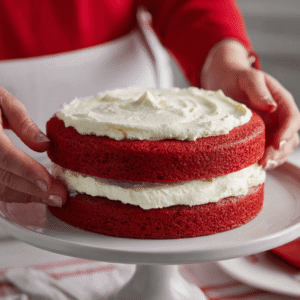
Classic Red Velvet Elegance
Simply frost your two-layer cake with cream cheese frosting. Then dust the top with a light sprinkle of cocoa powder. Next, place it on a black cake stand surrounded by small pumpkins and autumn leaves. This creates an elegant seasonal presentation.
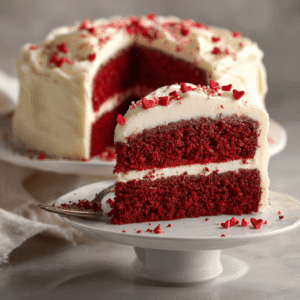
Spooky Surprise Layers
Cut your cake layers in half horizontally to create four thinner layers. After that, frost between each layer, creating a tall, dramatic cake. Subsequently, this reveals multiple red velvet stripes when sliced. Therefore, it’s perfect for Halloween’s dramatic flair.
Red Velvet Cupcakes Conversion
Transform this recipe into 24 cupcakes by filling lined muffin tins 2/3 full. Then bake for 18-22 minutes. Finally, top with swirled cream cheese frosting. Add Halloween sprinkles or chocolate “dirt” made from crushed chocolate cookies.
Gothic Glamour Styling
For an extra Halloween touch, consider decorating with edible black roses or dark chocolate shavings. Alternatively, create “blood” drips using red candy melts. These dramatic elements enhance the spooky aesthetic.
Red Velvet Cake Storage Secrets for Make-Ahead Success
One of red velvet’s greatest gifts is its keeping quality. In fact, properly stored, this cake actually improves after a day. Consequently, the flavors meld and the texture becomes even more tender.
Red Velvet Storage Methods
Store your finished cake covered in the refrigerator for up to five days. Although the cream cheese frosting requires refrigeration, remove the cake 30 minutes before serving. This allows it to come to room temperature for the best texture and flavor.
Long-Term Storage Options
For longer storage, wrap unfrosted cake layers tightly in plastic wrap. Then freeze for up to three months. Subsequently, thaw overnight in the refrigerator before frosting and serving.
Make-Ahead Tips
You can make components separately to spread out the work. Bake layers up to two days ahead. Make frosting the day before serving. This approach reduces stress for special occasions.
Red Velvet Recipe Troubleshooting Your Success
Even experienced bakers sometimes encounter challenges. However, here are solutions to the most common red velvet issues:
Red Velvet Cake Color Problems
Pale Color: First, ensure you’re using gel food coloring rather than liquid. Liquid coloring can thin your batter and create less vibrant color. Additionally, some cocoa powders are more processed and react less with acidic ingredients. Furthermore, Dutch-processed cocoa won’t create the same natural reddish tint.
Moist Red Velvet Texture Issues
Dense Texture: Initially, check your baking soda’s freshness, as it loses potency over time. Also ensure you’re not overmixing once flour is added. Moreover, verify that your buttermilk and eggs are truly at room temperature.
Dry Cake: First, measure flour carefully and don’t overbake. The cake should spring back lightly when touched in the center. Additionally, a toothpick should have a few moist crumbs clinging to it.
Cream Cheese Frosting Problems
Runny Frosting: This usually indicates ingredients were too warm. Chill the frosting for 20-30 minutes, then rewhip. Lumpy Frosting: Ensure cream cheese is properly softened but not melted.
Red Velvet Cake Recipe: Making Memories, One Slice at a Time
As Halloween approaches and you plan your celebrations, consider the power of a homemade cake to create lasting memories. Indeed, there’s something deeply satisfying about presenting a dessert you’ve crafted with your own hands.
Homemade Red Velvet for Entertaining
This recipe serves 12-16 people generously, making it perfect for Halloween parties. It’s also ideal for family gatherings or neighborhood potlucks. However, don’t save it just for special occasions. Moreover, red velvet cake has a way of making any day feel celebratory.
Building Red Velvet Baking Confidence
Whether you’re a seasoned baker or tackling your first layer cake, this recipe offers the perfect balance. Specifically, it combines impressive results with achievable methods. Additionally, detailed guidance ensures success. Meanwhile, the dramatic presentation guarantees compliments.
Creating Family Traditions
This Halloween season, skip store-bought desserts. Instead, treat yourself and loved ones to homemade magic. After all, the best treats bring us together around the table. Ultimately, they create sweet memories lasting long after the last crumb.
Red Velvet Cake Recipe FAQ: Frequently Asked Questions
Q: Can I make this cake without food coloring? A: Absolutely! Originally, red velvet cakes relied on natural reactions between cocoa and acidic ingredients. Your cake will be more brownish-red, but the flavor remains identical. In fact, many bakers prefer this natural approach.
Q: What’s the difference between red velvet and chocolate cake? A: Red velvet uses much less cocoa—only 2 tablespoons versus ¾ cup in chocolate cake. Additionally, red velvet’s flavor is more subtle and tangy due to buttermilk and vinegar. Consequently, this creates a unique taste that’s distinctly different.
Q: Can I substitute the buttermilk? A: You can make buttermilk substitute by adding 1 tablespoon lemon juice to 1 cup regular milk. Let it sit for 5 minutes until slightly curdled. However, real buttermilk provides superior flavor and texture.
Q: Why did my cake turn brown instead of red? A: This usually happens with Dutch-processed cocoa powder instead of natural cocoa. Dutch processing neutralizes acidity and prevents color reactions. Therefore, always use natural, unsweetened cocoa powder.
Q: Can I make this ahead of time? A: Yes! Cake layers can be baked 2 days ahead or frozen for 3 months. Meanwhile, assembled frosted cake should be refrigerated and actually improves overnight as flavors develop.
Q: My frosting turned runny—what went wrong? A: Ingredients were likely too warm. Ensure butter and cream cheese are cool room temperature. If runny, refrigerate 20-30 minutes and rewhip.
Q: Can I convert this to cupcakes? A: Absolutely! This makes about 24 cupcakes. Fill lined tins 2/3 full and bake at 350°F for 18-22 minutes.
Q: How do I get even cake layers? A: Use a kitchen scale for precise division. Alternatively, alternate large spoonfuls between pans. Level by gently tapping pans on the counter.
Red Velvet Cake Recipe Essential Notes for Perfect Results
Ingredient Temperature Matters
Room temperature ingredients blend easily and create better texture. Additionally, cold ingredients cause batter to curdle or become lumpy. This affects final cake quality significantly.
Don’t Overmix the Batter
Once flour joins wet ingredients, mix just until combined. Furthermore, overmixing develops gluten, resulting in tough, dense cake. This destroys the tender crumb red velvet is famous for.
Gel vs. Liquid Food Coloring
Gel food coloring provides vibrant color without thinning batter. However, if using liquid coloring, you may need more for desired shade. Nevertheless, be careful not to add excessive liquid.
Altitude Adjustments
If baking above 3,000 feet, decrease baking soda by ¼ teaspoon. Additionally, increase flour by 2-4 tablespoons. Higher altitudes may also require reducing sugar and increasing liquid slightly.
Pan Preparation is Crucial
Properly greased and floured pans ensure easy release. Moreover, for extra insurance, line pan bottoms with parchment paper circles. This prevents sticking disasters.
Red Velvet Cake Recipe Conclusion: Creating Halloween Magic, One Layer at a Time
As autumn leaves turn crimson and jack-o’-lanterns begin their nightly glow, there’s something deeply satisfying about creating a dessert that captures the season’s dramatic beauty.
The Power of Homemade
This red velvet cake isn’t just another recipe—it’s your secret weapon for transforming ordinary October evenings into memorable celebrations. Rather, it’s the way this cake brings people together. Additionally, it creates spontaneous moments when conversation flows as smoothly as cream cheese frosting.
Connecting Past and Present
For those who’ve been baking for decades, red velvet represents something timeless. It’s a connection to previous generations of bakers. Furthermore, it links to celebration cakes that marked life’s special moments. Yet it’s also wonderfully modern and Instagram-ready.
Beyond Halloween Magic
This Halloween season, remember that treasured treats aren’t always the most complicated. Sometimes magic happens in simple moments. For instance, when you slice into perfect red velvet layers. Moreover, when guests pause conversations to savor that first bite.
Year-Round Versatility
The beauty of mastering this cake extends far beyond Halloween. This recipe becomes part of your repertoire. Additionally, it’s perfect for Valentine’s Day with its romantic red hue. Furthermore, it’s elegant enough for birthday celebrations throughout the year.
The Journey Matters
As you embark on this red velvet adventure, remember that baking is about the journey. Embrace the process—the satisfaction of creaming butter to perfect fluffiness. Additionally, enjoy the anticipation as cake rises in the oven. These mindful creation moments offer their own rewards.
Creating Lasting Memories
Whether planning intimate Halloween dinner parties or large family gatherings, this cake promises to be the conversation starter. In our world of store-bought convenience, there’s something revolutionary about baking from scratch. Furthermore, creating with intention and care makes all the difference.
Your Halloween Legacy
So tie on your apron, preheat your oven, and prepare to create not just cake, but memory. Let dramatic crimson layers and cloud-like frosting transport guests beyond the ordinary. This Halloween, don’t just serve dessert—serve an experience.
Your guests will leave not just satisfied, but inspired. They’ll carry memories of your beautiful red velvet creation. Perhaps they’ll even find motivation to try their own baking magic.
After all, the best recipes aren’t just about feeding people. They’re about nourishing connections, creating traditions, and proving that life’s sweetest moments can be homemade.
Happy baking, and may your Halloween be filled with more treats than tricks—especially the kind from your own kitchen, made with love, and shared with joy.
Print
The Perfect Halloween Red Velvet Cake: A Hauntingly Delicious Recipe That’ll Cast a Spell on Your Guests
Description
Red velvet cake recipe has enchanted Americans since the 1920s. Its origins remain delightfully mysterious. Some say it was born in New York’s Waldorf-Astoria Hotel ballrooms. Others trace its roots to the South, where buttermilk and cocoa created magic.
Ingredients
Red Velvet Cake Recipe Ingredients & Instructions
Red Velvet Cake Ingredients:
- 2½ cups all-purpose flour, plus more to dust pans
- 2 Tbsp unsweetened cocoa powder
- 1 tsp baking soda
- ½ tsp salt
- ½ cup unsalted butter, room temperature
- 1½ cups granulated sugar
- 2 tsp vanilla extract
- 2 large eggs, room temperature
- ¾ cup vegetable oil or light olive oil
- 1 cup low-fat buttermilk, room temperature
- 1 tsp white distilled vinegar
- ½ tsp red gel food coloring
Cream Cheese Frosting Ingredients:
- 1½ cups (¾ lb) unsalted butter, room temperature
- 8 oz cream cheese, room temperature
- 4 cups (1 lb) powdered sugar
- 1 Tbsp real vanilla extract
- ⅛ tsp or generous pinch of salt
Instructions
Red Velvet Cake Recipe: Mastering the Perfect Step-by-Step Success
Red Velvet Cake from Scratch Kitchen Prep
Start by preheating your oven to 350°F and preparing your pans. I recommend using two 9-inch round pans, greased with butter and dusted with flour. This old-school method creates a protective barrier that ensures easy release. This prevents sticking when you’re presenting a show-stopping cake.
Red Velvet Cake Ingredients Room Temperature Rule
Room temperature ingredients are non-negotiable for red velvet success. Cold eggs and buttermilk can cause your butter mixture to seize. This creates lumps that no amount of mixing will smooth out. Therefore, plan ahead and remove your eggs and buttermilk from the refrigerator at least an hour before baking.
Perfect Red Velvet Batter Creation
Begin by whisking together your dry ingredients. Combine flour, cocoa powder, baking soda, and salt. This ensures even distribution. It prevents cocoa powder clumps that create bitter spots.
In a separate large bowl, cream butter and granulated sugar together. Beat until light and fluffy. This takes about 4-5 minutes with an electric mixer. This step incorporates air into your batter. It contributes to the cake’s tender texture.
Adding Eggs and Vanilla
Add vanilla extract and eggs one at a time. Beat well after each addition. This ensures proper emulsification. Room temperature eggs blend more easily into the mixture.
Red Velvet Recipe Oil Streaming Technique
Here’s where the magic happens. Slowly stream in your oil while mixing. This might seem unusual. But this technique creates the moistest red velvet cake you’ve ever tasted. The oil coats flour proteins. This prevents overdevelopment and ensures tenderness.
Moist Red Velvet Alternating Method
Now for the alternating method. This separates good bakers from great ones. Add your flour mixture in three additions. Alternate with buttermilk in two additions. Begin and end with flour. Mix just until combined. Overmixing develops gluten, creating tough cake.
Red Velvet Food Coloring Final Flourish
Mix your vinegar and food coloring in a small bowl. This prevents streaking. Fold it into your batter just until evenly distributed. The batter should be gorgeous deep red. Like autumn leaves or Halloween decorations.
Red Velvet Cake Baking to Perfection
Divide the batter evenly between your prepared pans. A kitchen scale makes this foolproof. But you can eyeball it if needed. Bake for 28-32 minutes. Rotate the pans halfway through for even browning.
Red Velvet Cake Testing for Doneness
The cakes are done when a toothpick inserted in the center comes out clean. It should have just a few moist crumbs clinging to it. Let the cakes cool in their pans for 10 minutes. Then turn them out onto wire racks.
Proper Cooling Technique
This brief cooling prevents breaking. It also ensures the cakes don’t become soggy from trapped steam. Complete cooling is essential before frosting.
Cream Cheese Frosting for Red Velvet Cake Recipe
While your cakes cool completely, let’s create frosting magic. This isn’t just any cream cheese frosting. It’s the silky, tangy, perfectly pipeable frosting that transforms good cake into unforgettable dessert.
Red Velvet Frosting Temperature is Everything
Start with room temperature ingredients. This cannot be emphasized enough. Cold cream cheese creates lumps. Too-warm ingredients create runny frosting. Both problems are easily avoided. Both cream cheese and butter should yield slightly to pressure. But they shouldn’t be soft or greasy.
Cream Cheese Frosting Perfect Technique
Beat the butter until light and fluffy. Then add cream cheese and beat until completely smooth. Gradually add powdered sugar, one cup at a time. Beat well after each addition. Finish with vanilla extract and that crucial pinch of salt.
Achieving Perfect Consistency
Salt balances sweetness and enhances all other flavors. The result should be smooth, creamy frosting. It should hold its shape when piped. But it should spread beautifully when smoothed. If it’s too soft, refrigerate for 15-20 minutes. Too stiff? Add a tablespoon of milk or cream.
Halloween Red Velvet Cake Presentation Ideas That Wow
Red velvet’s dramatic appearance makes it naturally Halloween-appropriate. However, a few simple touches can transform it into the centerpiece of your spooky celebration.
Classic Red Velvet Elegance
Simply frost your two-layer cake with cream cheese frosting. Then dust the top with a light sprinkle of cocoa powder. Next, place it on a black cake stand surrounded by small pumpkins and autumn leaves. This creates an elegant seasonal presentation.
Spooky Surprise Layers
Cut your cake layers in half horizontally to create four thinner layers. After that, frost between each layer, creating a tall, dramatic cake. Subsequently, this reveals multiple red velvet stripes when sliced. Therefore, it’s perfect for Halloween’s dramatic flair.
Red Velvet Cupcakes Conversion
Transform this recipe into 24 cupcakes by filling lined muffin tins 2/3 full. Then bake for 18-22 minutes. Finally, top with swirled cream cheese frosting. Add Halloween sprinkles or chocolate “dirt” made from crushed chocolate cookies.
Gothic Glamour Styling
For an extra Halloween touch, consider decorating with edible black roses or dark chocolate shavings. Alternatively, create “blood” drips using red candy melts. These dramatic elements enhance the spooky aesthetic.
Red Velvet Cake Storage Secrets for Make-Ahead Success
One of red velvet’s greatest gifts is its keeping quality. In fact, properly stored, this cake actually improves after a day. Consequently, the flavors meld and the texture becomes even more tender.
Red Velvet Storage Methods
Store your finished cake covered in the refrigerator for up to five days. Although the cream cheese frosting requires refrigeration, remove the cake 30 minutes before serving. This allows it to come to room temperature for the best texture and flavor.
Long-Term Storage Options
For longer storage, wrap unfrosted cake layers tightly in plastic wrap. Then freeze for up to three months. Subsequently, thaw overnight in the refrigerator before frosting and serving.
Make-Ahead Tips
You can make components separately to spread out the work. Bake layers up to two days ahead. Make frosting the day before serving. This approach reduces stress for special occasions.
Red Velvet Recipe Troubleshooting Your Success
Even experienced bakers sometimes encounter challenges. However, here are solutions to the most common red velvet issues:
Red Velvet Cake Color Problems
Pale Color: First, ensure you’re using gel food coloring rather than liquid. Liquid coloring can thin your batter and create less vibrant color. Additionally, some cocoa powders are more processed and react less with acidic ingredients. Furthermore, Dutch-processed cocoa won’t create the same natural reddish tint.
Moist Red Velvet Texture Issues
Dense Texture: Initially, check your baking soda’s freshness, as it loses potency over time. Also ensure you’re not overmixing once flour is added. Moreover, verify that your buttermilk and eggs are truly at room temperature.
Dry Cake: First, measure flour carefully and don’t overbake. The cake should spring back lightly when touched in the center. Additionally, a toothpick should have a few moist crumbs clinging to it.
Cream Cheese Frosting Problems
Runny Frosting: This usually indicates ingredients were too warm. Chill the frosting for 20-30 minutes, then rewhip. Lumpy Frosting: Ensure cream cheese is properly softened but not melted.
Red Velvet Cake Recipe: Making Memories, One Slice at a Time
As Halloween approaches and you plan your celebrations, consider the power of a homemade cake to create lasting memories. Indeed, there’s something deeply satisfying about presenting a dessert you’ve crafted with your own hands.
Homemade Red Velvet for Entertaining
This recipe serves 12-16 people generously, making it perfect for Halloween parties. It’s also ideal for family gatherings or neighborhood potlucks. However, don’t save it just for special occasions. Moreover, red velvet cake has a way of making any day feel celebratory.
Building Red Velvet Baking Confidence
Whether you’re a seasoned baker or tackling your first layer cake, this recipe offers the perfect balance. Specifically, it combines impressive results with achievable methods. Additionally, detailed guidance ensures success. Meanwhile, the dramatic presentation guarantees compliments.
Creating Family Traditions
This Halloween season, skip store-bought desserts. Instead, treat yourself and loved ones to homemade magic. After all, the best treats bring us together around the table. Ultimately, they create sweet memories lasting long after the last crumb.
Notes
Red Velvet Cake Recipe FAQ: Frequently Asked Questions
Q: Can I make this cake without food coloring? A: Absolutely! Originally, red velvet cakes relied on natural reactions between cocoa and acidic ingredients. Your cake will be more brownish-red, but the flavor remains identical. In fact, many bakers prefer this natural approach.
Q: What’s the difference between red velvet and chocolate cake? A: Red velvet uses much less cocoa—only 2 tablespoons versus ¾ cup in chocolate cake. Additionally, red velvet’s flavor is more subtle and tangy due to buttermilk and vinegar. Consequently, this creates a unique taste that’s distinctly different.
Q: Can I substitute the buttermilk? A: You can make buttermilk substitute by adding 1 tablespoon lemon juice to 1 cup regular milk. Let it sit for 5 minutes until slightly curdled. However, real buttermilk provides superior flavor and texture.
Q: Why did my cake turn brown instead of red? A: This usually happens with Dutch-processed cocoa powder instead of natural cocoa. Dutch processing neutralizes acidity and prevents color reactions. Therefore, always use natural, unsweetened cocoa powder.
Q: Can I make this ahead of time? A: Yes! Cake layers can be baked 2 days ahead or frozen for 3 months. Meanwhile, assembled frosted cake should be refrigerated and actually improves overnight as flavors develop.
Q: My frosting turned runny—what went wrong? A: Ingredients were likely too warm. Ensure butter and cream cheese are cool room temperature. If runny, refrigerate 20-30 minutes and rewhip.
Q: Can I convert this to cupcakes? A: Absolutely! This makes about 24 cupcakes. Fill lined tins 2/3 full and bake at 350°F for 18-22 minutes.
Q: How do I get even cake layers? A: Use a kitchen scale for precise division. Alternatively, alternate large spoonfuls between pans. Level by gently tapping pans on the counter.