Alright, settle in, my friends. Pull up a chair. I need to tell you about the time I almost got banned from my own mother’s Thanksgiving dinner. It was 2018. I was 28 years old, thought I was a chef because I could follow a boxed mac and cheese recipe without setting the kitchen on fire, and I volunteered to bring the main protein. “I’ll make a chicken!” I announced, pictures of golden, juicy roast chicken dancing in my head.
What I served was a pale, rubbery, grey-ish hockey puck that had the moisture content of particleboard. My uncle, bless his heart, took one bite, chewed for a solid 45 seconds, and said, “You know, I think I’m just going to stick with the green bean casserole.” I wanted to die. That carcass of a bird was the moment I realized my cooking confidence was built on a foundation of soggy cardboard and over-salted pasta. I needed a hero. I needed something that was foolproof, something that promised juiciness every single time. That’s when I found it—the recipe that changed everything. The one that made me realize I could actually do this. The one that led me to this incredible, no-fail Garlic Butter Chicken Recipe.
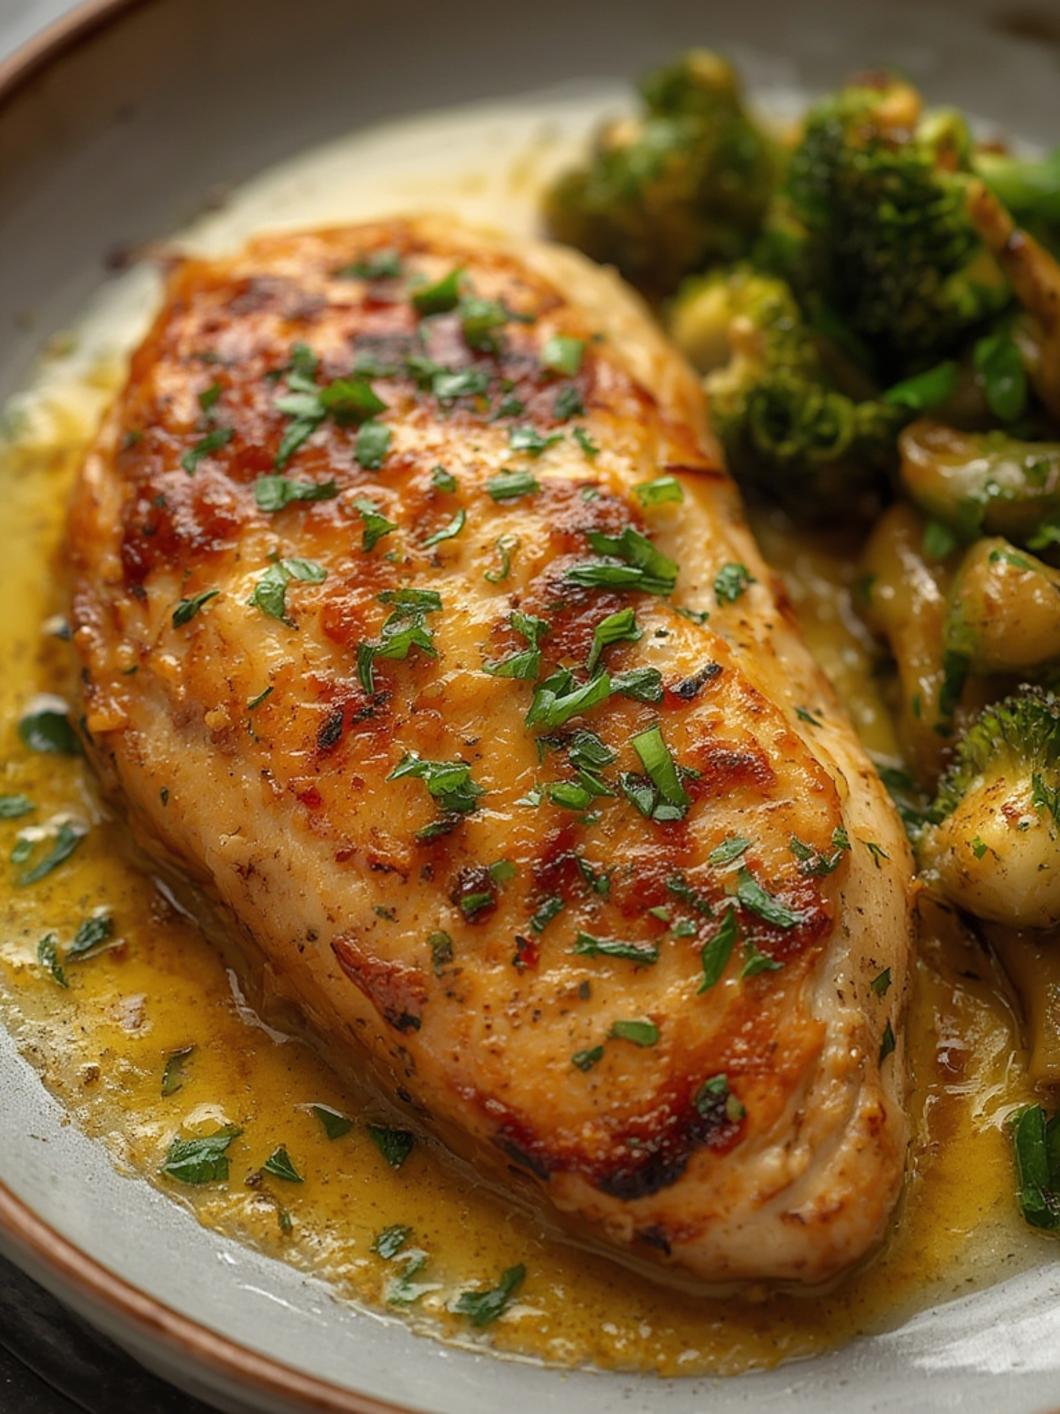
Now, this isn’t just a chicken recipe. This is the chicken recipe. The one that looks like you’ve mastered French cuisine but took you 20 minutes and used one pan. It’s the dish that has saved my butt for last-minute dinner parties, made random Tuesday nights feel special, and honestly? My doctor was surprised when I told him I make this at home every week instead of ordering takeout. The secret is in the technique and that glorious, silky sauce. So, let’s get into it. This is the ultimate Focus keyword you’ll ever need.
Materials & Supplies (Your Kitchen Armory)
Look, I’m not about to list a bunch of fancy schmancy equipment you’ll use once and then forget about in a drawer. We’re keeping it real and accessible.
For the Chicken & The Magic:
Chicken Breasts: Two good-sized, boneless, skin-on. Yes, skin-on. Trust me. It baste itself and gets crispy. If you only have skinless, it’s fine, but pat it extra dry.*
Butter: One full stick (½ cup). Unsalted, so you* control the salt. This is non-negotiable. This is the soul.
Garlic: A whole head. Yes, a whole head. Don’t be shy. We’re making a garlic butter sauce, not a garlic hint*.
- Fresh Herbs: A big handful of thyme and rosemary. Dried works in a pinch (use 1 tsp each), but fresh is a game-changer. Also, a few sprigs for garnishing.
- Lemon: One, for zest and juice. The zest is key! It brightens the whole dish.
Chicken Broth: About ½ cup. Low-sodium is best. Or, if you’re feeling fancy, a splash of dry white wine in addition* to the broth. We’ll talk variations.
- Heavy Cream: A few tablespoons to finish the sauce and make it dreamy. Optional, but why would you skip dreamy?
The Toolkit:
- One heavy, oven-safe skillet. Cast iron is a BOSS here. A good stainless steel works too. It must go from stovetop to oven.
- Kitchen shears (to trim the chicken if needed).
- Paper towels (the unsung heroes of good chicken).
- A garlic press (I used to mince by hand and my fingers smelled for days. This is a lifestyle upgrade).
- Tongs.
- A meat thermometer. This is the only way to guarantee perfect chicken. I’m serious. Stop guessing.
Timing / Cooking Schedule (Let’s Be Real)
- Prep: 10 minutes. Mincing garlic, zesting lemon, patting chicken dry.
- Cook: 18-22 minutes. (Searing + oven time).
- Total: About 30 minutes from start to finish.
Honestly, the first time it took me double this time because I was so nervous about burning the garlic and over-cooking the chicken. I kept checking the oven, opening the door, and ruining the temperature. Just set it and forget it (well, check the thermometer).

Step-by-Step Instructions (The Ritual)
Preheat & Prep: Preheat your oven to 400°F (200°C). Pat your chicken breasts bone-dry with paper towels. This is the single most important step for crispy skin. Season generously on both sides with salt and pepper. I made the mistake of skipping this once and regretted it—the skin was soggy and sad.
Sear for Glory: Heat your skillet over medium-high. Add 1 tablespoon of butter and a drizzle of olive oil (the oil prevents the butter from burning). Once hot and shimmering, place the chicken skin-side down. Do not touch it for 5 minutes. Let that skin get a deep, golden bronze. This is where the flavor builds. Flip and sear the other side for 3 minutes. It will still be very pink. That’s the point!
Garlic Butter Bomb: Reduce heat to medium. Add the remaining butter. Once melted, throw in all that minced garlic. Cook for 30 seconds. Not a minute more. You just want it fragrant, not browned. I once walked away for a minute and got bitter burnt garlic. Had to start over. It was a dark day.
Herbs & Liquid: Add the thyme, rosemary, lemon zest, and chicken broth. Let it bubble for a minute, scraping up any browned bits from the pan. This is the fond, and it’s pure flavor gold.
Into the Oven: Pop the whole, uncovered skillet into your preheated oven. Roast for 10-15 minutes, or until the internal temperature of the thickest part of the chicken reaches 155-160°F (68-71°C). The carryover cooking will take it to a perfect 165°F (74°C).
Rest & Sauce: Transfer chicken to a plate and let it rest for 5 minutes. This keeps it juicy. While it rests, the pan sauce will reduce slightly. Stir in the heavy cream (if using) and a squeeze of lemon juice. Taste it. Add more salt if needed. It should be rich and garlicky and incredible.
Serve: Slice the chicken against the grain. Pour that luscious sauce over everything. Garnish with fresh herbs. Get the good bread ready for sauce-dunking.
Nutritional Benefits / Advantages
I’m not going to sit here and call this “low-fat” or “diet food.” It’s a celebration. But here’s the cool part: because you’re making it at home, you control everything. No mysterious additives, no insane amounts of sodium like in some restaurant versions. You’re getting a massive hit of protein from the chicken, healthy fats from the butter and olive oil, and antioxidants from all that fresh garlic and lemon. My cholesterol is actually better now that I cook this instead of eating fried takeout chicken. My doctor was genuinely surprised when I told him my weekly “indulgence” was a home-cooked meal with real ingredients. It’s the kind of meal that satisfies your soul without leaving you feeling like a bloated balloon.
Tips, Alternative Methods, or Cooking Advice
- Chicken Thighs: Use them! They’re even more forgiving and juicier. Skin-on, bone-in is perfection. Adjust cooking time by a few minutes.
Wine Variation: Swap ¼ cup of the chicken broth for a dry white wine (like Sauvignon Blanc). Add it after the garlic, let it reduce by half, then* add the broth.
- Lemon Butter Sauce Only: Skip the cream for a lighter, brighter sauce. Add an extra squeeze of lemon at the end.
- No Cream? Mash a tablespoon of cold butter into the finished sauce off the heat for a classic “monter au beurre” finish. It makes it shiny and luxurious.
- The Pan is Key: I use my 12-inch cast iron. If your skillet is smaller, cook the chicken in batches. Don’t crowd the pan—steaming is the enemy of sear.
Common Mistakes to Avoid (My Personal Shame Hall of Fame)
1. Not Patting Dry: I did this once when I was rushed. The chicken steamed in its own moisture, the skin never crisped, and it was a wet, flabby mess. It looked like it had given up on life. Pat. It. Dry.
2. Using Cold Chicken straight from the fridge: It will cook unevenly. Let it sit on the counter for 15 minutes while you prep. It makes a huge difference.
3. Overcrowding the Pan: If your chicken breasts are huge, you might need to cook them one at a time. Crowding = lower pan temp = grey chicken.
4. Skipping the Rest: Cutting into it immediately lets all the beautiful, hot juices run out onto your cutting board instead of staying in the chicken. WAIT.
Storage / Maintenance Tips
Leftovers (if you have any!) are a gift. Cool completely, then store the sliced chicken and sauce separately in airtight containers in the fridge for up to 3 days. The sauce will solidify in the cold—just reheat gently in a saucepan or microwave, stirring. Do not reheat the chicken until it’s dry. Reheat it in the sauce, or wrapped in foil with a splash of broth in a 300°F oven. It will never be as good as fresh (nothing is), but it’s a glorious next-day lunch. Reheated, it’s perfect over a big pile of buttered noodles or a simple salad.
Conclusion (Your New Go-To)
This Garlic Butter Chicken Recipe isn’t just food. It’s a confidence builder. It’s the dish I make when I want to feel like a pro without any of the stress. That tragic, dry hockey puck from 2018? I think of it as the necessary evil that led me here. This recipe taught me about temperature, about patience, about how a few simple, quality ingredients treated with respect can create something spectacular. It’s now my default for “I have no idea what to make but need it to be amazing.” I hope it becomes yours, too. Make it, savor it, and let me know in the comments—what’s your go-to foolproof dinner? I’m always looking for my next kitchen win.
FAQs (Your Burning Questions, Answered)
Q: Can I use chicken tenderloins instead?
A: You can! They cook much faster. Sear them for 2-3 mins per side, then pop in the oven for just 5-7 minutes. Watch the thermometer like a hawk. They can go from perfect to dry in seconds.
Q: My sauce is too thin/too thick. How do I fix it?
A: Too thin? Let it simmer on the stovetop for a few more minutes to reduce. Too thick? Whisk in a splash more chicken broth or even a little water. The beauty is you can adjust it right up until you serve.
Q: Is there a good substitute for fresh herbs?
A: Dried is fine! Use 1 teaspoon of dried thyme and ½ teaspoon dried rosemary. Add them with the garlic so they have a moment to rehydrate in the butter. Fresh is brighter, but dried will still give you the earthy backbone.
Q: How do I know if my chicken is done without a thermometer?
A: I gotta be honest with you—the thermometer is the safety net. If you absolutely must, cut into the thickest part. The juices should run clear, and there should be no pink. But a $10 thermometer is the best insurance policy against dry or undercooked chicken you’ll ever buy.
Q: Can I make this ahead?
A: You can sear the chicken and make the sauce earlier in the day. Store them separately. To serve, reheat the sauce, then slice the cold chicken, nestle it in the hot sauce for a minute to warm through, and serve. Still excellent.