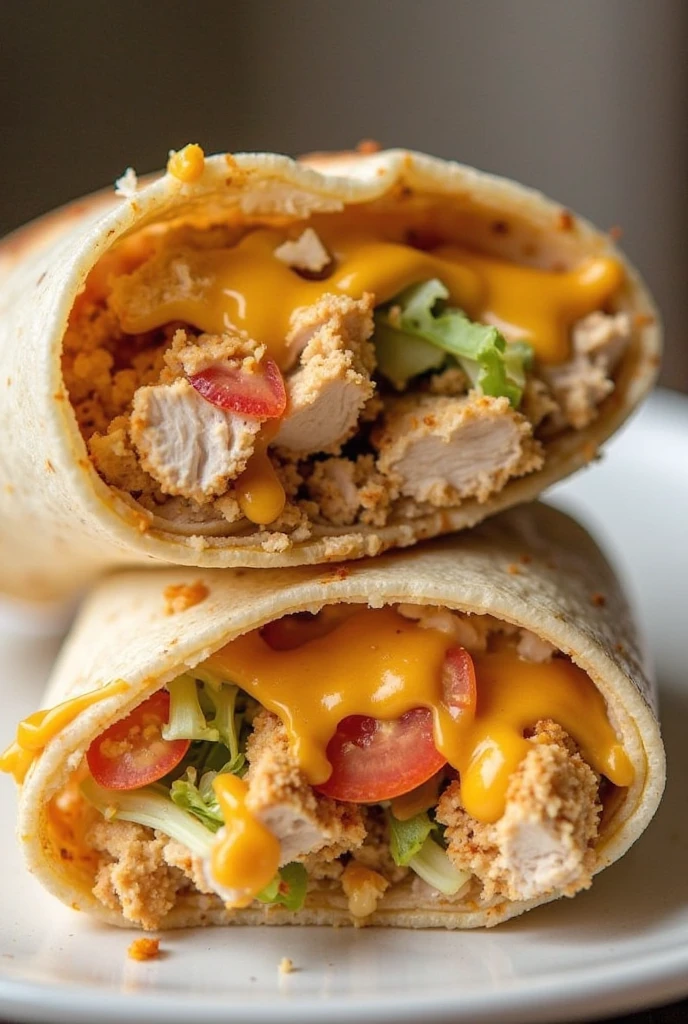
When you’re staring into the fridge at 6 PM wondering what to make for dinner, these cheesy chicken wraps are about to become your new best friend. They’re the kind of meal that looks like you spent way more time on it than you actually did – golden, melty, satisfying, and ready in less time than it takes to get takeout delivered.
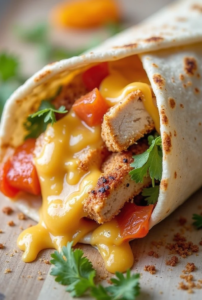
What makes these wraps special isn’t just their speed, though that’s certainly a major selling point. It’s the way crispy, seasoned chicken combines with melted cheese and fresh vegetables, all wrapped up in a perfectly toasted tortilla that’s crispy on the outside and gooey on the inside. They’re comfort food that doesn’t require an hour in the kitchen or a complicated ingredient list.
Why This Recipe Works for Busy Lives
Let’s be honest – most of us are juggling work, family, and a dozen other responsibilities. The last thing you want is a dinner recipe that requires specialty ingredients or complex techniques. These chicken wraps use pantry staples and basic cooking methods, but the results taste anything but basic.
The secret is in the layering and the final toasting step. By cooking the chicken with the right seasonings, using good melting cheese, and giving the assembled wrap a quick pan-fry, you create multiple layers of flavor and texture that make each bite interesting.
Plus, they’re infinitely customizable. Got leftover rotisserie chicken? Perfect. Want to add some heat with jalapeños? Go for it. Need to use up those bell peppers before they go bad? Throw them in. This recipe is more of a template than a rigid set of rules.
The Foundation: Perfect Seasoned Chicken
The chicken in these wraps isn’t just protein – it’s the star of the show. Whether you’re using leftover chicken, rotisserie chicken, or cooking it fresh, the seasoning makes all the difference.
For fresh chicken, cut boneless breasts or thighs into bite-sized pieces. Season generously with salt, pepper, garlic powder, and paprika. The paprika isn’t just for color – it adds a subtle smokiness that elevates the whole dish. Cook the chicken in a hot skillet with a bit of oil until it’s golden and cooked through, about 6-8 minutes.
If you’re using leftover or rotisserie chicken, shred it and toss with the same seasonings, then give it a quick sauté to warm through and let the flavors meld. This step makes all the difference between a wrap that tastes like leftovers and one that tastes intentionally delicious.
Essential Ingredients and Smart Swaps
For the Chicken:
- 1 lb boneless chicken (breasts or thighs), cut into cubes
- 1 tsp garlic powder
- 1 tsp paprika
- 1/2 tsp salt
- 1/4 tsp black pepper
- 2 tbsp olive oil
For Assembly:
- 4 large flour tortillas
- 1 1/2 cups shredded cheese (cheddar, Monterey Jack, or Mexican blend)
- 1 bell pepper, sliced thin
- 1/2 red onion, sliced thin
- 2 tbsp butter for toasting
- Fresh cilantro for garnish
Ingredient Flexibility
The beauty of wraps is their adaptability. Don’t have bell peppers? Try mushrooms, zucchini, or even leftover roasted vegetables. The cheese can be whatever melts well – sharp cheddar for tang, Monterey Jack for mildness, or pepper jack for heat.
For the tortillas, flour works best because they’re more pliable and toast beautifully, but whole wheat or even corn tortillas can work if that’s what you have. Just warm them slightly before filling to prevent cracking.
Step-by-Step Wrap Construction
Preparing the Components
Start by cooking your chicken as described above. While it’s cooking, slice your vegetables thin – this ensures they’ll cook quickly and won’t make the wrap bulky. If you’re using raw onions and peppers, you can sauté them briefly with the chicken for the last few minutes of cooking, or leave them raw for extra crunch.
Have your cheese shredded and your tortillas at room temperature. Cold tortillas are more likely to crack when you fold them, so if yours have been in the fridge, warm them in the microwave for 10-15 seconds or in a dry skillet for 30 seconds per side.
Assembly Strategy
Here’s where technique matters. Lay your tortilla flat and imagine it divided into quarters. Place your filling in the center, but slightly toward one edge – this makes rolling easier and prevents overstuffing.
Start with a layer of cheese directly on the tortilla – this acts as “glue” to hold everything together. Add your warm chicken, then vegetables, then more cheese on top. The cheese on top will melt down into the other ingredients, creating that irresistible gooey factor.
The Perfect Fold
Roll from the bottom edge, tucking in the sides as you go. The key is to roll tightly but not so tight that you squeeze out the filling. If you’re having trouble, try folding in the sides first, then rolling from bottom to top.
The Game-Changing Toasting Technique
This is what transforms a regular wrap into something special. Heat a large skillet over medium heat and add a pat of butter. Place your wrapped seam-side down first – this helps seal it closed. Cook for 2-3 minutes until golden and crispy, then flip carefully and cook another 2-3 minutes.
The butter creates a golden, crispy exterior while the heat melts the cheese inside. You’ll hear it sizzling and see the cheese starting to ooze out slightly – that’s exactly what you want.
Troubleshooting Common Wrap Problems
Wraps falling apart: Usually caused by overfilling or not rolling tightly enough. Try using less filling and make sure to tuck as you roll.
Soggy tortillas: This happens when wet ingredients (like tomatoes or saucy vegetables) make the tortilla soggy. Pat ingredients dry or add them sparingly.
Uneven cooking: Make sure your skillet is at medium heat, not high. Too hot and the outside burns before the inside heats through.
Cheese not melting: The filling should be warm when you assemble the wrap. Cold ingredients won’t create enough heat to melt the cheese properly.
Flavor Variations to Keep Things Interesting
Buffalo Chicken Style: Toss the cooked chicken with buffalo sauce, use pepper jack cheese, and add celery for crunch. Serve with a side of ranch or blue cheese dressing.
Mediterranean Twist: Season chicken with oregano and lemon, use feta cheese, and add cucumber, tomatoes, and a drizzle of tzatziki.
BBQ Ranch: Mix BBQ sauce into the chicken, use sharp cheddar, and add crispy bacon bits and red onion.
Tex-Mex Style: Add cumin and chili powder to the chicken seasoning, use Mexican cheese blend, and include jalapeños, corn, and black beans.
Make-Ahead and Meal Prep Tips
These wraps are perfect for meal prep, but there’s a right way to do it. Cook your chicken and vegetables ahead of time and store them separately in the fridge for up to 3 days. When you’re ready to eat, simply assemble and toast.
You can also assemble the wraps completely and wrap them tightly in foil or plastic wrap. They’ll keep in the fridge for up to 24 hours. When ready to eat, unwrap and toast in the skillet as directed – you might need an extra minute or two since they’re starting cold.
For freezing, wrap assembled (but not toasted) wraps individually in plastic wrap, then foil. They’ll keep for up to 3 months. Thaw overnight in the fridge before toasting.
Serving Suggestions and Sides
While these wraps are satisfying on their own, a few simple sides can round out the meal. A handful of tortilla chips and salsa, a quick side salad, or some fresh fruit all work well.
For a heartier meal, serve with seasoned sweet potato fries or a cup of soup. The wraps are also perfect for packing in lunch boxes or taking on picnics – just wait to toast them until you’re ready to eat, or enjoy them at room temperature.
The Economics of Homemade vs. Takeout
Let’s talk numbers for a second. A similar wrap from a restaurant or food truck typically costs $8-12, and that’s before delivery fees and tips. Making these at home costs roughly $2-3 per wrap, depending on your local ingredient prices.
More importantly, you control the quality and quantity of ingredients. Restaurant wraps often skimp on the protein or load up on cheap fillers. When you make them at home, you can be generous with the good stuff – real cheese, plenty of chicken, fresh vegetables.
Why Kids Love These (And Parents Do Too)
There’s something about handheld food that appeals to kids, and these wraps are no exception. The cheese factor doesn’t hurt either. But what parents love is how easy it is to sneak in vegetables – thinly sliced peppers and onions often go unnoticed when they’re mixed with chicken and melted cheese.
You can even set up a “wrap bar” and let everyone customize their own. Provide the basic components and let family members choose their own adventure. It’s interactive, fun, and ensures everyone gets something they’ll actually eat.
Final Thoughts on Quick Weeknight Success
Quick cheesy chicken wraps prove that fast food doesn’t have to mean compromising on flavor or nutrition. With just a few basic ingredients and simple techniques, you can create something that’s genuinely satisfying and delicious.
The key is having the right expectations – this isn’t fine dining, and it doesn’t need to be. It’s comfort food that happens to be quick, customizable, and way better than anything you’ll get from a drive-through. Sometimes that’s exactly what dinner needs to be.
Keep the basic technique in your back pocket, and you’ll always have an answer to the “what’s for dinner?” question. Whether you’re feeding a family on a busy Tuesday or need a quick lunch that’s better than a sad desk salad, these wraps deliver every time.