The first time I bit into a peppermint meltaway cookie, I understood why they earned such a perfect name. These delicate, cloud-like treats literally dissolve on your tongue, leaving behind the refreshing coolness of peppermint and the creamy sweetness of white chocolate. It was during a holiday cookie exchange five years ago when my friend Sarah brought a tin filled with these pristine white confections, each one looking like a tiny snowflake dusted with ruby-red peppermint sparkles. After tasting just one, I immediately asked for the recipe. Now, peppermint meltaways have become my signature holiday cookie, and I’m excited to share this treasured recipe with you.
What Makes Peppermint Meltaways So Special
Peppermint meltaway cookies occupy a unique space in the world of holiday baking. Unlike chewy chocolate chip cookies or crispy gingerbread, these cookies are all about delicate texture and refined flavor. The name “meltaways” perfectly describes their defining characteristic—they’re incredibly tender and dissolve almost instantly when you eat them, creating an ethereal eating experience that feels luxurious and special.
The combination of peppermint and white chocolate creates a flavor profile that’s quintessentially wintery and festive. The cool, refreshing taste of peppermint evokes candy canes and snowy afternoons, while the white chocolate coating adds richness and visual appeal. These cookies are elegant enough for formal holiday parties yet simple enough to enjoy during a quiet evening at home with a mug of hot cocoa.
What makes these peppermint cookie meltaways particularly appealing is their impressive appearance with minimal decorating effort. The white chocolate coating creates a smooth, professional-looking finish, and the sparkly red peppermint sugar sprinkled on top adds just the right amount of festive flair without requiring any special skills or equipment.
The Science Behind Perfect Meltaway Cookies
The secret to achieving that signature melt-in-your-mouth texture in these peppermint meltaway cookies lies in two key ingredients: cornstarch and powdered sugar. Cornstarch has smaller starch molecules than flour, which means it creates a more tender, delicate structure in baked goods. When you replace a portion of the all-purpose flour with cornstarch, you reduce gluten development, resulting in cookies that are incredibly tender and have that characteristic crumbly, melt-away texture.
Powdered sugar also plays a crucial role in creating the perfect peppermint meltaways. Unlike granulated sugar, powdered sugar contains a small amount of cornstarch and has a much finer texture. This fine texture distributes more evenly throughout the dough, creating a uniform crumb and contributing to that dissolve-on-your-tongue quality. The powdered sugar also helps create a smooth dough that’s easy to work with and shape.
The addition of peppermint extract provides that refreshing holiday flavor that makes these cookies special. Real peppermint extract (not peppermint oil, which is much more concentrated) gives you that authentic candy cane taste without being overwhelming. The key is finding the right balance—enough to clearly taste the peppermint, but not so much that it becomes medicinal.
Essential Ingredients for Peppermint Meltaway Cookies
For the Cookie Dough:
- 1 cup (226g) unsalted butter, softened to room temperature
- 1/2 cup (60g) powdered sugar
- 1 teaspoon pure peppermint extract
- 1/2 teaspoon pure vanilla extract
- 1 3/4 cups (219g) all-purpose flour
- 1/4 cup (32g) cornstarch
- 1/4 teaspoon salt
the White Chocolate Coating:
- 12 ounces (340g) white chocolate chips or white chocolate bars, chopped
- 1 tablespoon coconut oil or vegetable shortening (optional, for smoother coating)
Decoration:
- Red sanding sugar or crushed candy canes
- White sanding sugar or pearl sugar (optional)
When selecting ingredients for your peppermint meltaway cookies, quality matters significantly. Choose a good-quality peppermint extract—McCormick, Nielsen-Massey, or Frontier Co-op all make excellent options. Avoid imitation peppermint flavor, which can taste artificial and harsh. For the white chocolate coating, I prefer using real white chocolate rather than white candy melts. Look for white chocolate that lists cocoa butter as an ingredient for the best flavor and texture.
Step-by-Step Guide to Baking Peppermint Meltaways
Preparing Your Workspace
Begin by organizing your workspace and gathering all your ingredients and equipment. This recipe moves quickly once you start, so having everything ready makes the process smooth and enjoyable. Preheat your oven to 350°F (175°C) and line two baking sheets with parchment paper. The parchment prevents sticking and makes cleanup easier.
Ensure your butter is properly softened—it should be cool to the touch but soft enough to leave an impression when pressed gently. If your butter is too cold, it won’t cream properly with the sugar. If it’s too warm or melted, your peppermint meltaway dough will be too soft and the cookies will spread excessively during baking.
Mixing the Peppermint Meltaway Dough
In a large mixing bowl, cream together the softened butter and powdered sugar using an electric mixer set to medium speed. Beat for 3-4 minutes until the mixture becomes light, fluffy, and almost white in color. This creaming process is crucial for creating tender meltaway cookies—it incorporates air into the dough, resulting in a lighter texture.
Add the peppermint extract and vanilla extract to the butter mixture, beating until fully incorporated. You’ll immediately smell the wonderful peppermint aroma that makes these cookies so distinctive. The vanilla extract might seem like an odd addition to a peppermint cookie, but it actually enhances and rounds out the peppermint flavor rather than competing with it.
In a separate bowl, whisk together the all-purpose flour, cornstarch, and salt. This step ensures even distribution of the cornstarch and salt throughout your peppermint meltaway cookies. The cornstarch is absolutely essential—it’s what gives these cookies their signature tender, crumbly texture.
Gradually add the dry ingredients to the wet ingredients, mixing on low speed just until the dough comes together. The dough will appear slightly crumbly at first but should hold together when pressed. Avoid overmixing—once you no longer see dry flour, stop mixing. Overmixing develops gluten, which will make your cookies tough rather than tender.
Shaping Your Meltaway Cookies
The dough for these peppermint meltaways is soft and delicate, which can make shaping a bit tricky. If your dough feels too soft to handle, wrap it in plastic wrap and refrigerate for 15-20 minutes until it firms up slightly. This brief chilling makes the dough much easier to work with.
Using a tablespoon or small cookie scoop, portion out the dough into pieces about 1 tablespoon each. Roll each portion gently between your palms to form smooth balls. The gentle rolling motion creates a nice round shape, but don’t overwork the dough—handle it as little as possible to maintain that tender texture.
Place the dough balls on your prepared baking sheets, spacing them about 2 inches apart. These cookies don’t spread much during baking, so you can fit quite a few on each sheet. Using the bottom of a glass or measuring cup, gently press each dough ball to flatten it slightly into a disc shape about 1/4 inch thick. This step isn’t absolutely necessary—you can bake them as balls if you prefer round cookies—but flattening them creates a more uniform appearance and helps them bake evenly.
Baking to Perfection
Bake your peppermint meltaway cookies for 10-12 minutes. Here’s the important part: these cookies will NOT brown. Because they contain powdered sugar and cornstarch, they stay pale and white even when fully baked. They’re done when they appear set around the edges but still soft in the center. The bottoms might have the slightest hint of golden color, but the tops should remain white.
Resist the urge to overbake these peppermint meltaways thinking they need to turn golden. Overbaking will make them dry and crumbly instead of tender and delicate. Trust the timing and remove them when they look set but still pale.
Allow the cookies to cool on the baking sheet for 5 minutes—they’ll be very fragile when hot. After 5 minutes, carefully transfer them to a wire cooling rack to cool completely. This complete cooling is essential before coating them in white chocolate. If you try to coat warm cookies, the chocolate will melt completely and create a mess.
Creating the White Chocolate Coating
Once your peppermint meltaway cookies have cooled completely, it’s time for the white chocolate coating that takes them from simple butter cookies to something truly special. Melt the white chocolate using a double boiler or microwave. For the double boiler method, place chopped white chocolate in a heatproof bowl set over a pot of simmering water, stirring until smooth.
If using a microwave, place the white chocolate in a microwave-safe bowl and heat in 30-second intervals, stirring between each interval, until completely melted and smooth. White chocolate is more delicate than dark chocolate and can seize or burn easily, so take your time and use lower power settings if possible.
If your melted white chocolate seems thick or difficult to work with, add the optional tablespoon of coconut oil or vegetable shortening. This addition thins the chocolate slightly, making it easier to coat the cookies and creating a smoother finish. Stir until the oil is fully incorporated and the chocolate appears glossy and fluid.
Coating and Decorating Your Peppermint Meltaways
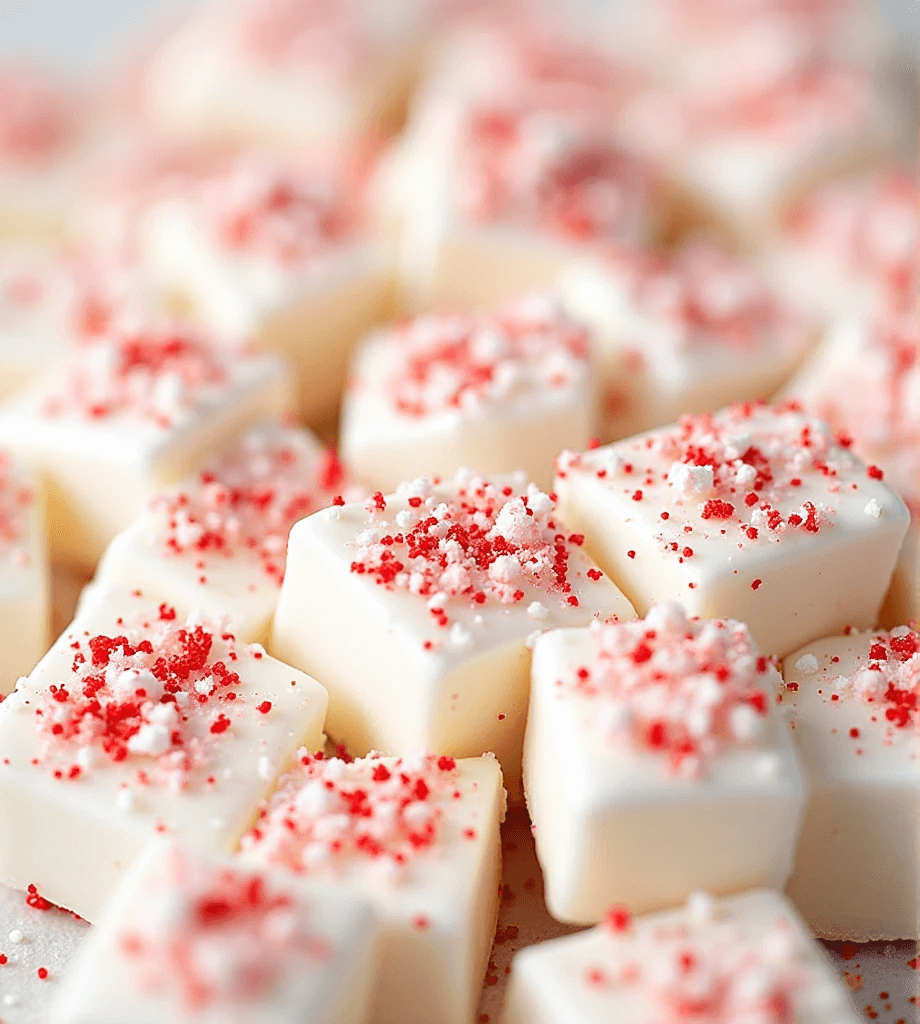
Here’s where these cookies transform into the beautiful confections you see in the photograph—pristine white treats dusted with sparkling red peppermint sugar that look like they came from an upscale bakery. There are several methods for coating the cookies in white chocolate, and you can choose the one that works best for you.
The dipping method involves using a fork to lower each cookie into the melted white chocolate, then lifting it out and allowing excess chocolate to drip back into the bowl. Gently tap the fork against the edge of the bowl to remove excess chocolate, then slide the coated cookie onto a parchment-lined baking sheet. This method creates a complete coating on all sides.
The drizzling method is faster and creates a more rustic look. Place the cooled cookies on a wire rack set over parchment paper (to catch drips). Using a spoon, drizzle melted white chocolate over each cookie, allowing it to run down the sides. This method uses less chocolate and creates an attractive drizzled pattern.
My preferred method is a hybrid: I dip the top of each cookie into the white chocolate, then turn it right-side up and use a small spoon to smooth the chocolate and allow it to run slightly down the sides. This creates a nice coating on top while keeping the bottom exposed, making them easier to handle and eat.
Immediately after coating each cookie, while the white chocolate is still wet, sprinkle the red sanding sugar or crushed candy canes over the top. You can also add white sanding sugar or pearl sugar for extra sparkle, creating that gorgeous two-toned effect shown in the photograph. The red peppermint sugar creates a beautiful contrast against the pure white chocolate, making these cookies as visually stunning as they are delicious.
Allow the chocolate coating to set completely before serving or storing. You can leave them at room temperature (the chocolate will set in about 30 minutes), or place them in the refrigerator for 10-15 minutes to speed up the process.
Nutritional Profile of Peppermint Meltaway Cookies
Understanding the nutritional content of your homemade peppermint meltaways helps you enjoy them mindfully. Here’s the approximate nutritional breakdown per cookie (recipe makes about 24 cookies):
- Calories: 135
- Total Fat: 8g
- Saturated Fat: 5g
- Cholesterol: 20mg
- Sodium: 30mg
- Total Carbohydrates: 15g
- Dietary Fiber: 0g
- Sugars: 9g
- Protein: 1g
These peppermint cookie meltaways are indulgent treats perfect for holiday celebrations and special occasions. Their rich, buttery nature and white chocolate coating make them satisfying in small portions—one or two cookies with a cup of tea or coffee is the perfect serving.
Presenting Your Peppermint Meltaways Beautifully
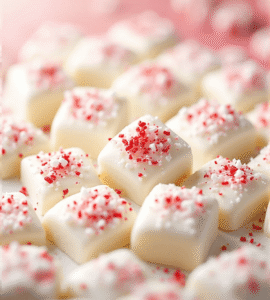
The inherent beauty of these peppermint meltaway cookies makes them incredibly easy to present in an attractive way. Their pristine white appearance with ruby-red sparkles looks elegant in almost any setting. For the photograph featured here, the cookies are displayed in a slightly out-of-focus cluster that emphasizes their snowy-white coating and glittering red peppermint sugar, creating a dreamy, soft aesthetic that perfectly captures their delicate nature.
For holiday entertaining, arrange your peppermint meltaways on a white or red serving platter for a classic look, or use a silver tray for elegant appeal. The monochromatic white-on-white presentation with pops of red creates a sophisticated color scheme that fits perfectly with traditional holiday décor.
These cookies also make wonderful gifts. Pack them in clear cellophane bags tied with red and white striped ribbon for a candy-cane inspired presentation, or arrange them in a decorative tin lined with parchment paper. Because of their delicate texture, make sure to package them carefully with tissue paper or bubble wrap between layers to prevent breakage during transport.
Create a beautiful dessert board by combining peppermint meltaways with other holiday treats like chocolate truffles, white chocolate bark, and candy canes. The various shades of white, cream, and red create a cohesive, winter-themed display that’s perfect for holiday parties.
Perfect Pairings for Peppermint Meltaway Cookies
The refreshing peppermint flavor and delicate texture of these meltaway cookies pair beautifully with both hot and cold beverages. Hot chocolate is a natural match—the mint cookies complement the chocolate beverage without competing, and the cooling peppermint provides a nice contrast to the warm drink. Add a splash of peppermint schnapps to your hot chocolate for an adults-only version.
Coffee and peppermint create a café-style pairing that’s sophisticated and satisfying. The slight bitterness of coffee balances the sweetness of the cookies, while the peppermint adds a refreshing note. An Irish coffee with a hint of mint is particularly magical with these cookies during cold winter evenings.
For tea lovers, peppermint meltaways pair wonderfully with Earl Grey or English Breakfast tea. The bergamot in Earl Grey complements the mint flavor, while the robust nature of English Breakfast stands up well to the sweet, rich cookies. A glass of cold milk remains a classic option that will never disappoint, especially for children who adore these minty treats.
Wine pairings might seem unconventional for cookies, but a sparkling wine like Prosecco or Champagne actually works beautifully with peppermint meltaways. The bubbles and acidity cut through the richness of the white chocolate and butter, while the mint provides a palate-cleansing effect between sips.
Creative Variations for Your Peppermint Meltaways
While the classic peppermint meltaway with white chocolate coating is absolutely perfect as written, experimenting with variations can be fun and helps you customize the recipe to different tastes and occasions.
Flavor Variations
Create chocolate mint meltaways by adding 2 tablespoons of cocoa powder to the dry ingredients and reducing the flour by 2 tablespoons. This creates a chocolate cookie with peppermint flavor that you can still coat in white chocolate. For almond meltaways, replace the peppermint extract with almond extract for a completely different but equally delicious flavor profile.
Lemon meltaways made with lemon zest and lemon extract instead of peppermint create a bright, summery version perfect for spring celebrations. Orange meltaways with orange zest and extract work wonderfully during the holidays as well, especially when coated in dark chocolate instead of white chocolate.
Coating Options
Instead of white chocolate, try coating your peppermint meltaways in milk chocolate or dark chocolate for a different flavor experience. Dark chocolate and peppermint is a particularly sophisticated combination that adult audiences often prefer. You can also create a two-tone effect by dipping half the cookie in white chocolate and half in dark chocolate.
For a simpler approach, skip the chocolate coating entirely and simply dust the baked cookies with powdered sugar. This creates a more rustic, old-fashioned appearance while keeping the focus entirely on the tender, minty cookie itself.
Decorating Ideas
Get creative with your decoration by using different colors of sanding sugar to match various holidays or celebrations. Pink or red sanding sugar works for Valentine’s Day, pastel colors for Easter, or even black and orange for Halloween (though you might want to adjust the flavoring for those holidays!). Crushed candy canes add extra peppermint flavor and a festive crunch, while edible pearls or silver dragées create an elegant, sophisticated look.
Storing and Freezing Peppermint Meltaway Cookies
Proper storage keeps your peppermint meltaways fresh and delicious. Once the white chocolate coating has fully set, layer the cookies between sheets of parchment paper in an airtight container. Store at room temperature in a cool, dry place for up to one week. The delicate nature of these cookies means they don’t have as long a shelf life as heartier cookies like oatmeal or chocolate chip, so they’re best enjoyed within the first few days for optimal texture.
If you live in a warm climate or your kitchen gets particularly hot, you may need to refrigerate these cookies to prevent the white chocolate coating from softening or melting. Just be aware that refrigeration can sometimes cause the white chocolate to develop condensation or “bloom” (white streaks) when brought back to room temperature. This is purely cosmetic and doesn’t affect the taste.
For longer storage, these peppermint cookie meltaways freeze beautifully. Freeze uncoated cookies in a single layer on a baking sheet until solid, then transfer to a freezer-safe container or bag with parchment paper between layers. Frozen uncoated cookies will keep for up to 3 months. When you’re ready to serve them, thaw at room temperature and add the white chocolate coating and decoration fresh.
You can also freeze the completed cookies with their white chocolate coating, though the chocolate may develop some condensation or bloom when thawed. Freeze them in a single layer first, then pack carefully in a container with layers separated by parchment paper. These will keep for about 2 months in the freezer.
The cookie dough itself also freezes well. Shape it into balls before freezing, then freeze on a baking sheet until solid before transferring to a freezer bag. You can bake frozen dough balls directly from the freezer—just add 1-2 minutes to the baking time.
Troubleshooting Common Meltaway Cookie Issues
Even experienced bakers sometimes encounter challenges with these delicate cookies. Here are solutions to common problems:
Problem: Cookies are too crumbly and fall apart Solution: This usually means too much cornstarch or not enough butter. Make sure to measure your cornstarch carefully using the spoon-and-level method. Also ensure your butter is properly softened—if it’s too cold, it won’t incorporate properly into the dough.
Problem: Cookies spread too much during baking Solution: Your butter may have been too soft or the dough may have been too warm. Chill the shaped dough balls for 15 minutes before baking, and make sure your butter is softened but still cool to the touch.
Problem: White chocolate coating is too thick or lumpy Solution: White chocolate can be finicky. Make sure not to overheat it, as this can cause it to seize and become grainy. Add a tablespoon of coconut oil or shortening to thin it out and make it more workable. If it has seized, you may need to start over with fresh chocolate.
Problem: Cookies don’t have enough peppermint flavor Solution: Increase the peppermint extract by 1/4 to 1/2 teaspoon next time. You can also add a tiny amount of peppermint oil (just a few drops—it’s much more concentrated than extract). Taste the dough before baking to check the flavor level.
Problem: Sanding sugar won’t stick to the white chocolate Solution: You need to apply the sugar while the white chocolate is still wet and sticky. Work quickly after coating each cookie, or coat just a few at a time so the chocolate doesn’t have time to set before you add the decoration.
My Favorite Peppermint Meltaway Tips
After making hundreds of these peppermint meltaways over the years, I’ve discovered a few tips that consistently produce the best results. First, resist the temptation to add more peppermint extract than the recipe calls for. These cookies should taste refreshing, not medicinal. If you want a stronger mint flavor, crush a candy cane and add it to the white chocolate coating instead—this adds mint flavor without making the cookie itself overwhelming.
Second, invest in good quality white chocolate. The difference between premium white chocolate and cheap candy coating is dramatic in terms of both flavor and texture. Real white chocolate contains cocoa butter and has a smooth, creamy taste, while candy melts can taste waxy and artificial.
My absolute best tip? Make a double batch of the dough, bake half, and freeze the other half. These cookies are so delicate and lovely that they disappear quickly at parties, and having backup dough in the freezer means you’re never more than 15 minutes away from fresh, homemade peppermint meltaways. There’s something truly magical about being able to pull a batch of these elegant cookies from the oven on a moment’s notice, especially during the busy holiday season when unexpected guests often appear at your door.