Introduction: When Creativity Meets Cookies
I’ll never forget the first time I served Oreo Sweet Sushi Rolls at a dinner party. My guests walked into the dining room, saw what appeared to be elegant chocolate sushi on a platter, and their expressions ranged from confused to intrigued. When I revealed these were actually sweet desserts made with Oreos, cream cheese, and a touch of creativity, the room erupted in excitement. This no-bake Oreo dessert has become my signature party trick—a conversation starter that tastes as amazing as it looks.
The genius of this Oreo sushi recipe lies in its simplicity and visual appeal. You’re essentially rolling Oreo cream filling with other sweet ingredients, coating them in crushed cookies, and presenting them like sushi. The result is a dessert that’s fun to make, impressive to serve, and absolutely delicious to eat.
What Makes Oreo Sweet Sushi Rolls So Special?
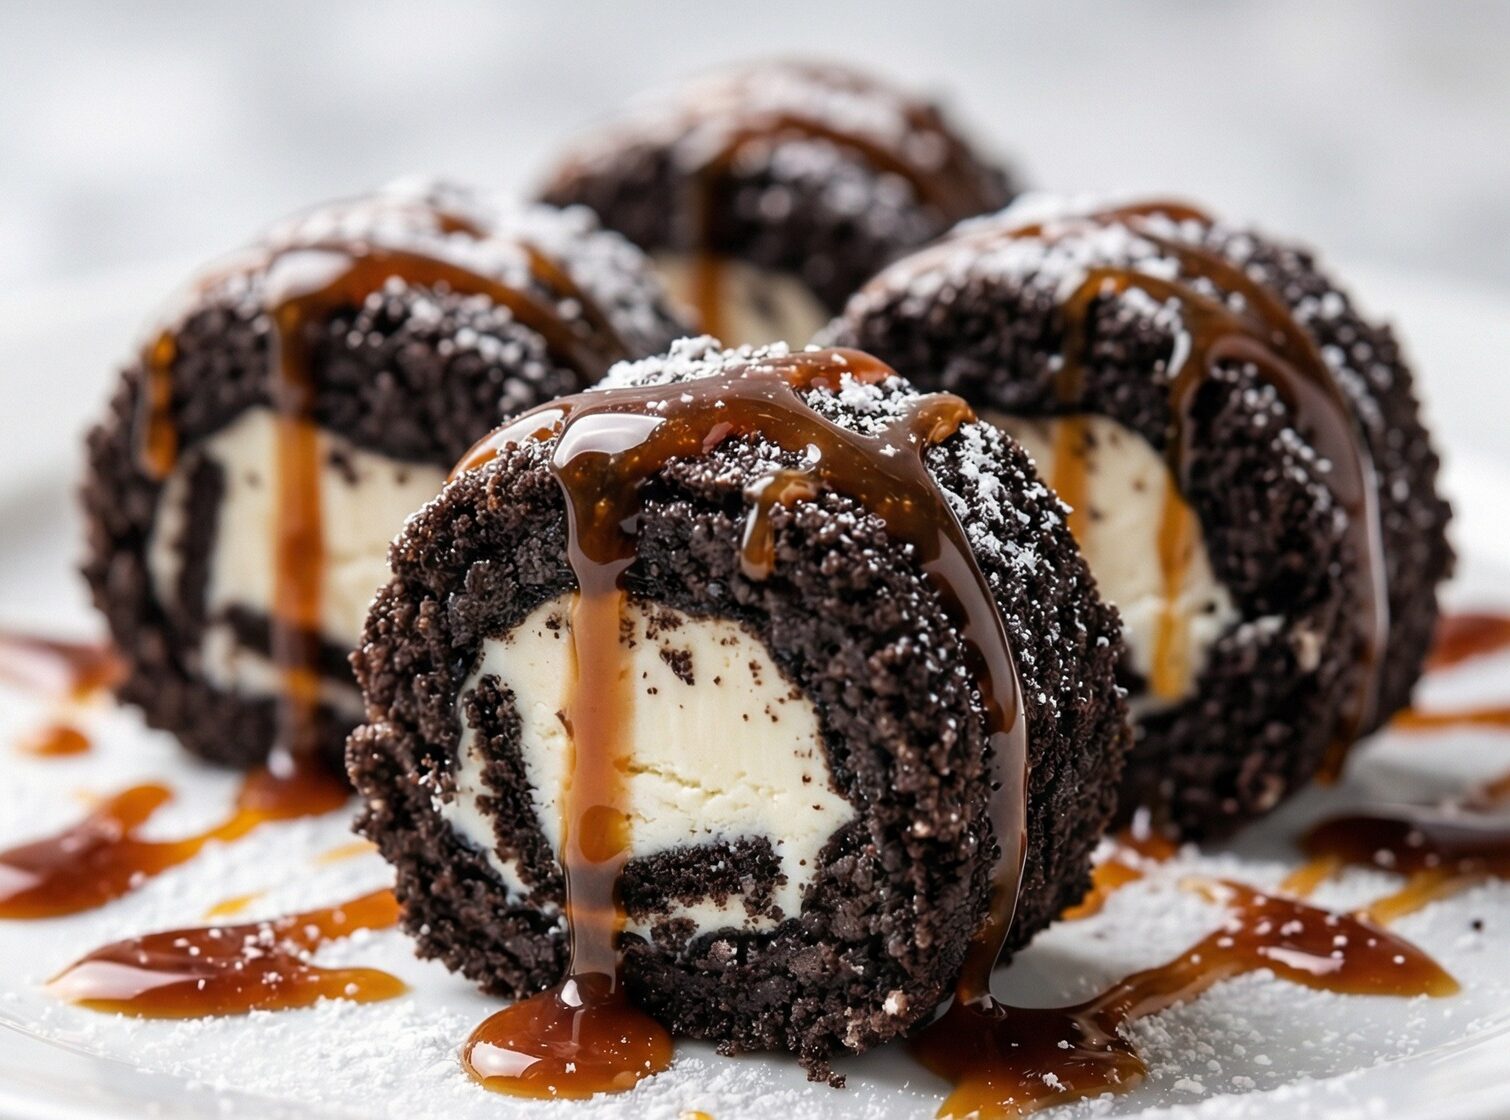
Looking at the image, you can see why these sweet sushi rolls are so captivating. Three perfectly formed chocolate-coated spheres sit on a white plate, each generously drizzled with glossy chocolate and caramel sauce. The exterior has that characteristic Oreo cookie crumb texture, while a light dusting of powdered sugar adds elegance. The cross-section reveals a creamy white filling wrapped in the dark chocolate cookie coating—just like looking at the inside of a sushi roll!
This creative Oreo dessert is perfect for themed parties, kids’ gatherings, or any occasion where you want to serve something unexpected and delightful. Unlike traditional sushi, these require no cooking, no special equipment, and come together in less than 30 minutes.
Gathering Your Oreo Sushi Ingredients
The beauty of this easy Oreo recipe is its minimal ingredient list. You’ll need:
Main Ingredients:
- Oreo cream from cookies (scrape out the filling from about 20-24 Oreos)
- 2 tablespoons milk
- 1/4 cup milk (for rolling consistency)
For Coating and Decoration:
- Crushed Oreo cookies (the cookies you scraped the cream from)
- Chocolate sauce or melted chocolate for drizzling
- Caramel sauce for drizzling
- Powdered sugar for dusting
The ingredient list might seem unusual, but trust me—this combination creates the perfect texture and flavor for these Oreo sweet sushi treats. The cream filling provides the base, while the milk helps create a moldable consistency that holds its shape.
Step-by-Step Instructions for Oreo Sweet Sushi
Step 1: Prepare Your Oreo Cream Filling
Carefully twist apart your Oreo cookies, scraping all the cream filling into a medium bowl. You can save the cookie wafers for the coating, so don’t toss them! This is the most time-consuming part of making these no-bake Oreo treats, but put on some music and make it fun. I like to involve kids in this step—they love it!
Step 2: Create the Sushi “Rice”
Add 2 tablespoons of milk to your Oreo cream and mix until smooth and slightly softened. If the mixture seems too stiff to roll, add a bit more milk, one tablespoon at a time, until you reach a playdough-like consistency. This is your “sushi rice” base!
Step 3: Crush Your Cookies
Place your scraped Oreo cookies in a food processor or sealed plastic bag. Pulse or crush them until you have fine crumbs. These will serve as the outer coating for your Oreo sushi rolls, giving them that authentic dark appearance and adding a delightful crunch.
Step 4: Form Your Sushi Rolls
Scoop about 2 tablespoons of the Oreo cream mixture and roll it into a ball or oblong shape between your palms. The shape is up to you—traditional sushi shapes are slightly oval, but balls work beautifully too. Work quickly, as the mixture can soften from the warmth of your hands.
Step 5: Coat in Cookie Crumbs
Roll each formed piece in the crushed Oreo crumbs, pressing gently to ensure the crumbs adhere well. This creates that gorgeous dark exterior that makes these sweet sushi rolls so visually striking. Place your finished rolls on a parchment-lined plate or tray.
Step 6: Chill and Set
Refrigerate your Oreo sweet sushi for at least 30 minutes to firm up. This chilling time is important—it helps the rolls hold their shape and makes them easier to cut if you want to show off that beautiful cream center.
Step 7: Add Artistic Drizzles
Once chilled, transfer your rolls to a serving plate. Drizzle with chocolate sauce and caramel sauce in artistic patterns. Finish with a light dusting of powdered sugar through a fine-mesh sieve for that professional bakery look.
Nutritional Information
Per serving (1 sushi roll):
- Calories: 145
- Total Fat: 6g
- Saturated Fat: 2g
- Cholesterol: 5mg
- Sodium: 95mg
- Total Carbohydrates: 22g
- Dietary Fiber: 1g
- Sugars: 16g
- Protein: 1g
Expert Tips for Perfect Sweet Sushi
Work with Cold Ingredients
For the best results with this no-bake Oreo dessert, make sure your ingredients are cold. Cold cream filling is easier to work with and holds its shape better. If the mixture gets too soft while you’re working, pop it in the fridge for 10 minutes.
Use Quality Chocolate for Drizzling
The chocolate drizzle is a crucial visual element for these Oreo sushi rolls. Use good quality chocolate melted with a little cream for the smoothest, most luxurious finish.
Get Creative with Shapes
While balls are easiest, you can shape these into traditional sushi shapes by forming cylinders and slightly pressing the top flat. For “maki rolls,” make longer cylinders and slice them into rounds to show off the cream center.
Make Them Ahead
These sweet sushi rolls are perfect make-ahead desserts. Prepare them up to 2 days in advance and store in the refrigerator. Add the drizzles and powdered sugar just before serving for the freshest look.
Creative Variations for Your Sweet Sushi
Birthday Cake Oreo Sushi
Use Birthday Cake Oreos instead of regular ones for a festive twist. Add rainbow sprinkles to the cookie crumb coating for extra birthday celebration vibes!
Mint Chocolate Oreo Rolls
Use Mint Oreos and drizzle with green-tinted white chocolate for a refreshing variation on this Oreo dessert recipe.
Peanut Butter Oreo Sushi
Mix a tablespoon of peanut butter into your Oreo cream before rolling. Roll the outside in crushed Nutter Butter cookies instead of Oreos for a completely different flavor profile.
Red Velvet Sweet Sushi
Use Red Velvet Oreos and add a cream cheese frosting drizzle instead of chocolate for an elegant variation.
Golden Oreo Version
Make “white rice” sushi using Golden Oreos. The pale color creates a completely different aesthetic that’s equally stunning.
Presentation Ideas for Maximum Impact
The presentation is half the fun with these Oreo sweet sushi rolls! Here are some creative serving suggestions:
Traditional Sushi Platter Style
Arrange your rolls on a rectangular plate or wooden sushi board. Add small dishes of “soy sauce” (chocolate sauce) for dipping, and garnish with fresh mint leaves to mimic pickled ginger.
Individual Servings
Place 2-3 rolls on small dessert plates with artistic sauce drizzles already on the plate. Add a fork designed to look like chopsticks for a fun touch.
Dessert Sushi Bar
Set up a DIY station where guests can make their own Oreo sushi rolls with various toppings and drizzles to choose from. Provide crushed Oreos, sprinkles, mini chocolate chips, and different sauce options.
Bento Box Presentation
Serve these sweet sushi treats in actual bento boxes with other small desserts for a complete Japanese-inspired dessert experience.
Perfect Occasions for Oreo Sweet Sushi
These no-bake Oreo treats are perfect for:
- Kids’ birthday parties (especially sushi-themed parties!)
- Sleepover desserts
- Potluck contributions
- Class party treats
- Holiday gatherings with a twist
- Movie night snacks
- Bridal or baby shower desserts
- Office party contributions
The novelty factor makes them a hit every single time.
Storage and Shelf Life
Refrigerator Storage
Store your Oreo sweet sushi rolls in an airtight container in the refrigerator for up to 5 days. Place parchment paper between layers to prevent sticking. The chocolate and caramel drizzles may soften slightly, but they’ll still taste delicious.
Freezer Storage
These freeze beautifully! Wrap individual rolls in plastic wrap, then place in a freezer-safe container or bag. Freeze for up to 2 months. Thaw in the refrigerator for 2 hours before serving. Add fresh drizzles after thawing for the best appearance.
Make-Ahead Timeline
- Up to 2 days ahead: Form and coat rolls, store in refrigerator
- Day of serving: Add drizzles and powdered sugar within 2-3 hours of serving for best appearance
- For parties: Transport in a cooler with ice packs, drizzle at the venue
Frequently Asked Questions
Q: Can I use other cookie brands besides Oreos?
A: Absolutely! Any cream-filled chocolate sandwich cookie will work for this sweet sushi recipe. Store brands work just as well and can save you money.
Q: The mixture is too dry/crumbly. What should I do?
A: Add milk one teaspoon at a time until the mixture is moldable. Different Oreo varieties have different amounts of filling, so you may need to adjust the liquid.
Q: Can I make these without milk for a dairy-free version?
A: Yes! Use almond milk, oat milk, or even water. Oreos are actually vegan (in most countries), so with non-dairy milk, these become a vegan dessert.
Q: How do I cut them to show the cream center?
A: Use a sharp knife warmed in hot water and wiped dry. Make a clean cut straight down—don’t saw back and forth, which will crumble the coating.
Q: Can kids make these?
A: Definitely! This is a perfect kid-friendly recipe. They’ll love scraping out the Oreo cream and rolling the balls. Just supervise the melted chocolate drizzling step.
Q: Why are mine falling apart?
A: The mixture may be too dry, or you might not have chilled them long enough. Make sure to refrigerate for at least 30 minutes before handling or serving.
Fun Facts About Oreos
Since we’re using Oreos as the star ingredient in this creative Oreo dessert, here are some fun facts:
- Oreos are the best-selling cookie in the United States
- Over 450 billion Oreo cookies have been sold worldwide since 1912
- There are over 85 different flavor varieties of Oreos
- The Oreo cookie design has 12 flowers, 12 dots, and 12 dashes
- National Oreo Cookie Day is March 6th
Troubleshooting Common Issues
Too Soft to Hold Shape
If your Oreo sushi rolls are too soft, you likely added too much milk. Add more Oreo cream or chill longer to firm them up. You can also add a tablespoon of powdered sugar to help bind the mixture.
Cookie Coating Won’t Stick
Make sure the mixture is slightly tacky before rolling in crumbs. If it’s too dry, the crumbs won’t adhere. Lightly dampen your hands with water while rolling to help.
Melted Chocolate Too Thick
Thin chocolate with a teaspoon of milk or cream at a time until it’s drizzle-able. Chocolate that’s too thick will form clumps instead of elegant drizzles.
Conclusion: A Dessert That’s Pure Fun
These Oreo Sweet Sushi Rolls represent everything I love about creative cooking—they’re simple, fun, unexpected, and absolutely delicious. The first time you serve these at a gathering and watch people’s faces light up with surprise and delight, you’ll understand why this recipe has become one of my most-requested desserts.
What makes this no-bake Oreo dessert so special isn’t just the taste (though they’re undeniably delicious)—it’s the experience. From the fun of making them to the joy of presenting something so unexpected, these sweet treats bring happiness at every step. Kids love making them, adults love the creativity, and everyone loves eating them.
I’ve made these for countless occasions, from sophisticated dinner parties to casual kids’ gatherings, and they’re always a hit. The beauty is that you can adjust the presentation to suit any event. Serve them simply for a casual get-together, or go all out with elaborate drizzles and garnishes for special occasions.
My personal tip? Make extra. These Oreo sushi rolls disappear faster than you’d expect, and you’ll definitely want to save some for yourself. I learned this lesson the hard way at my first party—by the time I got to try one, they were gone! Now I always make a secret stash that I hide in the back of the fridge for later.
So grab those Oreos, get creative, and prepare to amaze your family and friends with these adorable sweet sushi rolls. They’re proof that some of the best desserts come from thinking outside the box—or in this case, outside the cookie package. Happy rolling!
Print
Oreo Sweet Sushi Rolls – A Fun No-Bake Dessert Everyone Will Love
Description
What Makes Oreo Sweet Sushi Rolls So Special?
Looking at the image, you can see why these sweet sushi rolls are so captivating. Three perfectly formed chocolate-coated spheres sit on a white plate, each generously drizzled with glossy chocolate and caramel sauce. The exterior has that characteristic Oreo cookie crumb texture, while a light dusting of powdered sugar adds elegance. The cross-section reveals a creamy white filling wrapped in the dark chocolate cookie coating—just like looking at the inside of a sushi roll!
This creative Oreo dessert is perfect for themed parties, kids’ gatherings, or any occasion where you want to serve something unexpected and delightful. Unlike traditional sushi, these require no cooking, no special equipment, and come together in less than 30 minutes.
Ingredients
Gathering Your Oreo Sushi Ingredients
The beauty of this easy Oreo recipe is its minimal ingredient list. You’ll need:
Main Ingredients:
- Oreo cream from cookies (scrape out the filling from about 20-24 Oreos)
- 2 tablespoons milk
- 1/4 cup milk (for rolling consistency)
For Coating and Decoration:
- Crushed Oreo cookies (the cookies you scraped the cream from)
- Chocolate sauce or melted chocolate for drizzling
- Caramel sauce for drizzling
- Powdered sugar for dusting
The ingredient list might seem unusual, but trust me—this combination creates the perfect texture and flavor for these Oreo sweet sushi treats. The cream filling provides the base, while the milk helps create a moldable consistency that holds its shape.
Instructions
Step-by-Step Instructions for Oreo Sweet Sushi
Step 1: Prepare Your Oreo Cream Filling
Carefully twist apart your Oreo cookies, scraping all the cream filling into a medium bowl. You can save the cookie wafers for the coating, so don’t toss them! This is the most time-consuming part of making these no-bake Oreo treats, but put on some music and make it fun. I like to involve kids in this step—they love it!
Step 2: Create the Sushi “Rice”
Add 2 tablespoons of milk to your Oreo cream and mix until smooth and slightly softened. If the mixture seems too stiff to roll, add a bit more milk, one tablespoon at a time, until you reach a playdough-like consistency. This is your “sushi rice” base!
Step 3: Crush Your Cookies
Place your scraped Oreo cookies in a food processor or sealed plastic bag. Pulse or crush them until you have fine crumbs. These will serve as the outer coating for your Oreo sushi rolls, giving them that authentic dark appearance and adding a delightful crunch.
Step 4: Form Your Sushi Rolls
Scoop about 2 tablespoons of the Oreo cream mixture and roll it into a ball or oblong shape between your palms. The shape is up to you—traditional sushi shapes are slightly oval, but balls work beautifully too. Work quickly, as the mixture can soften from the warmth of your hands.
Step 5: Coat in Cookie Crumbs
Roll each formed piece in the crushed Oreo crumbs, pressing gently to ensure the crumbs adhere well. This creates that gorgeous dark exterior that makes these sweet sushi rolls so visually striking. Place your finished rolls on a parchment-lined plate or tray.
Step 6: Chill and Set
Refrigerate your Oreo sweet sushi for at least 30 minutes to firm up. This chilling time is important—it helps the rolls hold their shape and makes them easier to cut if you want to show off that beautiful cream center.
Step 7: Add Artistic Drizzles
Once chilled, transfer your rolls to a serving plate. Drizzle with chocolate sauce and caramel sauce in artistic patterns. Finish with a light dusting of powdered sugar through a fine-mesh sieve for that professional bakery look.
Nutritional Information
Per serving (1 sushi roll):
- Calories: 145
- Total Fat: 6g
- Saturated Fat: 2g
- Cholesterol: 5mg
- Sodium: 95mg
- Total Carbohydrates: 22g
- Dietary Fiber: 1g
- Sugars: 16g
- Protein: 1g