Orange Creamsicle Cake Recipe
Orange Creamsicle Cake: A Nostalgic Dessert That Tastes Like Summer
The first time I tasted an orange creamsicle as a child, I was absolutely enchanted. That perfect combination of tangy orange and sweet cream became one of my most treasured summer memories. Fast forward to a few years ago when I was planning my daughter’s birthday party, and she requested “something orange and creamy, like those popsicles we get from the ice cream truck.” That’s when inspiration struck—what if I could capture that beloved flavor in cake form?
After several experiments in my kitchen, I perfected this orange creamsicle cake recipe, and let me tell you, it exceeded all expectations. The bright orange flavor reminds you of those sunny summer days, while the creamy vanilla frosting provides that smooth, dreamy contrast that makes creamsicles so irresistible. The best part? This cake tastes exactly like your favorite childhood frozen treat, but in a sophisticated, bakery-worthy presentation.
Whether you’re planning a birthday celebration, summer gathering, or simply craving something refreshing and nostalgic, this orange creamsicle cake delivers pure joy. The vibrant color, incredible flavor, and creamy texture make it a showstopper that both kids and adults absolutely love.
What Makes Orange Creamsicle Cake So Special
Orange creamsicle cake stands out from ordinary cakes for so many reasons. First, the flavor profile is absolutely unique and utterly nostalgic. While most cakes stick to chocolate or vanilla, this orange creamsicle version offers something completely different—bright citrus notes balanced with sweet cream.
Second, the texture is phenomenal. The addition of orange gelatin mix creates an incredibly moist crumb that stays soft for days. The orange juice adds natural citrus flavor and extra moisture, while the creamy frosting provides a luxurious mouthfeel that melts on your tongue.
Third, this orange creamsicle cake is visually stunning. The bright orange color is naturally cheerful and eye-catching, making it perfect for celebrations. When you slice into it, revealing those gorgeous orange layers against white frosting, it’s absolutely Instagram-worthy.
Finally, despite its impressive appearance and gourmet flavor, this orange creamsicle cake is surprisingly easy to make. Using a boxed cake mix as the base (with special enhancements) means you get professional results without professional skills.
Complete Ingredients for Orange Creamsicle Cake
Prep Time: 20 minutes
Cook Time: 30 minutes
Cooling Time: 2 hours
Frosting Time: 30 minutes
Total Time: 3 hours 20 minutes
Servings: 12-16 slices
For the Orange Cake Layers:
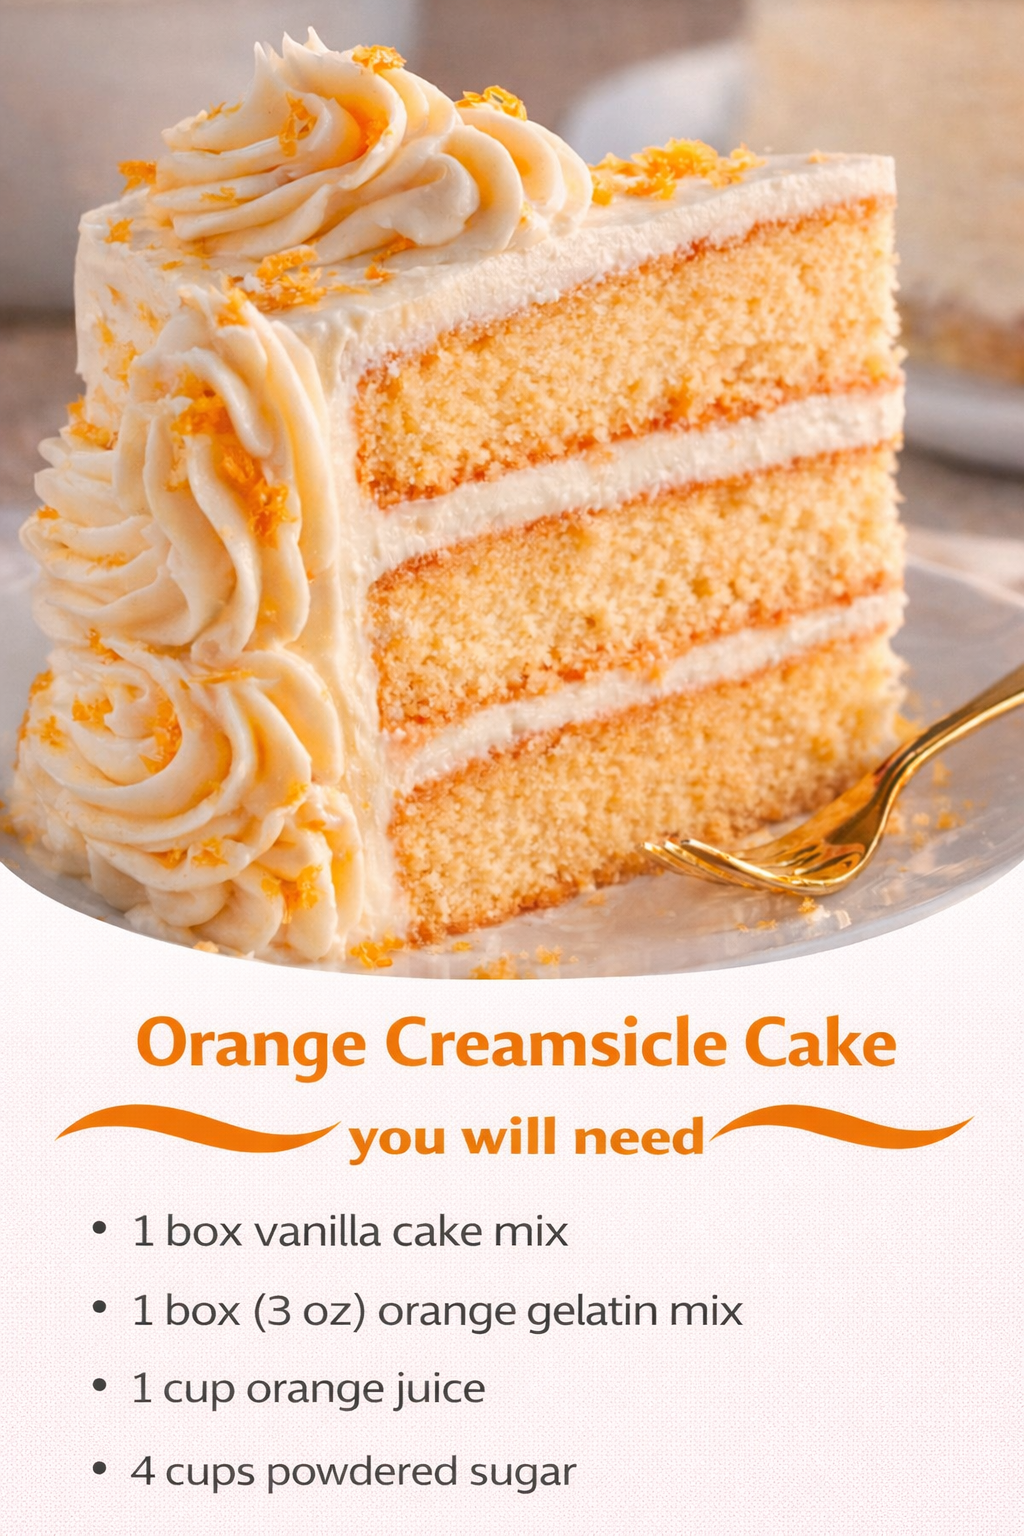
- 1 box (15.25 oz) vanilla cake mix (or white cake mix)
- 1 box (3 oz) orange gelatin mix (like Jell-O brand)
- 1 cup orange juice (fresh-squeezed is best, but store-bought works)
- ½ cup vegetable oil
- 4 large eggs (room temperature)
- 1 tablespoon orange zest (from about 1 large orange)
- ½ teaspoon vanilla extract
- Orange food coloring (optional, for more vibrant color – start with 3-4 drops)
For the Creamsicle Frosting:
- 1½ cups (3 sticks) unsalted butter, softened
- 6 cups powdered sugar
- ⅓ cup heavy cream
- 2 teaspoons vanilla extract
- 1 teaspoon orange extract (or additional orange zest)
- Pinch of salt
For Assembly and Decoration:
- Orange zest (for garnish)
- Fresh orange slices (optional, for decoration)
- White chocolate shavings (optional)
Equipment Needed:
- Two 9-inch round cake pans
- Parchment paper
- Mixing bowls
- Electric mixer (stand or hand mixer)
- Rubber spatula
- Cooling racks
- Offset spatula for frosting
- Cake turntable (optional but helpful)
Step-by-Step Instructions for Perfect Orange Creamsicle Cake
Let me guide you through creating this stunning orange creamsicle cake from start to finish.
Step 1: Prepare Your Cake Pans
Preheat your oven to 350°F (175°C). This is the standard temperature for most cakes and ensures even baking.
Prepare two 9-inch round cake pans by generously greasing them with butter or non-stick spray. Line the bottoms with parchment paper circles, then grease the parchment too. This double insurance ensures your orange creamsicle cake layers release perfectly every time.
For extra insurance against sticking, you can also dust the greased pans lightly with flour, tapping out any excess. This creates a barrier between the pan and batter.
Step 2: Mix the Dry Ingredients
In a large mixing bowl, combine:
- 1 box vanilla cake mix
- 1 box (3 oz) orange gelatin mix
Whisk these together until thoroughly combined. The orange gelatin is the secret ingredient that gives this orange creamsicle cake its incredible moisture and intensifies the orange flavor. Don’t skip it!
Step 3: Combine the Wet Ingredients
In a separate medium bowl, whisk together:
- 1 cup orange juice (preferably fresh-squeezed)
- ½ cup vegetable oil
- 4 large eggs (room temperature)
- 1 tablespoon orange zest
- ½ teaspoon vanilla extract
Whisk vigorously until the mixture is well combined and slightly foamy. The eggs should be completely incorporated with no streaks visible.
Step 4: Create the Cake Batter
Pour the wet ingredients into the bowl with the dry ingredients. Using an electric mixer on medium speed, beat for 2-3 minutes. The batter should be smooth, thick, and glossy.
Stop occasionally to scrape down the sides and bottom of the bowl with a rubber spatula, ensuring no dry pockets of cake mix remain.
At this point, assess the color. If you want a more vibrant orange hue for your orange creamsicle cake, add 3-4 drops of orange food coloring and mix until the color is uniform. Remember, the color will lighten slightly during baking.
Step 5: Bake the Cake Layers
Divide the batter evenly between your two prepared pans. A kitchen scale helps ensure equal layers, but you can eyeball it—each pan should be about half to two-thirds full.
Gently tap each pan on the counter 2-3 times to release any air bubbles trapped in the batter.
Bake for 28-32 minutes, or until a toothpick inserted into the center comes out clean or with just a few moist crumbs. The cake should spring back when gently pressed, and the edges should just start pulling away from the pan sides.
Important: Don’t overbake! The orange juice and gelatin make this a very moist cake, so it may seem slightly underdone even when it’s perfect. As long as the toothpick comes out without wet batter, you’re good.
Step 6: Cool the Cake Layers
Remove the pans from the oven and let them cool in the pans on a wire rack for 15 minutes. This cooling period is crucial—if you try to remove the cakes too soon, they might break.
After 15 minutes, run a thin knife around the edges of each pan to loosen the cakes. Place a cooling rack on top of one pan, then carefully flip it over. The cake should release easily. Peel off the parchment paper. Repeat with the second layer.
Let the orange creamsicle cake layers cool completely—at least 1-2 hours—before frosting. Frosting warm cake will cause the frosting to melt and slide off.
For faster cooling, you can place the cooled layers in the refrigerator for 30 minutes once they’ve cooled to room temperature.
Step 7: Make the Creamsicle Frosting
While your cake layers cool, prepare the frosting. In a large bowl, beat 1½ cups (3 sticks) softened butter with an electric mixer on medium speed for 2-3 minutes until light and fluffy. The butter should be very soft but not melted.
Gradually add 6 cups of powdered sugar, about 1 cup at a time, beating on low speed after each addition. Once all the sugar is incorporated, increase speed to medium and beat for another 2 minutes.
Add:
- ⅓ cup heavy cream
- 2 teaspoons vanilla extract
- 1 teaspoon orange extract (or 1 tablespoon orange zest)
- Pinch of salt
Beat on high speed for 3-4 minutes until the frosting is light, fluffy, and spreadable. If it’s too thick, add more cream, 1 tablespoon at a time. If it’s too thin, add more powdered sugar, ¼ cup at a time.
The frosting should hold stiff peaks but still be creamy and spreadable—perfect for creating that signature creamsicle appearance on your orange creamsicle cake.
Step 8: Level the Cake Layers (Optional)
If your cake layers domed during baking, you can level them for a more professional look. Using a long serrated knife or a cake leveler, carefully slice off the domed tops to create flat surfaces.
Save the scraps! They’re perfect for snacking or making cake pops later.
Step 9: Assemble the Orange Creamsicle Cake
Place your first cake layer on a cake board or serving plate. If using a regular plate, slide strips of parchment paper under the edges to keep the plate clean while frosting.
Spread about 1 to 1½ cups of frosting evenly over the top of the first layer, going all the way to the edges. An offset spatula makes this much easier.
Carefully place the second cake layer on top, pressing down gently to adhere it to the frosting.
Step 10: Frost the Orange Creamsicle Cake
Apply a thin “crumb coat” of frosting all over the entire cake—top and sides. This seals in crumbs and creates a smooth base. Don’t worry about making it perfect; you’ll barely see it.
Refrigerate the crumb-coated cake for 20-30 minutes until the frosting is firm.
Once chilled, apply the final layer of frosting. Start with the top, spreading frosting evenly across the surface. Then frost the sides, using smooth strokes with your offset spatula.
For an extra-smooth finish, dip your spatula in hot water, wipe it dry, and run it over the frosting in long, smooth strokes.
Step 11: Decorate Your Orange Creamsicle Cake
For a simple but beautiful finish, create decorative swirls in the frosting using the back of a spoon or your offset spatula.
Sprinkle fresh orange zest over the top for a pop of color and extra orange aroma. The oils in the zest will make your entire orange creamsicle cake smell incredible.
For special occasions, garnish with thin orange slices, placing them decoratively on top or around the base. You can also add white chocolate shavings for an elegant touch.
If you want to get fancy, pipe rosettes or stars around the top edge using a piping bag fitted with a large star tip.
Step 12: Chill and Serve
Refrigerate your completed orange creamsicle cake for at least 1 hour before serving. This allows the frosting to set and makes slicing much cleaner.
When ready to serve, let the cake sit at room temperature for 15-20 minutes. This brings out the flavors and makes the texture perfect—not too cold, not too soft.
Use a sharp knife dipped in hot water and wiped clean between slices for the cleanest cuts.
Serving Suggestions for Orange Creamsicle Cake
This orange creamsicle cake is stunning on its own, but these serving suggestions make it even more special.
Serve each slice with a dollop of freshly whipped cream on the side. The extra creaminess enhances the “creamsicle” experience and adds a touch of elegance.
For a fun summer presentation, serve your orange creamsicle cake alongside actual orange creamsicle popsicles. Kids especially love this playful combination, and it really drives home the flavor inspiration.
Create a beautiful dessert plate by adding a drizzle of orange coulis or white chocolate sauce around each slice. Garnish with fresh berries—the tartness of raspberries or blueberries provides a nice contrast to the sweet cake.
For an adult twist, serve the orange creamsicle cake with a glass of champagne or prosecco. The bubbles and slight dryness of the wine balance the sweetness perfectly, creating a sophisticated dessert experience.
Turn it into a trifle by cutting leftover cake into cubes and layering it in glasses with whipped cream, orange curd, and fresh berries. It’s a completely different presentation that stretches your leftovers and looks impressive.
Nutritional Information for Orange Creamsicle Cake
Here’s the approximate nutritional breakdown per slice (assuming 12 slices):
- Calories: 580
- Total Fat: 28g
- Saturated Fat: 15g
- Cholesterol: 115mg
- Sodium: 340mg
- Total Carbohydrates: 78g
- Dietary Fiber: 0g
- Sugars: 62g
- Protein: 4g
These values are estimates based on standard ingredients. Using reduced-fat ingredients or smaller slices can lower the calorie count. Remember, this orange creamsicle cake is a special treat meant for celebrations!
Recipe Variations for Orange Creamsicle Cake
This orange creamsicle cake recipe is wonderfully adaptable. Here are some variations I’ve tried and loved.
Lemon Creamsicle Cake: Substitute lemon juice for orange juice, lemon zest for orange zest, and lemon gelatin for orange gelatin. The result is a tangy, refreshing lemon creamsicle cake that’s perfect for spring.
Raspberry Orange Creamsicle Cake: Add ½ cup of fresh or frozen raspberries (tossed in flour) to the batter. The raspberry-orange combination is sophisticated and delicious.
Tropical Creamsicle Cake: Replace half the orange juice with pineapple juice and add ½ cup of crushed pineapple (well-drained) to the batter. Use pineapple gelatin instead of orange.
Chocolate Orange Creamsicle Cake: Add ¼ cup of cocoa powder to the cake mix and use chocolate cake mix instead of vanilla. The chocolate-orange combination is incredibly sophisticated.
Coconut Orange Creamsicle Cake: Add ½ cup of sweetened shredded coconut to the batter and sprinkle toasted coconut over the frosted cake. The coconut enhances the tropical, creamy vibe.
Cupcake Version: Pour the batter into lined cupcake tins, filling each about two-thirds full. Bake at 350°F for 18-22 minutes. This recipe makes approximately 24 cupcakes—perfect for parties and easy portion control.
Perfect Beverage Pairings
The right drink enhances your orange creamsicle cake experience significantly.
Iced Tea: Particularly sweet tea or peach tea, which complements the orange flavor without competing. The coolness of iced tea is perfect with the creamy frosting.
Vanilla Coffee: A vanilla latte or vanilla iced coffee echoes the creamy vanilla notes in the frosting while providing a gentle contrast to the bright orange cake.
Milk: Sometimes simple is best. A cold glass of whole milk is classic and perfect with orange creamsicle cake, especially for kids.
Champagne or Prosecco: For celebrations, these sparkling wines provide elegant bubbles and a dry counterpoint to the cake’s sweetness. The effervescence cleanses your palate between bites.
Orange Cream Soda: For a fun, themed beverage that doubles down on the creamsicle flavor, serve orange cream soda in fancy glasses with orange slice garnishes.
Storage and Make-Ahead Tips
This orange creamsicle cake stores beautifully and can be made in stages for convenience.
Room Temperature Storage: Unfrosted cake layers can be wrapped tightly in plastic wrap and stored at room temperature for up to 2 days. This is perfect if you want to bake ahead.
Refrigerator Storage: Once frosted, store the orange creamsicle cake covered in the refrigerator for up to 5 days. The frosting protects the cake from drying out. Always bring it to room temperature before serving for the best flavor and texture.
Freezing Cake Layers: Wrap unfrosted, cooled cake layers tightly in plastic wrap, then aluminum foil. Freeze for up to 3 months. Thaw overnight in the refrigerator before frosting.
Freezing Whole Cake: You can freeze the entire frosted orange creamsicle cake. Place it in the freezer unwrapped for 1 hour until the frosting is firm, then wrap carefully in plastic wrap and foil. Freeze for up to 2 months. Thaw overnight in the refrigerator.
Make-Ahead Frosting: The frosting can be made up to 1 week in advance and stored in an airtight container in the refrigerator. Bring to room temperature and re-whip with an electric mixer before using to restore its fluffy texture.
Timeline for Party Planning: Bake the cake layers 1-2 days ahead and store wrapped at room temperature. Make the frosting 1 day ahead and refrigerate. On party day, bring frosting to room temperature, whip it, frost the cake, and refrigerate until 1 hour before serving.
Troubleshooting Common Orange Creamsicle Cake Issues
Even experienced bakers encounter problems occasionally. Here’s how to fix them.
Cake Layers Are Dense: This usually indicates overmixing the batter. Mix only until ingredients are just combined—about 2-3 minutes total. Overmixing develops gluten, creating a tough texture.
Cake Sticks to Pan: Always grease and line your pans with parchment paper. Let cakes cool for the full 15 minutes before attempting to remove them. If a layer still sticks, try placing the pan in a 300°F oven for 2-3 minutes to warm it slightly, which helps release it.
Orange Flavor Too Subtle: Use fresh-squeezed orange juice and add the full tablespoon of zest. You can also increase the orange extract in the frosting to 2 teaspoons. Don’t skip the orange gelatin—it’s crucial for intense flavor.
Frosting Too Soft: Your butter may have been too warm, or your kitchen might be very hot. Refrigerate the frosting for 20-30 minutes, then re-whip it. For future batches, ensure butter is softened but still holds its shape.
Frosting Too Stiff: Add more heavy cream, 1 tablespoon at a time, beating well after each addition until you reach the desired consistency.
Cake Layers Dome Significantly: This is normal, but you can minimize it by using cake strips (wet fabric strips wrapped around pans during baking) or lowering your oven temperature by 25°F and baking slightly longer.
Dry Cake: The orange juice and gelatin should keep this cake very moist, so dryness usually means overbaking. Check your oven temperature with an oven thermometer—many ovens run hot. Also, test for doneness at 28 minutes rather than waiting the full 32.
The Science Behind Orange Creamsicle Cake
Understanding why this recipe works helps you make it even better.
The orange gelatin mix is the secret weapon. It serves multiple purposes: it intensifies the orange flavor, adds extra moisture that keeps the cake tender for days, and contributes to the cake’s vibrant color. The gelatin also helps the cake hold moisture, preventing it from drying out.
Using orange juice instead of water or milk provides natural citrus flavor and acidity. The acid reacts with the baking soda/powder in the cake mix, creating a lighter, fluffier texture. Fresh-squeezed juice contains more essential oils than store-bought, which is why it provides superior flavor.
The orange zest is where the true orange essence lives. The zest contains essential oils that provide intense, aromatic orange flavor without adding extra liquid to the batter.
The creamy frosting mimics the vanilla ice cream coating on a creamsicle. The high ratio of butter to sugar creates a silky, smooth texture that melts on your tongue just like ice cream would.
Frequently Asked Questions About Orange Creamsicle Cake
Can I use a different cake mix flavor?
While vanilla or white cake mix works best to showcase the orange flavor, you could use lemon or orange cake mix. Just omit the orange gelatin if using orange cake mix to avoid overwhelming orange flavor.
Is the orange gelatin really necessary?
Yes! It’s crucial for the moisture, intense orange flavor, and vibrant color. Without it, you’ll have a decent orange cake, but it won’t taste like a true orange creamsicle cake.
Can I make this as a sheet cake instead?
Absolutely! Pour all the batter into a greased 9×13-inch pan and bake for 35-40 minutes. Frost the top only for a simpler presentation. This serves more people and is easier for potlucks.
What if I can’t find orange extract?
Use an additional tablespoon of orange zest in the frosting instead. The flavor will be slightly different but still delicious. You can also use ½ teaspoon of pure orange oil if you can find it.
Can I make this dairy-free?
Yes! Use dairy-free butter alternatives in the frosting and replace the heavy cream with full-fat coconut cream. The texture will be slightly different but still delicious.
How do I get perfectly flat cake layers?
Use cake strips (wet fabric strips wrapped around pans), bake at a slightly lower temperature (325°F for 35-37 minutes), or simply level the layers with a serrated knife after they cool.
Conclusion: A Cake That Captures Summer Joy
Making orange creamsicle cake from scratch is like capturing sunshine and childhood memories in dessert form. The bright citrus flavor combined with creamy, dreamy frosting creates something truly special—a cake that makes people smile before they even taste it.
Since perfecting this recipe, it’s become my go-to for summer birthdays, graduations, and any celebration that needs a cheerful, show-stopping centerpiece. The reactions are always the same: eyes light up at the vibrant color, and after the first bite, everyone exclaims, “It tastes exactly like an orange creamsicle!”
What I love most about this orange creamsicle cake is how it brings people together through nostalgia. It doesn’t matter if you’re 8 or 80—almost everyone has fond memories of orange creamsicles, and this cake taps into that universal joy. Suddenly, everyone’s sharing stories about ice cream trucks, summer vacations, and childhood treats.
Whether you’re an experienced baker or attempting a layer cake for the first time, this recipe is absolutely achievable. The combination of using a cake mix base with flavor-enhancing additions means you get professional results without professional skills.
My Personal Cooking Tip
Here’s my secret for the absolute best orange creamsicle cake: use fresh-squeezed orange juice and don’t skip the zest! I know it’s tempting to grab store-bought juice from the fridge, but fresh-squeezed makes an incredible difference. The natural oils and bright flavor of fresh oranges simply can’t be replicated. I usually buy 3-4 large oranges, zest them first (you need zest for both the cake and frosting), then juice them. You’ll get your cup of juice plus extra for sipping while you bake! Also, add the orange gelatin to the frosting too—just 1 tablespoon mixed in creates an extra pop of flavor that really drives home that creamsicle taste. Finally, don’t skip the chilling time before serving. A properly chilled orange creamsicle cake cuts beautifully and tastes absolutely perfect—just like biting into a frozen treat on a hot summer day!
Print
Orange Creamsicle Cake Recipe | Easy Nostalgic Layer Cake
Description
Orange creamsicle cake stands out from ordinary cakes for so many reasons. First, the flavor profile is absolutely unique and utterly nostalgic. While most cakes stick to chocolate or vanilla, this orange creamsicle version offers something completely different—bright citrus notes balanced with sweet cream.
Second, the texture is phenomenal. The addition of orange gelatin mix creates an incredibly moist crumb that stays soft for days. The orange juice adds natural citrus flavor and extra moisture, while the creamy frosting provides a luxurious mouthfeel that melts on your tongue.
Third, this orange creamsicle cake is visually stunning. The bright orange color is naturally cheerful and eye-catching, making it perfect for celebrations. When you slice into it, revealing those gorgeous orange layers against white frosting, it’s absolutely Instagram-worthy.
Finally, despite its impressive appearance and gourmet flavor, this orange creamsicle cake is surprisingly easy to make. Using a boxed cake mix as the base (with special enhancements) means you get professional results without professional skills.
Ingredients
Complete Ingredients for Orange Creamsicle Cake
Prep Time: 20 minutes
Cook Time: 30 minutes
Cooling Time: 2 hours
Frosting Time: 30 minutes
Total Time: 3 hours 20 minutes
Servings: 12-16 slices
For the Orange Cake Layers:
- 1 box (15.25 oz) vanilla cake mix (or white cake mix)
- 1 box (3 oz) orange gelatin mix (like Jell-O brand)
- 1 cup orange juice (fresh-squeezed is best, but store-bought works)
- ½ cup vegetable oil
- 4 large eggs (room temperature)
- 1 tablespoon orange zest (from about 1 large orange)
- ½ teaspoon vanilla extract
- Orange food coloring (optional, for more vibrant color – start with 3-4 drops)
For the Creamsicle Frosting:
- 1½ cups (3 sticks) unsalted butter, softened
- 6 cups powdered sugar
- ⅓ cup heavy cream
- 2 teaspoons vanilla extract
- 1 teaspoon orange extract (or additional orange zest)
- Pinch of salt
For Assembly and Decoration:
- Orange zest (for garnish)
- Fresh orange slices (optional, for decoration)
- White chocolate shavings (optional)
Equipment Needed:
- Two 9-inch round cake pans
- Parchment paper
- Mixing bowls
- Electric mixer (stand or hand mixer)
- Rubber spatula
- Cooling racks
- Offset spatula for frosting
- Cake turntable (optional but helpful)
Instructions
Step-by-Step Instructions for Perfect Orange Creamsicle Cake
Let me guide you through creating this stunning orange creamsicle cake from start to finish.
Step 1: Prepare Your Cake Pans
Preheat your oven to 350°F (175°C). This is the standard temperature for most cakes and ensures even baking.
Prepare two 9-inch round cake pans by generously greasing them with butter or non-stick spray. Line the bottoms with parchment paper circles, then grease the parchment too. This double insurance ensures your orange creamsicle cake layers release perfectly every time.
For extra insurance against sticking, you can also dust the greased pans lightly with flour, tapping out any excess. This creates a barrier between the pan and batter.
Step 2: Mix the Dry Ingredients
In a large mixing bowl, combine:
- 1 box vanilla cake mix
- 1 box (3 oz) orange gelatin mix
Whisk these together until thoroughly combined. The orange gelatin is the secret ingredient that gives this orange creamsicle cake its incredible moisture and intensifies the orange flavor. Don’t skip it!
Step 3: Combine the Wet Ingredients
In a separate medium bowl, whisk together:
- 1 cup orange juice (preferably fresh-squeezed)
- ½ cup vegetable oil
- 4 large eggs (room temperature)
- 1 tablespoon orange zest
- ½ teaspoon vanilla extract
Whisk vigorously until the mixture is well combined and slightly foamy. The eggs should be completely incorporated with no streaks visible.
Step 4: Create the Cake Batter
Pour the wet ingredients into the bowl with the dry ingredients. Using an electric mixer on medium speed, beat for 2-3 minutes. The batter should be smooth, thick, and glossy.
Stop occasionally to scrape down the sides and bottom of the bowl with a rubber spatula, ensuring no dry pockets of cake mix remain.
At this point, assess the color. If you want a more vibrant orange hue for your orange creamsicle cake, add 3-4 drops of orange food coloring and mix until the color is uniform. Remember, the color will lighten slightly during baking.
Step 5: Bake the Cake Layers
Divide the batter evenly between your two prepared pans. A kitchen scale helps ensure equal layers, but you can eyeball it—each pan should be about half to two-thirds full.
Gently tap each pan on the counter 2-3 times to release any air bubbles trapped in the batter.
Bake for 28-32 minutes, or until a toothpick inserted into the center comes out clean or with just a few moist crumbs. The cake should spring back when gently pressed, and the edges should just start pulling away from the pan sides.
Important: Don’t overbake! The orange juice and gelatin make this a very moist cake, so it may seem slightly underdone even when it’s perfect. As long as the toothpick comes out without wet batter, you’re good.
Step 6: Cool the Cake Layers
Remove the pans from the oven and let them cool in the pans on a wire rack for 15 minutes. This cooling period is crucial—if you try to remove the cakes too soon, they might break.
After 15 minutes, run a thin knife around the edges of each pan to loosen the cakes. Place a cooling rack on top of one pan, then carefully flip it over. The cake should release easily. Peel off the parchment paper. Repeat with the second layer.
Let the orange creamsicle cake layers cool completely—at least 1-2 hours—before frosting. Frosting warm cake will cause the frosting to melt and slide off.
For faster cooling, you can place the cooled layers in the refrigerator for 30 minutes once they’ve cooled to room temperature.
Step 7: Make the Creamsicle Frosting
While your cake layers cool, prepare the frosting. In a large bowl, beat 1½ cups (3 sticks) softened butter with an electric mixer on medium speed for 2-3 minutes until light and fluffy. The butter should be very soft but not melted.
Gradually add 6 cups of powdered sugar, about 1 cup at a time, beating on low speed after each addition. Once all the sugar is incorporated, increase speed to medium and beat for another 2 minutes.
Add:
- ⅓ cup heavy cream
- 2 teaspoons vanilla extract
- 1 teaspoon orange extract (or 1 tablespoon orange zest)
- Pinch of salt
Beat on high speed for 3-4 minutes until the frosting is light, fluffy, and spreadable. If it’s too thick, add more cream, 1 tablespoon at a time. If it’s too thin, add more powdered sugar, ¼ cup at a time.
The frosting should hold stiff peaks but still be creamy and spreadable—perfect for creating that signature creamsicle appearance on your orange creamsicle cake.