Two years ago, I was desperately searching for a Halloween dinner idea that would actually get my picky eaters excited. Store-bought pizza felt boring, and elaborate themed meals seemed too complicated for a school night. Then inspiration struck while looking at my Halloween cookie cutters – why not make personal-sized pizzas decorated with spooky faces? What started as a practical solution became an annual tradition that my kids now look forward to even more than trick-or-treating itself.
These mini Halloween pizzas are the perfect combination of fun, delicious, and surprisingly easy to make. Imagine individual-sized pizza rounds topped with melted mozzarella, tomato sauce, and creative toppings arranged to create jack-o’-lantern faces, spooky skulls, friendly ghosts, and silly monsters. They’re interactive, customizable, and turn dinner into an event that kids and adults genuinely enjoy making together.
Why These Mini Halloween Pizzas Are Pure Genius
What makes these mini Halloween pizzas absolutely brilliant is their versatility and kid-friendly appeal. Unlike elaborate decorated cakes or complicated recipes, these pizzas are genuinely accessible for cooks of all skill levels. If you can stretch dough and arrange toppings, you can create these spooky masterpieces.
The individual serving size is another stroke of genius. Everyone gets their own pizza to decorate however they want, which eliminates the typical mealtime negotiations about toppings. Kids feel empowered and creative, while adults can relax knowing everyone will actually eat what they’ve made. Plus, personal pizzas cook faster and more evenly than large ones, making this a practical weeknight dinner option.
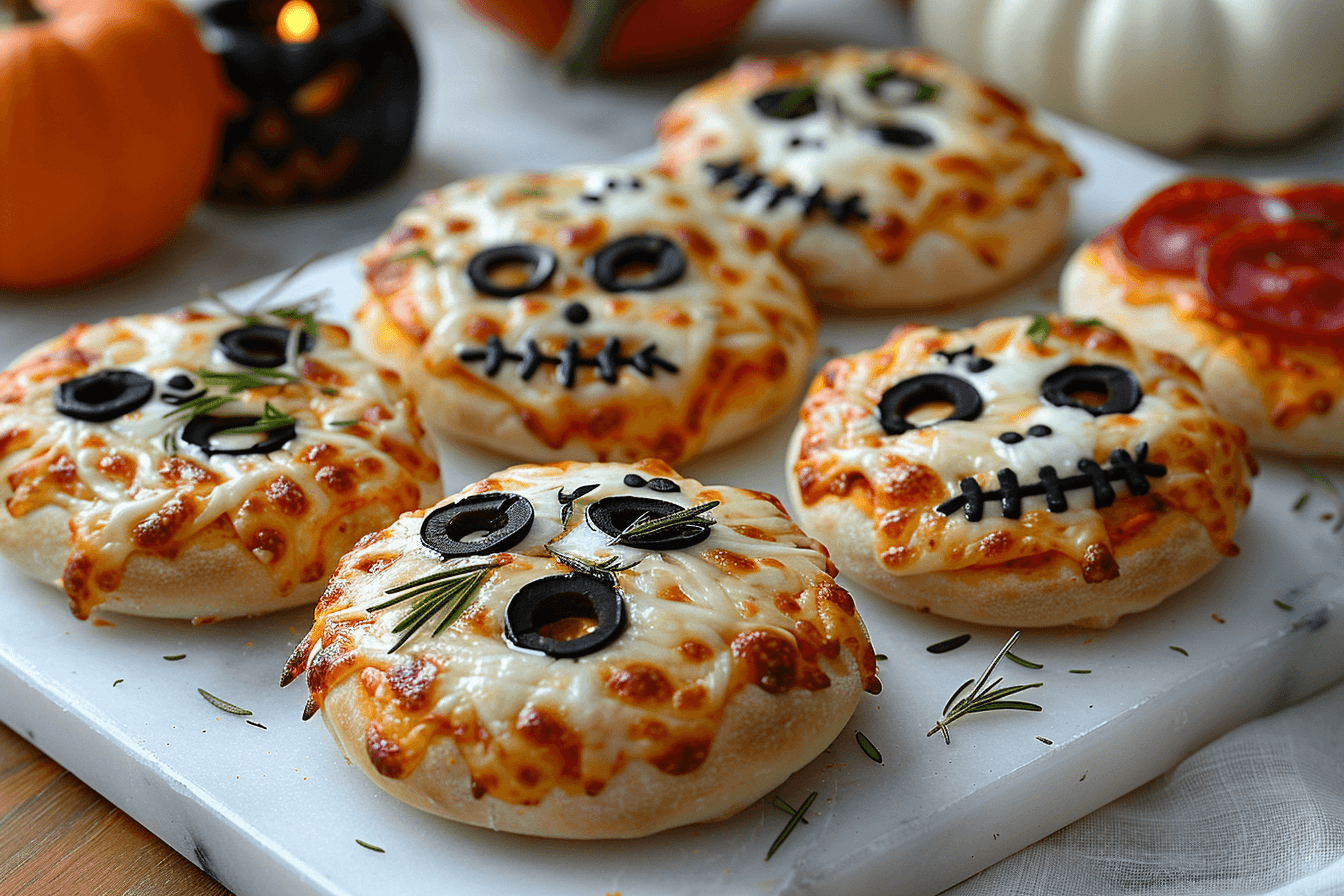
The creative decorating possibilities are endless. The photograph shows a variety of designs: classic jack-o’-lantern faces made with pepperoni and cheese, spooky skull pizzas using mozzarella shaped into skulls with olive eyes and teeth, and friendly ghost pizzas with simple mozzarella circles and black olive features. Each one has personality and charm, proving that you don’t need artistic skills to create impressive results.
Essential Ingredients for Mini Halloween Pizzas
Creating these spooky personal pizzas requires simple, readily available ingredients. Here’s what you’ll need for 6-8 mini pizzas:
the Pizza Dough:
- 3 cups all-purpose flour or bread flour
- 1 packet (2¼ teaspoons) instant yeast
- 1 tablespoon granulated sugar
- 1½ teaspoons salt
- 1 cup warm water (110°F)
- 2 tablespoons olive oil
- Alternative: Use store-bought pizza dough or naan bread for shortcuts
the Base:
- 1½ cups pizza sauce or marinara sauce
- 3 cups shredded mozzarella cheese
- Optional: Parmesan cheese for extra flavor
Halloween Decorations:
- Sliced black olives (for eyes, noses, mouths, and spooky details)
- Pepperoni slices (for jack-o’-lantern faces and monster features)
- Fresh mozzarella (for skull shapes and ghost pizzas)
- Bell peppers in various colors (for jack-o’-lantern stems and details)
- Cherry tomatoes (for additional color)
- Fresh basil (for garnish)
- String cheese (can be pulled into strips for mummy wrapping effects)
Optional Additional Toppings:
- Cooked sausage crumbles
- Mushroom slices
- Jalapeño slices (for adult pizzas)
- Corn kernels (for textural variety)
- Red bell pepper strips (for extra color)
The beauty of these mini Halloween pizzas is that you can use whatever toppings your family enjoys. The key is having ingredients in black, orange, white, and red to create that classic Halloween color palette.
Step-by-Step Guide to Creating Mini Halloween Pizzas
Preparing Perfect Pizza Dough
While you can absolutely use store-bought dough to save time, homemade pizza dough is surprisingly easy and tastes infinitely better. In a large bowl, combine the flour, instant yeast, sugar, and salt. Make a well in the center and add the warm water and olive oil.
Using a wooden spoon or your hands, mix until a shaggy dough forms. Turn it out onto a lightly floured surface and knead for 8-10 minutes until the dough is smooth, elastic, and slightly tacky but not sticky. If you have a stand mixer with a dough hook, this process takes just 5-6 minutes.
Place the dough in a lightly oiled bowl, turning once to coat. Cover with a damp kitchen towel or plastic wrap and let it rise in a warm place for 1-1½ hours until doubled in size. This rising period is crucial for developing flavor and creating that perfect chewy-yet-crispy crust that makes these Halloween pizzas so delicious.
Once risen, punch down the dough to release air bubbles. Divide it into 6-8 equal portions, depending on how large you want your mini pizzas. Roll each portion into a ball and let them rest for 10 minutes. This rest period relaxes the gluten, making the dough easier to stretch without springing back.
Shaping and Pre-Baking Your Halloween Pizza Crusts
Preheat your oven to 475°F (245°C). If you have a pizza stone, place it in the oven to heat – this creates a crispier crust. Otherwise, use inverted baking sheets.
On a lightly floured surface, stretch or roll each dough ball into a 6-8 inch circle. Don’t worry about making them perfectly round – rustic, organic shapes add to the homemade charm of these mini Halloween pizzas. I actually like slightly irregular shapes because they look more playful and fun.
Transfer the dough rounds to parchment paper-lined baking sheets. If you’re decorating with kids, I recommend pre-baking the crusts for 5-6 minutes until they’re just set but not browned. This creates a sturdier base that’s easier for little hands to decorate without the dough tearing or becoming soggy.
If you’re working with older kids or adults who can work quickly, you can skip the pre-baking step and assemble directly on the raw dough. Just work efficiently so the dough doesn’t have time to become soggy from the sauce.
Creating Spooky Halloween Pizza Designs
This is where the magic happens and these mini Halloween pizzas transform from simple food into edible art. Set up a decorating station with all your toppings in separate bowls. Having everything prepped and organized makes the creative process smooth and fun.
For Jack-O’-Lantern Pizzas: Start by spreading a thin layer of pizza sauce on each crust, leaving a ½-inch border around the edges. Sprinkle generously with shredded mozzarella cheese. Using pepperoni slices, create triangular eyes and nose, and a jagged smile. You can cut the pepperoni with kitchen scissors to create perfect triangles. Add a small piece of green bell pepper at the top for a stem.
For Skull Pizzas: Spread the sauce and add a light layer of mozzarella. Cut fresh mozzarella into a skull shape (oval with slightly narrower bottom) and place it on top. Use black olive slices for the eye sockets (2-3 slices per eye for depth), a triangle of olive for the nose, and create teeth using small rectangular pieces of cheese or olive slices arranged in a grinning pattern. The image shows this design beautifully – the white mozzarella skull stands out dramatically against the red sauce.
For Monster Pizzas: These are perfect for younger kids because anything goes! Add sauce and cheese, then create wild, silly faces using any combination of toppings. Multiple olive eyes, pepperoni horns, bell pepper tongues – let creativity run wild. The “uglier” and sillier, the better!
For Ghost Pizzas: These are the simplest yet somehow the most charming. Spread sauce lightly (or skip it for white pizzas), then create ghost shapes using fresh mozzarella slices arranged in overlapping circles. Add two small olive pieces for eyes. Simple, adorable, and perfect for youngest decorators.
The photograph captures the variety perfectly – multiple mini Halloween pizzas arranged together, each with its own personality. Some have intricate details, others are simple, but all are undeniably festive and fun.
Baking Mini Halloween Pizzas to Perfection
Once decorated, bake the pizzas for 10-14 minutes (or 8-12 minutes if you pre-baked the crusts) until the cheese is melted, bubbling, and starting to brown in spots, and the crust edges are golden and crispy. Keep a close eye on them, as personal pizzas cook faster than full-sized ones.
If you’re baking multiple batches, keep the first batch warm in a 200°F oven while the others bake. The best part about these mini Halloween pizzas is that they’re small enough that everyone’s pizza finishes at roughly the same time, so you can all eat together.
Remove from the oven and let them cool for just 2-3 minutes before serving. The cheese will be molten hot immediately after baking, so this brief rest makes them safer for eager kids to eat.
Nutritional Information for Mini Halloween Pizzas
These personal pizzas are actually quite balanced nutritionally. Here’s the approximate breakdown per mini pizza (varies based on toppings):
- Calories: 320
- Total Fat: 12g
- Saturated Fat: 6g
- Cholesterol: 25mg
- Sodium: 680mg
- Total Carbohydrates: 38g
- Dietary Fiber: 2g
- Sugars: 3g
- Protein: 14g
These mini Halloween pizzas provide a good balance of carbohydrates, protein, and fats, making them a legitimate meal rather than just a fun activity. To make them even more nutritious, serve alongside a fresh salad or vegetable sticks.
Presentation Tips for Festive Halloween Pizzas
These already-adorable pizzas benefit from thoughtful presentation:
For Family Dinners: Serve each mini Halloween pizza on an individual black or orange plate. Add a small side of carrot sticks and ranch dip, transforming it into a complete meal. Use Halloween-themed napkins and let kids drink from festive cups.
For Halloween Parties: Create a pizza buffet where kids can make their own. Set up the decorating station with all toppings in bowls, and let each child create their masterpiece. Have an adult handle the baking while kids play games, then serve the finished pizzas together.
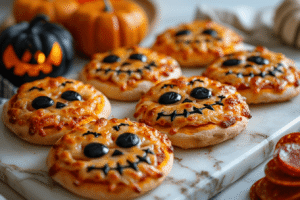
For Photos: The image shows these pizzas photographed from above on a light background, which really showcases the creative designs. Natural lighting highlights the colors – the red sauce, golden crust, white cheese, and black olives create that perfect Halloween palette.
For Outdoor Gatherings: These mini Halloween pizzas travel well if you’re heading to a party. Bake them, let them cool slightly, then transport in a foil-lined container. Reheat briefly before serving.
Perfect Pairings for Mini Halloween Pizzas
These fun pizzas pair well with various sides and beverages:
Side Dish Pairings:
- Caesar salad with homemade croutons
- Garlic breadsticks
- Roasted vegetables
- Fresh fruit platter
- Sweet potato fries
- Caprese salad skewers
Beverage Pairings:
- Orange soda (for festive color)
- Apple cider
- Sparkling water with orange slices
- Lemonade
- Hot chocolate (for after dinner)
- For adults: Red wine or craft beer
Creative Variations for Halloween Pizzas
The versatility of these mini Halloween pizzas means endless possibilities:
Dietary Variations:
- Use gluten-free pizza dough or cauliflower crust for gluten-free versions
- Make vegan pizzas with dairy-free cheese and vegetable toppings
- Create low-carb versions using portobello mushroom caps as the base
- Use whole wheat dough for added fiber and nutrition
Flavor Variations:
- White pizza bases with Alfredo sauce instead of tomato
- BBQ chicken pizzas with spooky decorations
- Breakfast pizzas with eggs, cheese, and bacon
- Dessert pizzas with Nutella, fruit, and marshmallows
Additional Spooky Designs:
- Spider pizzas using olive body and pretzel stick legs
- Witch hat pizzas using pepperoni cone shapes
- Mummy pizzas with string cheese strips and olive eyes
- Bat pizzas using pepperoni cut into bat shapes
- Frankenstein pizzas with green bell pepper “skin” base
International Twists:
- Mexican pizzas with refried beans, jalapeños, and cilantro decorations
- Mediterranean pizzas with feta, olives, and artichokes
- Hawaiian pizzas with pineapple jack-o’-lanterns
Storage and Make-Ahead Tips for Halloween Pizzas
These mini pizzas are best fresh but can be prepared ahead:
Dough Preparation: Make pizza dough up to 3 days ahead and refrigerate in an airtight container. Bring to room temperature before shaping. You can also freeze dough balls for up to 3 months.
Topping Prep: Cut all toppings the morning of and store in separate containers in the refrigerator. This makes decorating time faster and more organized.
Par-Baking: Pre-bake crusts up to 4 hours ahead. Let them cool completely, then cover with plastic wrap until decorating time.
Leftover Storage: Store cooled leftover pizzas in airtight containers in the refrigerator for up to 3 days. Reheat in a 400°F oven for 5-7 minutes to restore crispiness.
Freezing: Fully cooked mini Halloween pizzas can be frozen for up to 2 months. Wrap individually in plastic wrap, then foil. Reheat from frozen at 425°F for 12-15 minutes.
Troubleshooting Your Halloween Pizzas
Common challenges and solutions:
Soggy Crust: Use less sauce, pre-bake crusts, or increase oven temperature. Make sure not to overload with wet toppings.
Toppings Sliding Off: Press toppings gently into cheese layer. Don’t overload the pizza with too many heavy toppings.
Dough Shrinking Back: Let dough rest 10 minutes after dividing and before shaping. Don’t rush this step.
Cheese Not Browning: Increase oven temperature or move rack closer to top heating element for the last 2 minutes of baking.
Uneven Cooking: Rotate pans halfway through baking. Make sure all pizzas are similar thickness.
The Joy of Mini Halloween Pizzas
There’s something genuinely magical about these mini Halloween pizzas that goes beyond their delicious taste. They transform dinner into an event, create memories, and give kids (and adults!) a creative outlet. Every time I make these, I’m struck by how invested everyone becomes in their creations, carefully arranging toppings to achieve their vision.
What I love most is the lack of pressure. Unlike decorating elaborate cakes where mistakes feel catastrophic, these pizzas are forgiving and fun. If a pepperoni eye isn’t quite right, you just eat it and place a new one. If the design doesn’t turn out as planned, it’s still delicious pizza.
The photograph perfectly captures the spirit of these mini Halloween pizzas – the variety of designs, the playful creativity, the festive colors, and most importantly, the fact that they’re genuinely appetizing despite being decorated. They’re spooky enough for Halloween but still look like something you’d actually want to eat.
My Final Slice of Advice
After making these mini Halloween pizzas numerous times with various groups of kids and adults, here’s my ultimate wisdom: set up properly and embrace the chaos. Have all ingredients prepped, workspace covered with parchment paper, and everyone wearing aprons. Then let go and let creativity happen.
The “best” Halloween pizza isn’t the most perfect one – it’s the one made with enthusiasm and joy. Some of my favorite pizzas have been the messiest, silliest ones created by giggling kids who put eyes in weird places and created monsters that defy description.
Also, make extra! These disappear faster than you’d expect, and having a few spare crusts means latecomers or second-helpers are accommodated. Plus, adults often want to join the fun once they see kids decorating.
Finally, take photos before eating. These mini Halloween pizzas are so cute and everyone is so proud of their creations that you’ll want to document them. Create a collage each year and watch how designs evolve as kids grow.
These mini Halloween pizzas have become more than just a recipe in our house – they’re a tradition, a memory-maker, and honestly, the easiest way to get kids excited about dinner I’ve ever discovered. They prove that the best meals aren’t always the most sophisticated; sometimes they’re the ones that bring people together, spark creativity, and make everyone smile. Happy Halloween pizza making!