My Journey with Pineapple Cake
I’ve always had a soft spot for tropical flavors. Growing up in the Midwest, pineapple was that special treat that made an ordinary day feel like a mini vacation. But it wasn’t until I visited my cousin in Maui that I tasted a pineapple cake that truly deserved the name “Heaven.”
Back home, I spent weeks experimenting with recipes, trying to recreate that perfect balance of moisture, sweetness, and tropical tang. My kitchen looked like a pineapple bomb had exploded – there were failed cakes everywhere. But persistence paid off, and what emerged became my signature dessert.
What makes this cake different from other pineapple recipes I’ve tried? It’s all about how the fruit is incorporated. Rather than just dropping chunks into the batter, this recipe infuses pineapple flavor throughout every crumb while maintaining a light, almost cloud-like texture.
Why This Pineapple Cake Deserves the Name “Heaven”
The first time I served this cake at my daughter’s graduation party, her friend’s mother pulled me aside and whispered, “This isn’t just cake – it’s heaven on a plate.” The name stuck, and for good reason.
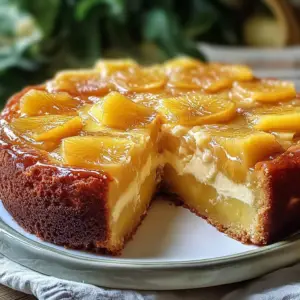
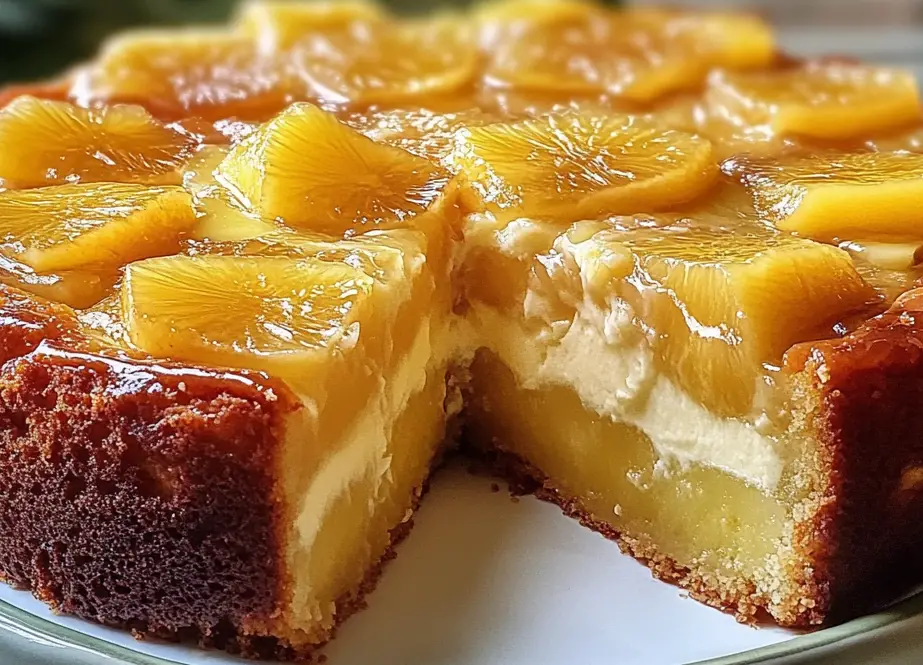
The magic happens when the sweet-tart pineapple meets the brown sugar topping. As the cake bakes, the sugars caramelize, creating this incredible golden crust that seeps slightly into the cake, creating these pockets of gooey, tropical goodness that make each bite slightly different from the last.
I’ve made this cake for birthdays, potlucks, and even as a welcome gift for new neighbors. The look on people’s faces when they take their first bite – that moment of surprise followed by pure delight – is why I keep baking it year after year.
Perfect for Any Occasion (But Especially These)
Over the years, I’ve discovered this cake shines brightest in certain settings:
Summer gatherings – Something about the tropical flavor just pairs perfectly with warm weather and outdoor dining. Last July, I brought it to our neighborhood block party, and it disappeared faster than the ice in our coolers.
Holiday alternatives – When everyone else is bringing pumpkin and apple desserts to Thanksgiving, this cake offers a refreshing change. My brother-in-law, who claims to hate “fruity desserts,” asks for it specifically.
Weeknight pick-me-ups – Sometimes, in the dead of winter, I’ll make this cake on a Tuesday night just to bring a little sunshine into our routine. My teenagers, normally too cool to get excited about mom’s baking, always find room for seconds.
The Recipe: Simpler Than You’d Think
What You’ll Need
For the caramelized topping:
- ½ cup brown sugar (dark gives more flavor, but light works too)
- ¼ cup butter, melted
- 1 tablespoon honey (my secret addition that makes all the difference)
For the cake:
- 2 cups all-purpose flour
- 1 ½ cups granulated sugar
- 1 cup crushed pineapple with juice (fresh or canned both work)
- ½ cup unsalted butter, softened to room temperature
- ½ cup milk (whole milk gives the best texture)
- 2 large eggs (room temperature)
- 1 teaspoon vanilla extract
- 1 teaspoon baking powder
- ½ teaspoon baking soda
- ¼ teaspoon salt
- Optional: 2 tablespoons rum (for adults-only version)

The Method Behind the Magic
- Start by preheating your oven to 350°F (175°C). I use a 9-inch round cake pan, but I’ve found a well-seasoned cast iron skillet creates an even better caramelized edge.
- Create the topping by mixing brown sugar, melted butter, and honey (my secret ingredient) until it resembles wet sand. Spread this mixture evenly across the bottom of your pan. The honey helps achieve that perfect sticky-but-not-too-sweet topping that makes this cake special.
- For the batter, I start by creaming the softened butter and sugar together for a full 3 minutes. Don’t rush this step! This is where the cake gets its light texture. The butter should turn almost white and increase noticeably in volume.
- Add eggs one at a time, beating well after each addition. Then add the vanilla (and rum if using). The mixture might look slightly curdled – that’s completely normal.
- Combine dry ingredients in a separate bowl – the flour, baking powder, baking soda, and salt. I like to whisk these together to ensure even distribution.
- Create the perfect texture by adding the dry ingredients to the butter mixture in three parts, alternating with the milk. Start and end with the dry ingredients (dry-milk-dry-milk-dry). Mix just until combined after each addition – overmixing is the enemy of tender cake!
- Now for the star: Fold in the crushed pineapple with its juice using a spatula, not a mixer. This gentle folding preserves the air bubbles we’ve worked to create. The batter will look slightly curdled – trust me, this is exactly what we want.
- Pour the batter carefully over the brown sugar mixture in your pan, spreading it gently to the edges.
- Bake for 35-40 minutes until golden and a toothpick inserted in the center comes out with a few moist crumbs (not wet batter). Every oven is different – in mine, 37 minutes is the magic number.
- The crucial flip: Let the cake cool for exactly 10 minutes before inverting onto a serving plate. Too soon, and it falls apart; too late, and the caramel hardens and sticks to the pan. I learned this the hard way!
Serving Suggestions From Years of Experience
After making this cake countless times, I’ve discovered some perfect pairings:
- A scoop of coconut ice cream takes the tropical theme to the next level.
- Lightly sweetened whipped cream with a tiny splash of rum creates an elegant dessert.
- For brunch, I’ve served thin slices alongside strong coffee with spectacular results.
My personal favorite way to enjoy it? Slightly warm with nothing else – just focusing on those perfect caramelized edges and moist, fruity center.
Tips I’ve Learned Over Many, Many Bakes
- Pineapple options matter: While fresh pineapple crushed at home gives the brightest flavor, don’t stress if you only have canned. Just make sure to buy pineapple in juice, not syrup – the latter makes the cake too sweet.
- The pan affects the outcome: A dark metal pan produces more caramelization (my preference), while light-colored pans yield a more golden result with less deep caramel notes.
- Make-ahead magic: This cake actually improves overnight as the flavors meld and the moisture from the pineapple fully distributes. I often bake it the evening before serving.
- Temperature matters: Room temperature ingredients incorporate better, creating a more even texture. I set out my butter, eggs, and milk at least an hour before baking.
Storage Secrets
This cake rarely lasts long enough to need storage advice, but here’s what works best:
- Room temperature: Covered with a cake dome, it stays perfectly moist for 2 days.
- Refrigeration: In an airtight container, it keeps for up to 5 days. Let it come to room temperature before serving, or warm individual slices for 15 seconds in the microwave.
- Freezing: Individual slices freeze beautifully! Wrap in plastic wrap, then foil, and freeze for up to 2 months. Thaw unwrapped at room temperature.
Why This Recipe Works Every Time
After making this cake for practically every occasion over the past five years, I’ve pinpointed why it’s so reliable: the balance of moisture and structure. The pineapple provides incredible moisture without making the cake soggy, while the proper mixing technique creates enough structure to hold up to the fruit and caramel topping.
What started as a vacation-inspired experiment has become my signature dessert. Friends now message me weeks before gatherings asking if I’ll be bringing “that pineapple cake.” Neighbors have offered to shovel my driveway in winter in exchange for a freshly baked one. My daughter even requested it instead of a traditional cake for her sweet sixteen.
So if you’re looking for a dessert that brings a little tropical sunshine to any occasion, this Juicy Pineapple Heaven Cake might just become your signature recipe too. Just be prepared – once you start bringing it to gatherings, you’ll never be allowed to bring anything else!
