Let me tell you about the Great Pavlova Tragedy of 2017. I was trying to impress a new crush (now my husband, luckily for me) with an “elegant” Australian dessert. My meringue? A weeping, sticky mess that slid off the plate and onto his new white carpet. The whipped cream soured. The passion fruit seeds got everywhere. It was a $40 ingredient nightmare that ended with us ordering pizza and him promising never to let me near a stand mixer again.
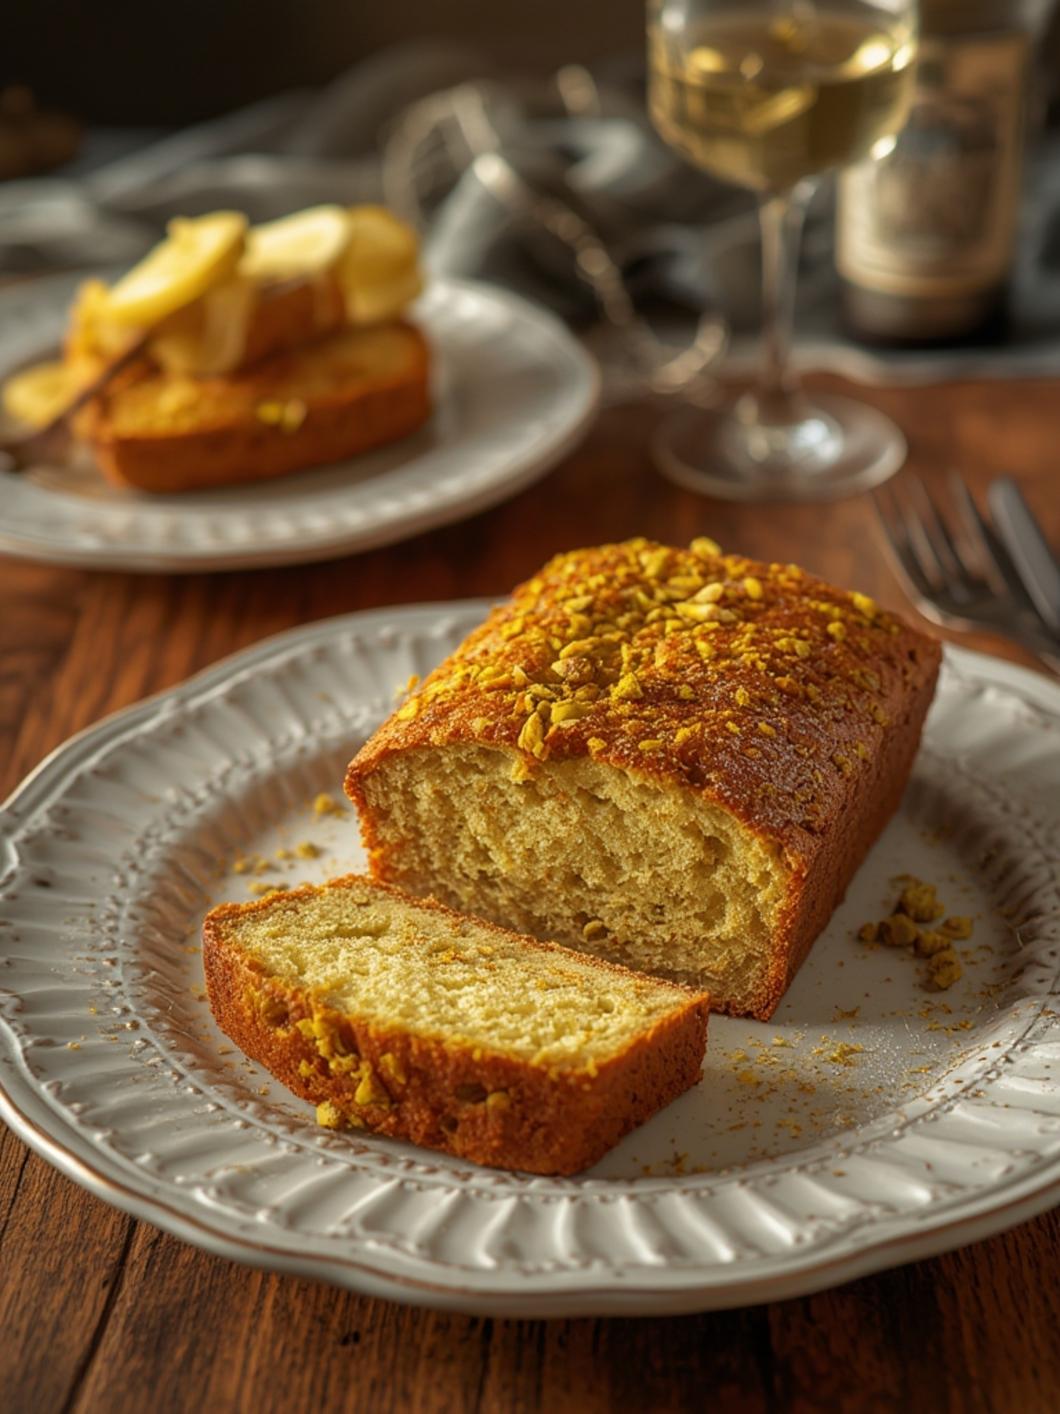
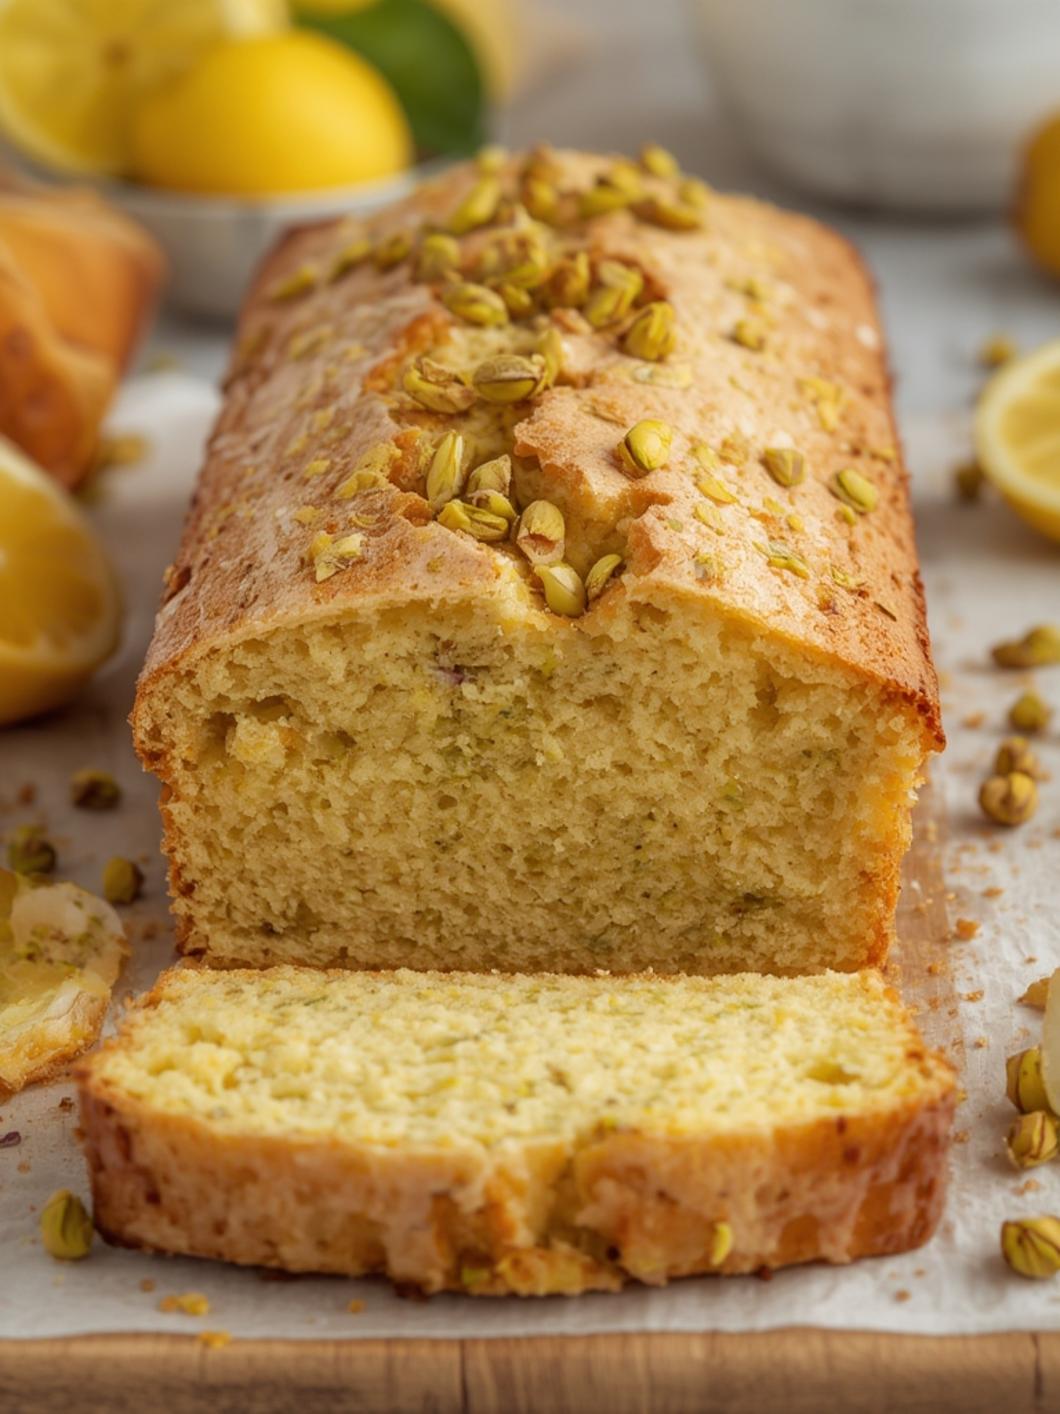
I was devastated. I loved creating beautiful, delicious things for the people I cared about, but my confidence was shattered. For months, I stuck to boxed cakes and store-bought cookies. That all changed one sleepy Sunday when my sister Maya showed up unannounced with a golden-brown loaf, still warm from her oven. “It’s a pistachio lemon cake,” she said, shrugging like it was no big deal. “I had a sudden craving.” One slice, and I was a goner. The crumb was impossibly fine and moist, studded with vibrant green pistachios, with a lemon syrup that sang on my tongue. It wasn’t fussy or fancy; it was honest. And in that moment, I knew I had to master it. That humble loaf didn’t just taste like sunshine—it felt like my redemption. This, my friends, is the story of that Pistachio lemon loaf, the recipe that quietly rebuilt my kitchen soul and made me a confident baker again.
Materials & Supplies (What You’ll Actually Need)
First, let’s get our tools together. No special equipment here—just the basics, which is part of its charm.
For the Loaf:
- Dry Team: 1 ½ cups (190g) all-purpose flour, 1 ½ tsp baking powder, ¼ tsp baking soda, ¼ tsp fine sea salt.
- Wet & Flavor Team: ¾ cup (150g) granulated sugar, 2 large eggs (room temp!), ½ cup (115g) unsalted butter, softened, 1 cup (240ml) buttermilk (full-fat for best results), 2 tbsp fresh lemon juice, zest of 2 big lemons (this is NON-NEGOTIABLE—the oil in the zest is pure flavor gold).
- The Star: 1 cup (about 120g) raw, unsalted pistachios, roughly chopped (not too fine! You want texture).
- For the Glaze: 1 cup (120g) powdered sugar, 1-2 tbsp fresh lemon juice, 1 tbsp finely chopped pistachios for garnish.
Kitchen Gear:
- A standard 9×5-inch loaf pan (the kind you have from your wedding registry or that $5 one from the dollar store—it works!).
- Mixing bowls (one large, one medium).
- Whisk and a sturdy spatula (my silicone one is my best friend).
- A microplane or fine grater for that lemon zest.
- Parchment paper (trust me, it makes cleanup a dream).
- A few toothpicks or a thin skewer to test doneness.
Optional & Substitutions:
- No buttermilk? No panic! Mix 1 cup milk with 1 tbsp lemon juice or white vinegar. Let it sit 5 minutes until slightly curdled. Works perfectly.
- Not a pistachio fan? I get it. Swap for an equal amount of roughly chopped almonds or even dried cranberries for a tart twist. But… why would you? The pistachios are iconic here.
- Want it dairy-free? Use a good-quality vegan butter stick and a plant-based buttermilk (soy milk + lemon juice works). The texture will be just a tad different but still delicious.
- Flavor Boost: Add ½ tsp almond extract to the wet ingredients. It makes the pistachio flavor pop in a way that’s magic.
Timing / Cooking Schedule (Be Realistic, Friend)
Let’s be honest—the first time I made this, I was so nervous I doubled the prep time. My sister’s breezy “oh, it’s easy” felt like a lie! Here’s the real breakdown:
- Prep Time: 20 minutes (mise en place, as the fancy chefs say, which just means “get your stuff ready”).
- Bake Time: 45-55 minutes.
Cool & Glaze Time: At least 1 hour (you can* glaze it warm, but it’ll soak right in and look messy—let it cool for prettiness!).
- Total Time: About 2 hours from start to finish.
My Personal PSA: The bake time can vary wildly based on your oven. Start checking at 45 minutes with that toothpick. If it comes out clean or with a few dry crumbs, it’s done. If it’s wet, give it 5 more minutes. Honestly, the first time it took me double this time because my old oven ran 25 degrees cold! A cheap oven thermometer was the best $10 I ever spent.
Step-by-Step Instructions (With My Missteps Included)
Follow these, and you’ll have a masterpiece. I’ve noted my own hilarious failures so you don’t have to repeat them!
Step 1: Prep & Preheat.
Preheat your oven to 350°F (175°C). Grease your loaf pan and line it with parchment paper, leaving an overhang on the two long sides. This is your “lift-out” insurance policy. I once skipped the parchment because I was “in a rush.” What did I get? A beautiful loaf that was surgically attached to the pan. We had to eat it with a spoon. Not cute.
Step 2: Zest & Dry Ingredients.
Zest those lemons right into your large bowl with the flour, baking powder, baking soda, and salt. Whisk it all together. The zest oils will infuse the dry mix with flavor.
Step 3: Cream Butter & Sugar.
In your medium bowl, beat the softened butter and granulated sugar together with your whisk or mixer for 2-3 minutes until it’s pale, fluffy, and looks almost creamy. This step incorporates air—don’t rush it!
Step 4: Add Eggs & Lemon.
Add the eggs one at a time, beating well after each. Then pour in the lemon juice and mix. Pro Tip from my “salty cake” phase: Scrape down the bowl! Little pockets of unincorporated butter are the enemy of even texture.
Step 5: Combine Wet & Dry.
Now, add your dry flour mixture to the wet mixture in three parts, alternating with the buttermilk. Start and end with the dry ingredients. Mix just until no flour streaks remain. Overmixing = tough cake. Use your spatula for the last few folds.
Step 6: Fold in the Pistachios.
Gently fold in those lovely chopped pistachios. They should be distributed, not sunk to the bottom. I once dumped them in and gave one aggressive stir. Half the nuts were at the bottom, creating a crunchy… crust? Not the effect we’re going for.
Step 7: Bake.
Pour the gorgeous batter into your prepared pan. Smooth the top. Bake for 45-55 minutes, or until a toothpick inserted in the center comes out clean. If the top is browning too fast, loosely tent a piece of foil over it at the 30-minute mark.
Step 8: The Lemon Syrup (While Hot!).
As soon as the loaf comes out of the oven, make the syrup. Whisk the powdered sugar and 1 tbsp lemon juice until smooth. Poke the warm loaf all over with a toothpick and slowly brush or spoon the syrup over the top. It will soak right in. Let the loaf cool in the pan for 15 minutes, then use the parchment “handles” to lift it onto a wire rack. Let it cool completely (at least 1 hour) before glazing.
Step 9: Glaze & Garnish.
For the glaze, whisk powdered sugar with lemon juice, starting with 1 tbsp. You want it thick but pourable. Drizzle it over the completely cooled loaf. Immediately sprinkle with those extra chopped pistachios. Let the glaze set (about 15 minutes), then slice and prepare for compliments.
Nutritional Benefits / Advantages
Look, I’m not saying this is a health food. It has butter and sugar, friends. But it’s a mindful treat. The pistachios are a powerhouse of protein, fiber, and healthy fats—they help keep you full, so you’re satisfied with one slice, not three. The lemon provides a hit of Vitamin C and antioxidants. My doctor was genuinely surprised when I told him I have a slice of this with my afternoon tea most days instead of a processed cookie. It’s made with real ingredients I can pronounce, no weird stabilizers or dyes. It’s the kind of “nutrition” that feeds your soul first, which is a kind of health all its own.
Tips, Alternative Methods, or Cooking Advice
- Make it a Bundt: Grease and flour a 10-cup Bundt pan well. Bake time may increase by 10-15 minutes. The shape is stunning for parties.
- Citrus Swap: Use half lemon, half orange zest and juice for a sweeter, brighter vibe. Or add a teaspoon of poppy seeds for a lemon-poppyseed-pistachio trifecta.
The Buttermilk Hack: If you only have milk, use the lemon juice/vinegar trick as soon as you start prepping*. It needs those 5 minutes to thicken.
- Nut-Free Option: Use toasted pumpkin seeds (pepitas). They have a similar green hue and a lovely crunch.
- My Secret: A tiny pinch of flaky sea salt on the glazed loaf just before serving. It makes every flavor pop. Trust me.
Common Mistakes to Avoid (And My Shameful Tales)
Mistake 1: Cold Ingredients. Using cold eggs and butter leads to a dense, possibly curdled batter. I did this once when I forgot to take the eggs out. The batter looked like scrambled eggs. I just baked it anyway. It was a dense, sad brick that we used as a doorstop for a week.
Mistake 2: Skipping the Zest. Bottled lemon juice is for tea. Fresh zest is non-negotiable. It’s where 80% of the lemon flavor lives.
Mistake 3: Overbaking. This loaf dries out fast once it passes “done.” Set that timer and check early.
Mistake 4: Glazing a Hot Loaf. Do not do it. The glaze will melt into a puddle, not a pretty coating. Have patience!
Storage / Maintenance Tips (Keeping the Magic Alive)
This loaf is actually better the next day! The flavors meld. Store it un-cut in an airtight container at room temp for up to 3 days. Once sliced, press plastic wrap directly onto the cut surface to prevent drying. You can also wrap it tightly and freeze for up to 2 months. Thaw it on the counter, still wrapped. If it feels a touch dry after thawing, a light brush of simple syrup (1:1 sugar:water, heated and cooled) works wonders. My mom’s rule: If it’s stale, make it into a “trifle” with yogurt and berries. No waste, all win.
Conclusion (Why You Must Bake This)
That first slice of Maya’s Pistachio lemon loaf was more than just a tasty treat. It was my proof that perfection isn’t the goal—joy is. This loaf is forgiving, adaptable, and consistently stunning. It’s my go-to for book clubs, sick friends, and “just because” Tuesday mornings. It’s the edible reminder that some of the best things in life are simple, rustic, and shared. Baking it—and failing at it—and succeeding at it—taught me to be kinder to myself in the kitchen. So preheat your oven. Zest those lemons. Let the scent of toasted pistachios and citrus fill your home. I promise, this Pistachio lemon cake in loaf form will become a beloved chapter in your own cooking story. Bake it, share it, and come tell me all about it in the comments below.
FAQs (Your Questions, Answered)
Q: Can I use pre-toasted pistachios?
A: Absolutely! Just give them a quick chop. Just be sure they’re unsalted. Unsalted is key so you can control the seasoning.
Q: My loaf sank in the middle! What happened?
A: The most common culprit is opening the oven door too early, causing a temperature drop. Or your baking powder might be old (test it: drop some in warm water, it should fizz vigorously). Also, make sure your oven is fully preheated!
Q: Is it okay to use lemon extract instead of juice?
A: You can use ½ tsp extract in addition to the juice for a punchier flavor, but don’t replace the juice. The acid from the juice reacts with the baking soda to lift the loaf and adds crucial moisture.
Q: How ripe should the lemons be?
A: Firm but yielding slightly to pressure. You want them fragrant and juicy. Avoid lemons with thick, hard skins—they’re often drier inside.
Q: Can I make this into cupcakes?
A: Yes! Fill lined muffin tins ⅔ full. Reduce bake time to 18-22 minutes. They’ll be adorable and portable. Use the same glaze technique!

How to grow Pistachio lemon loaf recipe in 3 steps
Description
I was devastated. I loved creating beautiful, delicious things for the people I cared about, but my confidence was shattered. For months, I stuck to boxed cakes and store-bought cookies. That all changed one sleepy Sunday when my sister Maya showed up unannounced with a golden-brown loaf, still warm from her oven. “It’s a pistachio lemon cake,” she said, shrugging like it was no big deal. “I had a sudden craving.” One slice, and I was a goner. The crumb was impossibly fine and moist, studded with vibrant green pistachios, with a lemon syrup that sang on my tongue. It wasn’t fussy or fancy; it was honest. And in that moment, I knew I had to master it. That humble loaf didn’t just taste like sunshine—it felt like my redemption. This, my friends, is the story of that Pistachio lemon loaf, the recipe that quietly rebuilt my kitchen soul and made me a confident baker again.
Ingredients
Materials & Supplies (What You’ll Actually Need)
First, let’s get our tools together. No special equipment here—just the basics, which is part of its charm.
For the Loaf:
- Dry Team: 1 ½ cups (190g) all-purpose flour, 1 ½ tsp baking powder, ¼ tsp baking soda, ¼ tsp fine sea salt.
- Wet & Flavor Team: ¾ cup (150g) granulated sugar, 2 large eggs (room temp!), ½ cup (115g) unsalted butter, softened, 1 cup (240ml) buttermilk (full-fat for best results), 2 tbsp fresh lemon juice, zest of 2 big lemons (this is NON-NEGOTIABLE—the oil in the zest is pure flavor gold).
- The Star: 1 cup (about 120g) raw, unsalted pistachios, roughly chopped (not too fine! You want texture).
- For the Glaze: 1 cup (120g) powdered sugar, 1-2 tbsp fresh lemon juice, 1 tbsp finely chopped pistachios for garnish.
Kitchen Gear:
- A standard 9x5-inch loaf pan (the kind you have from your wedding registry or that $5 one from the dollar store—it works!).
- Mixing bowls (one large, one medium).
- Whisk and a sturdy spatula (my silicone one is my best friend).
- A microplane or fine grater for that lemon zest.
- Parchment paper (trust me, it makes cleanup a dream).
- A few toothpicks or a thin skewer to test doneness.
Optional & Substitutions:
- No buttermilk? No panic! Mix 1 cup milk with 1 tbsp lemon juice or white vinegar. Let it sit 5 minutes until slightly curdled. Works perfectly.
- Not a pistachio fan? I get it. Swap for an equal amount of roughly chopped almonds or even dried cranberries for a tart twist. But… why would you? The pistachios are iconic here.
- Want it dairy-free? Use a good-quality vegan butter stick and a plant-based buttermilk (soy milk + lemon juice works). The texture will be just a tad different but still delicious.
- Flavor Boost: Add ½ tsp almond extract to the wet ingredients. It makes the pistachio flavor pop in a way that’s magic.
Timing / Cooking Schedule (Be Realistic, Friend)
Let’s be honest—the first time I made this, I was so nervous I doubled the prep time. My sister’s breezy “oh, it’s easy” felt like a lie! Here’s the real breakdown:
- Prep Time: 20 minutes (mise en place, as the fancy chefs say, which just means “get your stuff ready”).
- Bake Time: 45-55 minutes.
Cool & Glaze Time: At least 1 hour (you can* glaze it warm, but it’ll soak right in and look messy—let it cool for prettiness!).
- Total Time: About 2 hours from start to finish.
My Personal PSA: The bake time can vary wildly based on your oven. Start checking at 45 minutes with that toothpick. If it comes out clean or with a few dry crumbs, it’s done. If it’s wet, give it 5 more minutes. Honestly, the first time it took me double this time because my old oven ran 25 degrees cold! A cheap oven thermometer was the best $10 I ever spent.
Instructions
Step-by-Step Instructions (With My Missteps Included)
Follow these, and you’ll have a masterpiece. I’ve noted my own hilarious failures so you don’t have to repeat them!
Step 1: Prep & Preheat.
Preheat your oven to 350°F (175°C). Grease your loaf pan and line it with parchment paper, leaving an overhang on the two long sides. This is your “lift-out” insurance policy. I once skipped the parchment because I was “in a rush.” What did I get? A beautiful loaf that was surgically attached to the pan. We had to eat it with a spoon. Not cute.
Step 2: Zest & Dry Ingredients.
Zest those lemons right into your large bowl with the flour, baking powder, baking soda, and salt. Whisk it all together. The zest oils will infuse the dry mix with flavor.
Step 3: Cream Butter & Sugar.
In your medium bowl, beat the softened butter and granulated sugar together with your whisk or mixer for 2-3 minutes until it’s pale, fluffy, and looks almost creamy. This step incorporates air—don’t rush it!
Step 4: Add Eggs & Lemon.
Add the eggs one at a time, beating well after each. Then pour in the lemon juice and mix. Pro Tip from my “salty cake” phase: Scrape down the bowl! Little pockets of unincorporated butter are the enemy of even texture.
Step 5: Combine Wet & Dry.
Now, add your dry flour mixture to the wet mixture in three parts, alternating with the buttermilk. Start and end with the dry ingredients. Mix just until no flour streaks remain. Overmixing = tough cake. Use your spatula for the last few folds.
Step 6: Fold in the Pistachios.
Gently fold in those lovely chopped pistachios. They should be distributed, not sunk to the bottom. I once dumped them in and gave one aggressive stir. Half the nuts were at the bottom, creating a crunchy… crust? Not the effect we’re going for.
Step 7: Bake.
Pour the gorgeous batter into your prepared pan. Smooth the top. Bake for 45-55 minutes, or until a toothpick inserted in the center comes out clean. If the top is browning too fast, loosely tent a piece of foil over it at the 30-minute mark.
Step 8: The Lemon Syrup (While Hot!).
As soon as the loaf comes out of the oven, make the syrup. Whisk the powdered sugar and 1 tbsp lemon juice until smooth. Poke the warm loaf all over with a toothpick and slowly brush or spoon the syrup over the top. It will soak right in. Let the loaf cool in the pan for 15 minutes, then use the parchment “handles” to lift it onto a wire rack. Let it cool completely (at least 1 hour) before glazing.
Step 9: Glaze & Garnish.
For the glaze, whisk powdered sugar with lemon juice, starting with 1 tbsp. You want it thick but pourable. Drizzle it over the completely cooled loaf. Immediately sprinkle with those extra chopped pistachios. Let the glaze set (about 15 minutes), then slice and prepare for compliments.
Nutritional Benefits / Advantages
Look, I’m not saying this is a health food. It has butter and sugar, friends. But it’s a mindful treat. The pistachios are a powerhouse of protein, fiber, and healthy fats—they help keep you full, so you’re satisfied with one slice, not three. The lemon provides a hit of Vitamin C and antioxidants. My doctor was genuinely surprised when I told him I have a slice of this with my afternoon tea most days instead of a processed cookie. It’s made with real ingredients I can pronounce, no weird stabilizers or dyes. It’s the kind of “nutrition” that feeds your soul first, which is a kind of health all its own.
Tips, Alternative Methods, or Cooking Advice
Make it a Bundt: Grease and flour a 10-cup Bundt pan well. Bake time may increase by 10-15 minutes. The shape is stunning for parties.
Citrus Swap: Use half lemon, half orange zest and juice for a sweeter, brighter vibe. Or add a teaspoon of poppy seeds for a lemon-poppyseed-pistachio trifecta.
The Buttermilk Hack: If you only have milk, use the lemon juice/vinegar trick as soon as you start prepping*. It needs those 5 minutes to thicken.
Nut-Free Option: Use toasted pumpkin seeds (pepitas). They have a similar green hue and a lovely crunch.
My Secret: A tiny pinch of flaky sea salt on the glazed loaf just before serving. It makes every flavor pop. Trust me.
Common Mistakes to Avoid (And My Shameful Tales)
Mistake 1: Cold Ingredients. Using cold eggs and butter leads to a dense, possibly curdled batter. I did this once when I forgot to take the eggs out. The batter looked like scrambled eggs. I just baked it anyway. It was a dense, sad brick that we used as a doorstop for a week.
Mistake 2: Skipping the Zest. Bottled lemon juice is for tea. Fresh zest is non-negotiable. It’s where 80% of the lemon flavor lives.
Mistake 3: Overbaking. This loaf dries out fast once it passes “done.” Set that timer and check early.
Mistake 4: Glazing a Hot Loaf. Do not do it. The glaze will melt into a puddle, not a pretty coating. Have patience!
Storage / Maintenance Tips (Keeping the Magic Alive)
This loaf is actually better the next day! The flavors meld. Store it un-cut in an airtight container at room temp for up to 3 days. Once sliced, press plastic wrap directly onto the cut surface to prevent drying. You can also wrap it tightly and freeze for up to 2 months. Thaw it on the counter, still wrapped. If it feels a touch dry after thawing, a light brush of simple syrup (1:1 sugar:water, heated and cooled) works wonders. My mom’s rule: If it’s stale, make it into a “trifle” with yogurt and berries. No waste, all win.
Conclusion (Why You Must Bake This)
That first slice of Maya’s Pistachio lemon loaf was more than just a tasty treat. It was my proof that perfection isn’t the goal—joy is. This loaf is forgiving, adaptable, and consistently stunning. It’s my go-to for book clubs, sick friends, and “just because” Tuesday mornings. It’s the edible reminder that some of the best things in life are simple, rustic, and shared. Baking it—and failing at it—and succeeding at it—taught me to be kinder to myself in the kitchen. So preheat your oven. Zest those lemons. Let the scent of toasted pistachios and citrus fill your home. I promise, this Pistachio lemon cake in loaf form will become a beloved chapter in your own cooking story. Bake it, share it, and come tell me all about it in the comments below.