There’s something magical that happens when perfectly seasoned chicken meets melted cheese and aromatic garlic, all wrapped up in a golden, crispy tortilla. These gooey cheese garlic chicken wraps aren’t just any ordinary meal – they’re comfort food heaven that’ll have your family asking for seconds before they’ve finished their first bite.
Picture this: It’s a Tuesday evening, the kids are hungry, and you need something satisfying that doesn’t require hours in the kitchen. You reach for a few simple ingredients, and within 30 minutes, you’ve created gooey cheese garlic chicken wraps that taste like they came from your favorite restaurant. That’s the beauty of these incredible wraps – they transform everyday ingredients into something extraordinary.
Why These Gooey Cheese Garlic Chicken Wraps Will Become Your New Obsession
Let me tell you a story. Last month, my neighbor Sarah knocked on my door with tears of joy in her eyes. Her teenage son, who typically survives on pizza rolls and cereal, had just devoured three of these gooey cheese garlic chicken wraps and declared them “better than anything at that fancy place downtown.” That’s the power of comfort food done right.
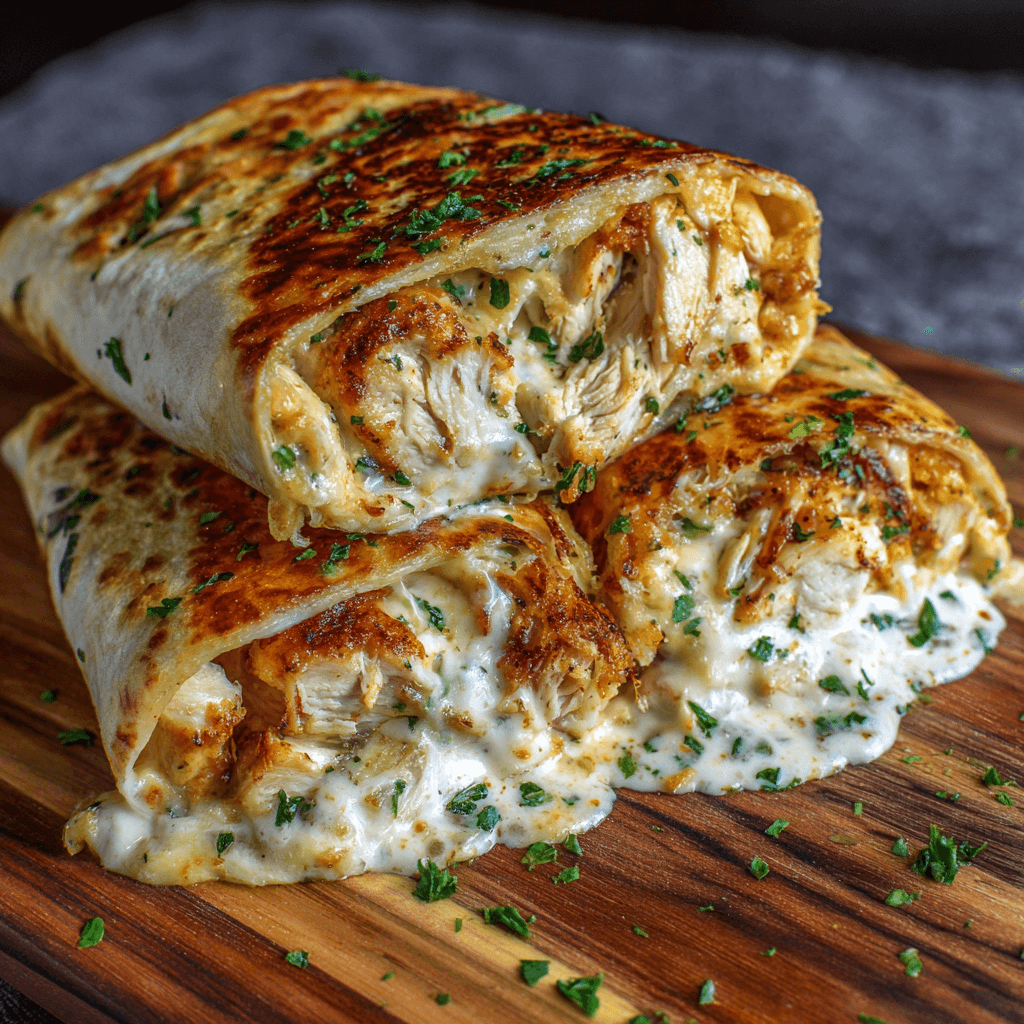
These gooey cheese garlic chicken wraps hit every note your taste buds crave. The chicken is tender and juicy, infused with garlic that doesn’t overpower but rather enhances every bite. The cheese – oh, the cheese – creates those Instagram-worthy cheese pulls that make everyone at the table pause mid-conversation. And the tortilla? It’s golden and slightly crispy on the outside while staying soft enough to hold all that melted goodness inside.
What makes these cheese garlic chicken wraps particularly special is their versatility. They’re fancy enough for a dinner party appetizer, casual enough for a weeknight family meal, and portable enough for lunch boxes or picnic baskets. I’ve served them at everything from teenage birthday parties to book club meetings, and they never fail to disappear within minutes.
The Secret Behind the Perfect Garlic Flavor
Here’s where many home cooks go wrong with garlic chicken recipes – they either use too little and lose the flavor, or too much and overpower everything else. The secret lies in using garlic in multiple forms and cooking it properly to develop those sweet, nutty undertones that make your kitchen smell like heaven.
Fresh minced garlic gets sautéed with the chicken, creating that immediate aromatic base. But here’s the game-changer: a touch of garlic powder mixed into the seasoning blend ensures that garlicky goodness penetrates every fiber of the meat. Finally, a whisper of granulated garlic in the cheese mixture ties everything together without creating any harsh, raw garlic bites.
The cooking technique matters just as much as the ingredients. When you sauté the garlic, you want it golden and fragrant – never brown or burnt, which turns bitter and ruins the entire dish. It should take about 30 seconds of gentle cooking to reach that perfect point where your neighbors start wondering what smells so incredible.

Choosing the Right Cheese Combination
Not all cheese is created equal, especially when it comes to achieving that perfect melt and stretch factor that makes these gooey cheese garlic chicken wraps truly irresistible. After testing dozens of combinations, I’ve discovered the winning formula that creates both incredible flavor and that satisfying cheese pull we all secretly video for social media.
The foundation is sharp cheddar, which provides robust flavor and melts beautifully. But cheddar alone can sometimes become oily when heated. That’s where mozzarella comes in – it adds that stretchy, gooey texture while mellowing the sharpness just enough. A small amount of cream cheese mixed in creates an ultra-creamy base that helps everything meld together seamlessly.
For those who enjoy a bit more complexity, a sprinkle of freshly grated Parmesan adds a nutty depth that elevates the entire flavor profile. The key is using freshly grated cheese rather than pre-shredded when possible. Those anti-caking agents in pre-shredded cheese can prevent proper melting, and we definitely don’t want that when we’re going for maximum gooeyness.
The Art of the Perfect Wrap
Wrapping these beauties properly is crucial for preventing messy leaks and ensuring even cooking. Start with room-temperature tortillas – cold ones crack, and nobody wants their delicious filling escaping during cooking. Large flour tortillas work best because they’re sturdy enough to hold generous amounts of filling while remaining pliable.
Place your filling in the lower third of the tortilla, leaving about an inch border on the sides. Here’s the technique that changed my wrap game forever: fold the bottom edge up and over the filling, tuck it under slightly, then fold in the sides before rolling tightly toward the top. The result? A secure package that won’t burst open during cooking.
Don’t overstuff your wraps, as tempting as it might be. A too-full wrap is a burst wrap waiting to happen. Trust me, it’s better to make an extra wrap than to clean melted cheese off your skillet and counter.
Cooking Methods That Guarantee Success
The beauty of these wraps lies in their flexibility – you can achieve delicious results using several different cooking methods, depending on your equipment and preferences.
Skillet Method: This is my go-to technique for weeknight dinners. Heat a large skillet over medium heat with just a touch of oil or butter. Place the wraps seam-side down first – this helps seal them closed. Cook for 2-3 minutes until golden brown, then flip carefully and cook another 2-3 minutes. The result is a crispy exterior with perfectly melted cheese inside.
Oven Method: Perfect for feeding a crowd or when you’re multitasking. Preheat your oven to 425°F, place the wraps on a baking sheet, and brush lightly with melted butter or oil. Bake for 12-15 minutes, flipping halfway through. This method gives you more control and less hands-on cooking time.
Air Fryer Method: For those crispy-texture lovers, the air fryer creates an incredibly satisfying crunch. Cook at 380°F for 8-10 minutes, flipping once. Just remember to secure the wraps with toothpicks if your air fryer has strong circulation fans.
Ingredient Substitutions That Actually Work
Life happens, and sometimes you don’t have every ingredient on hand. The good news is that these wraps are incredibly forgiving and adaptable to what’s in your refrigerator.
Chicken Alternatives: Rotisserie chicken is a fantastic shortcut that actually adds extra flavor. Leftover grilled chicken works beautifully, as does properly seasoned chicken thighs, which stay even more tender than breasts. For a different protein entirely, turkey, pork, or even well-seasoned ground meat can create delicious variations.
Cheese Flexibility: While the cheddar-mozzarella combination is ideal, you can substitute with whatever good melting cheeses you have on hand. Monterey Jack, Gouda, or even a Mexican cheese blend work wonderfully. Just avoid hard cheeses like aged Parmesan on their own, as they don’t create that gooey texture we’re after.
Tortilla Options: Large flour tortillas are traditional, but spinach tortillas add color and subtle flavor, while whole wheat versions provide extra nutrition. Corn tortillas work too, though they’re less flexible and require more gentle handling.
Serving Suggestions That Elevate the Experience
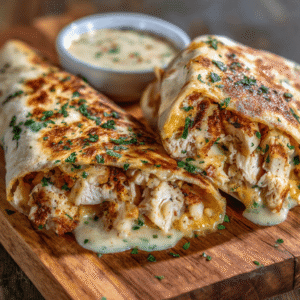
These wraps are fantastic on their own, but the right accompaniments can transform a simple meal into something special. A dollop of cool sour cream provides a nice temperature and flavor contrast to the warm, garlicky chicken. Fresh guacamole adds richness and a pop of color that makes the plate more visually appealing.
For a lighter touch, a simple salad of mixed greens with a tangy vinaigrette cuts through the richness beautifully. Cherry tomatoes, cucumber, and red onion create a fresh counterpoint that makes the meal feel more complete and balanced.
Dipping sauces open up a world of flavor possibilities. Ranch dressing is always a crowd-pleaser, especially with kids. Salsa verde adds a bright, tangy element, while chipotle mayo brings smoky heat that adults particularly enjoy.
Storage and Reheating Tips
These wraps are excellent for meal prep, though there are some tricks to ensure they maintain their quality. Wrap cooled wraps individually in foil and refrigerate for up to three days. For longer storage, freeze them for up to a month, though the texture is best when consumed fresh.
When reheating, avoid the microwave if possible – it tends to make the tortillas chewy and the cheese stringy. Instead, reheat in a 350°F oven for 10-12 minutes if frozen, or 6-8 minutes if refrigerated. A toaster oven works perfectly for single servings.
If you must use a microwave, wrap the wrap in a slightly damp paper towel and heat in 30-second intervals, checking frequently to prevent overcooking.
The Complete Recipe: Step-by-Step Guide
Ingredients
- 1 lb boneless, skinless chicken breasts, cut into bite-sized pieces
- 4 large flour tortillas (10-12 inch)
- 2 cups shredded sharp cheddar cheese
- 1 cup shredded mozzarella cheese
- 4 oz cream cheese, softened
- 4 cloves fresh garlic, minced
- 1 teaspoon garlic powder
- 1/2 teaspoon granulated garlic
- 1 teaspoon Italian seasoning
- 1/2 teaspoon paprika
- 1/2 teaspoon onion powder
- Salt and black pepper to taste
- 2 tablespoons olive oil
- 2 tablespoons butter
- 1/4 cup fresh parsley, chopped (for garnish)
- Optional: 1/4 teaspoon red pepper flakes for heat
Instructions:
- Season the Chicken: In a large bowl, combine chicken pieces with garlic powder, Italian seasoning, paprika, onion powder, salt, and pepper. Let it marinate for at least 15 minutes to develop flavors.
- Prepare the Cheese Mixture: In a medium bowl, combine the softened cream cheese with granulated garlic and half of the chopped parsley. Mix until smooth and set aside.
- Cook the Chicken: Heat olive oil in a large skillet over medium-high heat. Add the seasoned chicken and cook for 5-6 minutes, stirring occasionally. Add minced garlic and cook for another 30 seconds until fragrant. The chicken should be golden brown and cooked through (internal temperature of 165°F). Remove from heat and let cool slightly.
- Assemble the Wraps: Lay tortillas on a flat surface. Spread a layer of the cream cheese mixture on each tortilla, leaving a 1-inch border. Divide the cooked chicken evenly among the tortillas. Top with cheddar and mozzarella cheese, ensuring even distribution.
- Wrap Them Up: Fold the bottom edge of each tortilla up and over the filling, tuck slightly under, then fold in the sides and roll tightly toward the top. The seam should be on the bottom.
- Cook the Wraps: Heat butter in the same skillet over medium heat. Place wraps seam-side down and cook for 2-3 minutes until golden brown. Carefully flip and cook another 2-3 minutes until the second side is golden and the cheese is completely melted.
- Serve and Enjoy: Remove from heat, let cool for 2 minutes, then slice each wrap in half diagonally. Garnish with remaining fresh parsley and serve immediately while the cheese is still gooey.
Prep Time: 20 minutes | Cook Time: 15 minutes | Total Time: 35 minutes | Serves: 4
Making It Your Own
The beauty of this recipe lies in its adaptability. Once you master the basic technique, you can customize these wraps to match your family’s preferences or dietary needs. Add sautéed bell peppers and onions for extra vegetables and sweetness. Jalapeños bring heat for spice lovers, while sun-dried tomatoes add Mediterranean flair.
Herb variations can completely change the flavor profile. Fresh cilantro and lime juice create a Mexican-inspired version, while basil and oregano lean Italian. Rosemary and thyme give it a more sophisticated, European feel.
The key is to maintain the balance between the chicken, cheese, and seasonings while adding your personal touches. Start with small amounts of new ingredients and adjust to taste – you can always add more, but you can’t take it away.
Why This Recipe Works Every Time
After years of perfecting this recipe, I’ve learned that success comes down to three fundamental principles: proper seasoning, temperature control, and not rushing the process. The chicken needs adequate seasoning time to develop flavor. The cheese requires the right heat level to melt without separating. And the tortillas need gentle, even cooking to achieve that perfect golden exterior.
These aren’t just instructions – they’re the difference between good wraps and absolutely incredible ones that have people asking for the recipe before they’ve finished eating.
So next time you’re staring into your refrigerator wondering what to make for dinner, remember these wraps. They’re proof that with the right technique and a little love, simple ingredients can create something truly special that brings people together around the table, sharing stories and asking for seconds.