There are few desserts that transport me back to my childhood quite like Golden Key Caramel Cake. The first time I tasted this magical creation was at my grandmother’s kitchen table in the outskirts of Kyiv. I was just eight years old, and I can still recall the rich caramel aroma filling the house as she pulled the cake layers from the oven. Over my decade of experience developing recipes and exploring the world of Eastern European baking, I’ve perfected this nostalgic treat that combines the beloved flavors of the iconic “Zolotoy Klyuchik” candy into a showstopping layered cake.
What Makes Golden Key Caramel Cake Special?
The name “Golden Key” (or “Zolotoy Klyuchik” in Russian) comes from the beloved candy bar that’s been a staple in Russia, Ukraine, and throughout Eastern Europe since the Soviet era. This toffee-like sweet features a distinctive caramel flavor with subtle notes of condensed milk. The candy’s popularity has inspired countless dessert variations, but none captures its essence quite like this multi-layered caramel cake.
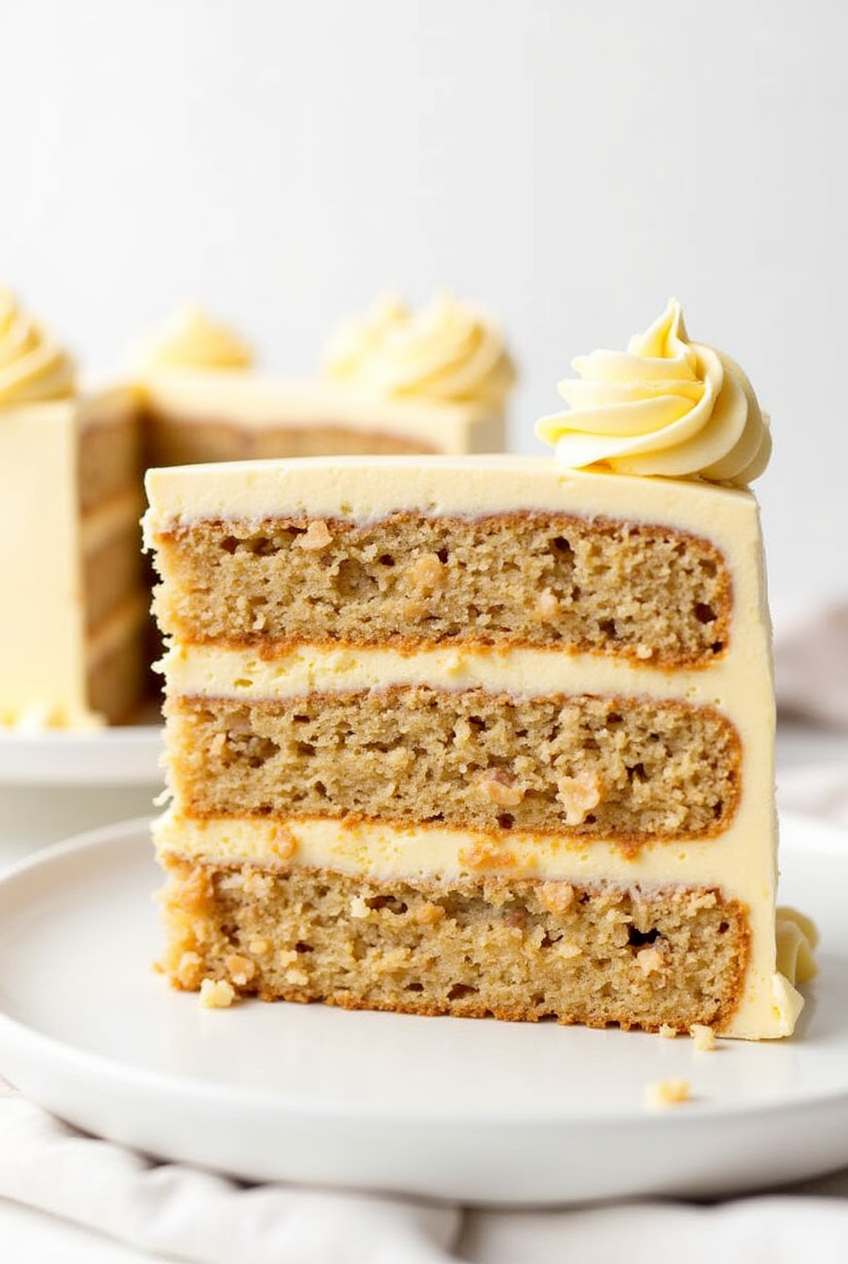
What sets this cake apart is its perfect balance of textures and flavors. The coffee-infused cake layers provide a subtle depth that complements the sweet caramel frosting, while the condensed milk filling and crunchy nuts create delightful textural contrasts in each bite. It’s a cake that manages to be both rustic and elegant, homey yet sophisticated enough for special occasions.
The Secret to Authentic Golden Key Flavor
Having experimented with countless variations over the years, I’ve learned that the key to capturing that authentic “Golden Key” taste lies in three critical components:
- Dulce de leche – This caramelized condensed milk forms the backbone of the cake’s flavor profile. While you can purchase it ready-made, I sometimes make my own by slowly simmering cans of sweetened condensed milk (safely, in a water bath) for several hours until the sugars caramelize.
- Coffee infusion – A touch of coffee doesn’t make the cake taste like coffee but rather enhances the caramel notes and adds complexity. This subtle background note is what separates an ordinary caramel cake from an authentic Golden Key cake.
- The right nuts – Traditionally, hazelnuts are used, but I’ve found that pecans work beautifully as well, adding their distinctive buttery richness to the ensemble.
Now, let me walk you through creating this Eastern European masterpiece step by step.
Ingredients You’ll Need
For the Caramel Cake Layers:
- 4 large eggs, room temperature
- ¾ cup (228g) dulce de leche
- 1 teaspoon pure vanilla extract
- ½ cup (100g) white granulated sugar
- 1 cup (240ml) buttermilk
- ¾ cup (180ml) light cooking oil (canola works perfectly)
- 2 teaspoons (4g) instant coffee dissolved in 1½ tablespoons (22ml) hot water
- 2 cups (250g) all-purpose flour
- 2 teaspoons (10g) baking soda
- 2 teaspoons (8g) baking powder
- ¼ teaspoon salt
For the Caramel Filling:
- ¼ cup (76g) dulce de leche
- ½ cup (120ml) sweetened condensed milk
- 1 cup (125g) finely diced pecans or hazelnuts
For the Caramel Whipped Cream Frosting:
- 16 oz (454g) mascarpone cheese, softened at room temperature
- 1 cup (304g) dulce de leche
- ½ cup (120ml) sweetened condensed milk
- 1 teaspoon vanilla extract
- 1 teaspoon instant coffee dissolved in 2 teaspoons (10ml) hot water
- 3 cups (710ml) heavy cream, well-chilled
- 1 cup (125g) diced pecans or hazelnuts, for garnish
Preparing the Perfect Cake Layers
The foundation of this dessert is its tender, caramel-infused cake layers. Unlike many cake recipes that begin with creaming butter and sugar, this one follows a different method that yields incredibly moist results.
- Preheat your oven to 350°F (175°C). Line three 8-inch cake pans with parchment paper and lightly spray with cooking spray.
- In a large mixing bowl, whisk together the eggs, dulce de leche, vanilla extract, and sugar until smooth and well combined. This might take a few minutes of whisking, but perseverance is key—you want the dulce de leche to fully incorporate without lumps.
- Add the buttermilk and oil, whisking until the mixture is homogeneous. The oil, rather than butter, is crucial here as it creates an exceptionally moist cake that stays fresh longer.
- Dissolve the instant coffee in hot water and add this coffee solution to the wet ingredients. Stir well to combine. This might seem like a small amount of coffee, but trust me—it makes all the difference in developing that authentic Golden Key flavor.
- In a separate bowl, whisk together the flour, baking soda, baking powder, and salt.
- Gradually add the dry ingredients to the wet ingredients, folding gently until just combined. Be careful not to overmix, as this can lead to a dense cake.
- Divide the batter evenly among the prepared cake pans. For absolute precision (something I’ve learned is essential over years of baking), use a kitchen scale to ensure each pan gets exactly the same amount.
- Bake in the preheated oven for 23-25 minutes, or until a toothpick inserted into the center comes out clean. The tops should be golden brown and spring back when lightly touched.
- Allow the cakes to cool in their pans for 10 minutes before transferring to wire racks to cool completely. This step is critical—if you attempt to assemble the cake while the layers are still warm, your frosting will melt and create a messy situation.
Creating the Luxurious Fillings and Frosting
The filling and frosting are where the cake truly gets its signature Golden Key character. The combination of dulce de leche, condensed milk, and mascarpone creates a flavor profile that perfectly mirrors the iconic candy.
For the Caramel Filling:
- In a medium bowl, combine the dulce de leche and sweetened condensed milk, stirring until smooth and well blended.
- Fold in the finely diced nuts, ensuring they’re evenly distributed throughout the mixture. Set aside while you prepare the frosting.
For the Caramel Whipped Cream Frosting:
- In a large bowl, beat the softened mascarpone cheese until smooth and creamy.
- Add the dulce de leche, sweetened condensed milk, vanilla extract, and coffee solution. Beat until well combined and silky.
- In a separate chilled bowl, whip the heavy cream until stiff peaks form. The cream must be very cold for the best results—I sometimes even chill the bowl and beaters beforehand.
- Carefully fold the whipped cream into the mascarpone-caramel mixture in several additions. Use a gentle hand to maintain as much air as possible in the mixture, which creates that light, cloudlike texture that makes this frosting so special.
Assembling Your Golden Key Caramel Cake
Assembly is where your creation comes to life. Take your time with this step—it’s worth the extra care to create a cake that’s as beautiful as it is delicious.
- Place the first cake layer on your serving plate or cake stand. If the top is domed, you may want to level it with a serrated knife for a more professional appearance.
- Spread half of the caramel filling evenly over the first layer, leaving about a ½-inch border around the edge (the filling will spread as you add the next layer).
- Carefully place the second cake layer on top, gently pressing down to secure.
- Spread the remaining caramel filling over the second layer, again leaving a small border.
- Place the final cake layer on top, this time with the bottom side facing up to give you a nice flat surface for decorating.
- Apply a thin layer of the caramel whipped cream frosting all over the cake to create a crumb coat. This initial layer seals in any loose crumbs. Refrigerate the cake for about 30 minutes to set this layer.
- Once the crumb coat has set, apply the remaining frosting generously to the top and sides of the cake. You can create decorative swirls using an offset spatula or pipe rosettes around the top edge using a pastry bag fitted with a star tip.
- Finally, press the diced nuts onto the sides of the cake and sprinkle some on top for garnish. This not only adds a beautiful finish but provides a wonderful textural contrast to the soft cake and creamy frosting.
Tips From My Years of Experience
After making this cake countless times over the past decade, I’ve gathered some insights that can help ensure your Golden Key Caramel Cake turns out perfectly:
- Temperature matters: All refrigerated ingredients (except the heavy cream) should be at room temperature before you begin. This ensures smooth incorporation and prevents curdling.
- Don’t rush the cooling: Allow the cake layers to cool completely before assembling. Even slightly warm layers can cause the frosting to melt.
- Stabilize if necessary: If you’re making this cake during hot weather or for an outdoor event, consider adding a tablespoon of unflavored gelatin (bloomed and dissolved) to the frosting to help it hold up better at warmer temperatures.
- Make ahead option: The unfrosted cake layers can be wrapped tightly and frozen for up to a month. Thaw overnight in the refrigerator before assembling.
- Serving suggestion: For the best flavor experience, remove the cake from the refrigerator about 30 minutes before serving. The slightly softened texture allows the caramel notes to shine.
The Cultural Significance of Golden Key Cake
What makes this cake particularly special to me is its cultural significance. In Eastern European households, Golden Key Cake often appears at milestone celebrations—birthdays, anniversaries, and holiday gatherings. It represents not just a delicious dessert but a