Last summer, my air conditioner broke right before a family gathering, and the thought of turning on the oven was unbearable. That’s when I discovered the magic of icebox cakes. This funfetti Oreo icebox cake became my secret weapon—no baking required, make-ahead friendly, and so festive it looks like a party all on its own. The best part? It tastes even better than it looks, and trust me, it looks spectacular.
What Makes Funfetti Oreo Icebox Cake So Special?
An icebox cake is a brilliant concept: layers of cookies and cream that meld together as they chill, creating a cake-like texture without ever touching an oven. This funfetti Oreo version takes that classic idea and turns it into a celebration-worthy dessert that’s as fun to make as it is to eat.
The combination of crushed Oreos, fluffy whipped cream, and colorful sprinkles creates a dessert that’s both nostalgic and exciting. The Oreos soften as they absorb moisture from the cream, transforming into tender cake layers, while the sprinkles add pops of color and a slight crunch. It’s the kind of dessert that makes everyone smile before they even take a bite.
Ingredients for Your Funfetti Oreo Icebox Cake
For the whipped cream layers:
- 2 cups heavy whipping cream, very cold
- ¼ cup powdered sugar
- 1 teaspoon vanilla extract
- ½ cup cream cheese, softened (optional, for stability)
For assembly:
- 36-40 Oreo cookies (about 1 package)
- ½ cup rainbow sprinkles, divided
- Additional whipped cream for topping
- Extra Oreos for garnish (crushed or whole)
Complete Instructions for Making This No-Bake Cake
Preparing Your Whipped Cream Base
The foundation of any great icebox cake is perfectly whipped cream. Start by placing your mixing bowl and whisk attachment in the freezer for 15 minutes—cold equipment helps the cream whip faster and hold better.
Pour the cold heavy whipping cream into your chilled bowl. Beat on medium speed until it begins to thicken, about 1-2 minutes. Add the powdered sugar and vanilla extract, then increase the speed to medium-high.
Continue whipping until stiff peaks form—this means when you lift the whisk, the cream stands up straight rather than flopping over. This usually takes 3-4 minutes total. Be careful not to overwhip, or you’ll end up with butter!
If you’re adding cream cheese for stability (which I recommend if you’re making this more than a day ahead), beat the softened cream cheese separately until smooth, then fold it into the whipped cream gently with a spatula.
Fold in about ¼ cup of rainbow sprinkles, reserving the rest for topping and decoration. The sprinkles will bleed slightly into the cream, creating beautiful streaks of color.
Building Your Funfetti Oreo Icebox Cake Layers
Choose your vessel carefully. A 9×9-inch square pan, a loaf pan, or even a springform pan works beautifully. Line it with plastic wrap, leaving plenty of overhang on the sides—this makes unmolding much easier later.
Spread a thin layer of whipped cream on the bottom of your pan. This creates a base and helps the first layer of cookies stick.
Arrange a single layer of Oreo cookies over the cream. You may need to break some cookies to fill gaps—that’s completely fine and won’t show in the final presentation. The goal is complete coverage with minimal gaps.
Spread about one-third of your remaining whipped cream over the cookie layer, making sure to get into all the corners and gaps. Use an offset spatula or the back of a spoon for smooth, even spreading.
Add another complete layer of Oreos, followed by more whipped cream. Repeat this process until you’ve used all your ingredients, ending with a whipped cream layer on top. You should have 3-4 layers of cookies depending on your pan depth.
Adding the Funfetti Finishing Touches
This is where your funfetti Oreo icebox cake really comes to life. Pipe or spread additional whipped cream on top in decorative swirls using a piping bag fitted with a star tip. If you don’t have a piping bag, spreading it with a spoon and creating swoops and peaks works beautifully too.
Shower the top generously with the remaining rainbow sprinkles. Don’t be shy—the more colorful, the better! Add crushed Oreo pieces or whole Oreo halves for extra decoration.
Cover the entire cake gently with plastic wrap, being careful not to disturb your decorations. Refrigerate for at least 6 hours, but preferably overnight. This chilling time is crucial—it allows the cookies to soften and the flavors to meld together.
Serving Your No-Bake Icebox Cake
When you’re ready to serve, use the plastic wrap overhang to lift the cake out of the pan if you’ve used a square or loaf pan. Transfer to a serving plate. If using a springform pan, simply release the sides.
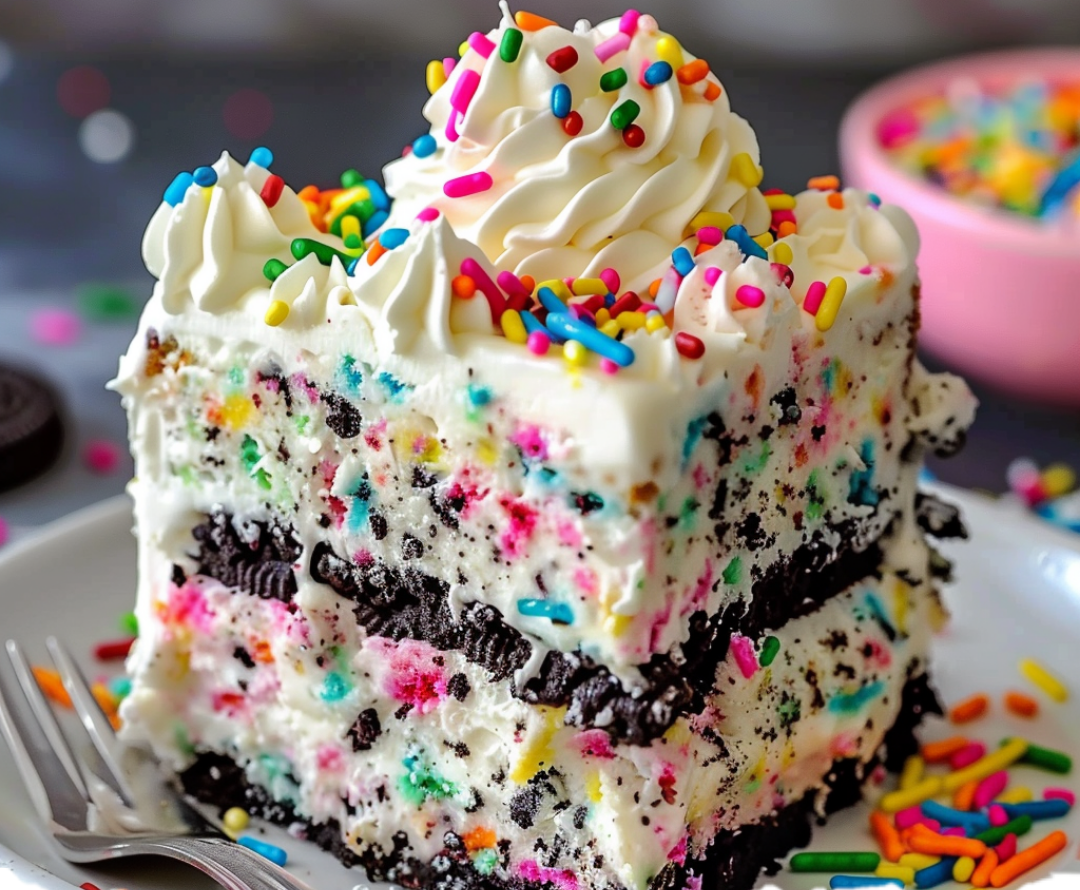
Cut with a sharp knife, wiping it clean between slices for neat presentation. The contrast between the dark Oreo layers and the white cream studded with colorful sprinkles is absolutely stunning.
Nutritional Information for Funfetti Oreo Icebox Cake
Per serving (based on 12 servings):
- Calories: 385
- Total Fat: 24g
- Saturated Fat: 14g
- Cholesterol: 70mg
- Sodium: 210mg
- Total Carbohydrates: 40g
- Dietary Fiber: 1g
- Sugars: 28g
- Protein: 3g
This is definitely a special occasion dessert, but the fact that it’s no-bake means you’re saving energy both in the kitchen and in your utility bill!
Creative Presentation Ideas for Your Icebox Cake
The visual drama of this funfetti Oreo icebox cake is undeniable. Those distinct layers visible from the side, the generous topping of whipped cream swirls, and the confetti-like scatter of rainbow sprinkles make it Instagram-worthy before anyone’s even tasted it.
For special presentations:
- Serve individual slices on colorful plates that complement the sprinkles
- Use a cake stand to elevate the presentation
- Add fresh berries around the base for color contrast
- Create a border of whole Oreos standing upright around the edges
- Drizzle with chocolate or caramel sauce in a decorative pattern
- Add birthday candles for celebrations
Perfect Pairings with This Festive Dessert
This funfetti Oreo icebox cake pairs wonderfully with:
- Coffee or espresso: The bitterness cuts through the sweetness perfectly
- Fresh strawberries: Their tartness balances the rich cream
- Chocolate sauce: Because you can never have too much chocolate
- Sparkling beverages: Champagne for adults, sparkling cider for kids
- Milk: The classic cookie pairing, elevated
Variations and Flavor Twists for Icebox Cake
Cookie Variations
Chocolate Chip Cookie Icebox Cake: Replace Oreos with chocolate chip cookies for a different flavor profile.
Golden Oreo Version: Use Golden Oreos for a vanilla-on-vanilla experience with a lighter appearance.
Mixed Cookie: Alternate layers of different cookies—Oreos, chocolate chip, and vanilla wafers create interesting flavor combinations.
Strawberry Oreo: Use strawberry-flavored Oreos and add strawberry puree to the whipped cream.
Cream Variations
Chocolate Whipped Cream: Add 3 tablespoons of cocoa powder to your whipped cream for a chocolate version.
Peanut Butter Cream: Fold ½ cup of creamy peanut butter into your whipped cream.
Coffee Cream: Add 2 tablespoons of instant espresso powder for a mocha-flavored icebox cake.
Lemon Cream: Add lemon zest and a tablespoon of lemon juice for brightness.
Seasonal Adaptations
Holiday Version: Use red and green sprinkles for Christmas, pastel colors for Easter, or themed sprinkles for any celebration.
S’mores Icebox Cake: Use chocolate graham crackers, add marshmallow fluff to the cream, and top with toasted mini marshmallows.
Mint Chocolate: Use mint Oreos and add peppermint extract to the cream.
Make-Ahead and Storage Tips
The beauty of this funfetti Oreo icebox cake is that it must be made ahead—it’s not optional, it’s essential. The cake actually improves as it sits, reaching peak texture and flavor after 8-12 hours of refrigeration.
You can make this cake up to 2 days in advance. Just wait to add the final whipped cream decoration and sprinkles until a few hours before serving to keep them looking fresh.
Store any leftovers covered in the refrigerator for up to 3 days. The texture continues to evolve, becoming increasingly cake-like as time goes on.
Freezing is possible but not ideal, as the whipped cream texture changes slightly upon thawing. If you do freeze it, thaw in the refrigerator overnight.
Common Questions About Making Icebox Cakes
Can I use Cool Whip instead of whipped cream? You can, though fresh whipped cream tastes noticeably better. If you do use Cool Whip, choose the extra creamy version and fold in the cream cheese for better stability.
How do I prevent my cookies from being too soft? Some softening is desired—that’s what creates the cake texture. If you prefer a bit more bite, reduce the chilling time to 6 hours instead of overnight.
Can I make this in individual servings? Absolutely! Layer in mason jars or clear cups for adorable individual desserts.
Why did my whipped cream get runny? This usually happens if the cream was overwhipped, underwhipped, or not cold enough to begin with. Adding cream cheese helps stabilize it.
Tips for Icebox Cake Success
After making countless versions of this funfetti Oreo icebox cake, I’ve learned some tricks that guarantee success every time.
First, temperature matters. Make sure everything that needs to be cold really is cold—cream, bowl, whisk, even the cookies if you can manage it. Warm ingredients won’t whip properly and can cause the cream to deflate.
Second, don’t rush the assembly. Take your time spreading each layer evenly. Those perfectly level layers are what create those stunning cross-sections when you slice the cake.
Third, resist the temptation to cut into it early. I know it’s hard—it looks so pretty sitting in the fridge! But those cookies need time to soften. The difference between 4 hours and 8 hours is dramatic.
Why This No-Bake Dessert Deserves a Place in Your Recipe Box
This funfetti Oreo icebox cake represents everything I love about desserts that don’t require baking. It’s forgiving, adaptable, impressive-looking, and absolutely delicious. There’s no worry about overbaking, underbaking, or whether your cake will rise properly.
The image of this cake is pure joy—layers of cream and cookies visible through the sides, topped with billowy whipped cream swirls and a generous shower of rainbow sprinkles. Some of those colorful specks inevitably bleed into the white cream, creating beautiful tie-dye effects that make each slice unique.
My best advice: Make this cake for your next celebration, but don’t wait for a special occasion. Sometimes regular Tuesday needs to feel like a party, and this funfetti Oreo icebox cake delivers that celebratory feeling without any fuss. The smiles on everyone’s faces when you bring this to the table? That’s the real reward.

Funfetti Oreo Icebox Cake: The No-Bake Celebration Dessert
Description
An icebox cake is a brilliant concept: layers of cookies and cream that meld together as they chill, creating a cake-like texture without ever touching an oven. This funfetti Oreo version takes that classic idea and turns it into a celebration-worthy dessert that’s as fun to make as it is to eat.
The combination of crushed Oreos, fluffy whipped cream, and colorful sprinkles creates a dessert that’s both nostalgic and exciting. The Oreos soften as they absorb moisture from the cream, transforming into tender cake layers, while the sprinkles add pops of color and a slight crunch. It’s the kind of dessert that makes everyone smile before they even take a bite.
Ingredients
Ingredients for Your Funfetti Oreo Icebox Cake
For the whipped cream layers:
- 2 cups heavy whipping cream, very cold
- ¼ cup powdered sugar
- 1 teaspoon vanilla extract
- ½ cup cream cheese, softened (optional, for stability)
For assembly:
- 36–40 Oreo cookies (about 1 package)
- ½ cup rainbow sprinkles, divided
- Additional whipped cream for topping
- Extra Oreos for garnish (crushed or whole)
Instructions
Complete Instructions for Making This No-Bake Cake
Preparing Your Whipped Cream Base
The foundation of any great icebox cake is perfectly whipped cream. Start by placing your mixing bowl and whisk attachment in the freezer for 15 minutes—cold equipment helps the cream whip faster and hold better.
Pour the cold heavy whipping cream into your chilled bowl. Beat on medium speed until it begins to thicken, about 1-2 minutes. Add the powdered sugar and vanilla extract, then increase the speed to medium-high.
Continue whipping until stiff peaks form—this means when you lift the whisk, the cream stands up straight rather than flopping over. This usually takes 3-4 minutes total. Be careful not to overwhip, or you’ll end up with butter!
If you’re adding cream cheese for stability (which I recommend if you’re making this more than a day ahead), beat the softened cream cheese separately until smooth, then fold it into the whipped cream gently with a spatula.
Fold in about ¼ cup of rainbow sprinkles, reserving the rest for topping and decoration. The sprinkles will bleed slightly into the cream, creating beautiful streaks of color.
Building Your Funfetti Oreo Icebox Cake Layers
Choose your vessel carefully. A 9×9-inch square pan, a loaf pan, or even a springform pan works beautifully. Line it with plastic wrap, leaving plenty of overhang on the sides—this makes unmolding much easier later.
Spread a thin layer of whipped cream on the bottom of your pan. This creates a base and helps the first layer of cookies stick.
Arrange a single layer of Oreo cookies over the cream. You may need to break some cookies to fill gaps—that’s completely fine and won’t show in the final presentation. The goal is complete coverage with minimal gaps.
Spread about one-third of your remaining whipped cream over the cookie layer, making sure to get into all the corners and gaps. Use an offset spatula or the back of a spoon for smooth, even spreading.
Add another complete layer of Oreos, followed by more whipped cream. Repeat this process until you’ve used all your ingredients, ending with a whipped cream layer on top. You should have 3-4 layers of cookies depending on your pan depth.
Adding the Funfetti Finishing Touches
This is where your funfetti Oreo icebox cake really comes to life. Pipe or spread additional whipped cream on top in decorative swirls using a piping bag fitted with a star tip. If you don’t have a piping bag, spreading it with a spoon and creating swoops and peaks works beautifully too.
Shower the top generously with the remaining rainbow sprinkles. Don’t be shy—the more colorful, the better! Add crushed Oreo pieces or whole Oreo halves for extra decoration.
Cover the entire cake gently with plastic wrap, being careful not to disturb your decorations. Refrigerate for at least 6 hours, but preferably overnight. This chilling time is crucial—it allows the cookies to soften and the flavors to meld together.
Serving Your No-Bake Icebox Cake
When you’re ready to serve, use the plastic wrap overhang to lift the cake out of the pan if you’ve used a square or loaf pan. Transfer to a serving plate. If using a springform pan, simply release the sides.
Cut with a sharp knife, wiping it clean between slices for neat presentation. The contrast between the dark Oreo layers and the white cream studded with colorful sprinkles is absolutely stunning.
Nutritional Information for Funfetti Oreo Icebox Cake
Per serving (based on 12 servings):
- Calories: 385
- Total Fat: 24g
- Saturated Fat: 14g
- Cholesterol: 70mg
- Sodium: 210mg
- Total Carbohydrates: 40g
- Dietary Fiber: 1g
- Sugars: 28g
- Protein: 3g
This is definitely a special occasion dessert, but the fact that it’s no-bake means you’re saving energy both in the kitchen and in your utility bill!