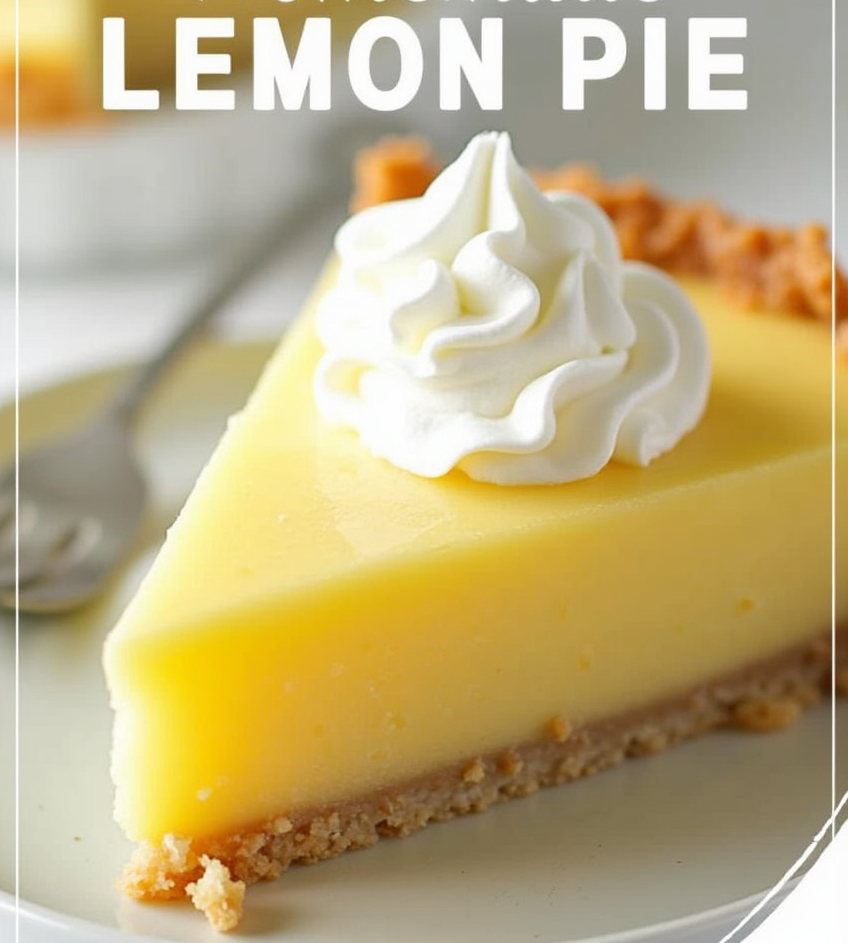
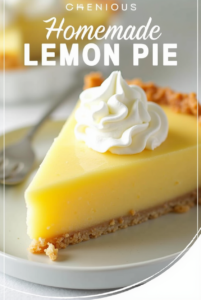
There’s something undeniably refreshing about a slice of homemade lemon pie. The bright citrus flavor balanced with sweetened condensed milk creates a dessert that’s both tangy and sweet, all nestled in a buttery graham cracker crust. This classic American dessert has stood the test of time for good reason—it’s relatively simple to make yet delivers impressive results that brighten any table.
What Makes This Lemon Pie Special
Unlike many lemon pies that rely on artificial flavors or complicated techniques, this recipe embraces simplicity while maximizing flavor. The filling uses fresh lemon juice for authentic tang, while the sweetened condensed milk provides a silky, luxurious texture that sets perfectly every time. Topped with homemade whipped cream, this pie strikes the perfect balance between refreshing citrus and indulgent creaminess.
The Science Behind the Perfect Lemon Pie
The magic of this lemon pie happens when three simple ingredients—sweetened condensed milk, egg yolks, and lemon juice—come together. When the acidic lemon juice meets the proteins in the egg yolks and sweetened condensed milk, a chemical reaction occurs that thickens the mixture even before baking. This reaction, combined with gentle heat from the oven, creates the pie’s signature smooth, custard-like texture.
Breaking Down the Ingredients
For the Graham Cracker Crust:
- 1 ½ cups graham cracker crumbs (170g): Forms the foundation of the crust with its subtle sweetness and distinctive flavor
- 2 Tablespoons granulated sugar: Adds sweetness and helps bind the crust
- 1 Tablespoon brown sugar, firmly packed: Provides depth of flavor with its molasses notes
- 7 Tbsp butter, melted (100g): Acts as the binder that holds the crumbs together; either salted or unsalted works well
For the Lemon Filling:
- 2 14-oz cans sweetened condensed milk (792g): Creates the creamy base and provides sweetness to balance the tart lemon
- 5 large egg yolks: Adds richness and helps thicken the filling through protein coagulation
- 1 cup lemon juice, fresh preferred (236ml): The star ingredient that provides the signature tangy flavor
For the Whipped Cream Topping:
- 1 cup heavy cream (236ml): The foundation of the light, fluffy topping
- ⅓ cup powdered sugar (41g): Sweetens the cream while its cornstarch component helps stabilize the whipped texture
- ½ teaspoon vanilla extract: Adds warmth and depth to the flavor profile
- Freshly grated lemon zest (optional): Intensifies the lemon flavor and adds visual appeal
Step-by-Step Preparation Guide
Preparing the Perfect Graham Cracker Crust
The foundation of any great pie starts with its crust. This graham cracker crust offers the perfect contrast to the smooth, creamy filling with its slight crunch and subtle sweetness.
Start by preheating your oven to 350°F (175°C) to ensure it’s properly heated when your crust is ready. In a medium-sized bowl, combine your graham cracker crumbs with both sugars, mixing them evenly to distribute the sweetness. The combination of white and brown sugars creates a more complex flavor than using just one type.
Once your dry ingredients are mixed, pour in the melted butter. The warm butter acts as the binding agent, holding all those crumbs together when pressed into the pie plate. Stir until the mixture resembles wet sand – every crumb should be coated in butter, but the mixture shouldn’t be soggy.
Transfer this mixture to your 9.5-inch pie plate and press it firmly and evenly across the bottom and up the sides. Using the bottom of a measuring cup can help create an even layer with a smooth finish. The crust should be about ¼-inch thick throughout.
Bake the crust for exactly 10 minutes. This short baking time allows the butter to set and the crust to firm up slightly without becoming too hard or burnt. The pre-baking step is crucial as it prevents the crust from becoming soggy once the filling is added.
Creating the Luscious Lemon Filling
While your crust is baking, prepare the filling to streamline the process. In a large bowl, combine the sweetened condensed milk and egg yolks. Whisk these together thoroughly until completely blended – this creates the rich base for your filling.
Now comes the critical step: adding the lemon juice. Pour it in gradually while continuously whisking. You’ll notice the mixture immediately begins to thicken as the acid in the lemon juice reacts with the proteins in the egg yolks and milk. This chemical reaction, called acid-induced protein denaturation, is what gives lemon pie its signature texture.
Ensure all ingredients are thoroughly combined with no streaks remaining. The filling should be smooth, thick, and pour like heavy cream. If using fresh lemons (which is highly recommended for the best flavor), you’ll need approximately 6-8 medium lemons to yield one cup of juice.
Once your pre-baked crust is ready, remove it from the oven and carefully pour in the prepared filling. The warm crust creates a slight seal against the filling, which helps prevent sogginess.
Return the pie to the 350°F (175°C) oven and bake for 18-20 minutes. You’ll know it’s done when the edges are set and the center is mostly set but still has a slight jiggle when gently shaken – similar to how a cheesecake looks when properly baked. Avoid overbaking, which can cause cracks and affect the silky texture.
Cooling and Setting
Proper cooling is crucial for achieving the perfect texture in your lemon pie. After removing from the oven, allow the pie to cool at room temperature for about 30 minutes. This gradual cooling helps prevent the top from cracking.
Once it’s no longer hot, transfer the pie to the refrigerator and chill for at least 6-8 hours, though overnight is preferable. This extended chilling time allows the filling to set completely and the flavors to fully develop. Patience pays off here – rushing this step might result in a filling that’s too soft or flavors that haven’t fully melded.
Whipping Up the Perfect Cream Topping
Just before serving, prepare your homemade whipped cream topping. For best results, chill your metal mixing bowl and beaters in the freezer for about 15 minutes before starting. The cold temperature helps the cream whip faster and achieve greater volume.
Combine the heavy cream, powdered sugar, and vanilla extract in your chilled bowl. Starting on low speed prevents splattering, while gradually increasing to high speed incorporates air efficiently. Beat until the cream forms stiff peaks – when you lift the beater, the cream should stand up with peaks that don’t fold over.
Pipe or dollop the freshly made whipped cream onto your chilled pie just before serving. If desired, garnish with a light sprinkle of freshly grated lemon zest for an extra punch of citrus aroma and a beautiful visual contrast against the white cream.
Serving and Storage Tips
For the cleanest slices, use a sharp knife dipped in hot water and wiped clean between each cut. This prevents the filling from sticking to the knife and creates picture-perfect slices.
This lemon pie is best enjoyed within 2-3 days of making. Store it in the refrigerator, loosely covered with plastic wrap after the first cutting to prevent the top from drying out. Avoid storing it near foods with strong odors, as the pie can absorb those flavors.
While you can freeze this pie for up to one month, the texture of the filling may change slightly upon thawing. If you do freeze it, thaw overnight in the refrigerator and add fresh whipped cream after thawing for best results.
Variations to Try
While this classic recipe is perfect as is, here are some delicious variations to consider:
- Citrus Medley Pie: Replace half the lemon juice with freshly squeezed lime or grapefruit juice for a more complex citrus flavor.
- Lemon-Blueberry Pie: Add a layer of blueberry compote between the crust and filling for a beautiful color contrast and complementary flavor.
- Coconut Lemon Pie: Add toasted coconut flakes to the graham cracker crust and coconut extract to the whipped cream for a tropical twist.
- Ginger Lemon Pie: Include crushed gingersnap cookies in place of some graham crackers in the crust for a spicy kick that pairs wonderfully with lemon.
- Meringue-Topped Lemon Pie: Use the leftover egg whites to make a traditional meringue topping instead of whipped cream.
Troubleshooting Common Issues
Even experienced bakers can run into occasional challenges. Here are solutions to common lemon pie problems:
- Runny filling: Most likely caused by underbaking or insufficient chilling time. Ensure you’re baking until the edges are completely set and the center is just slightly jiggly, then chill for at least 8 hours.
- Cracked filling: Usually results from overbaking. Watch your pie carefully in the final minutes of baking and remember that residual heat will continue cooking the filling slightly after removal from the oven.
- Soggy crust: Make sure to pre-bake your crust as directed and allow it to cool slightly before adding the filling.
- Weeping whipped cream: Add the whipped cream just before serving, or stabilize it by adding 1-2 teaspoons of unflavored gelatin (bloomed in cold water and dissolved over low heat) to the cold cream before whipping.
Why This Homemade Lemon Pie Will Become Your Go-To Dessert
There’s something about a homemade lemon pie that feels both nostalgic and special. Perhaps it’s the bright yellow color that brings sunshine to any table, or maybe it’s the perfect balance of sweet and tart flavors that satisfies without being cloying.
This particular recipe stands out for its straightforward approach that yields consistently excellent results. The ingredients are pantry staples, the technique is accessible to bakers of all skill levels, and the end result is undeniably impressive. It’s the kind of dessert that prompts guests to ask for the recipe and becomes requested at family gatherings.
Whether you’re making it for a special occasion or simply because you’re craving something bright and refreshing, this homemade lemon pie delivers satisfaction in every slice. The contrast between the crisp, buttery crust, the smooth, tangy filling, and the light, airy whipped cream creates a dessert experience that’s both comforting and sophisticated.
So gather your ingredients, set aside a little time, and treat yourself to this timeless classic. Your taste buds—and anyone lucky enough to share—will thank you.