Last summer, I volunteered to bring dessert to our neighborhood potluck. I wanted something that captured the essence of homemade cherry pie—that perfect balance of buttery crust and sweet-tart cherry filling—but without the fuss of rolling out pastry and crimping edges. That’s when inspiration struck, and these Easy Cherry Pie Bars were born. They were such a hit that I had three people ask for the recipe before the evening was over, and one neighbor still texts me every few months asking when I’ll make them again.
What makes these bars so special is their simplicity. Unlike traditional pie that requires skill and patience, these bars come together quickly with ingredients you likely have in your pantry. The buttery shortbread crust provides the perfect foundation, while the crumbly topping adds delightful texture. And that cherry filling? It’s vibrant, fruity, and just sweet enough without being cloying.
Why Cherry Pie Bars Are Better Than Traditional Pie
Don’t get me wrong—I love a classic cherry pie—but these bars have several advantages. First, they’re much easier to make. No pie dough to chill, roll, or worry about shrinking. Second, they’re perfectly portable. Try bringing a lattice-top pie to a picnic without disaster—these bars travel beautifully. Third, portion control is built in. Each bar is a perfect individual serving, eliminating the “just a little more” pie dilemma.
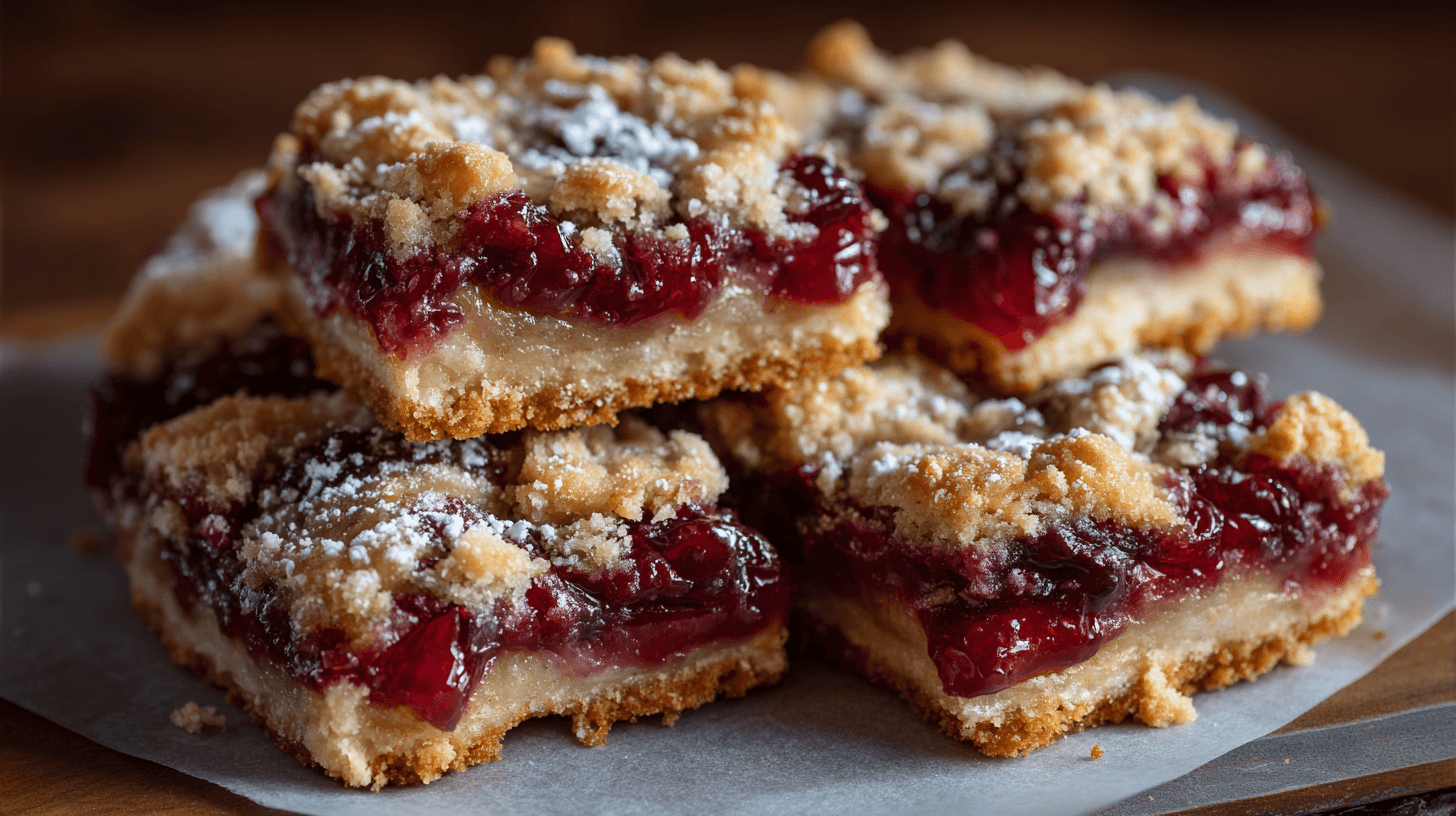
The visual appeal is undeniable too. When you cut into these bars, you see distinct, beautiful layers—the golden crust, the jewel-toned cherry filling, and that crumbly streusel topping that’s often dusted with powdered sugar. They look like they came from a fancy bakery, but I’ll let you in on a secret: they’re almost foolproof to make.
Ingredients for Easy Cherry Pie Bars
Crust and Topping:
- 3 cups all-purpose flour
- 1½ cups granulated sugar
- 1 teaspoon baking powder
- ¼ teaspoon salt
- 1 cup cold unsalted butter, cubed
- 1 large egg, lightly beaten
- 1 teaspoon vanilla extract
- ½ teaspoon almond extract
Cherry Filling:
- 42 ounces cherry pie filling (two 21-ounce cans) or homemade equivalent
- 1 teaspoon lemon zest
- ½ teaspoon almond extract
- 2 tablespoons cornstarch (if using fresh cherries)
Finishing:
- 2 tablespoons powdered sugar for dusting
- 1 tablespoon coarse sugar (optional, for sparkle)
Step-by-Step Instructions for Cherry Pie Bars
Building the Foundation
Step 1: Prepare Your Baking Pan Preheat your oven to 350°F (175°C). Line a 9×13-inch baking pan with parchment paper or aluminum foil, leaving overhang on two sides. This creates handles that make removing the bars effortless. Spray lightly with cooking spray.
Step 2: Make the Crust Dough In a large bowl, whisk together flour, sugar, baking powder, and salt. Add the cold, cubed butter. Using a pastry cutter or your fingers, work the butter into the flour mixture until it resembles coarse crumbs. Think of the texture of streusel topping—that’s what you’re going for. Add the beaten egg and extracts, mixing just until the dough begins to come together. It should be crumbly but hold together when squeezed.
Step 3: Press the Bottom Crust Reserve about 1½ cups of the crumb mixture for topping and set aside. Press the remaining mixture firmly into the bottom of your prepared pan, creating an even layer. I use the bottom of a measuring cup to really pack it down. This ensures a sturdy base that won’t crumble when you cut the bars.
Creating the Layers
Step 4: Prepare the Cherry Filling If using canned pie filling, enhance it by stirring in lemon zest and almond extract. If making homemade filling with fresh or frozen cherries, combine cherries, sugar, cornstarch, and flavorings in a saucepan and cook over medium heat until thickened, about 10 minutes. Let cool slightly before using.
Step 5: Assemble the Bars Spread the cherry filling evenly over the pressed crust layer, leaving about ¼ inch border around the edges. This prevents overflow during baking. Crumble the reserved topping mixture over the cherries, covering as much surface area as possible. Don’t worry about perfection—the rustic, crumbly look is part of the charm.
Baking to Golden Perfection
Step 6: Bake Place the pan in the preheated oven and bake for 45-50 minutes. You’re looking for golden-brown edges and a lightly golden topping. The cherry filling should be bubbling around the edges. If the topping is browning too quickly, tent loosely with aluminum foil for the last 10 minutes.
Step 7: Cool Completely This is crucial! Remove from the oven and let cool in the pan for at least 2 hours. The filling needs time to set, or your bars will be messy when cut. For cleanest slices, refrigerate for 1 hour after cooling to room temperature.
Finishing Touches
Step 8: Cut and Serve Using the parchment overhang, lift the entire block of bars onto a cutting board. With a sharp knife, cut into squares or rectangles. Dust generously with powdered sugar just before serving. The contrast between the white powdered sugar and deep red cherries is visually stunning, as you can see in the beautiful photo.
Nutritional Information
Per serving (1 bar, recipe makes 24):
- Calories: 245
- Total Fat: 9g
- Saturated Fat: 5g
- Cholesterol: 30mg
- Sodium: 85mg
- Total Carbohydrates: 39g
- Dietary Fiber: 1g
- Sugars: 24g
- Protein: 3g
Note: Nutritional values are approximate and based on canned cherry pie filling.
Presentation Tips for Cherry Pie Bars
The key to bakery-worthy presentation is in the details. First, make sure your cuts are clean and even. Wipe your knife between cuts for the sharpest lines. Arrange the bars on a white serving platter or cake stand to make the red cherries pop.
The powdered sugar dusting is best done right before serving. Use a fine-mesh sieve for an even, professional-looking snow effect. For special occasions, I like to add a light sprinkle of coarse sugar over the crumbly topping before baking—it creates a beautiful sparkle and adds a subtle crunch.
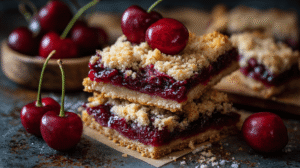
Stack a few bars at slight angles to show off the layers. The image shows this technique perfectly—you can see the golden crust, the thick cherry filling, and the crumbly topping in all their glory.
Perfect Pairings
Cherry Pie Bars are wonderful on their own, but these pairings take them to another level:
Vanilla Ice Cream: The classic pairing for any cherry dessert. Serve bars slightly warm with a scoop on top.
Whipped Cream: Light and airy whipped cream balances the sweet fruit filling.
Coffee or Tea: These bars make an excellent afternoon treat with a hot beverage.
Sparkling Wine: For adult gatherings, try pairing with prosecco or champagne.
Recipe Variations and Substitutions
Different Fruit Options:
- Blueberry Pie Bars: Replace cherry filling with blueberry pie filling
- Mixed Berry Bars: Combine strawberry and raspberry for a summer twist
- Apple Crumble Bars: Use apple pie filling and add cinnamon to the topping
- Peach Cobbler Bars: Swap in peach filling and add a pinch of nutmeg
Crust Variations:
- Coconut Crust: Add ½ cup shredded coconut to the crust mixture
- Nutty Topping: Mix ½ cup chopped almonds or pecans into the crumble topping
- Lemon Bars: Add 2 tablespoons lemon zest to the crust for extra brightness
Dietary Modifications:
- Gluten-Free: Use a 1:1 gluten-free flour blend
- Vegan: Replace butter with cold vegan butter and use a flax egg
- Lower Sugar: Use a no-sugar-added cherry filling and reduce crust sugar by ¼ cup
Frequently Asked Questions About Cherry Pie Bars
Can I use fresh cherries instead of canned filling? A: Absolutely! You’ll need about 5 cups pitted fresh cherries. Toss with ¾ cup sugar, 3 tablespoons cornstarch, and the flavorings. Cook until thickened before using.
Why is my crust falling apart? A: The butter might have been too warm, or the mixture wasn’t pressed firmly enough. Make sure butter is cold and really pack down the bottom layer.
How do I get clean cuts? A: Let the bars cool completely, then refrigerate. Use a sharp knife and wipe it clean between each cut. Chilled bars cut much cleaner than room temperature ones.
Can I make these ahead of time? A: Yes! These actually taste even better the next day as the flavors meld. Store covered at room temperature for up to 2 days, or refrigerate for up to 5 days.
My topping sank into the filling. What happened? A: The filling was likely too hot when you added the topping. Let homemade filling cool for 15-20 minutes before assembly, or use cold canned filling.
Can I freeze Cherry Pie Bars? A: Yes! Freeze individual bars wrapped in plastic wrap, then place in a freezer bag for up to 3 months. Thaw overnight in the refrigerator.
Storage and Make-Ahead Tips
Cherry Pie Bars store beautifully, making them perfect for meal prep or advance baking. At room temperature, keep them covered loosely with foil for up to 2 days. The crust will stay crispest this way. For longer storage, place bars in a single layer in an airtight container and refrigerate for up to 5 days.
These bars freeze exceptionally well. Cut them into individual portions, wrap each tightly in plastic wrap, then place in a freezer-safe container with parchment between layers. They’ll keep for up to 3 months. To serve, thaw in the refrigerator overnight or at room temperature for a few hours. You can even eat them frozen for a fun, cold treat!
Troubleshooting Common Issues
Problem: Filling leaks out during baking Solution: Leave a small border around edges and don’t overfill. Make sure bottom crust is pressed firmly with no gaps.
Problem: Topping is too hard Solution: The butter was probably too warm when mixing. Cold butter creates a tender, crumbly topping. Also, be careful not to overbake.
Problem: Bars are too crumbly Solution: Let them cool completely before cutting. The filling needs time to set and act as a binding agent between layers.
My Personal Baker’s Tip
Here’s my secret to taking these bars from good to absolutely incredible: add a tiny pinch of black pepper to your cherry filling. I know it sounds strange, but trust me—it enhances the cherry flavor in an unexpected way, making them taste more complex and interesting. You won’t taste pepper; you’ll just notice the cherry flavor is somehow brighter and more dimensional.
Also, don’t skip the almond extract. It’s a classic pairing with cherries and really makes the fruit flavor sing. If you’re nervous about almond flavor, start with just ¼ teaspoon—a little goes a long way. But I promise, once you try it, you’ll understand why traditional cherry pie recipes have used this combination for generations.
Conclusion
Easy Cherry Pie Bars prove that impressive desserts don’t have to be complicated. With their buttery shortbread crust, vibrant cherry filling, and crumbly topping, they deliver all the flavor of traditional cherry pie in a more convenient, portable form. Whether you’re bringing them to a potluck, serving them at a family gathering, or simply enjoying one with your afternoon tea, these bars are guaranteed to become a treasured recipe in your collection.
The beauty of this recipe lies in its versatility and forgiving nature. Even if you’ve never made a pie crust in your life, you can master these bars. So grab those cans of cherry pie filling from your pantry, and get baking. Your kitchen is about to smell amazing!
Print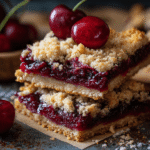
Easy Cherry Pie Bars: A Slice of Heaven in Every Bite
Description
Don’t get me wrong—I love a classic cherry pie—but these bars have several advantages. First, they’re much easier to make. No pie dough to chill, roll, or worry about shrinking. Second, they’re perfectly portable. Try bringing a lattice-top pie to a picnic without disaster—these bars travel beautifully. Third, portion control is built in. Each bar is a perfect individual serving, eliminating the “just a little more” pie dilemma.
The visual appeal is undeniable too. When you cut into these bars, you see distinct, beautiful layers—the golden crust, the jewel-toned cherry filling, and that crumbly streusel topping that’s often dusted with powdered sugar. They look like they came from a fancy bakery, but I’ll let you in on a secret: they’re almost foolproof to make.
Ingredients
Ingredients for Easy Cherry Pie Bars
Crust and Topping:
- 3 cups all-purpose flour
- 1½ cups granulated sugar
- 1 teaspoon baking powder
- ¼ teaspoon salt
- 1 cup cold unsalted butter, cubed
- 1 large egg, lightly beaten
- 1 teaspoon vanilla extract
- ½ teaspoon almond extract
Cherry Filling:
- 42 ounces cherry pie filling (two 21-ounce cans) or homemade equivalent
- 1 teaspoon lemon zest
- ½ teaspoon almond extract
- 2 tablespoons cornstarch (if using fresh cherries)
Finishing:
- 2 tablespoons powdered sugar for dusting
- 1 tablespoon coarse sugar (optional, for sparkle)
Instructions
Step-by-Step Instructions for Cherry Pie Bars
Building the Foundation
Step 1: Prepare Your Baking Pan Preheat your oven to 350°F (175°C). Line a 9×13-inch baking pan with parchment paper or aluminum foil, leaving overhang on two sides. This creates handles that make removing the bars effortless. Spray lightly with cooking spray.
Step 2: Make the Crust Dough In a large bowl, whisk together flour, sugar, baking powder, and salt. Add the cold, cubed butter. Using a pastry cutter or your fingers, work the butter into the flour mixture until it resembles coarse crumbs. Think of the texture of streusel topping—that’s what you’re going for. Add the beaten egg and extracts, mixing just until the dough begins to come together. It should be crumbly but hold together when squeezed.
Step 3: Press the Bottom Crust Reserve about 1½ cups of the crumb mixture for topping and set aside. Press the remaining mixture firmly into the bottom of your prepared pan, creating an even layer. I use the bottom of a measuring cup to really pack it down. This ensures a sturdy base that won’t crumble when you cut the bars.
Creating the Layers
Step 4: Prepare the Cherry Filling If using canned pie filling, enhance it by stirring in lemon zest and almond extract. If making homemade filling with fresh or frozen cherries, combine cherries, sugar, cornstarch, and flavorings in a saucepan and cook over medium heat until thickened, about 10 minutes. Let cool slightly before using.
Step 5: Assemble the Bars Spread the cherry filling evenly over the pressed crust layer, leaving about ¼ inch border around the edges. This prevents overflow during baking. Crumble the reserved topping mixture over the cherries, covering as much surface area as possible. Don’t worry about perfection—the rustic, crumbly look is part of the charm.
Baking to Golden Perfection
Step 6: Bake Place the pan in the preheated oven and bake for 45-50 minutes. You’re looking for golden-brown edges and a lightly golden topping. The cherry filling should be bubbling around the edges. If the topping is browning too quickly, tent loosely with aluminum foil for the last 10 minutes.
Step 7: Cool Completely This is crucial! Remove from the oven and let cool in the pan for at least 2 hours. The filling needs time to set, or your bars will be messy when cut. For cleanest slices, refrigerate for 1 hour after cooling to room temperature.
Finishing Touches
Step 8: Cut and Serve Using the parchment overhang, lift the entire block of bars onto a cutting board. With a sharp knife, cut into squares or rectangles. Dust generously with powdered sugar just before serving. The contrast between the white powdered sugar and deep red cherries is visually stunning, as you can see in the beautiful photo.
Nutritional Information
Per serving (1 bar, recipe makes 24):
Calories: 245
Total Fat: 9g
Saturated Fat: 5g
Cholesterol: 30mg
Sodium: 85mg
Total Carbohydrates: 39g
Dietary Fiber: 1g
Sugars: 24g
Protein: 3g
Note: Nutritional values are approximate and based on canned cherry pie filling.
Presentation Tips for Cherry Pie Bars
The key to bakery-worthy presentation is in the details. First, make sure your cuts are clean and even. Wipe your knife between cuts for the sharpest lines. Arrange the bars on a white serving platter or cake stand to make the red cherries pop.
The powdered sugar dusting is best done right before serving. Use a fine-mesh sieve for an even, professional-looking snow effect. For special occasions, I like to add a light sprinkle of coarse sugar over the crumbly topping before baking—it creates a beautiful sparkle and adds a subtle crunch.
Stack a few bars at slight angles to show off the layers. The image shows this technique perfectly—you can see the golden crust, the thick cherry filling, and the crumbly topping in all their glory.
Perfect Pairings
Cherry Pie Bars are wonderful on their own, but these pairings take them to another level:
Vanilla Ice Cream: The classic pairing for any cherry dessert. Serve bars slightly warm with a scoop on top.
Whipped Cream: Light and airy whipped cream balances the sweet fruit filling.
Coffee or Tea: These bars make an excellent afternoon treat with a hot beverage.
Sparkling Wine: For adult gatherings, try pairing with prosecco or champagne.
Recipe Variations and Substitutions
Different Fruit Options:
Blueberry Pie Bars: Replace cherry filling with blueberry pie filling
Mixed Berry Bars: Combine strawberry and raspberry for a summer twist
Apple Crumble Bars: Use apple pie filling and add cinnamon to the topping
Peach Cobbler Bars: Swap in peach filling and add a pinch of nutmeg
Crust Variations:
Coconut Crust: Add ½ cup shredded coconut to the crust mixture
Nutty Topping: Mix ½ cup chopped almonds or pecans into the crumble topping
Lemon Bars: Add 2 tablespoons lemon zest to the crust for extra brightness
Dietary Modifications:
Gluten-Free: Use a 1:1 gluten-free flour blend
Vegan: Replace butter with cold vegan butter and use a flax egg
Lower Sugar: Use a no-sugar-added cherry filling and reduce crust sugar by ¼ cup
Frequently Asked Questions About Cherry Pie Bars
Can I use fresh cherries instead of canned filling? A: Absolutely! You’ll need about 5 cups pitted fresh cherries. Toss with ¾ cup sugar, 3 tablespoons cornstarch, and the flavorings. Cook until thickened before using.
Why is my crust falling apart? A: The butter might have been too warm, or the mixture wasn’t pressed firmly enough. Make sure butter is cold and really pack down the bottom layer.
How do I get clean cuts? A: Let the bars cool completely, then refrigerate. Use a sharp knife and wipe it clean between each cut. Chilled bars cut much cleaner than room temperature ones.
Can I make these ahead of time? A: Yes! These actually taste even better the next day as the flavors meld. Store covered at room temperature for up to 2 days, or refrigerate for up to 5 days.
My topping sank into the filling. What happened? A: The filling was likely too hot when you added the topping. Let homemade filling cool for 15-20 minutes before assembly, or use cold canned filling.
Can I freeze Cherry Pie Bars? A: Yes! Freeze individual bars wrapped in plastic wrap, then place in a freezer bag for up to 3 months. Thaw overnight in the refrigerator.