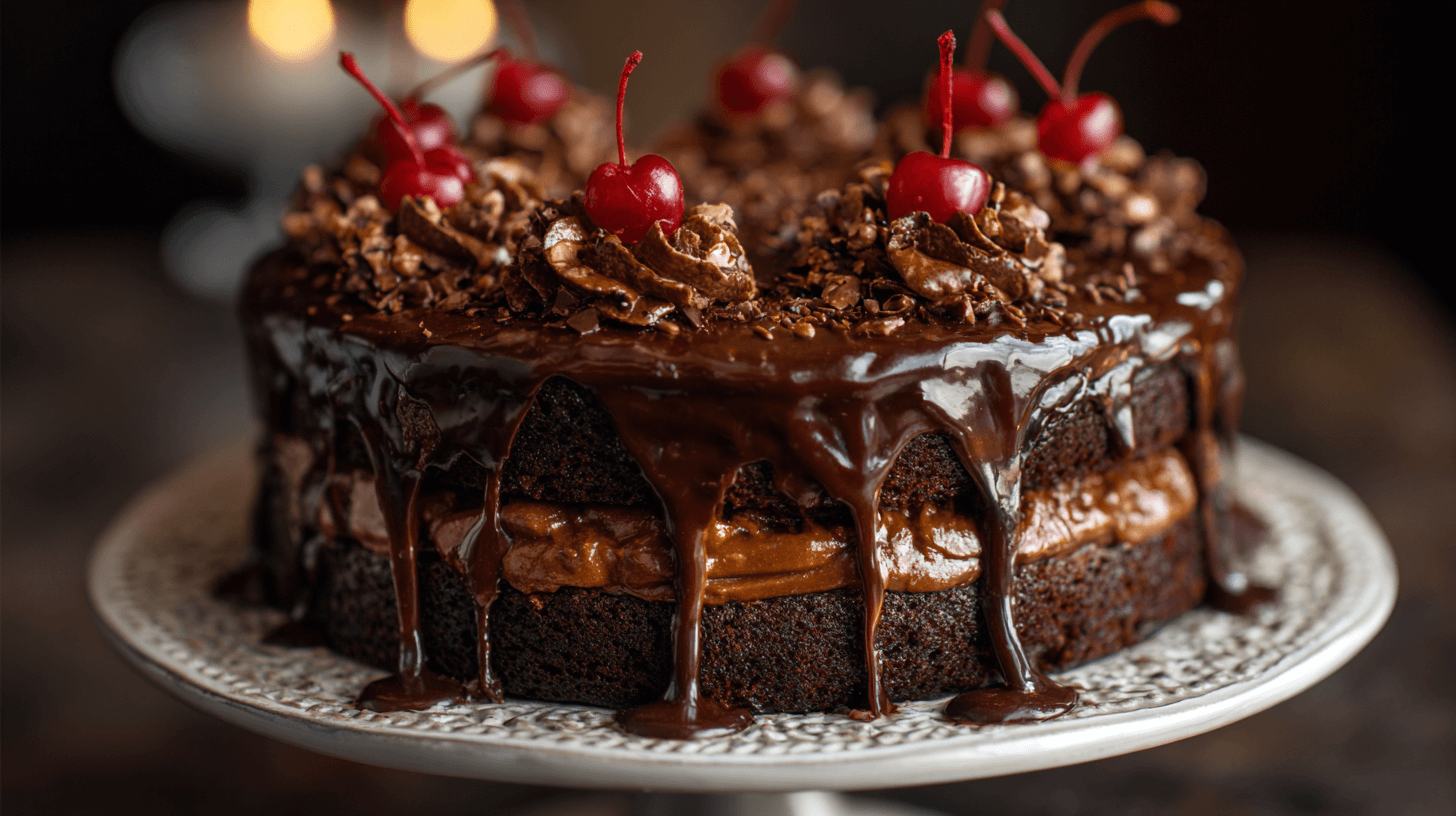
When I first saw this towering chocolate layer cake dripping with chocolate ganache and crowned with glossy cherries, my heart skipped a beat. This isn’t just another chocolate cake recipe—this is a statement piece, a celebration of everything chocolate lovers hold dear. I made this for my husband’s birthday last year, and the moment I set it on the table, the entire room fell silent. Then came the gasps, the camera phones, and the chorus of “Can we eat it now?”
This Decadent Chocolate Layer Cake represents everything a show-stopping chocolate dessert should be: multiple layers of rich, moist chocolate cake, generous layers of chocolate filling, a glossy chocolate ganache that cascades dramatically down the sides, and the finishing touch—chocolate shavings and maraschino cherries that make it look like it came from an upscale patisserie.
Why This Chocolate Layer Cake Is For Real Chocolate Lovers
The title isn’t kidding—this cake is exclusively for true chocolate devotees. Every single component delivers intense chocolate flavor: the cake layers are deeply chocolatey, the filling adds creamy richness, and the ganache provides that smooth, dark chocolate finish. If you’re someone who prefers subtle chocolate flavor, this probably isn’t your cake. But if you’re the type who orders double chocolate everything and thinks most chocolate desserts aren’t chocolatey enough, welcome home.
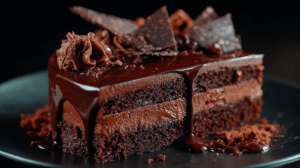
What makes this chocolate layer cake truly special is its architectural beauty. The visible layers create stunning visual appeal when you slice into it, revealing perfect strata of dark chocolate cake alternating with lighter chocolate filling. It’s the kind of dessert that makes people pause and appreciate it before diving in—though diving in doesn’t take long once they see it.
The Art of Layering Chocolate Cake
Creating a multi-layer chocolate cake might seem intimidating, but it’s remarkably straightforward once you understand the technique. The key is patience: allowing each layer to cool completely, spreading your filling evenly, and taking your time with the ganache. Rush any of these steps, and you risk a lopsided cake or ganache that slides right off.
I learned this the hard way when I attempted my first layer cake for a dinner party. I was running late and tried to assemble it while the layers were still warm. The filling melted, the ganache pooled at the bottom, and I ended up with a chocolate mess that, while delicious, looked nothing like the elegant dessert I’d envisioned. Since then, I always bake my layers the day before, giving them plenty of time to cool and firm up.
Ingredients for Your Chocolate Layer Masterpiece
This recipe makes a substantial four-layer chocolate cake that serves 12-16 people generously. Here’s what you’ll need:
Chocolate Cake Layers:
- 3 cups all-purpose flour
- 2½ cups granulated sugar
- 1 cup Dutch-process cocoa powder
- 2 teaspoons baking soda
- 1½ teaspoons baking powder
- 1½ teaspoons salt
- 4 large eggs, room temperature
- 1½ cups buttermilk, room temperature
- 1½ cups hot brewed coffee
- ¾ cup vegetable oil
- 1 tablespoon pure vanilla extract
Filling:
- 2 cups heavy cream
- 8 ounces semi-sweet chocolate, finely chopped
- 4 tablespoons unsalted butter
- 2 tablespoons powdered sugar
Ganache:
- 16 ounces dark chocolate (60-70% cacao), finely chopped
- 2 cups heavy cream
- 3 tablespoons unsalted butter
- 2 tablespoons corn syrup
Decoration:
- 1 cup chocolate shavings or curls
- 10-12 maraschino cherries, drained and patted dry
- Chocolate chips or mini chocolate pieces (optional)
Step-by-Step Instructions for Chocolate Layer Cake Perfection
Creating Your Chocolate Cake Layers
Step 1: Preparation is Key Preheat your oven to 350°F (175°C). Prepare four 8-inch or three 9-inch round cake pans by greasing them thoroughly with butter, dusting with cocoa powder (not flour—cocoa keeps the exterior dark), and lining the bottoms with parchment paper rounds. This triple protection ensures your precious chocolate layers release flawlessly.
Step 2: Mix the Dry Ingredients In your largest mixing bowl, whisk together flour, sugar, cocoa powder, baking soda, baking powder, and salt. Take your time with this—you want those leavening agents evenly distributed throughout the mixture. Any lumps in the cocoa powder should be sifted out for a perfectly smooth chocolate cake batter.
Step 3: Combine Wet Ingredients In a separate bowl, whisk the eggs until slightly foamy. Add buttermilk, vegetable oil, and vanilla extract, whisking until thoroughly combined. Room temperature ingredients are crucial here—they emulsify better and create a more uniform batter.
Step 4: Build Your Batter Add the wet ingredients to the dry ingredients and mix on medium speed for 2 minutes. The batter will be thick and somewhat lumpy at this stage—that’s perfectly fine. Now slowly stream in the hot coffee while mixing on low speed. The batter will become quite thin and pourable, which is exactly what creates that ultra-moist texture in the finished chocolate layer cake.
Step 5: Bake to Perfection Divide the batter evenly among your prepared pans. If you have a kitchen scale, this is the time to use it—even layers are crucial for a professional-looking cake. Bake for 25-30 minutes for 8-inch pans, or 30-35 minutes for 9-inch pans. The cake is done when a toothpick inserted in the center comes out with a few moist crumbs.
Step 6: Cool Completely Let the chocolate cakes cool in their pans for 15 minutes, then turn them out onto wire racks to cool completely—this takes at least 2 hours. Don’t rush this step! Warm cake layers will make your filling melt and slide.
Preparing the Chocolate Filling
Step 7: Make Chocolate Cream Filling Heat 2 cups of heavy cream until it just begins to simmer. Pour over the 8 ounces of chopped chocolate and let sit for 3 minutes. Stir until smooth, then add butter and powdered sugar. Mix until fully incorporated. Refrigerate for 2-3 hours until it reaches a thick, spreadable consistency similar to frosting.
Creating the Perfect Chocolate Ganache
Step 8: Prepare Show-Stopping Ganache Place your 16 ounces of chopped dark chocolate in a large heatproof bowl. Heat 2 cups of heavy cream until steaming and just beginning to bubble around the edges. Pour over the chocolate and let stand for 3 minutes without stirring. Then stir from the center outward until completely smooth. Add butter and corn syrup, stirring until glossy and uniform.
Step 9: Achieve Perfect Consistency Let the ganache cool at room temperature for about 30-40 minutes, stirring occasionally. You want it thick enough to coat the back of a spoon but still pourable for those gorgeous drips down the sides of your chocolate layer cake.
Assembling Your Chocolate Layer Cake
Step 10: Level Your Layers Using a long serrated knife or cake leveler, trim any domed tops from your chocolate cake layers so they’re perfectly flat. This ensures stability in your finished layer cake.
Step 11: Build Your Layers Place one cake layer on your serving plate or cake stand. Spread about ½ cup of chocolate filling evenly over the top, leaving a small border around the edge. Place the second layer on top and repeat. Continue with remaining layers. The final layer should go top-side up (the flat side you leveled).
Step 12: Apply Crumb Coat Spread a very thin layer of chocolate filling or ganache over the entire cake—top and sides. This “crumb coat” traps any loose crumbs. Refrigerate for 30 minutes until firm.
Step 13: The Grand Finale Pour the prepared ganache over the center of the cake, letting it spread naturally. Use an offset spatula to encourage it toward the edges, allowing it to drip down the sides in those beautiful, organic streams. Don’t over-smooth—those drips are part of the charm!
Step 14: Decorate Like a Pro While the ganache is still slightly soft, press chocolate shavings gently onto the top and around the base of the cake. Arrange maraschino cherries on top in an artful pattern. Add extra chocolate chips or curls if desired. Refrigerate for at least 1 hour before serving to let everything set properly.
Expert Tips for Chocolate Layer Cake Success
After making numerous layer cakes, here are my hard-won insights:
Invest in Quality Chocolate: Your chocolate layer cake is only as good as the chocolate you use. For the ganache especially, splurge on high-quality chocolate with at least 60% cacao content.
Temperature Matters: All dairy ingredients should be at room temperature for the cake batter, but you want chilled ingredients for making the filling firm up properly.
Level Your Layers: This seems fussy, but it’s the difference between a cake that looks homemade and one that looks professional. A cake leveler costs about $10 and is worth every penny.
Support Your Cake: Insert 4-5 wooden dowels or thick straws through the layers if your cake is quite tall. Trim them level with the top. This prevents upper layers from sinking into lower ones.
Make It Ahead: The cake layers can be baked 2 days in advance, wrapped tightly in plastic wrap, and stored at room temperature. The filling can be made a day ahead and refrigerated.
Chocolate Layer Cake Variations
While this recipe is perfection, here are some creative twists:
Black Forest Chocolate Cake: Add a layer of cherry pie filling between the chocolate layers. Replace some filling with whipped cream for a lighter texture.
Mocha Layer Cake: Add 2 tablespoons of instant espresso powder to the cake batter and 1 tablespoon to the ganache for coffee-chocolate bliss.
Chocolate Peanut Butter Dream: Replace one layer of chocolate filling with peanut butter frosting. Drizzle melted peanut butter over the ganache.
Chocolate Raspberry Elegance: Spread raspberry preserves between layers along with the chocolate filling. Top with fresh raspberries instead of cherries.
Chocolate Caramel Heaven: Drizzle salted caramel sauce between layers and over the finished ganache. Sprinkle with flaky sea salt.
Serving Your Chocolate Layer Cake
This dramatic dessert deserves an equally impressive presentation:
- Slice with a hot, clean knife for pristine cuts that showcase the layers
- Serve slightly chilled for the cleanest slices, or at room temperature for the most flavor
- Pair with vanilla bean ice cream or fresh whipped cream
- Add fresh berries on the side for color and a tart contrast
- Dust individual plates with cocoa powder before placing the slice
- Serve with espresso or coffee to enhance the chocolate notes
Storage and Make-Ahead Instructions
Room Temperature: Cover loosely and keep for up to 2 days in a cool room (below 70°F).
Refrigerated: Store covered for up to 5 days. Bring to room temperature for 30 minutes before serving for best flavor and texture.
Freezing: Wrap well-chilled cake in plastic wrap, then aluminum foil. Freeze for up to 2 months. Thaw overnight in the refrigerator.
Components: You can bake the layers and freeze them separately for up to 3 months. Make the filling and ganache fresh when you’re ready to assemble.
Nutritional Information
Per serving (1 slice, assuming 16 slices):
- Calories: 650
- Total Fat: 38g
- Saturated Fat: 22g
- Cholesterol: 95mg
- Sodium: 420mg
- Total Carbohydrates: 75g
- Dietary Fiber: 5g
- Sugars: 56g
- Protein: 8g
Pairing Suggestions for Chocolate Layer Cake
The intense chocolate flavor pairs beautifully with:
Wines:
- Port (Ruby or Tawny)
- Cabernet Sauvignon
- Late Harvest Zinfandel
- Recioto della Valpolicella
Coffees:
- Dark roast Colombian
- Espresso
- Cappuccino
- Irish coffee
Other Beverages:
- Cold whole milk
- Hot chocolate
- Vanilla or cherry liqueur
- Cream sherry
Frequently Asked Questions About Chocolate Layer Cake
How do I prevent my layers from sliding? Make sure each layer is completely cool before assembly. Chill the assembled cake for 30 minutes between adding layers if working in a warm kitchen.
Can I make this with fewer layers? Absolutely! Three layers works wonderfully. Just adjust your filling amounts accordingly.
My ganache is too thick to pour. Help! Microwave it in 10-second bursts, stirring between each, until it reaches pouring consistency. Don’t overheat or it will separate.
How do I transport this cake? Chill it thoroughly first. Place on a sturdy cake board, then in a tall cake carrier. Drive carefully! Alternatively, transport components separately and assemble on-site.
Can I use milk chocolate instead of dark? You can, but the cake will be sweeter and less intensely chocolatey. Most chocolate lovers prefer the depth of dark chocolate.
Why did my layers sink in the middle? Either the oven temperature was too high (causing rapid rise then collapse), or you opened the oven door too early in baking.
Troubleshooting Your Chocolate Layer Cake
Cake is Too Dense: You may have overmixed after adding the coffee, or measured flour incorrectly. Always spoon and level flour rather than scooping.
Filling is Runny: It needs more chilling time. Place it in the freezer for 15-minute intervals, stirring between, until spreadable.
Ganache Won’t Stick: Your crumb coat may not have chilled long enough, or the ganache was too warm. The crumb coat should be firm to the touch.
Layers Keep Sliding: Use a dab of filling or ganache on the cake board to “glue” the bottom layer. Also ensure each layer is completely level.
Conclusion: A Chocolate Lover’s Dream Come True
This Decadent Chocolate Layer Cake truly earns its title—it’s exclusively for those who understand that there’s no such thing as too much chocolate. From the moment you start baking those deeply chocolatey layers to the final swirl of ganache and placement of those glossy cherries, you’re creating something special.
The first time I made this chocolate layer cake, I was nervous about whether I could pull off something so elaborate. But as I worked through each step, I discovered that it’s really just a series of simple techniques done carefully and with patience. The result was breathtaking—a towering monument to chocolate that tasted even better than it looked.
This is the cake I make for the biggest celebrations, the most important birthdays, the achievements worth commemorating. It’s the cake that makes people pause, take photos, and ask for the recipe. It’s the cake that chocolate lovers dream about long after the last crumb is gone.
Don’t be intimidated by the multiple components or the impressive height. Take it one step at a time, give yourself plenty of time to let things cool and set properly, and you’ll create a chocolate layer cake that looks like it came from a fancy bakery but tastes so much better because it’s made with your own hands and love.
My Personal Tip: Save this recipe for when you have a full afternoon to dedicate to baking. Put on your favorite music, pour yourself a glass of wine (after you measure your ingredients!), and enjoy the process. The methodical rhythm of baking, layering, and decorating is incredibly satisfying, and the end result—a towering chocolate masterpiece—makes every minute worthwhile. And here’s a secret: the person who bakes the cake gets to trim the layers to make them even, which means baker’s snacks. It’s practically tradition!
Print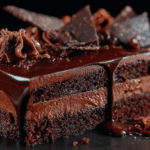
Decadent Chocolate Layer Cake Recipe – Only for Real Chocolate Lovers
Description
The Art of Layering Chocolate Cake
Creating a multi-layer chocolate cake might seem intimidating, but it’s remarkably straightforward once you understand the technique. The key is patience: allowing each layer to cool completely, spreading your filling evenly, and taking your time with the ganache. Rush any of these steps, and you risk a lopsided cake or ganache that slides right off.
I learned this the hard way when I attempted my first layer cake for a dinner party. I was running late and tried to assemble it while the layers were still warm. The filling melted, the ganache pooled at the bottom, and I ended up with a chocolate mess that, while delicious, looked nothing like the elegant dessert I’d envisioned. Since then, I always bake my layers the day before, giving them plenty of time to cool and firm up.
Ingredients
Ingredients for Your Chocolate Layer Masterpiece
This recipe makes a substantial four-layer chocolate cake that serves 12-16 people generously. Here’s what you’ll need:
Chocolate Cake Layers:
- 3 cups all-purpose flour
- 2½ cups granulated sugar
- 1 cup Dutch-process cocoa powder
- 2 teaspoons baking soda
- 1½ teaspoons baking powder
- 1½ teaspoons salt
- 4 large eggs, room temperature
- 1½ cups buttermilk, room temperature
- 1½ cups hot brewed coffee
- ¾ cup vegetable oil
- 1 tablespoon pure vanilla extract
Filling:
- 2 cups heavy cream
- 8 ounces semi-sweet chocolate, finely chopped
- 4 tablespoons unsalted butter
- 2 tablespoons powdered sugar
Ganache:
- 16 ounces dark chocolate (60-70% cacao), finely chopped
- 2 cups heavy cream
- 3 tablespoons unsalted butter
- 2 tablespoons corn syrup
Decoration:
- 1 cup chocolate shavings or curls
- 10–12 maraschino cherries, drained and patted dry
- Chocolate chips or mini chocolate pieces (optional)
Instructions
Step-by-Step Instructions for Chocolate Layer Cake Perfection
Creating Your Chocolate Cake Layers
Step 1: Preparation is Key Preheat your oven to 350°F (175°C). Prepare four 8-inch or three 9-inch round cake pans by greasing them thoroughly with butter, dusting with cocoa powder (not flour—cocoa keeps the exterior dark), and lining the bottoms with parchment paper rounds. This triple protection ensures your precious chocolate layers release flawlessly.
Step 2: Mix the Dry Ingredients In your largest mixing bowl, whisk together flour, sugar, cocoa powder, baking soda, baking powder, and salt. Take your time with this—you want those leavening agents evenly distributed throughout the mixture. Any lumps in the cocoa powder should be sifted out for a perfectly smooth chocolate cake batter.
Step 3: Combine Wet Ingredients In a separate bowl, whisk the eggs until slightly foamy. Add buttermilk, vegetable oil, and vanilla extract, whisking until thoroughly combined. Room temperature ingredients are crucial here—they emulsify better and create a more uniform batter.
Step 4: Build Your Batter Add the wet ingredients to the dry ingredients and mix on medium speed for 2 minutes. The batter will be thick and somewhat lumpy at this stage—that’s perfectly fine. Now slowly stream in the hot coffee while mixing on low speed. The batter will become quite thin and pourable, which is exactly what creates that ultra-moist texture in the finished chocolate layer cake.
Step 5: Bake to Perfection Divide the batter evenly among your prepared pans. If you have a kitchen scale, this is the time to use it—even layers are crucial for a professional-looking cake. Bake for 25-30 minutes for 8-inch pans, or 30-35 minutes for 9-inch pans. The cake is done when a toothpick inserted in the center comes out with a few moist crumbs.
Step 6: Cool Completely Let the chocolate cakes cool in their pans for 15 minutes, then turn them out onto wire racks to cool completely—this takes at least 2 hours. Don’t rush this step! Warm cake layers will make your filling melt and slide.
Preparing the Chocolate Filling
Step 7: Make Chocolate Cream Filling Heat 2 cups of heavy cream until it just begins to simmer. Pour over the 8 ounces of chopped chocolate and let sit for 3 minutes. Stir until smooth, then add butter and powdered sugar. Mix until fully incorporated. Refrigerate for 2-3 hours until it reaches a thick, spreadable consistency similar to frosting.
Creating the Perfect Chocolate Ganache
Step 8: Prepare Show-Stopping Ganache Place your 16 ounces of chopped dark chocolate in a large heatproof bowl. Heat 2 cups of heavy cream until steaming and just beginning to bubble around the edges. Pour over the chocolate and let stand for 3 minutes without stirring. Then stir from the center outward until completely smooth. Add butter and corn syrup, stirring until glossy and uniform.
Step 9: Achieve Perfect Consistency Let the ganache cool at room temperature for about 30-40 minutes, stirring occasionally. You want it thick enough to coat the back of a spoon but still pourable for those gorgeous drips down the sides of your chocolate layer cake.
Assembling Your Chocolate Layer Cake
Step 10: Level Your Layers Using a long serrated knife or cake leveler, trim any domed tops from your chocolate cake layers so they’re perfectly flat. This ensures stability in your finished layer cake.
Step 11: Build Your Layers Place one cake layer on your serving plate or cake stand. Spread about ½ cup of chocolate filling evenly over the top, leaving a small border around the edge. Place the second layer on top and repeat. Continue with remaining layers. The final layer should go top-side up (the flat side you leveled).
Step 12: Apply Crumb Coat Spread a very thin layer of chocolate filling or ganache over the entire cake—top and sides. This “crumb coat” traps any loose crumbs. Refrigerate for 30 minutes until firm.
Step 13: The Grand Finale Pour the prepared ganache over the center of the cake, letting it spread naturally. Use an offset spatula to encourage it toward the edges, allowing it to drip down the sides in those beautiful, organic streams. Don’t over-smooth—those drips are part of the charm!
Step 14: Decorate Like a Pro While the ganache is still slightly soft, press chocolate shavings gently onto the top and around the base of the cake. Arrange maraschino cherries on top in an artful pattern. Add extra chocolate chips or curls if desired. Refrigerate for at least 1 hour before serving to let everything set properly.
Expert Tips for Chocolate Layer Cake Success
After making numerous layer cakes, here are my hard-won insights:
Invest in Quality Chocolate: Your chocolate layer cake is only as good as the chocolate you use. For the ganache especially, splurge on high-quality chocolate with at least 60% cacao content.
Temperature Matters: All dairy ingredients should be at room temperature for the cake batter, but you want chilled ingredients for making the filling firm up properly.
Level Your Layers: This seems fussy, but it’s the difference between a cake that looks homemade and one that looks professional. A cake leveler costs about $10 and is worth every penny.
Support Your Cake: Insert 4-5 wooden dowels or thick straws through the layers if your cake is quite tall. Trim them level with the top. This prevents upper layers from sinking into lower ones.
Make It Ahead: The cake layers can be baked 2 days in advance, wrapped tightly in plastic wrap, and stored at room temperature. The filling can be made a day ahead and refrigerated.
Chocolate Layer Cake Variations
While this recipe is perfection, here are some creative twists:
Black Forest Chocolate Cake: Add a layer of cherry pie filling between the chocolate layers. Replace some filling with whipped cream for a lighter texture.
Mocha Layer Cake: Add 2 tablespoons of instant espresso powder to the cake batter and 1 tablespoon to the ganache for coffee-chocolate bliss.
Chocolate Peanut Butter Dream: Replace one layer of chocolate filling with peanut butter frosting. Drizzle melted peanut butter over the ganache.
Chocolate Raspberry Elegance: Spread raspberry preserves between layers along with the chocolate filling. Top with fresh raspberries instead of cherries.
Chocolate Caramel Heaven: Drizzle salted caramel sauce between layers and over the finished ganache. Sprinkle with flaky sea salt.
Serving Your Chocolate Layer Cake
This dramatic dessert deserves an equally impressive presentation:
Slice with a hot, clean knife for pristine cuts that showcase the layers
Serve slightly chilled for the cleanest slices, or at room temperature for the most flavor
Pair with vanilla bean ice cream or fresh whipped cream
Add fresh berries on the side for color and a tart contrast
Dust individual plates with cocoa powder before placing the slice
Serve with espresso or coffee to enhance the chocolate notes
Storage and Make-Ahead Instructions
Room Temperature: Cover loosely and keep for up to 2 days in a cool room (below 70°F).
Refrigerated: Store covered for up to 5 days. Bring to room temperature for 30 minutes before serving for best flavor and texture.
Freezing: Wrap well-chilled cake in plastic wrap, then aluminum foil. Freeze for up to 2 months. Thaw overnight in the refrigerator.
Components: You can bake the layers and freeze them separately for up to 3 months. Make the filling and ganache fresh when you’re ready to assemble.
Nutritional Information
Per serving (1 slice, assuming 16 slices):
Calories: 650
Total Fat: 38g
Saturated Fat: 22g
Cholesterol: 95mg
Sodium: 420mg
Total Carbohydrates: 75g
Dietary Fiber: 5g
Sugars: 56g
Protein: 8g