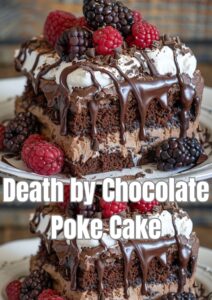
If you’ve ever wondered what pure chocolate bliss tastes like, let me introduce you to Death By Chocolate Poke Cake. The name alone should tell you everything you need to know. Rather than being a dessert for the faint of heart, it’s designed for serious chocoholics who believe that when it comes to chocolate, more is definitely more.
I’ll never forget the first time I made this decadent chocolate poke cake. It was for my husband’s birthday, and he’d specifically requested “the most chocolatey cake you can make.” Challenge accepted! I spent hours researching recipes and finally landed on this one. When I brought it out after dinner, the room went silent as everyone stared at this towering masterpiece of chocolate layers.
My husband took the first bite, and his eyes lit up with pure joy. Subsequently, he declared it the best birthday cake he’d ever had. Since then, I’ve been making it for special occasions, and it never fails to impress chocolate lovers everywhere.
What Makes This Death By Chocolate Cake Special
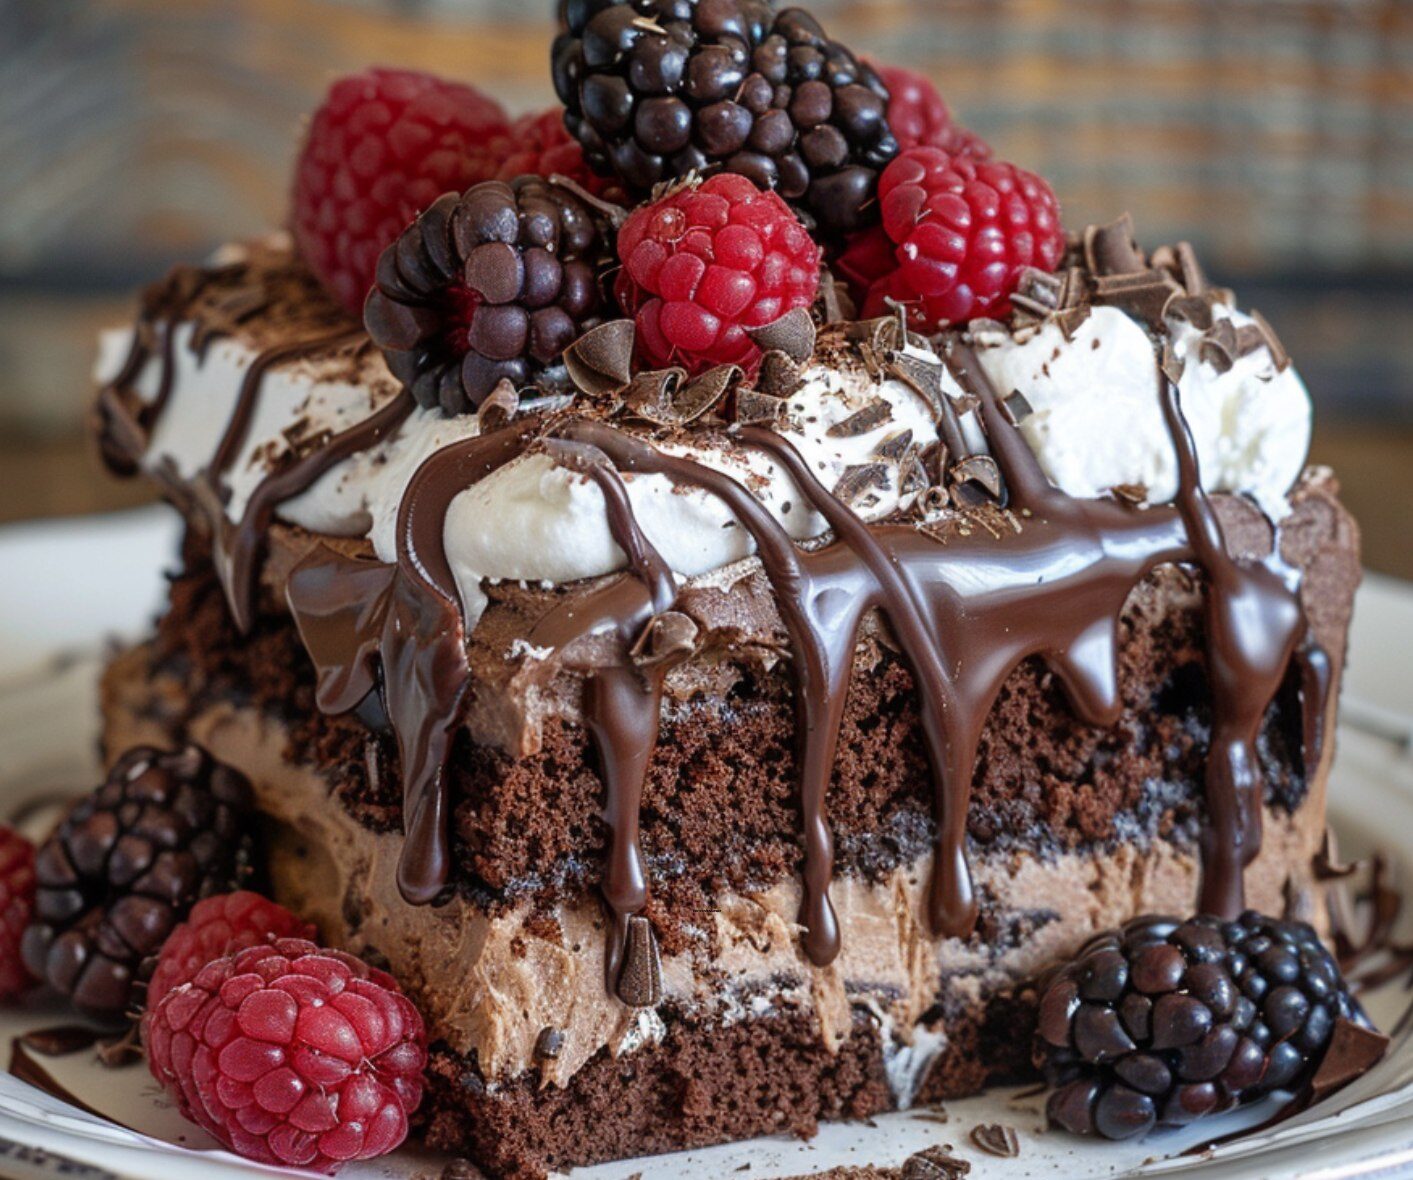
What makes this death by chocolate cake so special is the layers upon layers of chocolate goodness. You start with a rich chocolate cake base, then poke holes throughout. Next, fill those holes with chocolate pudding. After that, add a layer of chocolate fudge sauce, top it with chocolate whipped cream, and finish with chocolate chips or chopped candy bars.
It’s chocolate in every single bite, and somehow, it all works together perfectly without being overwhelmingly sweet. Moreover, the different textures create an experience that’s unlike any other chocolate dessert. In fact, each layer contributes something unique to the overall taste and mouthfeel.
Understanding the Magic of Poke Cakes
Before we dive into this specific chocolate poke cake recipe, let’s talk about what makes poke cakes so special. The concept is brilliantly simple: you bake a cake, then poke holes in it while it’s still warm. Subsequently, pour a liquid filling over the top. As a result, the filling seeps down into those holes, creating pockets of flavor throughout the cake and keeping it incredibly moist.
The History and Appeal
Poke cakes have been around since the 1970s, but they’ve experienced a major resurgence in recent years. There’s good reason for this popularity. First, they’re incredibly forgiving. Even if your cake is slightly overbaked, the moisture from the filling compensates. Additionally, they’re endlessly customizable, though this death by chocolate poke cake takes the concept to its most extreme (and delicious) conclusion. Furthermore, they’re perfect for feeding a crowd at potlucks and family gatherings.
The Secret to Success
The key to a successful poke cake is poking the holes at the right time and size. You want the cake to be warm so the filling absorbs better, but not so hot that it’s falling apart. Furthermore, the holes should be large enough to hold a good amount of filling but not so large that the cake loses its structure. Therefore, using a wooden spoon handle (about ½ inch diameter) works perfectly for this task.
Gathering Your Ingredients
To create this show-stopping chocolate dessert, gather these ingredients:
Chocolate Cake:
- 1 box (15.25 ounces) devil’s food or dark chocolate cake mix
- Eggs, oil, and water as called for on the cake mix box
- Or use your favorite homemade chocolate cake recipe
Chocolate Pudding Filling:
- 2 packages (3.9 ounces each) instant chocolate pudding mix
- 4 cups cold milk, divided
Chocolate Fudge Layer:
- 1 jar (16 ounces) hot fudge topping
- 1 can (14 ounces) sweetened condensed milk
Chocolate Whipped Topping:
- 1 container (8 ounces) whipped topping (or 2 cups heavy cream, whipped)
- 2 tablespoons cocoa powder
- 2 tablespoons powdered sugar (if making homemade whipped cream)
Garnish:
- 1 cup mini chocolate chips
- 2-3 chocolate candy bars, chopped
- Chocolate syrup for drizzling
The beauty of this death by chocolate cake recipe is that you can use a cake mix for convenience. Alternatively, use your favorite from-scratch chocolate cake recipe if you prefer. Either way works beautifully!
Step-by-Step Instructions
Let me walk you through creating this masterpiece layer by layer:
Baking Your Chocolate Foundation
Preheat your oven to 350°F and grease a 9×13-inch baking pan. Prepare the chocolate cake batter according to package directions (or your homemade recipe). Pour the batter into the prepared pan and bake for 25-30 minutes. Test with a toothpick inserted in the center—it should come out clean. This is your foundation, so you want it perfectly baked. However, remember that the fillings will add extra moisture, so don’t worry if it seems slightly firm.
Creating the Holes
Here’s where things get fun. As soon as the cake comes out of the oven, use the handle of a wooden spoon (about ½ inch in diameter) to poke holes all over the cake. Space them about 1 inch apart. Don’t be shy—you want plenty of holes to hold all that chocolatey goodness.
Make sure to poke all the way down to the bottom of the cake but be gentle so you don’t break through. However, if you make a mistake, don’t worry—the toppings will cover everything! Additionally, work while the cake is still warm for the best absorption.
Adding the First Chocolate Layer
While the cake is still warm, prepare one package of chocolate pudding by whisking it with 2 cups of cold milk for about 2 minutes until it starts to thicken. Working quickly (before it sets too much), pour this chocolate pudding mixture evenly over the warm cake. Make sure to cover all the holes. Use a spatula to gently spread it around if needed. Notably, the warm cake will help the pudding seep into those holes beautifully. Meanwhile, watch as the pudding disappears into the holes like magic.
The Fudge Layer
In a microwave-safe bowl, combine the hot fudge topping and sweetened condensed milk. Microwave for 45-60 seconds, stirring every 20 seconds, until the mixture is smooth and pourable. Pour this rich chocolate fudge mixture over the cake. Again, make sure to fill those holes and spread it evenly across the top. Some of it will seep in, and some will create a decadent layer on top—that’s exactly what you want. Furthermore, this layer adds an intense chocolate flavor that takes the cake to the next level.
Cooling Time
I know it’s tempting to skip ahead, but this step is crucial. Allow the cake to cool completely to room temperature, then refrigerate it for at least 2 hours. Overnight is even better. This cooling time lets all those layers set properly and allows the flavors to meld together perfectly. Additionally, a cold cake is much easier to frost with the whipped topping. Therefore, patience really pays off here.
The Chocolate Whipped Topping
Prepare the second package of chocolate pudding with the remaining 2 cups of milk. Once it’s thickened, gently fold in the whipped topping and cocoa powder until well combined. This creates a light, fluffy chocolate cream that’s absolutely divine.
If you’re making homemade whipped cream, however, beat the heavy cream with the cocoa powder and powdered sugar until stiff peaks form. Either method produces delicious results. Moreover, this topping provides a lighter contrast to the rich layers below.
Final Touches
Spread the chocolate whipped topping evenly over the cooled cake. Now comes the best part—garnishing! Sprinkle the top with mini chocolate chips, drizzle with chocolate syrup in a decorative pattern, and scatter the chopped chocolate candy bars over everything. Consequently, the visual impact is stunning, and it tastes even better than it looks. Finally, refrigerate until ready to serve for the best texture.
Expert Tips for Perfect Results
After making this death by chocolate poke cake dozens of times, I’ve learned some tricks that guarantee success every time. First, timing is everything when poking the holes. Specifically, the cake should be warm but not piping hot. Wait about 5 minutes after taking it out of the oven. If the cake is too hot, it might fall apart. Conversely, too cool, and the filling won’t absorb as well.
Poking Technique
Second, don’t be afraid to really poke those holes. I’ve seen people make timid little pokes, and then they wonder why their cake doesn’t have enough filling. You want substantial holes that go all the way to the bottom. Third, work quickly when adding the pudding layers. Instant pudding starts to set within minutes, so have everything ready to go before you start poking. Additionally, keep your mixing bowl and whisk nearby for efficient preparation.
Temperature Control
For the fudge layer, make sure it’s warm enough to pour easily but not so hot that it completely melts into the cake. You want some of that fudgy layer to remain visible on top. Additionally, when adding the whipped topping, make sure the cake is completely cool. Otherwise, the topping will melt and lose its fluffy texture. Furthermore, working with a cold cake makes spreading the topping much easier and more professional-looking.
Delicious Variations
While the classic version is hard to beat, here are some creative variations:
Nutty and Caramel Options
Turtle Poke Cake: Use caramel sauce instead of fudge sauce, and top with pecans and caramel drizzle along with the chocolate. This combination is especially popular in the South. Moreover, the caramel adds a buttery sweetness that complements the chocolate beautifully.
Peanut Butter Chocolate Poke Cake: Swirl peanut butter into the fudge layer and top with Reese’s Peanut Butter Cups instead of plain chocolate candy bars. This is perfect for peanut butter lovers. Additionally, you can add peanut butter chips to the topping for extra flavor.
Flavored Variations
Mint Chocolate Poke Cake: Add mint extract to the pudding layers and top with Andes mints or crushed peppermint candies. This version is especially festive during the holidays. Furthermore, the mint provides a refreshing contrast to the rich chocolate.
S’mores Poke Cake: Use chocolate cake with chocolate pudding, but top with toasted marshmallows and crushed graham crackers for a campfire twist. Alternatively, you can add marshmallow fluff to the whipped topping for extra s’mores flavor.
Mocha Poke Cake: Add 2 tablespoons of instant espresso powder to the cake batter and pudding for a coffee-chocolate combination. This is perfect for coffee lovers. In addition, the coffee enhances the chocolate flavor rather than overpowering it.
Serving and Presentation
This death by chocolate poke cake is impressive enough on its own. However, here are some ways to make it even more special. For an elegant presentation, cut the cake into perfect squares and place each serving on a white plate.
Then, drizzle additional chocolate sauce around the plate and add a dollop of whipped cream on the side. A fresh raspberry or strawberry on top provides a beautiful color contrast. Moreover, it adds a hint of tartness that cuts through the richness. Furthermore, a sprig of mint makes an elegant garnish.
Casual Serving Ideas
For casual gatherings, serve it straight from the pan—it’s meant to be a crowd-pleaser, not fussy. I like to bring it to potlucks in the baking dish, already garnished and ready to serve. It’s a guaranteed conversation starter, and you’ll go home with an empty pan every time. Additionally, guests appreciate the ease of self-service from a 9×13 pan.
Perfect Pairings
Pair this chocolate poke cake with a cold glass of milk, a cup of strong coffee, or even a scoop of vanilla ice cream if you really want to go over the top. For adult gatherings, a dessert wine or chocolate stout beer makes an excellent pairing. Meanwhile, for kids’ parties, serve it with chocolate milk for a total chocolate experience.
Make-Ahead and Storage
One of the best things about this easy poke cake recipe is that it’s actually better when made a day ahead. Specifically, the extra time allows all those layers to meld together and the cake to absorb even more moisture. Therefore, you can make the entire cake up to 2 days in advance. Just wait to add the final garnishes (chocolate chips and candy bars) until right before serving to keep them looking fresh. In fact, many bakers insist that day-two cake tastes even better than day-one.
Storage Guidelines
Store the chocolate poke cake covered tightly with plastic wrap or aluminum foil in the refrigerator for up to 5 days. Consequently, the cake will stay moist and delicious thanks to all those layers of pudding and fudge. Moreover, you can also freeze individual slices wrapped tightly in plastic wrap and then aluminum foil for up to 3 months. Thaw overnight in the refrigerator before serving. Additionally, bring slices to room temperature for about 15 minutes before eating for the best flavor.
Nutritional Information
Per serving (based on 12 large servings):
- Calories: 495
- Total Fat: 19g
- Saturated Fat: 10g
- Cholesterol: 55mg
- Sodium: 485mg
- Total Carbohydrates: 75g
- Dietary Fiber: 3g
- Sugars: 58g
- Protein: 7g
Yes, this is an indulgent dessert—but that’s the whole point! It’s called Death By Chocolate for a reason. Save it for special occasions when you really want to wow your guests.
Troubleshooting Common Issues
Structural Problems
Problem: The cake fell apart when I poked the holes. Solution: Make sure the cake has cooled for about 5 minutes before poking. Also, poke straight down and back out—don’t wiggle the spoon around. Additionally, use a gentle but firm pressure to create clean holes.
Problem: The filling didn’t soak into the holes. Solution: The cake may have been too cool, or the pudding mixture may have been too thick. Therefore, make sure to work quickly while both the cake and pudding are at the right temperature. Furthermore, you can use a toothpick to help guide the pudding into stubborn holes.
Topping Issues
Problem: The whipped topping melted. Solution: The cake must be completely cool before adding the whipped topping layer. If it’s even slightly warm, the topping will melt and lose its texture. Additionally, make sure your whipped topping is cold when you spread it.
Problem: The cake is too sweet. Solution: Balance the sweetness by serving with unsweetened whipped cream. Alternatively, add a sprinkle of sea salt on top before serving to cut through the sweetness. Furthermore, serving smaller portions can make the richness more enjoyable.
My Personal Experience
Every time I make this death by chocolate poke cake, I’m reminded why it’s worth the extra steps. Yes, it takes a bit more time than a simple cake, but the results are absolutely worth it. There’s something deeply satisfying about creating those layers and watching people’s faces when they take their first bite.
Consequently, the combination of the moist cake, creamy pudding pockets, fudgy middle layer, and fluffy chocolate topping creates a texture experience that’s unlike any other chocolate cake. Furthermore, each bite offers multiple flavors and textures that keep you coming back for more.
In addition, this dessert has become my signature for birthdays, potlucks, and any time someone says they want “something really chocolatey.” I’ve even made miniature versions in individual cups for a chocolate dessert bar, which was a huge hit. The best part is watching confirmed chocolate lovers take their first bite and experience that moment of pure bliss. Therefore, it’s become more than just a recipe—it’s become a tradition that brings joy to everyone who tries it.
If you love chocolate even half as much as I do, this death by chocolate poke cake needs to be on your baking list. It’s rich, it’s decadent, and it’s absolutely unforgettable. Your only regret will be not making it sooner!