There are cheesecakes, and then there’s the cheesecake—the one that ruins you for all others. This is that cheesecake. I first tasted something similar at a renowned cheesecake restaurant years ago, and I spent months trying to recreate that impossibly creamy, dense yet light, perfectly sweet with just enough tang texture. After countless attempts, adjustments, and a lot of taste-testing (tough job, I know), I finally cracked the code.
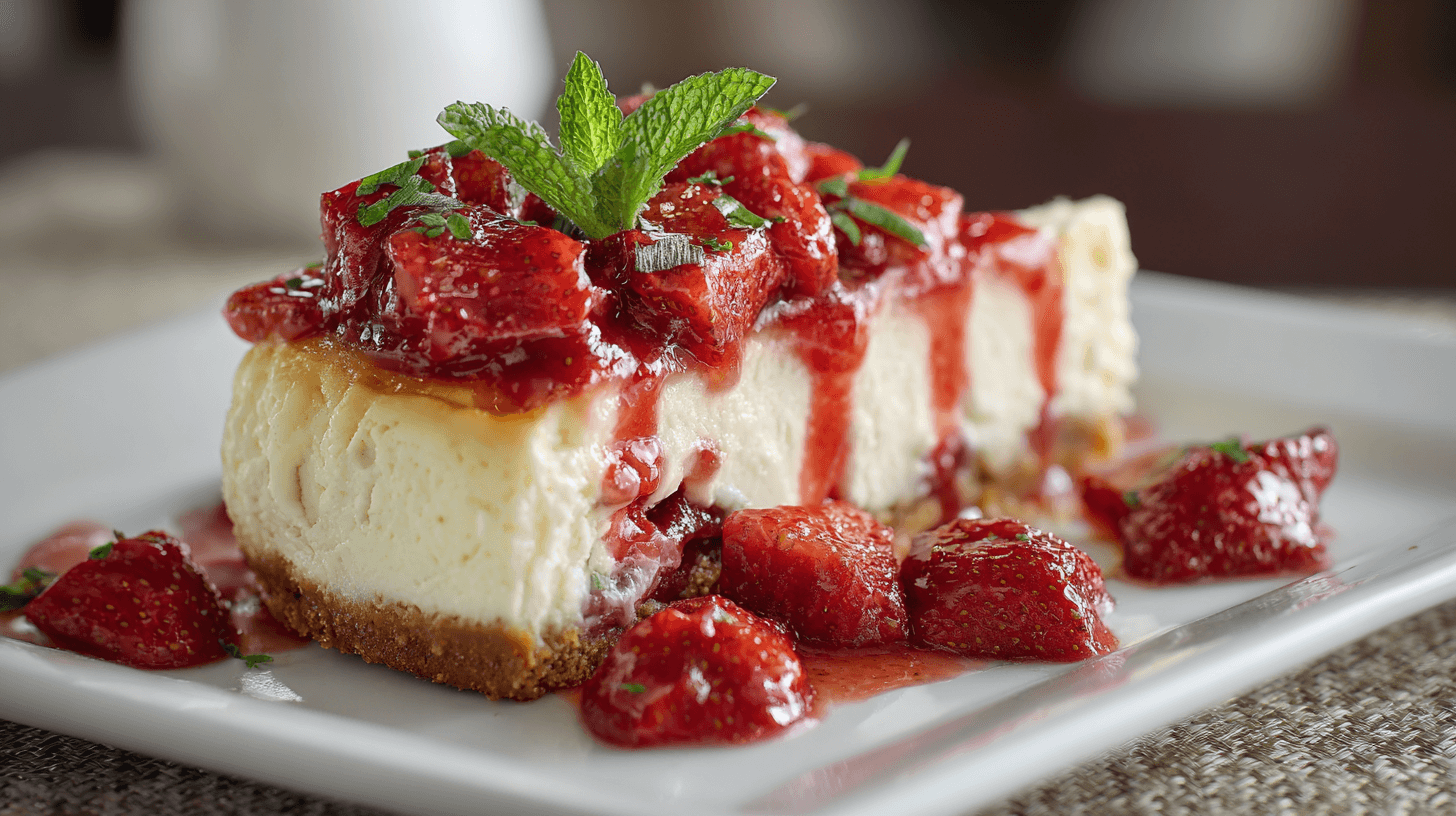
This isn’t your typical cheesecake recipe. This is The Creamiest Strawberry Cheesecake you’ll ever make—the kind that makes people close their eyes when they take that first bite, the kind that gets remembered long after the party ends, the kind that turns a simple Sunday dinner into a special occasion.
What Makes This The Creamiest Strawberry Cheesecake Ever
The secret to this exceptional cheesecake lies in several carefully calibrated factors. First, the cream cheese-to-cream ratio is precisely calculated to create maximum creaminess without heaviness. Second, the gentle baking method in a water bath ensures even cooking with no cracks. Third, the overnight chilling time allows flavors to develop and the texture to reach sublime perfection. And finally, the homemade strawberry topping provides the perfect sweet-tart complement to the rich, creamy filling.
When I say this is the creamiest cheesecake ever, I mean it literally melts on your tongue. It’s not dense and heavy like some cheesecakes, nor is it light and fluffy like a mousse. It occupies that perfect space in between—substantial enough to satisfy, creamy enough to feel luxurious, smooth enough to seem almost impossibly silky.
The Science Behind Perfect Cheesecake
Creating perfect cheesecake is part art, part science. The proteins in cream cheese need to set just enough to give structure without becoming rubbery. This requires moderate oven temperature and careful timing. The water bath (also called a bain-marie) creates humidity and gentle, even heat that prevents the edges from overcooking while the center remains underdone—a common cheesecake problem.
I learned the importance of the water bath the hard way. My first few cheesecakes emerged from the oven with dramatic cracks across the top and edges that were practically cheese leather while the centers wobbled dangerously. It wasn’t until I researched proper cheesecake technique that I understood the transformative power of that pan of hot water in the oven.
Ingredients for The Creamiest Strawberry Cheesecake
This recipe serves 12-16 people and requires quality ingredients for the best results:
For the Graham Cracker Crust:
- 2 cups graham cracker crumbs (about 16 full crackers)
- ½ cup unsalted butter, melted
- ¼ cup granulated sugar
- Pinch of salt
Creamy Cheesecake Filling:
- 32 ounces (four 8-ounce packages) cream cheese, softened to room temperature
- 1¼ cups granulated sugar
- 1 tablespoon cornstarch
- 1 cup sour cream, room temperature
- 2 teaspoons pure vanilla extract
- 1 teaspoon fresh lemon juice
- 4 large eggs, room temperature
- ½ cup heavy cream, room temperature
Fresh Strawberry Topping:
- 2 pounds fresh strawberries, hulled and halved
- ½ cup granulated sugar
- 2 tablespoons lemon juice
- 1 tablespoon cornstarch
- 2 tablespoons water
- 1 teaspoon vanilla extract
Optional Garnish:
- Fresh whole strawberries
- Whipped cream rosettes
- Fresh mint leaves
- Lemon zest
Step-by-Step Instructions for Creamy Cheesecake Perfection
Creating the Perfect Crust
Step 1: Prepare Your Pan Wrap the outside of a 9-inch springform pan with two layers of heavy-duty aluminum foil, covering the bottom and sides completely. This waterproofs the pan for the water bath. Grease the inside of the pan lightly with butter.
Step 2: Make the Graham Cracker Base In a medium bowl, combine graham cracker crumbs, melted butter, sugar, and salt. Mix with a fork until the mixture resembles wet sand and holds together when pressed. Press firmly into the bottom and about 1 inch up the sides of your prepared springform pan. Use the bottom of a measuring cup to pack it firmly and evenly.
Step 3: Pre-Bake the Crust Bake at 325°F (165°C) for 10 minutes. This sets the crust and prevents it from becoming soggy when you add the filling. Let it cool while you prepare the cheesecake filling.
Making the Creamiest Cheesecake Filling
Step 4: Beat the Cream Cheese In a large mixing bowl or stand mixer fitted with the paddle attachment, beat the softened cream cheese on medium speed for 3-4 minutes until completely smooth, fluffy, and free of any lumps. Scrape down the sides and bottom of the bowl several times during this process. This step is crucial—any lumps now will remain in your finished cheesecake.
Step 5: Add Sugar Mixture In a small bowl, whisk together sugar and cornstarch (the cornstarch helps prevent cracking). Add this mixture to the cream cheese and beat on medium speed for 2 minutes until light and fluffy.
Step 6: Incorporate Dairy Add sour cream, vanilla extract, and lemon juice. Beat on low speed just until combined—overmixing at this stage can incorporate too much air, which leads to cracks.
Step 7: Add Eggs Carefully This is perhaps the most important step for creamy texture. Add eggs one at a time, beating on the lowest speed setting just until each egg is incorporated. As soon as you no longer see streaks of egg, stop mixing. Overmixing eggs creates air bubbles that expand during baking and cause cracks.
Step 8: Finish with Cream Pour in the heavy cream and gently fold it in with a rubber spatula rather than using the mixer. This final addition makes the filling extra silky without incorporating too much air.
The Water Bath Method
Step 9: Prepare the Water Bath Place your wrapped springform pan in a large roasting pan. Pour the cheesecake filling into the crust—it should come almost to the top of the pan. Bring a kettle or pot of water to a boil.
Step 10: Create Humidity Carefully place the roasting pan (with the cheesecake) on the pulled-out oven rack. Pour the boiling water into the roasting pan until it comes about halfway up the sides of the springform pan. Gently push the rack back into the oven.
Baking Your Creamy Strawberry Cheesecake
Step 11: Slow and Steady Wins Bake at 325°F (165°C) for 1 hour and 15 minutes to 1 hour and 30 minutes. The cheesecake is done when the edges are set but the center still jiggles slightly when you gently shake the pan—about a 2-inch diameter circle in the center should still wobble like jello. Don’t overbake! It will continue cooking as it cools.
Step 12: Cool Gradually Turn off the oven but don’t open the door. Leave the cheesecake in the oven with the door closed for 1 hour. This gradual temperature change prevents dramatic cracking. After 1 hour, crack the door and let it cool for another 30 minutes.
Step 13: Finish Cooling Remove the cheesecake from the water bath and discard the foil. Run a thin knife around the edge to loosen it from the pan (this prevents cracks as it cools and contracts). Let it cool to room temperature on a wire rack, about 2 hours.
Step 14: The Overnight Chill Cover the cheesecake (still in the pan) with plastic wrap and refrigerate for at least 8 hours, preferably overnight. This isn’t optional—this chilling time is when the magic happens. The texture firms up, flavors meld, and it transforms from good to extraordinary.
Making Perfect Strawberry Topping
Step 15: Cook the Strawberries In a medium saucepan, combine halved strawberries, sugar, and lemon juice. Cook over medium heat, stirring occasionally, until the strawberries release their juices and the mixture begins to simmer, about 5-7 minutes.
Step 16: Thicken the Sauce In a small bowl, whisk cornstarch and water together to make a slurry. Pour this into the strawberry mixture and stir constantly. Continue cooking for 2-3 minutes until the mixture thickens to a glaze-like consistency. Remove from heat and stir in vanilla.
Step 17: Cool the Topping Let the strawberry topping cool to room temperature, then refrigerate until ready to serve. It will thicken slightly more as it cools.
The Grand Reveal
Step 18: Remove from Pan When ready to serve, carefully remove the sides of the springform pan. You can run a knife dipped in hot water around the edge first if it seems stuck. Slide the cheesecake (still on the metal bottom) onto your serving plate, or carefully remove it using large spatulas.
Step 19: Add the Strawberry Glory Spoon the cooled strawberry topping over the entire top of the cheesecake, letting some cascade down the sides naturally. Arrange a few whole strawberries on top for decoration, add whipped cream rosettes if desired, and garnish with fresh mint leaves.
Step 20: Slice and Serve Use a sharp knife dipped in hot water and wiped clean between cuts for the cleanest slices. Each perfect wedge should reveal layers of golden crust, creamy white cheesecake, and glossy red strawberry topping.
Expert Tips for Cheesecake Success
After years of cheesecake perfecting, these tips guarantee success:
Temperature is Everything: All filling ingredients must be at room temperature. Cold ingredients don’t blend smoothly, leaving lumps and potentially causing cracks.
Don’t Rush the Cream Cheese: Beat it longer than you think necessary. It should be completely smooth before you add anything else.
Less is More with Mixing: Once you add the eggs, mix as little as possible. Each unnecessary revolution of the mixer incorporates air that will expand during baking and cause cracks.
The Jiggle Test: The center should jiggle like Jello when you gently shake the pan. It seems underdone, but it’s perfect—it will firm up as it cools.
Patience with Cooling: Don’t rush the cooling process. Sudden temperature changes cause cracks. The gradual cool-down in the oven is essential.
The Overnight Wait: I know it’s torture, but overnight chilling truly is necessary for the best texture and flavor development.
Prevent Soggy Crust: Make sure your foil wrapping is waterproof. Any leaks into the springform pan will make the crust soggy.
Strawberry Cheesecake Variations
Once you’ve mastered this recipe, try these delicious variations:
Mixed Berry Cheesecake: Replace strawberries with a combination of strawberries, blueberries, raspberries, and blackberries.
Lemon Strawberry Cheesecake: Add 2 tablespoons of lemon zest to the filling for bright citrus flavor.
Chocolate Strawberry Cheesecake: Add 4 ounces of melted and cooled dark chocolate to the filling. Top with chocolate shavings and strawberries.
Strawberry Swirl Cheesecake: Reserve 1 cup of filling, mix with ¼ cup of strawberry puree, and swirl into the main filling before baking.
White Chocolate Strawberry: Melt 8 ounces of white chocolate and mix into the filling for extra richness.
No-Bake Version: Use the same filling but add gelatin to set it. Skip the oven entirely for hot summer days.
Serving Suggestions
This stunning cheesecake deserves a special presentation:
- Serve chilled but not ice-cold—about 45 minutes out of the refrigerator is perfect
- Add a dollop of fresh whipped cream to each slice
- Dust the plate with powdered sugar for elegance
- Pair with champagne or prosecco for celebrations
- Serve with fresh strawberries on the side
- Add a small scoop of vanilla bean ice cream for extra decadence
Storage and Make-Ahead Instructions
Refrigerator: Store covered for up to 5 days. The flavor actually improves over the first 2-3 days.
Freezing: Wrap well and freeze (without topping) for up to 2 months. Thaw overnight in the refrigerator before adding strawberry topping.
Make-Ahead Strategy: Bake the cheesecake up to 3 days in advance. Make the strawberry topping the day you plan to serve it for the freshest flavor.
Transporting: Keep chilled until the last possible moment. Transport in the springform pan for stability, removing the sides only when ready to serve.
Nutritional Information
Per serving (1 slice, assuming 16 slices):
- Calories: 425
- Total Fat: 30g
- Saturated Fat: 18g
- Cholesterol: 145mg
- Sodium: 280mg
- Total Carbohydrates: 35g
- Dietary Fiber: 2g
- Sugars: 27g
- Protein: 7g
Perfect Pairings for Strawberry Cheesecake
This luxurious dessert pairs beautifully with:
Wines:
- Moscato d’Asti
- Prosecco
- Rosé Champagne
- Late harvest Riesling
- Ruby Port
Coffees:
- Vanilla latte
- Cappuccino
- Irish coffee
- Espresso
Other Beverages:
- Dessert wine
- Strawberry lemonade
- Sparkling water with lemon
- Hot tea (Earl Grey or English Breakfast)
Frequently Asked Questions About Strawberry Cheesecake
Why did my cheesecake crack? Cracks usually result from overmixing (incorporating too much air), overbaking, or cooling too quickly. Follow the gradual cooling method carefully.
Can I skip the water bath? You can, but you risk cracks and uneven baking. The water bath is strongly recommended for the creamiest results.
My filling has lumps. What went wrong? Your cream cheese wasn’t soft enough, or you didn’t beat it long enough before adding other ingredients.
How do I know when it’s done baking? The edges should be set while the center (about 2 inches in diameter) still jiggles slightly when you gently shake the pan.
Can I use frozen strawberries for the topping? Yes, but thaw them first and drain excess liquid before cooking, or the topping will be too watery.
Why is the crust soggy? Water leaked into the springform pan during the water bath. Make sure your foil wrapping is completely waterproof.
Can I make this ahead for a party? Absolutely! Cheesecake is perfect for make-ahead desserts. Bake up to 3 days in advance and add the topping the day of serving.
Troubleshooting Creamy Strawberry Cheesecake
Sunken Center: Usually indicates underbaking. The jiggle should be slight—like Jello, not liquid.
Cracked Top: Overmixing, overbaking, or too-rapid cooling. Also check that your oven temperature is accurate.
Grainy Texture: Cold ingredients weren’t brought to room temperature, or eggs were overmixed.
Couldn’t Remove from Pan: Should have run a knife around the edge before cooling. Next time, do this step right when it comes out of the oven.
Topping is Runny: Didn’t cook long enough after adding the cornstarch slurry, or too much liquid was used.
Crust Falls Apart: Not enough butter in the mixture, or it wasn’t pressed firmly enough.
Conclusion: Cheesecake Perfection Achieved
This truly is The Creamiest Strawberry Cheesecake recipe you’ll ever make. From the buttery graham cracker crust to the impossibly smooth, dense yet light filling, to that gorgeous glossy strawberry topping, every element comes together to create something extraordinary.
I know this recipe requires more time and attention than a simple cake or cookies, but I promise you, it’s worth every single minute. The look on people’s faces when they take that first bite—eyes closed, slight smile, that little “mmm” of pure satisfaction—makes all the effort worthwhile.
Since perfecting this recipe, it’s become my signature dessert, the one I make for the most special occasions. It’s graced birthday tables, anniversary celebrations, holiday dinners, and “just because we deserve something special” Sunday afternoons. It’s the dessert that makes people ask for the recipe (which I happily share because everyone should experience this level of cheesecake perfection).
The best part? While it looks and tastes like it came from an upscale restaurant, it’s entirely achievable in your home kitchen. Yes, it requires patience and attention to detail, but the techniques are straightforward and the results are consistently spectacular.
My Personal Tip: Make this cheesecake when you have a full day at home with no time pressure. The actual hands-on work is only about 30 minutes, but the baking and cooling time means you need to be around. I like to start it on a Saturday morning, letting it bake while I do other things around the house, then cooling and chilling it for Sunday dinner. The anticipation builds all day, and by the time you finally slice into that perfectly creamy masterpiece, it feels like the event it truly is. And here’s a secret: any small cracks (if they happen) will be completely covered by the strawberry topping—it’s forgiving that way. But honestly, follow the techniques carefully and you probably won’t need that insurance policy. Happy baking!
Print
The Creamiest Strawberry Cheesecake Recipe Ever
Description
The Science Behind Perfect Cheesecake
Creating perfect cheesecake is part art, part science. The proteins in cream cheese need to set just enough to give structure without becoming rubbery. This requires moderate oven temperature and careful timing. The water bath (also called a bain-marie) creates humidity and gentle, even heat that prevents the edges from overcooking while the center remains underdone—a common cheesecake problem.
I learned the importance of the water bath the hard way. My first few cheesecakes emerged from the oven with dramatic cracks across the top and edges that were practically cheese leather while the centers wobbled dangerously. It wasn’t until I researched proper cheesecake technique that I understood the transformative power of that pan of hot water in the oven.
Ingredients
Ingredients for The Creamiest Strawberry Cheesecake
This recipe serves 12-16 people and requires quality ingredients for the best results:
For the Graham Cracker Crust:
- 2 cups graham cracker crumbs (about 16 full crackers)
- ½ cup unsalted butter, melted
- ¼ cup granulated sugar
- Pinch of salt
Creamy Cheesecake Filling:
- 32 ounces (four 8-ounce packages) cream cheese, softened to room temperature
- 1¼ cups granulated sugar
- 1 tablespoon cornstarch
- 1 cup sour cream, room temperature
- 2 teaspoons pure vanilla extract
- 1 teaspoon fresh lemon juice
- 4 large eggs, room temperature
- ½ cup heavy cream, room temperature
Fresh Strawberry Topping:
- 2 pounds fresh strawberries, hulled and halved
- ½ cup granulated sugar
- 2 tablespoons lemon juice
- 1 tablespoon cornstarch
- 2 tablespoons water
- 1 teaspoon vanilla extract
Optional Garnish:
- Fresh whole strawberries
- Whipped cream rosettes
- Fresh mint leaves
- Lemon zest
Instructions
Step-by-Step Instructions for Creamy Cheesecake Perfection
Creating the Perfect Crust
Step 1: Prepare Your Pan Wrap the outside of a 9-inch springform pan with two layers of heavy-duty aluminum foil, covering the bottom and sides completely. This waterproofs the pan for the water bath. Grease the inside of the pan lightly with butter.
Step 2: Make the Graham Cracker Base In a medium bowl, combine graham cracker crumbs, melted butter, sugar, and salt. Mix with a fork until the mixture resembles wet sand and holds together when pressed. Press firmly into the bottom and about 1 inch up the sides of your prepared springform pan. Use the bottom of a measuring cup to pack it firmly and evenly.
Step 3: Pre-Bake the Crust Bake at 325°F (165°C) for 10 minutes. This sets the crust and prevents it from becoming soggy when you add the filling. Let it cool while you prepare the cheesecake filling.
Making the Creamiest Cheesecake Filling
Step 4: Beat the Cream Cheese In a large mixing bowl or stand mixer fitted with the paddle attachment, beat the softened cream cheese on medium speed for 3-4 minutes until completely smooth, fluffy, and free of any lumps. Scrape down the sides and bottom of the bowl several times during this process. This step is crucial—any lumps now will remain in your finished cheesecake.
Step 5: Add Sugar Mixture In a small bowl, whisk together sugar and cornstarch (the cornstarch helps prevent cracking). Add this mixture to the cream cheese and beat on medium speed for 2 minutes until light and fluffy.
Step 6: Incorporate Dairy Add sour cream, vanilla extract, and lemon juice. Beat on low speed just until combined—overmixing at this stage can incorporate too much air, which leads to cracks.
Step 7: Add Eggs Carefully This is perhaps the most important step for creamy texture. Add eggs one at a time, beating on the lowest speed setting just until each egg is incorporated. As soon as you no longer see streaks of egg, stop mixing. Overmixing eggs creates air bubbles that expand during baking and cause cracks.
Step 8: Finish with Cream Pour in the heavy cream and gently fold it in with a rubber spatula rather than using the mixer. This final addition makes the filling extra silky without incorporating too much air.
The Water Bath Method
Step 9: Prepare the Water Bath Place your wrapped springform pan in a large roasting pan. Pour the cheesecake filling into the crust—it should come almost to the top of the pan. Bring a kettle or pot of water to a boil.
Step 10: Create Humidity Carefully place the roasting pan (with the cheesecake) on the pulled-out oven rack. Pour the boiling water into the roasting pan until it comes about halfway up the sides of the springform pan. Gently push the rack back into the oven.
Baking Your Creamy Strawberry Cheesecake
Step 11: Slow and Steady Wins Bake at 325°F (165°C) for 1 hour and 15 minutes to 1 hour and 30 minutes. The cheesecake is done when the edges are set but the center still jiggles slightly when you gently shake the pan—about a 2-inch diameter circle in the center should still wobble like jello. Don’t overbake! It will continue cooking as it cools.
Step 12: Cool Gradually Turn off the oven but don’t open the door. Leave the cheesecake in the oven with the door closed for 1 hour. This gradual temperature change prevents dramatic cracking. After 1 hour, crack the door and let it cool for another 30 minutes.
Step 13: Finish Cooling Remove the cheesecake from the water bath and discard the foil. Run a thin knife around the edge to loosen it from the pan (this prevents cracks as it cools and contracts). Let it cool to room temperature on a wire rack, about 2 hours.
Step 14: The Overnight Chill Cover the cheesecake (still in the pan) with plastic wrap and refrigerate for at least 8 hours, preferably overnight. This isn’t optional—this chilling time is when the magic happens. The texture firms up, flavors meld, and it transforms from good to extraordinary.
Making Perfect Strawberry Topping
Step 15: Cook the Strawberries In a medium saucepan, combine halved strawberries, sugar, and lemon juice. Cook over medium heat, stirring occasionally, until the strawberries release their juices and the mixture begins to simmer, about 5-7 minutes.
Step 16: Thicken the Sauce In a small bowl, whisk cornstarch and water together to make a slurry. Pour this into the strawberry mixture and stir constantly. Continue cooking for 2-3 minutes until the mixture thickens to a glaze-like consistency. Remove from heat and stir in vanilla.
Step 17: Cool the Topping Let the strawberry topping cool to room temperature, then refrigerate until ready to serve. It will thicken slightly more as it cools.
The Grand Reveal
Step 18: Remove from Pan When ready to serve, carefully remove the sides of the springform pan. You can run a knife dipped in hot water around the edge first if it seems stuck. Slide the cheesecake (still on the metal bottom) onto your serving plate, or carefully remove it using large spatulas.
Step 19: Add the Strawberry Glory Spoon the cooled strawberry topping over the entire top of the cheesecake, letting some cascade down the sides naturally. Arrange a few whole strawberries on top for decoration, add whipped cream rosettes if desired, and garnish with fresh mint leaves.
Step 20: Slice and Serve Use a sharp knife dipped in hot water and wiped clean between cuts for the cleanest slices. Each perfect wedge should reveal layers of golden crust, creamy white cheesecake, and glossy red strawberry topping.
Expert Tips for Cheesecake Success
After years of cheesecake perfecting, these tips guarantee success:
Temperature is Everything: All filling ingredients must be at room temperature. Cold ingredients don’t blend smoothly, leaving lumps and potentially causing cracks.
Don’t Rush the Cream Cheese: Beat it longer than you think necessary. It should be completely smooth before you add anything else.
Less is More with Mixing: Once you add the eggs, mix as little as possible. Each unnecessary revolution of the mixer incorporates air that will expand during baking and cause cracks.
The Jiggle Test: The center should jiggle like Jello when you gently shake the pan. It seems underdone, but it’s perfect—it will firm up as it cools.
Patience with Cooling: Don’t rush the cooling process. Sudden temperature changes cause cracks. The gradual cool-down in the oven is essential.
The Overnight Wait: I know it’s torture, but overnight chilling truly is necessary for the best texture and flavor development.
Prevent Soggy Crust: Make sure your foil wrapping is waterproof. Any leaks into the springform pan will make the crust soggy.
Strawberry Cheesecake Variations
Once you’ve mastered this recipe, try these delicious variations:
Mixed Berry Cheesecake: Replace strawberries with a combination of strawberries, blueberries, raspberries, and blackberries.
Lemon Strawberry Cheesecake: Add 2 tablespoons of lemon zest to the filling for bright citrus flavor.
Chocolate Strawberry Cheesecake: Add 4 ounces of melted and cooled dark chocolate to the filling. Top with chocolate shavings and strawberries.
Strawberry Swirl Cheesecake: Reserve 1 cup of filling, mix with ¼ cup of strawberry puree, and swirl into the main filling before baking.
White Chocolate Strawberry: Melt 8 ounces of white chocolate and mix into the filling for extra richness.
No-Bake Version: Use the same filling but add gelatin to set it. Skip the oven entirely for hot summer days.
Serving Suggestions
This stunning cheesecake deserves a special presentation:
Serve chilled but not ice-cold—about 45 minutes out of the refrigerator is perfect
Add a dollop of fresh whipped cream to each slice
Dust the plate with powdered sugar for elegance
Pair with champagne or prosecco for celebrations
Serve with fresh strawberries on the side
Add a small scoop of vanilla bean ice cream for extra decadence
Storage and Make-Ahead Instructions
Refrigerator: Store covered for up to 5 days. The flavor actually improves over the first 2-3 days.
Freezing: Wrap well and freeze (without topping) for up to 2 months. Thaw overnight in the refrigerator before adding strawberry topping.
Make-Ahead Strategy: Bake the cheesecake up to 3 days in advance. Make the strawberry topping the day you plan to serve it for the freshest flavor.
Transporting: Keep chilled until the last possible moment. Transport in the springform pan for stability, removing the sides only when ready to serve.
Nutritional Information
Per serving (1 slice, assuming 16 slices):
Calories: 425
Total Fat: 30g
Saturated Fat: 18g
Cholesterol: 145mg
Sodium: 280mg
Total Carbohydrates: 35g
Dietary Fiber: 2g
Sugars: 27g
Protein: 7g
Perfect Pairings for Strawberry Cheesecake
This luxurious dessert pairs beautifully with:
Wines:
Moscato d’Asti
Prosecco
Rosé Champagne
Late harvest Riesling
Ruby Port
Coffees:
Vanilla latte
Cappuccino
Irish coffee
Espresso
Other Beverages:
Dessert wine
Strawberry lemonade
Sparkling water with lemon
Hot tea (Earl Grey or English Breakfast)