The Cookie That Rekindled My Love for Baking
I’ll never forget the first time I successfully made homemade Nutter Butters. It was a rainy Saturday afternoon, and I was craving those iconic peanut-shaped sandwich cookies from my childhood. Instead of running to the store, I decided to try making them from scratch. When I pulled that first batch from the oven and sandwiched them together with homemade peanut butter cream, I experienced a moment of pure baking triumph.
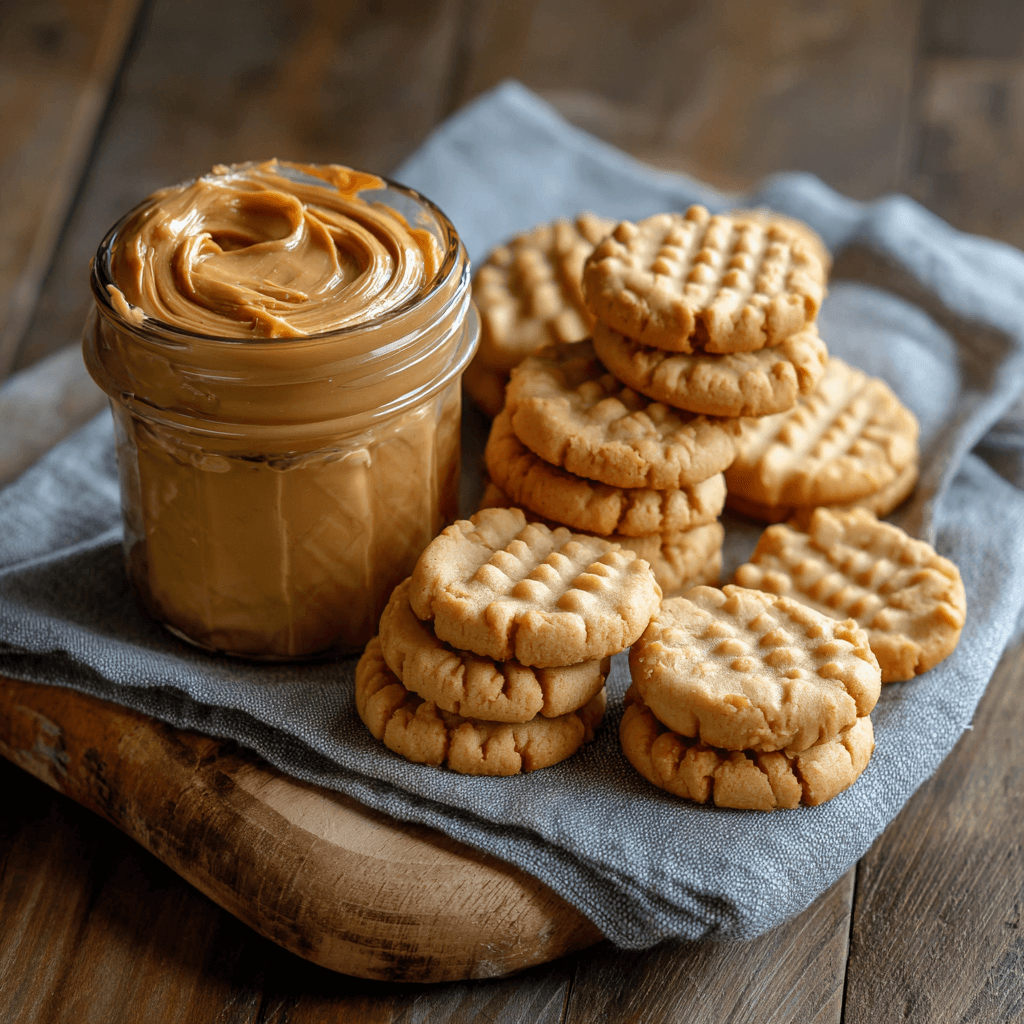
These copycat Nutter Butters capture everything wonderful about the store-bought version while elevating the experience with fresher ingredients and more intense peanut butter flavor. The cookies themselves are tender yet crisp, with that distinctive crumbly texture that makes Nutter Butters so addictive. The filling is creamy, rich, and intensely peanut-buttery—better than the original, if I’m being honest.
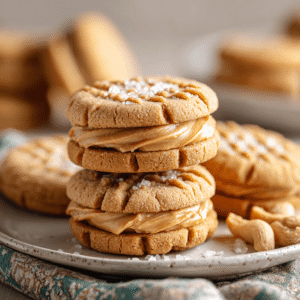
Looking at these beautiful sandwich cookies stacked high, you can see the classic peanut cookie texture with its cross-hatch pattern, that layer of creamy filling perfectly sandwiched between, and a sprinkle of sea salt on top that adds a gourmet touch. The golden color of the cookies, the smooth cream filling swirled between them, and those scattered cashews in the background create a scene that’s both nostalgic and elevated.
Why Homemade Nutter Butters Beat Store-Bought
Superior Ingredients and Flavor
The most compelling reason to make copycat Nutter Butters at home is the dramatic improvement in flavor. When you control the ingredients, you can use high-quality peanut butter without additives or preservatives. The result is a more pronounced, natural peanut flavor that tastes authentic rather than artificially enhanced.
You’ll also notice the texture is superior. Homemade cookies have a freshness that packaged cookies simply can’t match. They’re crisp on the outside with a slightly tender interior, and that filling is creamy and smooth without any waxy aftertaste. Once you’ve tried homemade Nutter Butters, the store-bought version tastes flat and overly processed in comparison.
Making Nutter Butters from scratch gives you complete control over sweetness, saltiness, and texture. Want a less sweet version? Reduce the sugar. Prefer extra peanut butter flavor? Add more to both the cookies and filling. You can make them larger or smaller, adjust the thickness of the filling, or even add mix-ins like mini chocolate chips.
This customization extends to dietary needs too. Need gluten-free Nutter Butters? Substitute gluten-free flour. Want them vegan? Use plant-based butter and adjust the binding agents. The base recipe is flexible enough to accommodate various modifications while maintaining that essential Nutter Butter character.
The Joy of the Baking Process
There’s something deeply satisfying about making these copycat Nutter Butters from scratch. Rolling out the dough, cutting peanut shapes (or using round cutters if you don’t have a peanut-shaped one), watching them bake to golden perfection, then carefully assembling the sandwiches—each step is enjoyable and meditative.
The process also makes your kitchen smell incredible. That warm, toasty peanut butter aroma that fills the air as the cookies bake is worth the effort alone. It creates an atmosphere of comfort and hominess that instant gratification from store-bought cookies simply can’t provide.
Essential Ingredients for Copycat Nutter Butters
Cookie Base Ingredients
- 2 1/4 cups all-purpose flour
- 1/2 teaspoon baking soda
- 1/2 teaspoon baking powder
- 1/4 teaspoon salt
- 1/2 cup unsalted butter, softened
- 3/4 cup creamy peanut butter
- 3/4 cup granulated sugar
- 1/2 cup packed light brown sugar
- 1 large egg
- 1 teaspoon vanilla extract
Peanut Butter Cream Filling
- 3/4 cup creamy peanut butter
- 1/2 cup unsalted butter, softened
- 1 1/2 cups powdered sugar
- 2-3 tablespoons heavy cream or milk
- 1/4 teaspoon salt
- 1/2 teaspoon vanilla extract
Optional Finishing Touches
- Flaky sea salt for sprinkling
- Extra peanut butter for drizzling
- Melted chocolate for dipping
Step-by-Step Instructions
Preparing the Cookie Dough
Start by whisking together your dry ingredients—flour, baking soda, baking powder, and salt—in a medium bowl. This ensures even distribution of leavening agents, which is crucial for consistent texture in your copycat Nutter Butters. Set this mixture aside while you prepare the wet ingredients.
In a large mixing bowl, cream together the softened butter and peanut butter until smooth and well combined. Use a hand mixer or stand mixer fitted with the paddle attachment. Beat for about 2 minutes until the mixture is light and fluffy. This creaming process incorporates air, which contributes to the cookies’ tender texture.
Add both sugars to the peanut butter mixture and beat for another 2-3 minutes until fluffy and lighter in color. Proper creaming of butter and sugar is one of the most important steps in cookie baking—don’t rush it. The mixture should look noticeably paler and feel lighter when ready.
Combining and Chilling the Dough
Beat in the egg and vanilla extract until fully incorporated. The mixture might look slightly curdled at this point—that’s normal and will resolve once you add the flour. Add the dry ingredients to the wet ingredients in two or three additions, mixing on low speed just until combined after each addition.
Be careful not to overmix once the flour is added. Overmixing develops too much gluten, resulting in tough cookies rather than the tender, crumbly texture that makes Nutter Butters special. Mix just until no flour streaks remain.
Divide the dough into two portions, shape each into a disk, wrap tightly in plastic wrap, and refrigerate for at least 1 hour. This chilling step is essential—it firms up the fats so the cookies hold their shape during baking and prevents excessive spreading.
Rolling and Cutting Your Nutter Butter Cookies
Once chilled, remove one disk of dough from the refrigerator and let it sit at room temperature for 5-10 minutes—this makes rolling easier. On a lightly floured surface, roll the dough to about 1/4-inch thickness. Consistency in thickness ensures even baking, so all cookies finish at the same time.
If you have a peanut-shaped cookie cutter, now’s the time to use it for authentic-looking copycat Nutter Butters. If not, a round 2-inch cutter works perfectly well—the flavor and texture matter more than the exact shape. Cut as many cookies as possible from the rolled dough, then gather scraps, re-roll once, and cut more.
Using the tines of a fork, create the signature crosshatch pattern on each cookie. Press gently—you want to make marks without pressing all the way through the dough. This crosshatch isn’t just decorative; it’s iconic to the Nutter Butter aesthetic and helps the cookies bake more evenly.
Baking to Golden Perfection
Preheat your oven to 350°F (175°C) and line baking sheets with parchment paper. Arrange cookies on the prepared sheets, leaving about 2 inches between each—they’ll spread slightly during baking. You want them to remain distinct cookies rather than merging into one mega-cookie.
Bake for 10-12 minutes, just until the edges are set and lightly golden. The centers might still look slightly soft—that’s perfect. They’ll firm up as they cool. Overbaking results in hard, dry cookies instead of the tender texture you want in copycat Nutter Butters.
Let cookies cool on the baking sheet for 5 minutes before transferring to a wire rack. This brief resting time allows them to set enough to move without breaking. Cool completely before filling—warm cookies will melt the filling, creating a mess.
Creating the Perfect Peanut Butter Filling
While your cookies cool, make the filling. In a medium bowl, beat together the peanut butter and softened butter until smooth and creamy. This combination creates a filling that’s rich but not too heavy, with incredible peanut butter flavor.
Add the powdered sugar, salt, and vanilla extract. Beat on low speed initially to prevent a sugar explosion, then increase to medium-high and beat for 2-3 minutes until light and fluffy. Add cream or milk one tablespoon at a time until you reach your desired consistency. The filling should be spreadable but thick enough to hold its shape between cookies.
For the creamiest filling, make sure your butter and peanut butter are at true room temperature—not cold, not warm. Room temperature fats emulsify properly with the sugar, creating that smooth, velvety texture that makes these copycat Nutter Butters so irresistible.
Assembling Your Nutter Butter Sandwiches
Once cookies are completely cool, it’s assembly time—my favorite part! Flip half the cookies upside down on your work surface. These will be your base cookies. Pipe or spoon about 1 tablespoon of filling onto each upturned cookie, creating a mound in the center.
Don’t spread the filling all the way to the edges. When you press the top cookie on, the filling will naturally spread toward the edges. If you pre-spread to the edges, it will squish out when pressed, creating messy cookies. Trust the process—let pressure do the spreading for you.
Place a second cookie on top of each filling mound and press gently but firmly. The filling should spread to just barely reach the edges—perfect. If some squishes out, that’s okay; just wipe it away with a damp cloth. For a gourmet touch, sprinkle a few flakes of sea salt on top of each cookie before the filling sets.
Nutritional Information
Per Cookie (based on 24 sandwich cookies)
- Calories: 215
- Protein: 5g
- Carbohydrates: 23g
- Fat: 13g
- Saturated Fat: 5g
- Cholesterol: 25mg
- Sodium: 115mg
- Fiber: 1g
- Sugar: 14g
These copycat Nutter Butters are treats, not health food, but they do offer some nutritional value from the peanut butter—protein, healthy fats, and minerals. Enjoy them as an occasional indulgence rather than everyday snacks.
Variations and Creative Twists
Chocolate-Enhanced Nutter Butters
For chocolate lovers, transform these copycat Nutter Butters into chocolate-peanut butter heaven. Add 1/4 cup cocoa powder to the cookie dough, reducing flour by the same amount. The result is a chocolate cookie with peanut butter filling—like a homemade version of those chocolate-covered peanut butter cups.
Alternatively, keep the cookies as written but dip the assembled sandwiches halfway in melted dark chocolate. Let the chocolate set on parchment paper. The combination of peanut butter cookies, peanut butter filling, and dark chocolate creates an ultra-decadent treat.
Crunchy Peanut Butter Version
If you prefer crunch in your cookies, substitute crunchy peanut butter for the creamy variety in the cookie dough. The small peanut pieces add textural interest and intensify the peanut flavor. You can also fold 1/2 cup finely chopped peanuts into the dough for extra crunch throughout.
For the filling, try mixing 1/4 cup of very finely chopped peanuts into the cream. This creates a filling with pleasant peanut chunks that adds another dimension to each bite of your copycat Nutter Butters.
Mini and Giant Versions
Size flexibility is one advantage of homemade cookies. Make mini Nutter Butters using a 1-inch cutter—perfect for parties or portion control. Reduce baking time to 8-9 minutes for these bite-sized treats. They’re adorable and addictive.
On the flip side, make giant Nutter Butters using a 3-4 inch cutter. Increase baking time to 14-16 minutes. These jumbo cookies make impressive gifts and are perfect for serious peanut butter enthusiasts who want maximum cookie in every bite.
Storage and Make-Ahead Tips
Keeping Cookies Fresh
Store your assembled copycat Nutter Butters in an airtight container at room temperature for up to 5 days. Place parchment or wax paper between layers to prevent sticking. The cookies stay remarkably fresh thanks to the fat content in the peanut butter, which keeps them from drying out.
If your kitchen is very warm, you might want to refrigerate them to prevent the filling from becoming too soft. Just let them come to room temperature for about 15 minutes before eating for the best texture and flavor.
Freezing for Later Enjoyment
Both the unbaked dough and baked unfilled cookies freeze beautifully. For dough, wrap the disks tightly and freeze for up to 3 months. Thaw overnight in the refrigerator before rolling and baking. For baked cookies, freeze them unfilled in a single layer on a baking sheet until solid, then transfer to freezer bags.
You can also freeze assembled Nutter Butters. Place them in a single layer on a baking sheet and freeze until solid, then transfer to an airtight container with parchment between layers. They’ll keep for up to 2 months. Thaw at room temperature for about 30 minutes before serving.
Baking Day Strategy
To make the process less overwhelming, break it into stages. Day one: make and chill the dough. Day two: roll, cut, and bake the cookies. Day three: make the filling and assemble. This approach spreads the work over several days, making it more manageable and less tiring.
Alternatively, bake all the cookies one day and freeze them. Then, when you want fresh Nutter Butters, simply thaw the cookies, make fresh filling, and assemble. This gives you the convenience of having most of the work done while still providing that “freshly made” quality.
Perfect Pairings and Serving Ideas
Beverage Companions
Copycat Nutter Butters pair perfectly with cold milk—the classic cookie companion. The milk helps balance the richness and provides hydration between bites of dense, peanut-buttery goodness. For adults, coffee is equally wonderful. The bitter notes of coffee complement the sweet, nutty cookies beautifully.
Hot chocolate is another excellent pairing, especially during colder months. The chocolate-peanut butter combination is universally beloved. For something different, try them with chai tea. The spices in chai—cinnamon, cardamom, ginger—add complexity that elevates the simple peanut flavor.
Serving Presentations
These homemade cookies deserve special presentation. Arrange them on a tiered cake stand for parties, alternating directions to create visual interest. The crosshatch pattern on top makes them naturally decorative. Place a small bowl of sea salt nearby so guests can add extra if desired.
For gifts, pack Nutter Butters in a clear cellophane bag tied with ribbon. The cookies are pretty enough to show off. Include a card with storage instructions. Alternatively, pack them in vintage tins or decorative boxes—they make thoughtful, homemade gifts that friends and family will genuinely appreciate.
Ice Cream Sandwiches
Transform your copycat Nutter Butters into incredible ice cream sandwiches. Use slightly larger cookies (3-inch diameter) and sandwich vanilla, chocolate, or peanut butter ice cream between them. Roll the edges in mini chocolate chips or chopped peanuts for extra appeal.
Wrap each ice cream sandwich individually in plastic wrap and freeze until solid. They’ll keep for up to one month in the freezer. These elevated treats are perfect for summer gatherings or as a special dessert that combines two beloved treats into one.
Troubleshooting Common Issues
Cookies Spreading Too Much
If your Nutter Butters spread excessively during baking, the dough was likely too warm. Always chill the dough thoroughly—at least one hour, preferably two. If your kitchen is warm, chill the cut cookies on the baking sheet for 10-15 minutes before baking.
Another cause of spreading is too much butter or not enough flour. Measure flour properly by spooning it into the measuring cup and leveling off rather than scooping directly from the bag, which compresses the flour and results in less than needed.
Cookies Too Hard or Dry
Overbaking is the primary cause of hard, dry cookies. Remember, the cookies continue cooking slightly after you remove them from the oven due to residual heat. They should look barely done when you take them out—just set at the edges with slightly soft centers.
Another possible cause is too much flour. Again, measure carefully. If you live in a dry climate, you might need to add an extra tablespoon of milk or water to the dough to compensate for lower humidity.
Filling Too Soft or Too Stiff
If your peanut butter filling is too soft to hold its shape, it needs more powdered sugar or less liquid. Add sugar 1/4 cup at a time until you reach the right consistency. Alternatively, refrigerate the filling for 15-20 minutes to firm it up before using.
If the filling is too stiff to spread easily, add more cream or milk, one teaspoon at a time, until it reaches a spreadable consistency. The ideal filling should hold soft peaks when you lift the beater but still spread easily without tearing the cookies.
Expert Tips for the Best Nutter Butters
After making countless batches of these copycat Nutter Butters, I’ve discovered some tricks that elevate them from good to exceptional. First, use the best peanut butter you can afford. Natural peanut butter creates a more pronounced flavor, though it makes the dough slightly more delicate. Regular commercial peanut butter (like Jif or Skippy) creates a more stable, familiar result.
Second, don’t skip the crosshatch pattern—it’s not just decorative. Those fork marks help the cookies bake more evenly and create the authentic appearance we associate with peanut butter cookies. Plus, they provide little crevices that catch extra sea salt if you’re adding that finishing touch.
Third, resist the temptation to make the filling too thick. Yes, it’s delicious and you want lots of it, but too much filling makes the cookies difficult to eat and overpowers the delicate cookie flavor. About 1 tablespoon per sandwich is the sweet spot—enough to taste in every bite without overwhelming.
Fourth, for the most authentic texture, slightly underbake rather than overbake. The cookies should still give slightly when pressed lightly in the center when you remove them from the oven. They’ll firm up as they cool but maintain that tender, slightly crumbly interior that makes Nutter Butters so addictive.
Finally, my secret weapon: a tiny pinch of cinnamon in the cookie dough. Just 1/4 teaspoon—not enough to taste distinctly as cinnamon, but enough to add warmth and depth that makes people say, “There’s something special about these, but I can’t quite identify it.” It’s my subtle signature that takes these cookies from great to unforgettable.
Why This Recipe Deserves Your Time
In our fast-paced world, taking time to make homemade copycat Nutter Butters might seem unnecessary when you can buy the original in any grocery store. But here’s the thing—baking these cookies isn’t just about the end result. It’s about the process, the aromatherapy of your kitchen filling with peanut butter scent, the satisfaction of creating something with your own hands.
When you bite into one of these homemade Nutter Butters, you’re tasting more than just cookies. You’re tasting the care you put into measuring ingredients precisely, the patience you exercised while the dough chilled, the attention you paid while assembling each sandwich. That investment of time and care translates into flavor and quality that no factory production line can replicate.
Plus, there’s the joy factor. The delight on someone’s face when they bite into a warm, fresh-from-your-oven peanut butter cookie sandwich is priceless. Whether you’re making these for your family, for a party, or just for yourself on a rainy afternoon, the act of creation brings its own reward.
These copycat Nutter Butters have become my go-to recipe when I want to impress without excessive complexity, when I need comfort food that reminds me of simpler times, or when I simply want to fill my home with the warm, welcoming aroma of freshly baked cookies. I hope they bring you as much joy as they’ve brought me.