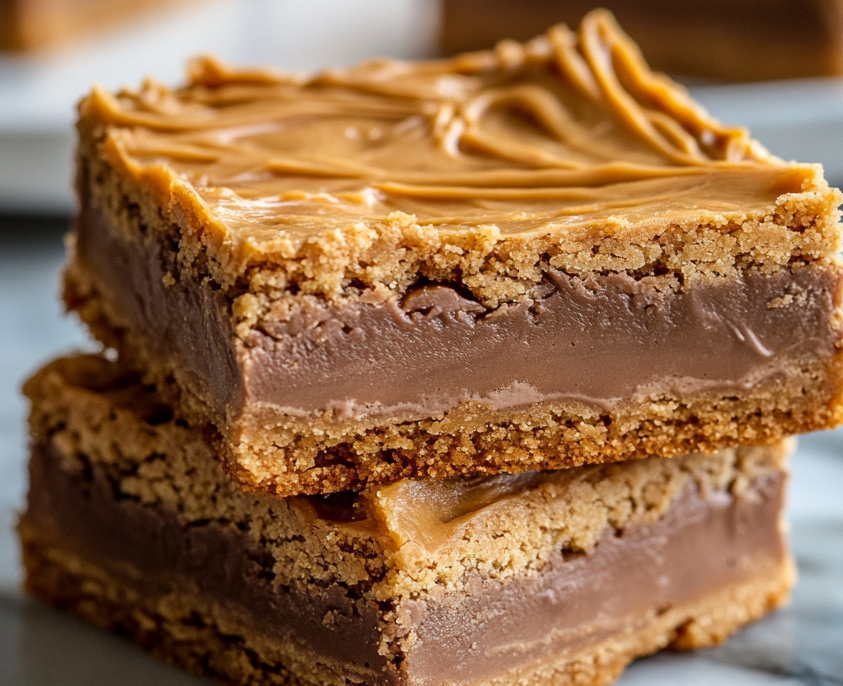
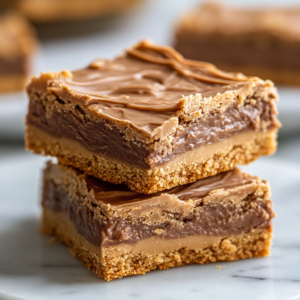
Classic Peanut Butter Lunch Lady Cookie Bars: A Nostalgic Treat
There’s something about the smell of peanut butter cookies baking that takes me right back to childhood. After perfecting this recipe over countless batches (and many happy taste-testers), I’m finally sharing my take on those legendary school cafeteria treats we all remember.
These peanut butter lunch lady cookie bars have become my go-to dessert for practically everything – from last week’s neighborhood potluck to my daughter’s soccer team celebration. They’re ridiculously simple to make but somehow always impress.
What makes these “lunch lady” bars so special?
I spent years trying to recreate that distinctive chew and flavor from the school cafeteria cookies of my youth. While researching this recipe, I discovered these treats earned their “lunch lady” nickname because they were a staple in school cafeterias across America during the 80s and 90s.
The secret? It’s all about that perfect balance between a soft cookie and a chewy bar, with a peanut butter intensity that hits you in waves. The sweet glaze on top adds just the right finish – exactly how I remember them from my elementary school days.
Why you’ll love this recipe
After making these at least monthly for the past two years, I can confidently say:
They’re nearly impossible to mess up – Even when I accidentally undermixed the batch I made for my son’s birthday, they still disappeared within minutes
They use pantry staples – I always have these ingredients on hand, making them perfect for last-minute guests (saved me when my in-laws showed up unexpectedly last month!)
They travel beautifully – Whether packed in lunchboxes or taken to potlucks, they don’t crumble or dry out
If you loved my Peanut Butter Blossom Cookies from last year, these bars give you that same nostalgic flavor in an even easier format.
What you’ll need
These cookie bars rely on simple ingredients that create magic together:
1 cup creamy peanut butter (I prefer Jif, but use what you love)
1/2 cup unsalted butter, softened
1 cup granulated sugar
1 cup brown sugar, packed
2 large eggs (room temperature works best)
1 teaspoon vanilla extract
2 cups all-purpose flour
1 teaspoon baking powder
1/2 teaspoon salt
1 cup powdered sugar (for the glaze)
2-3 tablespoons milk (for the glaze)
Pro tip I learned the hard way: Natural peanut butter creates a different texture. Stick with commercial brands like Skippy or Jif for that authentic lunch lady result.
How to make peanut butter lunch lady cookie bars
Prep your space: Preheat your oven to 350°F and grease a 9×13-inch baking pan. I line mine with parchment for easy lifting.
Mix the foundation: In my stand mixer (though a hand mixer works fine too), cream together the peanut butter, butter, and both sugars until light and fluffy, about 2 minutes. This step is crucial for that perfect texture – don’t rush it!
Add the wet ingredients: Beat in the eggs one at a time, then the vanilla. The mixture should look smooth and creamy.
Incorporate dry ingredients: Whisk together flour, baking powder, and salt in a separate bowl, then add to the wet mixture gradually. Mix just until combined – overmixing made my last batch too dense.
Transfer and bake: Press the dough evenly into your prepared pan. I use slightly damp hands to prevent sticking. Bake for 20-25 minutes, or until the edges turn golden but the center still looks slightly underdone (it’ll continue cooking as it cools).
The finishing touch: Once the bars have completely cooled (I know it’s tempting, but patience pays off here), whisk together powdered sugar and milk until smooth. Drizzle liberally over the bars.
Slice and enjoy: Cut into squares and watch them disappear!
Perfect pairings
When I serve these at family gatherings, I often create a simple dessert bar with:
Cold milk (oat milk works beautifully too)
Sliced bananas on the side
A scoop of vanilla ice cream for those wanting extra indulgence
Tips from my kitchen to yours
After making these countless times (and learning from a few mistakes), here’s what I’ve discovered:
The toothpick test lies – If you wait until a toothpick comes out completely clean, they’ll be overbaked. Look for golden edges with a center that’s set but not firm.
Glaze them twice – For special occasions, I let the first layer of glaze set for about 30 minutes, then add a second drizzle for that bakery-style finish.
Cut them cold – For the cleanest edges (especially important when I’m bringing these to bake sales), I refrigerate them for an hour after glazing, then slice with a sharp knife.
Storage and make-ahead tips
These bars actually taste even better on day two! Here’s how I store them:
Counter storage: In an airtight container, they’ll stay soft for 3-4 days.
Refrigerator: For up to a week, though they rarely last that long in my house.
Freezer: Individual bars wrapped in plastic wrap then placed in a freezer bag keep beautifully for up to 3 months. My kids love finding these in their lunchboxes – they thaw perfectly by lunch time!
Variations to try
The basic recipe is perfect, but I’ve experimented with some delicious twists:
Add 1/2 cup mini chocolate chips to the batter
Replace 1/4 cup of the flour with cocoa powder for a chocolate-peanut butter version
Sprinkle chopped peanuts on top of the glaze for extra crunch
Your questions answered
Can I use natural peanut butter?
You can, but expect a different texture. When I tried this with natural peanut butter, the bars were more crumbly but still delicious.
How do I know when they’re done without overbaking?
The edges should be golden and set, while the center might look slightly underdone. They’ll continue to set as they cool!
Can I double the recipe?
Absolutely! I do this for bake sales using a half-sheet pan (roughly 18×13 inches).
Why did my glaze soak in rather than stay on top?
The bars were likely still warm. I’ve made this mistake before – patience is key for that perfect white glaze finish!
These peanut butter lunch lady cookie bars have become my signature dessert for good reason – they’re simple, nostalgic, and universally loved. I’d love to hear if they bring back cafeteria memories for you too!
Happy baking!