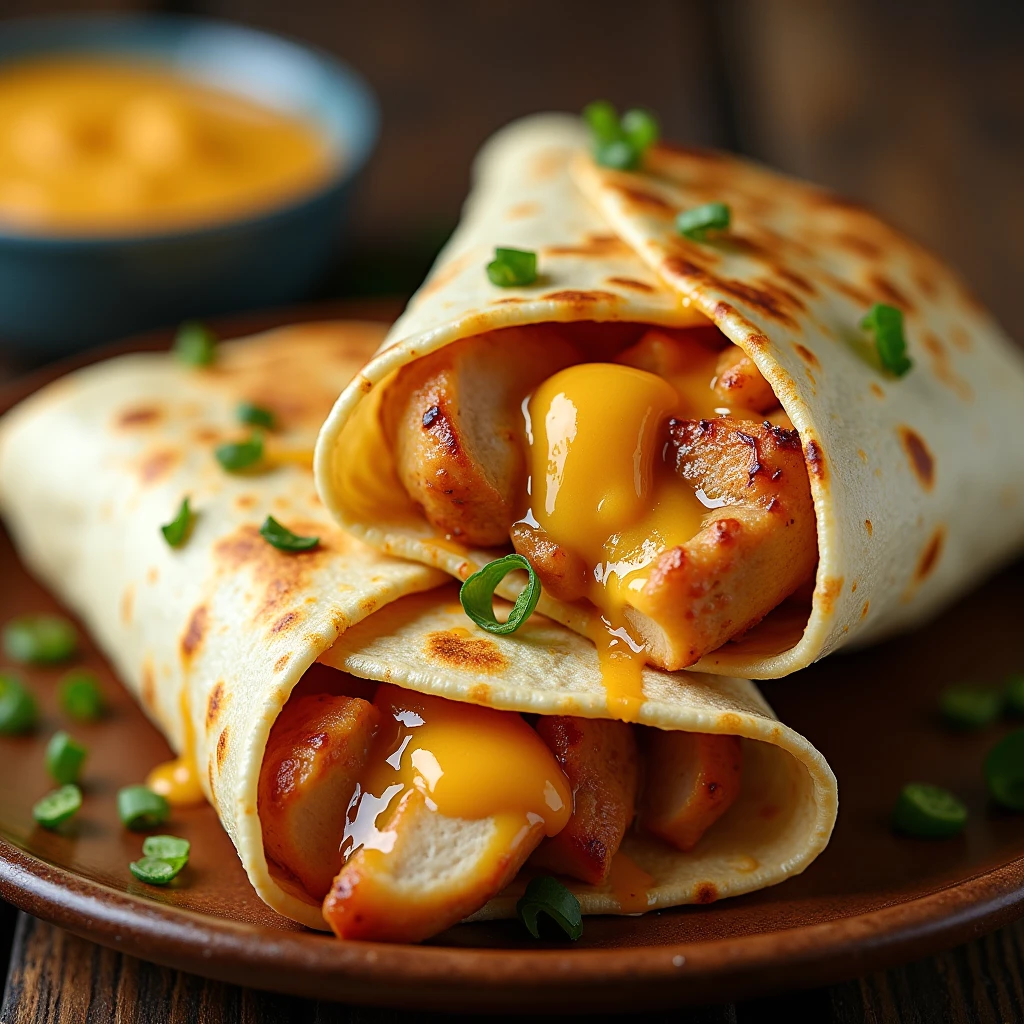
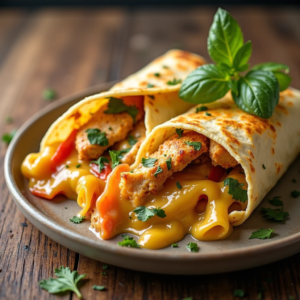
There’s something magical about the moment you bite into a perfectly crafted chicken wrap. The soft tortilla gives way to tender, spiced chicken, crisp vegetables, and that irresistible combination of melted cheese and creamy sauce. Today, I’m sharing my go-to recipe for cheesy garlic chicken wraps that has become a weekly staple in our household.
These aren’t your average lunch wraps. We’re talking about restaurant-quality flavor that you can whip up in your own kitchen using simple ingredients and techniques that actually work.
Why This Chicken Wrap Recipe Works Every Time
After testing dozens of wrap recipes, I’ve learned that the secret lies in three key elements: properly marinated chicken, a killer sauce, and the right assembly technique. This recipe nails all three.
The chicken gets marinated in a blend of yogurt and spices that not only tenderizes the meat but creates those beautiful caramelized edges when cooked. The homemade mayo sauce adds that restaurant-style creaminess that store-bought dressings just can’t match. And the assembly method ensures every bite has the perfect ratio of protein, vegetables, and sauce.
Ingredients You’ll Need
For the Chicken Marinade:
- 1½ kg boneless chicken, cut into strips
- ½ cup plain yogurt
- 1½ tsp salt (or to taste)
- 1 tbsp red chili powder
- 1 tsp cumin powder
- 1 tsp turmeric powder
- 1 tbsp coriander powder
- 1 tsp red chili flakes
- 1 tbsp paprika powder
- 1 tsp garlic powder
- 1 tsp ginger powder
- 1-2 tbsp fresh lemon juice
- 1-2 tbsp olive oil
- 1 pinch food coloring (optional)
Assembly:
- Large flour tortillas
- Fresh lettuce leaves
- Sliced red onions
- Fresh tomato slices
- Bell pepper strips
- Chili sauce
- Shredded cheese (cheddar or mozzarella work great)
Signature Mayo Sauce:
- 1 cup mayonnaise
- ¼ cup plain yogurt
- 1 tbsp fresh lemon juice
- 1 tbsp white vinegar
- 2 tbsp sesame seeds
- ½ tsp salt (or to taste)
- ½ tsp black pepper powder
- ½ tsp dried oregano
- 2 tbsp olive oil
Step-by-Step Instructions
Preparing the Chicken
Start by cutting your chicken into even strips about ½ inch thick. This ensures uniform cooking and makes for easier eating once wrapped.
In a large bowl, combine all the marinade ingredients. The yogurt acts as a natural tenderizer while the spice blend creates layers of flavor that penetrate deep into the meat. Mix everything thoroughly until the chicken is completely coated.
Cover and refrigerate for at least 2 hours, though overnight marination produces even better results. The longer marination time allows the enzymes in the yogurt to break down the protein fibers, resulting in incredibly tender chicken.
Making the Mayo Sauce
While the chicken marinates, prepare your sauce. This isn’t just any mayo-based dressing – it’s a carefully balanced combination that complements the spiced chicken without overpowering it.
Whisk together the mayonnaise and yogurt until smooth. The yogurt adds tanginess and helps thin the sauce to the perfect consistency. Add the lemon juice, vinegar, and all seasonings, whisking until well combined.
The sesame seeds add a subtle nutty flavor and pleasant texture. Store the sauce in the refrigerator until ready to use – it actually improves in flavor as the ingredients meld together.
Cooking the Chicken
Heat a large skillet or grill pan over medium-high heat. You want it hot enough to create a nice sear but not so hot that the spices burn.
Cook the marinated chicken strips in batches, avoiding overcrowding the pan. Each piece should have direct contact with the cooking surface to develop those coveted caramelized edges.
Cook for 4-5 minutes per side, or until the internal temperature reaches 165°F (74°C). The exterior should be golden brown with slightly charred edges that add incredible flavor depth.
Let the chicken rest for about 5 minutes after cooking. This allows the juices to redistribute, ensuring every bite is moist and flavorful.
Assembly Technique That Makes All the Difference
Warm your tortillas slightly – either in a dry pan for 30 seconds per side or wrapped in damp paper towels in the microwave for 20 seconds. Warm tortillas are more pliable and less likely to crack during rolling.
Lay the tortilla flat and spread a generous layer of the mayo sauce across the center, leaving about 2 inches clear on each side. This prevents the sauce from squeezing out during rolling.
Layer your ingredients strategically: lettuce first (it acts as a barrier preventing the tortilla from getting soggy), then the warm chicken, followed by tomatoes, onions, and bell peppers. Add a drizzle of chili sauce if you like extra heat.
Here’s the key to a perfect wrap: don’t overfill. It’s tempting to pack everything in, but restraint here pays off with a wrap that actually holds together.
Pro Tips for Perfect Wraps Every Time
Temperature matters: Serve these wraps immediately after assembly while the chicken is still warm. The contrast between the warm, spiced meat and cool, crisp vegetables is part of what makes them so satisfying.
Customize your heat level: The spice blend in this recipe delivers moderate heat. For milder wraps, reduce the chili powder and skip the chili flakes. For more heat, add fresh sliced jalapeños or increase the chili sauce.
Make-ahead friendly: The chicken can be marinated and cooked up to 2 days in advance. The mayo sauce keeps well in the refrigerator for up to a week. Just assemble fresh wraps when ready to eat.
Vegetable variations: Try adding cucumber for extra crunch, avocado for creaminess, or pickled jalapeños for tangy heat. Roasted red peppers also make an excellent addition.
Nutritional Benefits
These wraps pack serious nutritional value alongside their incredible taste. The chicken provides high-quality protein essential for muscle health and satiety. The yogurt in both the marinade and sauce adds probiotics and calcium.
The fresh vegetables contribute fiber, vitamins, and antioxidants, while the olive oil provides healthy fats. By making these at home, you control the sodium content and can use whole wheat tortillas for added fiber.
Storage and Meal Prep
While these wraps are best enjoyed fresh, you can prep components ahead for quick assembly during busy weekdays. Cook the chicken and store it in the refrigerator for up to 3 days. Pre-wash and chop all vegetables, storing them in separate containers.
The mayo sauce actually improves after a day in the refrigerator as flavors meld. Just give it a quick stir before using.
If you must store assembled wraps, wrap them tightly in foil and refrigerate for no more than 4 hours to prevent sogginess.
Serving Suggestions
These wraps make a complete meal on their own, but they pair beautifully with baked sweet potato fries, a simple side salad, or homemade coleslaw. For drinks, try iced tea, lemonade, or a light beer.
For entertaining, cut the wraps in half diagonally and arrange on a platter with some of the extra mayo sauce for dipping. They make excellent party food that’s both impressive and easy to eat.
The Final Verdict
This cheesy garlic chicken wrap recipe has earned its place in my regular rotation because it delivers restaurant-quality results with home-kitchen simplicity. The combination of perfectly spiced chicken, fresh vegetables, and that incredible mayo sauce creates something special that goes way beyond your average lunch wrap.
The best part? Once you master this basic technique, you can easily adapt it with different proteins, vegetables, or sauce variations to keep things interesting. But honestly, this version is so good that you might not want to change a thing.
Give this recipe a try and prepare to have your new favorite wrap recipe. Your taste buds (and your family) will thank you.