
There’s something undeniably captivating about a beautifully crafted layer cake that commands attention as soon as it enters the room. Among these show-stopping desserts, the Black Velvet Cake with Oreo Frosting stands in a league of its own—a sophisticated twist on the classic red velvet that combines rich chocolate flavors with the beloved taste of Oreo cookies. Having spent years perfecting this recipe in my home kitchen and for countless celebrations, I’m excited to share my insights and techniques for creating this remarkable dessert.
The Black Velvet Cake with Oreo Frosting marries the moist, tender crumb of a chocolate cake with the creamy, cookie-studded frosting that transforms an ordinary dessert into an extraordinary one. Whether you’re planning a birthday celebration, holiday gathering, or simply want to indulge in a weekend baking project, this cake promises to deliver both visually and in flavor.
The Story Behind Black Velvet Cake
While red velvet cake has long held its place in the dessert hall of fame, its darker, more intensely flavored cousin—the black velvet cake—has been gaining well-deserved attention in recent years. This variation intensifies the chocolate notes while maintaining the signature tenderness that makes velvet cakes so beloved.
Traditional red velvet cakes rely on a small amount of cocoa powder, buttermilk, and vinegar, with their distinctive color coming from red food coloring. Black velvet cake, however, embraces a richer chocolate profile, typically using more cocoa powder or even melted dark chocolate to create a deeper flavor and naturally darker appearance.
The pairing with Oreo frosting wasn’t an accident—it was a stroke of culinary brilliance. The classic cookies and cream combination provides the perfect counterpoint to the sophisticated black velvet layers, creating a dessert that appeals to both refined palates and those who appreciate nostalgic flavors.
Key Ingredients for the Perfect Black Velvet Cake
Creating a truly exceptional Black Velvet Cake with Oreo Frosting begins with selecting quality ingredients. Here’s what you’ll need for bakery-worthy results:
For the Black Velvet Cake Layers:
- All-purpose flour (2½ cups): The backbone of our cake structure. For a more tender crumb, you can substitute cake flour, but you’ll need to increase the quantity by 2 tablespoons per cup.
- Dutch-processed cocoa powder (⅔ cup): This alkalized cocoa provides a deeper color and smoother flavor than natural cocoa powder. It’s essential for achieving the true “black velvet” appearance.
- Granulated sugar (2 cups): Balances the cocoa’s bitterness while providing moisture and tenderness.
- Baking soda (2 teaspoons): Reacts with the acidic ingredients to create lift.
- Salt (1 teaspoon): Enhances all the flavors and balances sweetness.
- Large eggs (3): Provide structure, moisture, and richness.
- Vegetable oil (1 cup): Creates exceptional moisture and a velvety texture that butter alone cannot achieve.
- Buttermilk (1 cup): Adds tanginess and reacts with the baking soda for lift. If unavailable, mix 1 cup milk with 1 tablespoon lemon juice or white vinegar and let stand for 5 minutes.
- Strong hot coffee (1 cup): Deepens the chocolate flavor without adding a coffee taste. The heat helps bloom the cocoa powder, enhancing its flavor.
- Pure vanilla extract (2 teaspoons): Rounds out the flavor profile.
- White vinegar (1 tablespoon): Reacts with the baking soda for additional lift and contributes to the velvet texture.
- Black food coloring (optional): For an intensely black cake, though the dark cocoa often provides sufficient color.
For the Oreo Cream Cheese Frosting:
- Cream cheese (16 ounces), softened: Provides tanginess that balances the sweetness.
- Unsalted butter (1 cup), softened: Creates a stable, pipeable frosting.
- Powdered sugar (6 cups): Sweetens and stabilizes the frosting.
- Vanilla extract (2 teaspoons): Enhances the creamy flavor.
- Salt (¼ teaspoon): Balances sweetness.
- Oreo cookies (20-24): Crushed and folded into the frosting, plus additional whole cookies for decoration.
The Perfect Black Velvet Cake Recipe: A Step-by-Step Guide
After numerous iterations and fine-tuning, I’ve developed this foolproof method for creating the most decadent Black Velvet Cake with Oreo Frosting.
Preparing the Cake Layers
- Preheat and prepare: Set your oven to 350°F (175°C). Grease and line three 8-inch round cake pans with parchment paper. This preparation ensures your cakes release cleanly.
- Mix dry ingredients: In a large bowl, whisk together flour, cocoa powder, sugar, baking soda, and salt until well combined. This thorough mixing ensures even distribution of leavening agents.
- Combine wet ingredients: In a separate bowl, whisk eggs, oil, buttermilk, coffee, vanilla, and vinegar. If using black food coloring, add it here. The coffee should be hot to bloom the cocoa but not boiling.
- Create the batter: Gradually add the wet ingredients to the dry ingredients, whisking until just combined. Be careful not to overmix, which can develop gluten and create a tough cake.
- Bake to perfection: Divide the batter evenly among the prepared pans. Bake for 25-30 minutes or until a toothpick inserted in the center comes out with a few moist crumbs but no wet batter.
- Cool properly: Allow cakes to cool in pans for 10 minutes before turning out onto wire racks to cool completely. Proper cooling prevents the layers from breaking and allows the structure to set.
Crafting the Oreo Cream Cheese Frosting
- Beat the base: In a stand mixer with the paddle attachment, beat cream cheese and butter on medium speed until smooth and creamy, about 3 minutes. Scrape down the bowl as needed for even incorporation.
- Add sweetness gradually: Reduce speed to low and add powdered sugar one cup at a time, mixing well after each addition to prevent a sugar cloud.
- Enhance flavor: Add vanilla extract and salt, beating until incorporated.
- Incorporate cookies: Place 16 Oreo cookies in a food processor and pulse until finely crushed. Fold the cookie crumbs into the frosting by hand using a rubber spatula. Reserve some crumbs for decoration.
Assembling Your Masterpiece
- Level the layers: Using a large serrated knife, trim the domed tops of each cake layer to create flat surfaces. This ensures a stable, professional-looking cake.
- Build the foundation: Place one cake layer on your serving plate or cake stand. Spread about 1 cup of frosting evenly over the top.
- Add texture: Sprinkle a layer of crushed Oreos over the frosting for added texture and flavor contrast.
- Continue layering: Place the second cake layer on top and repeat with frosting and cookie crumbs.
- Complete the stack: Position the final cake layer on top, bottom side up (this gives you a flat top surface).
- Crumb coat: Apply a thin layer of frosting around the entire cake. This “crumb coat” seals in any loose cake crumbs. Refrigerate for 30 minutes to set.
- Final coating: Apply the remaining frosting generously to the top and sides of the cake, creating a smooth or textured finish as desired.
- Decorate: Pipe decorative swirls on top using a large star tip. Place whole and halved Oreo cookies around the top edge of the cake. Sprinkle any remaining cookie crumbs over the top or around the base.
Professional Tips for Cake Success
Over the years, I’ve discovered several techniques that elevate a good cake to an exceptional one:
Temperature Matters
Ensure all refrigerated ingredients (eggs, buttermilk, cream cheese, butter) come to room temperature before beginning. This allows for proper emulsification and a smoother batter.
The Coffee Secret
Don’t skip the coffee, even if you’re not a coffee drinker. It enhances the chocolate flavor without adding a coffee taste. The hot liquid blooms the cocoa powder, releasing its full flavor potential.
Measuring Cocoa Correctly
Cocoa powder easily compacts. For accurate measurement, spoon it into your measuring cup and level off with a knife rather than scooping directly with the measuring cup.
Preventing Dry Cake
The most common culprit of dry cake is overbaking. Begin checking your cake about 5 minutes before the suggested baking time. Remember that the cake continues to cook slightly as it cools.
Achieving the Perfect Frosting Consistency
If your frosting seems too soft for decorating, refrigerate it for 15-20 minutes. If it’s too stiff, add a tablespoon of heavy cream or milk and beat until desired consistency is reached.
Make-Ahead Options
The cake layers can be baked up to two days ahead, cooled completely, wrapped tightly in plastic wrap, and stored at room temperature. Alternatively, freeze them for up to a month, well-wrapped. Thaw at room temperature before frosting.
The frosting can be made a day ahead and stored in the refrigerator. Bring to room temperature and beat briefly to restore its fluffy texture before using.
Creative Variations to Explore
While the classic Black Velvet Cake with Oreo Frosting is magnificent on its own, consider these variations to customize it for different occasions:
Mini Black Velvet Oreo Cupcakes
Transform the recipe into approximately 30 cupcakes by filling lined cupcake tins two-thirds full and baking for 18-20 minutes. Core each cupcake and fill with Oreo frosting before topping with more frosting and a mini Oreo.
Black Velvet Oreo Cake Pops
Crumble leftover cake (or bake a layer specifically for this purpose), mix with a small amount of frosting, form into balls, chill, then dip in white chocolate and roll in crushed Oreos.
Black Velvet Oreo Cheesecake Cake
Replace the middle cake layer with an Oreo cheesecake layer for an extraordinary dessert mashup that will become legendary at gatherings.
Seasonal Adaptations
- Halloween: Add orange food coloring to a portion of the frosting for a striking orange and black cake.
- Christmas: Decorate with red and green sprinkles or incorporate peppermint flavor into the frosting.
- Valentine’s Day: Add heart-shaped cookies or red sprinkles for a romantic twist.
The Nutritional Perspective
While Black Velvet Cake with Oreo Frosting is undeniably an indulgent treat, understanding its nutritional aspects can help with mindful enjoyment:
A standard slice (approximately 1/12 of the cake) typically contains:
- Calories: 650-750
- Fat: 35-42g
- Carbohydrates: 80-90g
- Protein: 6-8g
For special dietary needs, consider these adaptations:
Gluten-Free Version
Substitute a high-quality cup-for-cup gluten-free flour blend and ensure your cocoa powder and Oreo-style cookies are certified gluten-free.
Reduced Sugar Option
Decrease the sugar in the cake by up to ¼ cup and use reduced-fat cream cheese in the frosting. While still a sweet treat, these adjustments can make a noticeable difference.
Dairy Considerations
For those with dairy sensitivities, plant-based butter, dairy-free cream cheese alternatives, and a buttermilk substitute (1 cup almond milk + 1 tablespoon lemon juice) can create a delicious dairy-free version.
Serving and Storage Recommendations
To maintain the cake’s quality and ensure the best experience:
Ideal Serving Temperature
The cake is best enjoyed at cool room temperature rather than straight from the refrigerator. Remove it from refrigeration 30-60 minutes before serving to allow the flavors to fully express themselves and the frosting to soften slightly.
Elegant Presentation
Serve on a beautiful cake stand with fresh berries for color contrast. A dusting of powdered sugar or cocoa adds a professional touch.
Proper Storage
Store leftover cake in an airtight container in the refrigerator for up to 5 days. The cream cheese frosting necessitates refrigeration, but the cake layers will stay moist thanks to the oil in the recipe.
For longer storage, individual slices can be frozen for up to 3 months. Wrap each slice in plastic wrap, then aluminum foil, and place in a freezer bag. Thaw overnight in the refrigerator, then bring to room temperature before enjoying.
Why You’ll Love This Black Velvet Cake with Oreo Frosting
After making this cake countless times and receiving enthusiastic feedback, I can confidently share why this recipe stands out:
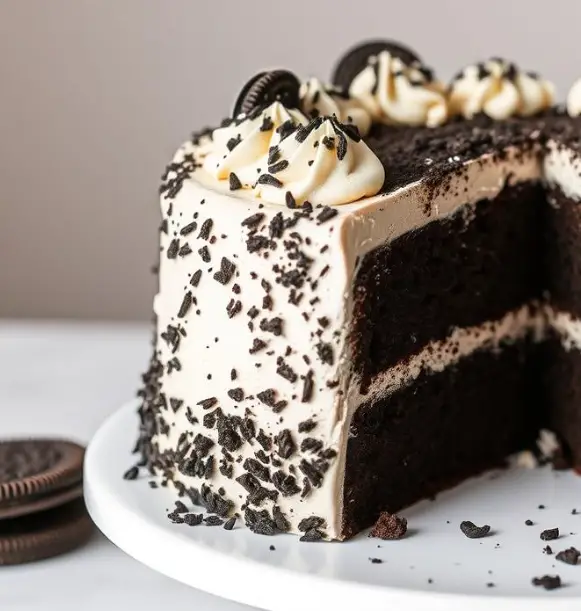
- Visual Impact: The stark contrast between the dark cake layers and white, Oreo-speckled frosting creates a dramatic presentation that impresses before the first bite.
- Texture Harmony: The moist, tender cake paired with creamy frosting and crunchy cookie pieces provides a captivating textural experience.
- Flavor Depth: The dark chocolate notes of the cake complemented by the sweet vanilla and cookie flavors in the frosting create a sophisticated yet approachable flavor profile.
- Nostalgia Factor: Oreos evoke childhood memories for many, adding an emotional connection to this elegant dessert.
- Versatility: Appropriate for casual gatherings yet sophisticated enough for formal celebrations.
Final Thoughts: A Cake Worth Celebrating
The Black Velvet Cake with Oreo Frosting represents more than just ingredients combined—it’s a canvas for creating memories. Whether you’re marking a milestone birthday, celebrating an achievement, or simply wanting to make an ordinary day extraordinary, this cake rises to the occasion.
The contrast of dark and light, the balance of sophisticated chocolate and playful cookies and cream, makes this dessert a true crowd-pleaser that appeals to all ages. Even those who typically pass on dessert find themselves requesting “just a small slice” before returning for seconds.
So preheat your oven, gather your ingredients, and prepare to create not just a cake, but an experience—one that will have friends and family requesting “that amazing Oreo cake” for years to come. In a world of passing trends, this Black Velvet Cake with Oreo Frosting has earned its place as a modern classic that’s here to stay.