Okay, grab a seat and a cup of coffee (or a glass of wine, I don’t judge). Let me tell you about the dinner that almost ended my marriage. Well, not almost, but it was a solid 7 on the “Disaster” scale. It was our first anniversary, and I decided to cook a “fancy” meal. I’d seen a recipe for “Chicken in a Mushroom Wine Sauce” online and thought, How hard can it be? Spoiler: very. I burned the garlic to a crisp (we’re talking charcoal briquette territory), the wine sauce separated into a greasy, sad puddle, and the chicken was drier than the Sahara. My husband, bless his heart, ate three bites, said “It’s… adventurous,” and then we ordered pizza. I cried into my soggy, over-cooked broccoli. That humiliation lit a fire under me. I was determined to master a staple that was always a win—something creamy, comforting, and impressive with minimal risk. That’s how I stumbled upon the Creamy Tuscan Chicken recipe that changed everything. It became my secret weapon, my “I got this” dish. But you know what takes it from great to mind-blowing? Pairing it with the crisp, tangy crunch from a good homemade pickled vegetables guide. That combo is the reason my dinner parties went from “polite compliments” to “ begging for the recipe.”
Materials & Supplies
Alright, let’s get set up. When I first tried this, I was a minimalist with a sad non-stick pan and a dull knife. Trust me, having the right tools makes the process joyful, not a chore.
For the Chicken & Sauce:
- Chicken breasts: 2 large, or 4 smaller ones. I sometimes use boneless, skinless thighs here for extra juiciness—game changer.
- Olive oil: For searing. The good stuff, if you have it.
- Salt & black pepper: The dynamic duo. Be generous but not crazy.
Garlic: 4 cloves, minced. Please* mince it fine; nobody wants to chomp on a garlic chunk.
- Chicken broth: About 1 cup. Low-sodium is best so you control the salt.
- Heavy cream: ½ cup. This is the creamy dream. Half-and-half works in a pinch, but it’s not the same.
Parmesan cheese: ¼ cup, grated. Do not use the pre-shredded stuff in the bag*—it has anti-caking agents that make it grainy. Grate it yourself, it takes 30 seconds.
- Sun-dried tomatoes: ¼ cup, jarred in oil, chopped. I drain the oil into the pan for extra flavor.
- Fresh spinach: 2 big handfuls. It wilts down to nothing, so don’t be shy.
- Italian seasoning: 1 teaspoon. Or just mix your own dried basil, oregano, thyme.
Optional / My Favorite Twists:
- White wine: A splash (¼ cup) to deglaze the pan after cooking the chicken. Adds acidity and depth. You can sub more broth.
- Red pepper flakes: A pinch for a little kick.
Bacon: 2 slices, diced and cooked first. Render the fat, cook the chicken in it, and crumble the bacon on top. Heaven.*
Essential Kitchen Tools:
- A heavy-bottomed skillet or fry pan (I use my trusty 12-inch cast iron). This is non-negotiable for a good sear.
- Tongs for flipping the chicken.
A wooden spoon for scraping up those tasty browned bits (the fond*)—that’s flavor gold.
- Two small bowls: one for your garlic/seasonings, one for your grated parm.
- A cheese grater (microplane is magic for parm).
- A lid or foil for the pan to wilt the spinach.
Timing / Cooking Schedule

Let’s be real about time. This is a 30-minute meal, but the first time I made it? It took me 45 minutes, easy. I was frantic, burned the garlic twice, and spilled the cream. Now, I can have this on the table in 25 minutes flat while also chopping a quick salad. Don’t rush the sear on the chicken—that’s where the flavor is built. Here’s the real breakdown:
- Prep Time: 10 minutes (chop garlic, grate cheese, measure stuff).
- Cook Time: 15 minutes.
- Total Time: 25 minutes.
Honestly, the first time it took me double this time because I was running back and forth checking emails. Now, I set everything out before* I turn the stove on (mise en place, fancy term for “don’t be a dummy like past-me”).
Step-by-Step Instructions
Follow these steps exactly the first few times. Once you vibe with it, you’ll be improvising like a pro.
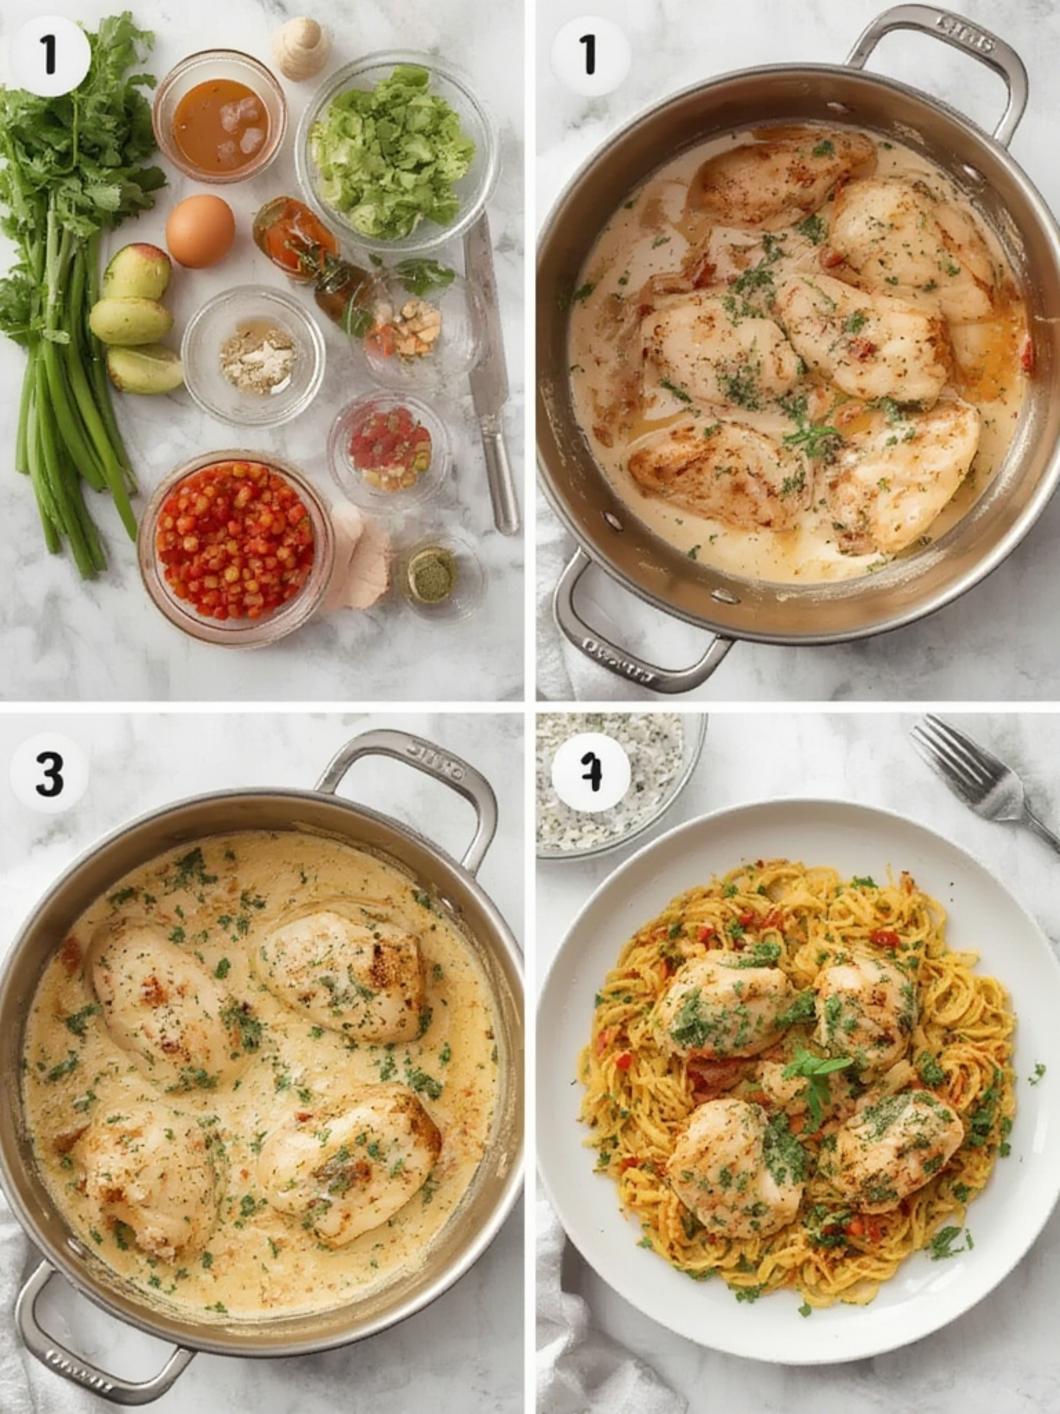
1. Pat That Chicken Dry! Take your chicken breasts out of the fridge 15 minutes before cooking. Pat them very dry with a paper towel. This is the #1 secret to a golden, not steamed, sear. Season both sides generously with salt and pepper. Personal tip: I used to skip the drying step and wondered why my chicken looked pale and sad. My dad (the original grill king) finally showed me the light. Do it. Your future crispy-self thanks you.
2. Sear, Baby, Sear! Heat your olive oil in that heavy skillet over medium-high heat until it shimmers. Add the chicken. Don’t crowd the pan! Cook for 5-6 minutes per side, until deep golden brown. You want those beautiful caramelized bits stuck to the pan—that’s flavor. Transfer the chicken to a plate. Story time: I once crowded my pan because I was impatient. The chicken steamed instead of seared, and the sauce was watery. Lesson learned: work in batches if you have to. It takes an extra 2 minutes and saves the whole dish.
3. Build the Flavor Base. Reduce heat to medium. Add a tiny bit more oil if needed. Toss in the minced garlic and cook for 30 seconds until fragrant—DO NOT BURN IT. Immediately pour in the chicken broth (and wine, if using), and use your wooden spoon to scrape all those glorious browned bits off the bottom of the pan. This is called deglazing, and it’s where the magic happens.
4. Make It Creamy & Tuscan. Stir in the heavy cream and the grated Parmesan. Let it bubble gently for 2-3 minutes until it starts to thicken slightly. Add the chopped sun-dried tomatoes and Italian seasoning. I made the mistake of adding the spinach too early once and it turned into a sad, stringy green slime. Add it next!
5. Finish with Greens & Return the Stars. Throw in all the fresh spinach and stir until it wilts, about 1 minute. Nestle the seared chicken breasts back into the sauce, spooning some over the top. Let it all simmer together for another 2-3 minutes so the chicken heats through and the flavors marry. Taste and adjust salt/pepper.
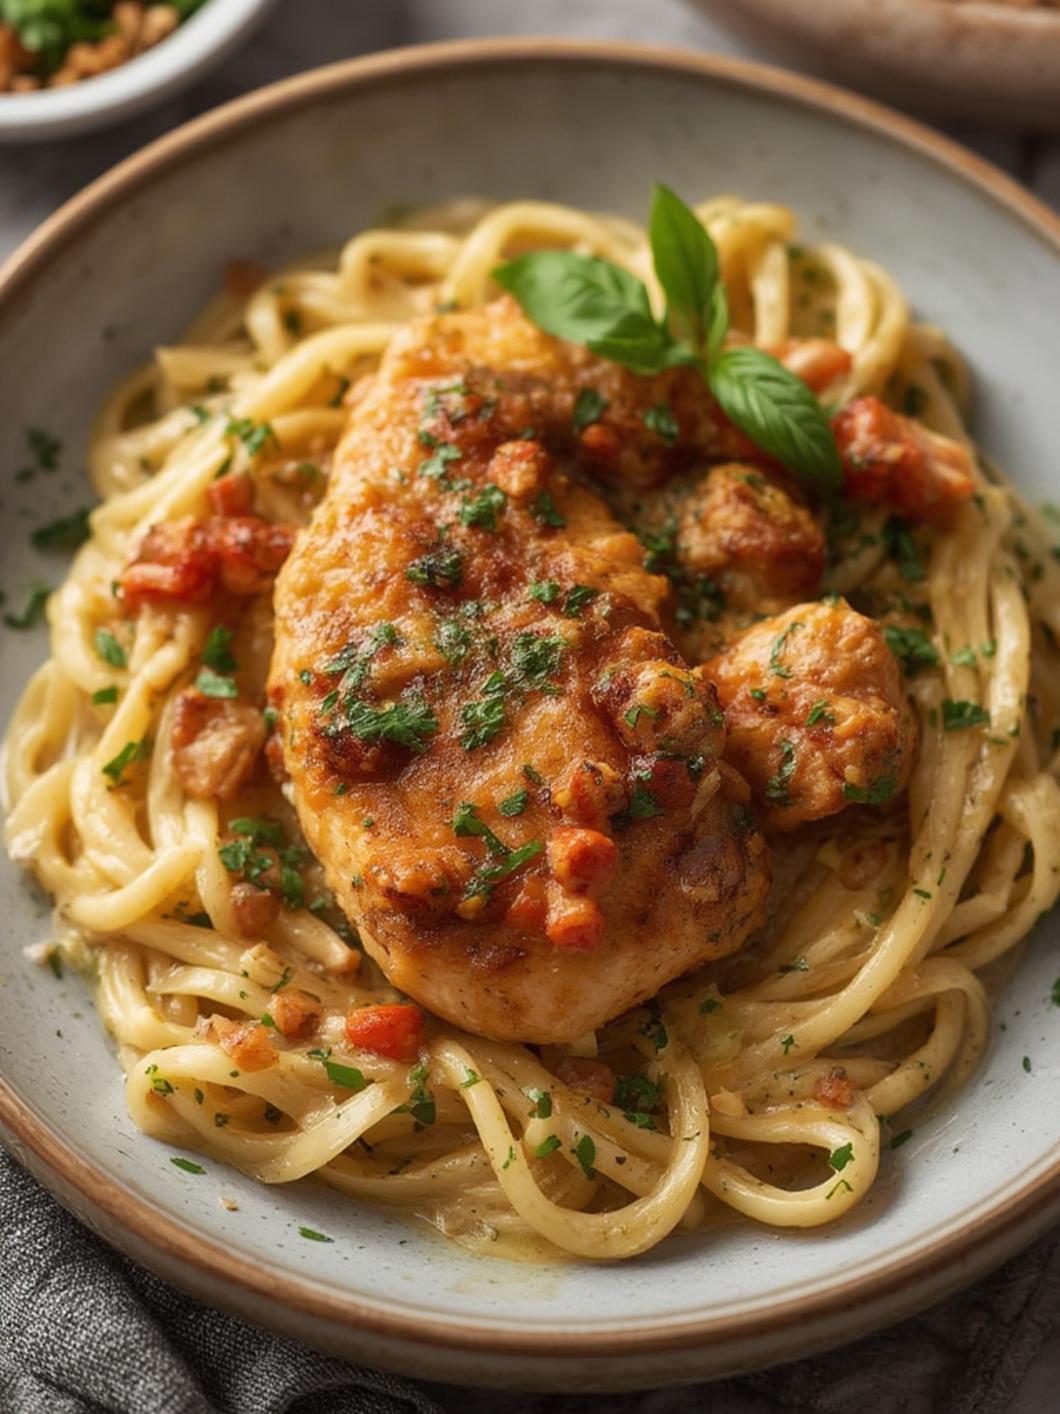
6. Serve Immediately. This is not a make-ahead dish (the sauce can break if reheated too aggressively). Plate that chicken, spoon that glorious sauce over it, and maybe with a hunk of crusty bread to dip. Pro move: Sprinkle a little extra parm and a grind of black pepper on top right before serving.
Nutritional Benefits / Advantages
Look, I’m no dietitian, but I know what makes me feel good. This dish is a powerhouse. You’ve got lean protein from the chicken, healthy fats from the olive oil and cream, antioxidants from the sun-dried tomatoes and spinach, and calcium from the Parmesan. It’s low-carb, gluten-free (if you skip the bread), and deeply satisfying. My doctor was surprised when I told him I make this at home every week and asked what my secret was. I showed him the recipe (he liked the spinach). It’s a complete meal in a pan that doesn’t leave you feeling heavy or bloated like some cream sauces can. The key is moderation—you don’t need a giant bowl of pasta with it. Just the chicken, sauce, and maybe a roasted veg on the side. Energy levels? Steady. Happy belly? Guaranteed.
Tips, Alternative Methods or Cooking Advice
- For a Lighter Sauce: Replace the heavy cream with half-and-half or a full-fat coconut milk for a dairy-free option. It will be slightly less rich but still delicious.
- Spice it Up: Add a pinch of red pepper flakes with the garlic, or a diced jalapeño.
- More Veggies are Welcome: Sauté sliced mushrooms with the garlic. Add them back in with the spinach. Or throw in some artichoke hearts.
- No Wine? No Problem. The chicken broth and a squeeze of lemon juice at the end gives the needed acidity.
- The One-Pan Wonder: I use this exact pan to make a simple side of roasted potatoes or broccoli on another burner while the chicken rests. Cleanup is minimal.
Perfect Pairing: As I mentioned, this is stellar* with a side of quick-pickled cucumbers, red onions, or even asparagus. That bright, acidic crunch cuts through the richness perfectly. That’s where a solid homemade pickled vegetables guide comes in handy—you can have a jar ready in the fridge all week.
Common Mistakes to Avoid
Oh, the things I’ve done. My most infamous mistake? Using pre-shredded Parmesan. I know, I know, it’s convenient. But it has potato starch or cellulose in it to prevent clumping, and that makes the sauce grainy and weird instead of silky and luxurious. I once served it to my in-laws and my mother-in-law, who is a fantastic cook, asked if I’d used “the bagged stuff.” I wanted to die. I’ve since seen the light of a Microplane. Also, overcooking the chicken. You sear it to get color, but it finishes in the sauce. If your chicken was rubbery the first time, you probably cooked it too long in the pan before the sauce step. It will finish cooking in that hot, creamy liquid. Finally, adding cold cream to a super-hot pan can cause it to separate. Keep the heat at a gentle simmer when you stir it in.
Storage / Maintenance Tips
This is best eaten fresh, but if you have leftovers (lucky you), let them cool completely and store in an airtight container in the fridge for up to 3 days. Important: The sauce thickens a lot in the fridge. When reheating, do it gently on the stove over low heat with a splash of chicken broth or milk, stirring constantly to bring it back to life. Do not microwave it on high—it will separate and become an oily mess. If you plan to meal prep, I’d suggest storing the chicken and sauce separately if possible, then combining and gently reheating together. Freezing is not recommended for this creamy sauce, as it can become grainy.
Conclusion
This Creamy Tuscan Chicken recipe isn’t just a meal; it’s my confidence in a skillet. It’s the dish I make when I need to say “I love you” without words, or when I need to impress someone without breaking a sweat. It’s the reason my freezer now always has a jar of quick-pickled carrots and red onions from my trusty homemade pickled vegetables guide, because the contrast of that sweet-tart crunch against the rich, garlicky cream is just… perfection. It’s healed kitchen wounds, won over skeptical friends, and filled my home with the kind of smell that makes people look forward to dinner. So please, give it a try. Follow the steps, dry that chicken, and grate your own cheese. You’ve got this. I can’t wait to hear about your first “Oh my gosh, this is amazing!” moment. Come back and tell me all about it in the comments.
FAQs
Q: Can I use chicken thighs instead of breasts?
A: Absolutely! Boneless, skinless thighs are even more forgiving and juicy. You might need to cook them a minute or two longer per side in the sear step since they’re thicker.
Q: My sauce seems too thin/too thick. How do I fix it?
A: Too thin? Simmer it uncovered for a few more minutes to reduce. Too thick? Whisk in a splash of warm chicken broth or milk, a tablespoon at a time, until it’s creamy but pourable.
Q: Is there a good dairy-free alternative to the cream and cheese?
A: Yes! Use full-fat coconut milk for the cream (it adds a slight tropical note that’s actually nice) and skip the Parmesan or use a nutritional yeast for a “cheesy” flavor. The sauce won’t be as thick, so you can simmer it a bit longer or add a cornstarch slurry (1 tsp cornstarch + 1 tbsp cold water) to thicken it.
Q: Can I make this ahead of time for a dinner party?
A: You can do all the prep (chop garlic, grate cheese, measure) ahead. You can even sear the chicken an hour before, let it rest on a plate, and then make the sauce right before serving, adding the chicken back in to warm through. The sauce doesn’t reheat well made ahead.
Q: My garlic burned! What do I do?
A: Don’t panic. Dump the pan, wipe it out quickly with a paper towel (careful, it’s hot!), start again. But next time, as soon as you smell garlic getting sharp (about 30 seconds after it hits the oil), add the liquid (broth/wine) immediately. That stops the cooking process and saves your garlic from turning bitter.