Let me tell you about the time I tried to impress my future in-laws with a “sophisticated” spaghetti dinner. I was 22, armed with a dubious internet recipe and the confidence of someone who’d successfully boiled pasta. I threw everything into a pot—ground beef, a can of “Italian” tomatoes (the kind with herbs already in it, what was I thinking?), a massive glug of cheap red wine from a box, and—this is the painful part—a entire tablespoon of red pepper flakes because I misread “to taste” as “to set your mouth on fire.” The result? A gritty, salty, volcanic sludge that could have been used to strip paint. My now-husband quietly ate two bowls, bless his heart, but his father took one bite, coughed, and asked if we had any saltines. It was a culinary war crime.
That humiliating dinner haunted me. For years, I avoided making any sauce that wasn’t from a jar. But the memory of that beautiful, rich Traditional Bolognese sauce I’d tasted on a rain-soaked trip to Bologna—silky, deep, complex—wouldn’t leave me. I was determined to master it, not for praise, but for the pure love of a perfect, slow-cooked bowl of comfort. What followed was a beautiful, messy, flour-dusted journey that taught me more about patience and layering flavors than any culinary school ever could. This isn’t just a recipe to me; it’s my redemption arc in a pot. And today, I’m sharing my soul (and my secrets) for the ultimate Classic Bolognese.
Materials & Supplies
Okay, let’s get our mise en place on. This is a simple ingredient list, but the quality makes all the difference. Think of these as your old friends.
- For the Sauce:
* Olive Oil & Butter: My combo. Oil for searing, butter for that final, glossy richness. Use good olive oil for frying, but a basic one is fine.
The Holy Trinity: 1 large yellow onion, 1 carrot, 1 celery rib. Finely diced (soffritto*). This is the non-negotiable flavor base. No substitutions. Ditch the food processor; dicing by hand gives the best texture.
* Garlic: 2-3 cloves, minced. Don’t burn it!
* Ground Meat: 1 pound ground beef (80/20 is my jam for fat) plus 1/2 pound ground pork. The pork adds unctuousness. Sometimes I use all beef and add a few tablespoons of pancetta, diced tiny.
* Tomato Paste: 2 tablespoons. This is your secret weapon for deep, umami-packed color. I use the stuff in the tube so I can use just what I need.
* Dry Red Wine: 1 cup. Something you’d actually drink—a Chianti or Cabernet Sauvignon. Don’t use “cooking wine.” If you don’t drink, use a splash of beef broth and a teaspoon of balsamic vinegar.
* Canned Tomatoes: 1 (28-ounce) can of whole peeled San Marzano tomatoes, crushed by hand. The gold standard. If you can’t find them, any good-quality crushed tomatoes will do.
* Beef or Chicken Broth: 1 cup, low-sodium. Homemade is amazing, but a good boxed brand is fine.
* Dairy: 1/4 cup whole milk or heavy cream. (Yes, milk! It tames the acidity and tenderizes the meat. This is a game-changer).
* Fresh Herbs: A few sprigs of fresh thyme and/or a bay leaf. Dried herbs are okay, but fresh is a level-up.
* Salt & Freshly Cracked Black Pepper: The most important tools in your kitchen. Season in layers.
- For Serving:
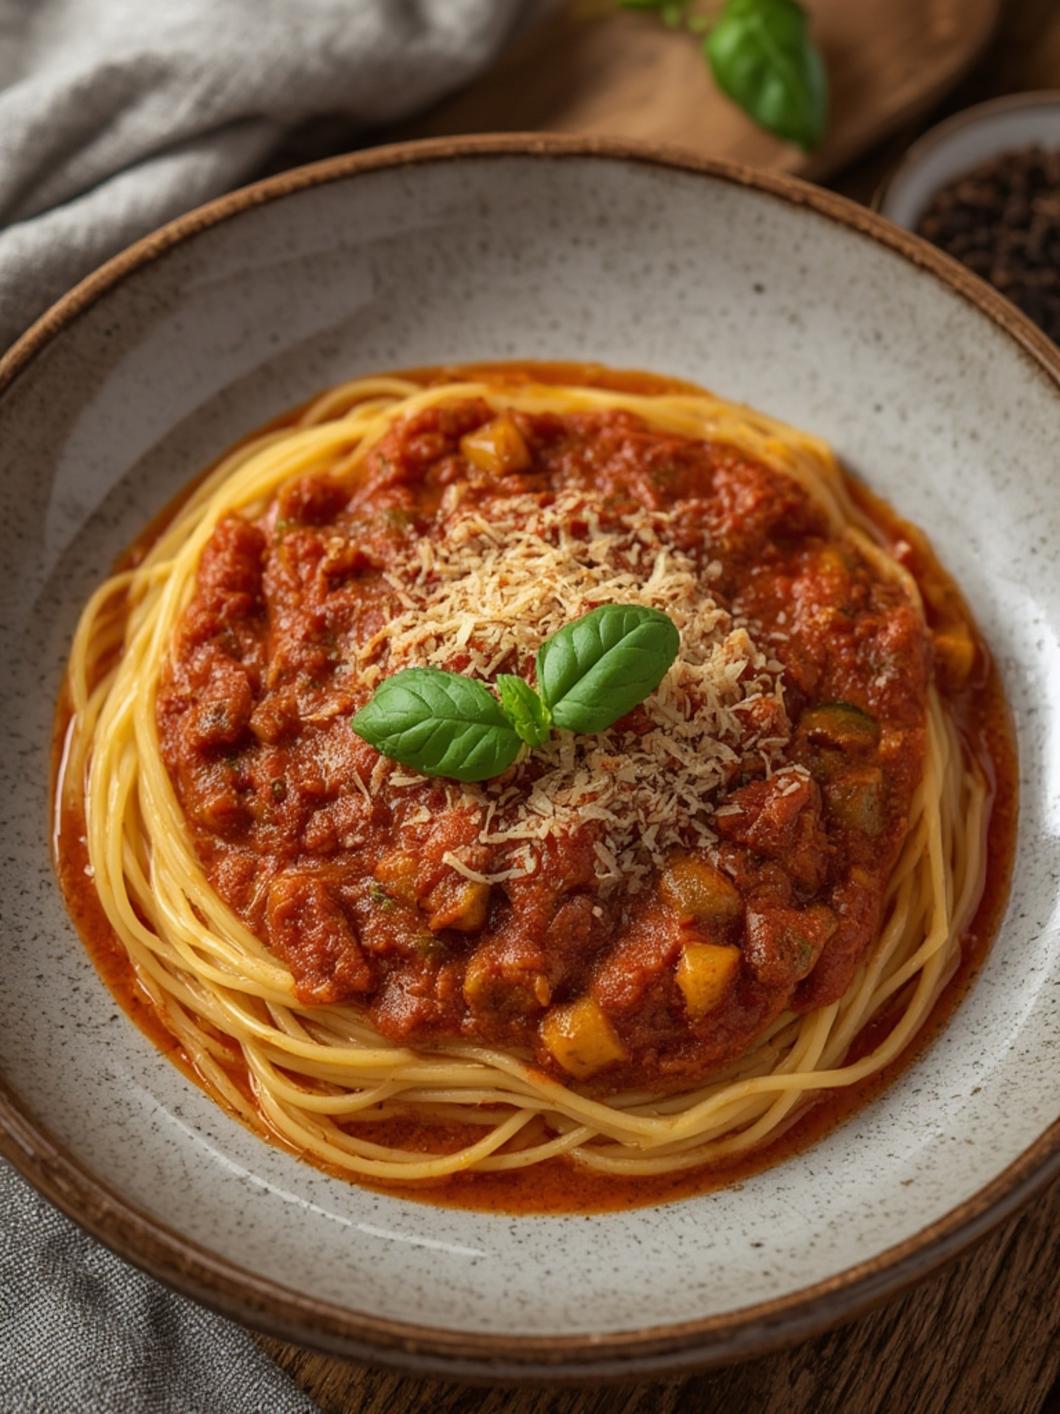
* Pasta: 1 pound of pappardelle or tagliatelle. The wide, flat ribbons are traditional and perfect for catching the sauce. Spaghetti is fine, but don’t use anything small like penne.
* Parmigiano-Reggiano: For serving, grated. And I mean the real wedge, not the pre-shredded stuff in the plastic tub. That stuff has anti-caking agents that make it clumpy and sad.
* Fresh Parsley: Chopped, for garnish.
- Kitchen Gear:
* A heavy, wide Dutch oven or deep, heavy pot. This is non-negotiable. It holds heat beautifully. My Le Creuset is my best friend here.
A wooden spoon (for stirring and that classic clink-clink* sound).
* A splatter guard or just a lid you can prop open.
* Two sturdy bowls (one for the soffritto, one for crushing tomatoes).
* Cheese grater (Microplane is great for Parm).
Timing / Cooking Schedule
Let’s be real: this is a slow food project. It asks for patience, but the reward is exponential.
- Prep Time (Active): 30 minutes (dicing veggies, opening cans, etc). Honestly, the first time it took me double this time! I was so slow with the onion dicing. Now I’ve got it down to a rhythm while listening to a podcast.
- Cook Time (Simmering): At least 2 1/2 to 3 hours. The longer, the better. I’ve let a batch go for 4 hours on a Sunday afternoon, and it was transcendent. This is not a 30-minute sauce.
- Total Time: 3 to 3 1/2 hours. Plan to make it on a lazy Sunday, pour yourself a glass of that same wine you’re cooking with, and let your kitchen smell like Italy.
Step-by-Step Instructions
1. Build the Foundation (Soffritto):
Heat 2 tablespoons olive oil and 1 tablespoon butter in your Dutch oven over medium-low heat. Add the diced onion, carrot, and celery. Cook slowly, stirring often, for 8-10 minutes until they are soft, sweet, and translucent but not browned. My Personal Tip: This step is where 80% of your flavor comes from. Don’t rush it! I made the mistake of cranking the heat once to “get it done” and ended up with bitter, burnt bits that ruined the whole batch. Low and slow wins the race.
2. Sweat the Aromatics:
Add the minced garlic and cook for just 1 minute until fragrant. Then, push the veggies to the side and add the tomato paste to the center of the pot. Cook the tomato paste alone for 2 minutes until it darkens slightly and smells rich. This caramelization is crucial for depth. I learned this from an Italian nonna on YouTube, and my sauce has never been the same since.
3. Brown the Meat:
Crank the heat to medium-high. Add the ground beef and pork. Break it up really well with your wooden spoon and cook until it loses its raw color and gets some nice browned bits (fond) stuck to the bottom of the pot—about 8-10 minutes. Season with a big pinch of salt and pepper. The Secret: Don’t overcrowd the pot. If your meat is steaming instead of browning, it’s too crowded. Do it in batches if needed.
4. Deglaze with Wine:
Pour in the red wine. Use the spoon to scrape up ALL that delicious brown fond from the bottom of the pot. Let it simmer until the wine is mostly evaporated, about 3 minutes. This step wipes the floor clean of flavor and cooks off the raw alcohol taste. I skipped this once because I was “out of wine” and regretted it. The sauce tasted thin and one-dimensional. Even a little bit of wine makes a huge difference.
5. Add Tomatoes & Simmer:
Add the crushed tomatoes, beef broth, thyme sprigs, and bay leaf. Stir to combine. Bring to a gentle simmer, then immediately reduce the heat to the lowest setting. Now, the Waiting Game: Partially cover the pot (leave a small gap) and let it bubble slowly, slowly, slowly for at least 2 1/2 hours, stirring occasionally. The sauce will reduce, darken, and thicken. If it gets too thick, add a splash more broth or water.
6. The Milk Magic (The Final Touches):
After 2 hours, stir in the milk or cream. Simmer for another 30 minutes. Taste and season generously with salt and pepper. Remove the thyme stems and bay leaf. If the sauce is still too thin for your liking, simmer uncovered for the final 15-30 minutes. It should be thick enough to coat the back of a spoon richly.
Nutritional Benefits / Advantages
Look, I’m not going to lie to you and call this “health food.” It’s a celebratory, hearty meal. But making it from scratch is a massive nutritional win over any jarred sauce or fast-food alternative.
You Control the Salt: Jarred sauces are sodium bombs. My version? You dictate the salt level. My doctor was surprised* when I told him I eat this rich meat sauce every week because my blood pressure is great. It’s all about controlling the input.
- Real Protein & Good Fats: Grass-fed beef and pork provide iron and complete protein. The olive oil and fat from the meat are healthy, satiating fats.
- Veggie Stealth Mode: That mirepoix (onion, carrot, celery) dissolves into sweet oblivion, meaning picky eaters (ahem, my nephew) get a dose of vegetables without even knowing. Fiber and micronutrients, check.
- No Mystery Ingredients: No preservatives, no added sugars (most jarred sauces are packed with them), no “natural flavors.” It’s just food. Simple, recognizable, honest food. Your gut will thank you.
Tips, Alternative Methods or Cooking Advice
- The Slow Cooker Shortcut: After step 4 (deglozing), transfer everything to a slow cooker. Cook on LOW for 6-8 hours. It’s fantastic, though you miss the beautiful reduction on the stovetop.
- Make it Vegetarian? Swap the meat for a mix of finely chopped mushrooms (shiitake or cremini for umami) and lentils. Sauté them separately first to develop color, then proceed.
- The “Too Acidic” Fix: If your sauce is sharp, a teaspoon of butter or a sprinkle of sugar can balance it. But the milk step usually prevents this.
- Batch & Freeze: This sauce is freezer royalty. Let it cool completely, portion it into freezer-safe bags or containers (lay flat!), and freeze for up to 3 months. Thaw overnight in the fridge. It actually tastes even better the next day as the flavors marry.
- Pasta Water is Gold: Before draining your pasta, save at least 1 cup of the starchy cooking water. When you combine the pasta and sauce in the pot, add splashes of this water to make it silky and cohesive.
Common Mistakes to Avoid
Let me tell you about the Great Spatchcock Incident. I was hosting a dinner party, short on time, and thought, “I’ll just simmer this for an hour and call it a day.” The sauce was watery, bright red, and tasted like canned tomatoes with ground beef. It was a Classic Bolognese in name only. My guests were polite, but I knew. That night, I committed to the full simmer time, and the difference was night and day. The biggest mistake is impatience. This sauce needs time to mellow, marry, and transform. It’s a slow-cooked love letter, not a quick text.
Another doozy: skipping the milk. I once thought, “Dairy in a meat sauce? Weird.” I made it, and while good, it had a sharp, acidic bite. The next time, I added the milk per a trusty cookbook, and the sauce became smoother, richer, and perfectly balanced. It’s the secret ingredient that makes it taste expensive.
Storage / Maintenance Tips
This sauce is a gift that keeps on giving.
- Fridge: Cool completely (don’t leave it out for hours!), then store in an airtight container for 4-5 days. The flavor improves daily.
- Freezer: As mentioned, portion it. Freeze flat for easy stacking. It thaws beautifully and reheats perfectly on the stove with a splash of water or broth.
- Reheating: Gently on the stove over low heat. Stir in a few tablespoons of pasta water or broth to loosen it up. Never microwave in a rush—it’ll get greasy and separate.
- Pot Care: That browned fond (fond) is flavor gold, but it can stick. After transferring the sauce, fill the pot with water and bring to a simmer. That stuck-on stuff will lift right up. Don’t scrub it with abrasives while it’s hot; let it soak.
Conclusion
That salvaged Sunday, after my in-laws’ visit, I served my first real Traditional Bolognese sauce over fresh pappardelle with a mountain of grated Parm. The silence at the table wasn’t awkward; it was sacred. We just ate, and ate, and ate. My father-in-law asked for the recipe. My husband hugged me in the kitchen. In that moment, I realized cooking wasn’t about perfection or impressing anyone; it was about building a moment, a memory, from a pile of simple ingredients and a lot of waiting.
This Classic Bolognese became my kitchen ritual. It’s the sauce I make when the weather turns, when I need to feel grounded, when I want to feed people I love without a single ounce of stress—because the process itself is the therapy. It taught me that the best things in life, like the best sauces, can’t be rushed. They need time, attention, and a little bit of milk (who knew?).
So, please, make this. On a Tuesday, for no reason. Let your kitchen smell like a slow Sunday in Italy. And when you do, I’d love to hear about it. Tell me your tricks, your substitutions, your proud, saucy moments in the comments. Because at the end of the day, that’s what this is all about: sharing a good meal and a good story.
FAQs
Q: Can I use ground turkey or chicken instead?
A: You can, but it won’t be the same. Turkey is much leaner, so it can be drier and less rich. If you do, I’d recommend adding a couple of tablespoons of olive oil or a few strips of pancetta to build fat and flavor. It’s a different sauce, still tasty, but not the classic.
Q: Do I have to use whole milk? I’m almost out of dairy!
A: The milk is highly recommended for its tenderness and balancing effect, but if you’re really in a pinch, you can skip it. Just be prepared for a slightly sharper, more acidic final sauce. A splash of cream at the end can help mimic the richness.
Q: What’s the absolute minimum simmer time? Can I do 1.5 hours?
A: Technically, yes, it will be cooked and edible. But 2.5 hours is the sweet spot where magic happens. At 1.5 hours, it’s still tasting like separate components—tomatoes, meat, wine—rather than a single, unified, deeply complex sauce. Give it the time; you’ll taste the difference.
Q: My sauce is too thick/thin! Help!
A: Too thick? Stir in some reserved pasta water, broth, or even a little plain water, a few tablespoons at a time. Too thin? Simmer uncovered, stirring more frequently to prevent scorching. Remember, it will thicken as it cools, so give it a few minutes off the heat before making drastic adjustments.
Q: Can I add other veggies like bell peppers or mushrooms?
A: You can, but purists (and I’m pretty close to one here for this recipe) would say no. The classic ragù alla bolognese is about the holy trinity. That said, if you love mushrooms, sauté some finely chopped creminis with the meat for an earthy twist. Bell peppers will change the flavor profile significantly—more of a “Bolognese-style” sauce. I’d stick to the script for your first time!

Best way to grow Classic Bolognese in 3 Steps
Description
That humiliating dinner haunted me. For years, I avoided making any sauce that wasn’t from a jar. But the memory of that beautiful, rich Traditional Bolognese sauce I’d tasted on a rain-soaked trip to Bologna—silky, deep, complex—wouldn’t leave me. I was determined to master it, not for praise, but for the pure love of a perfect, slow-cooked bowl of comfort. What followed was a beautiful, messy, flour-dusted journey that taught me more about patience and layering flavors than any culinary school ever could. This isn’t just a recipe to me; it’s my redemption arc in a pot. And today, I’m sharing my soul (and my secrets) for the ultimate Classic Bolognese.
Ingredients
Materials & Supplies
Okay, let’s get our mise en place on. This is a simple ingredient list, but the quality makes all the difference. Think of these as your old friends.
- For the Sauce:
* Olive Oil & Butter: My combo. Oil for searing, butter for that final, glossy richness. Use good olive oil for frying, but a basic one is fine.
The Holy Trinity: 1 large yellow onion, 1 carrot, 1 celery rib. Finely diced (soffritto*). This is the non-negotiable flavor base. No substitutions. Ditch the food processor; dicing by hand gives the best texture.
* Garlic: 2-3 cloves, minced. Don’t burn it!
* Ground Meat: 1 pound ground beef (80/20 is my jam for fat) plus 1/2 pound ground pork. The pork adds unctuousness. Sometimes I use all beef and add a few tablespoons of pancetta, diced tiny.
* Tomato Paste: 2 tablespoons. This is your secret weapon for deep, umami-packed color. I use the stuff in the tube so I can use just what I need.
* Dry Red Wine: 1 cup. Something you’d actually drink—a Chianti or Cabernet Sauvignon. Don’t use “cooking wine.” If you don’t drink, use a splash of beef broth and a teaspoon of balsamic vinegar.
* Canned Tomatoes: 1 (28-ounce) can of whole peeled San Marzano tomatoes, crushed by hand. The gold standard. If you can’t find them, any good-quality crushed tomatoes will do.
* Beef or Chicken Broth: 1 cup, low-sodium. Homemade is amazing, but a good boxed brand is fine.
* Dairy: 1/4 cup whole milk or heavy cream. (Yes, milk! It tames the acidity and tenderizes the meat. This is a game-changer).
* Fresh Herbs: A few sprigs of fresh thyme and/or a bay leaf. Dried herbs are okay, but fresh is a level-up.
* Salt & Freshly Cracked Black Pepper: The most important tools in your kitchen. Season in layers.
- For Serving:
* Pasta: 1 pound of pappardelle or tagliatelle. The wide, flat ribbons are traditional and perfect for catching the sauce. Spaghetti is fine, but don’t use anything small like penne.
* Parmigiano-Reggiano: For serving, grated. And I mean the real wedge, not the pre-shredded stuff in the plastic tub. That stuff has anti-caking agents that make it clumpy and sad.
* Fresh Parsley: Chopped, for garnish.
- Kitchen Gear:
* A heavy, wide Dutch oven or deep, heavy pot. This is non-negotiable. It holds heat beautifully. My Le Creuset is my best friend here.
A wooden spoon (for stirring and that classic clink-clink* sound).
* A splatter guard or just a lid you can prop open.
* Two sturdy bowls (one for the soffritto, one for crushing tomatoes).
* Cheese grater (Microplane is great for Parm).
Timing / Cooking Schedule
Let’s be real: this is a slow food project. It asks for patience, but the reward is exponential.
- Prep Time (Active): 30 minutes (dicing veggies, opening cans, etc). Honestly, the first time it took me double this time! I was so slow with the onion dicing. Now I’ve got it down to a rhythm while listening to a podcast.
- Cook Time (Simmering): At least 2 1/2 to 3 hours. The longer, the better. I’ve let a batch go for 4 hours on a Sunday afternoon, and it was transcendent. This is not a 30-minute sauce.
- Total Time: 3 to 3 1/2 hours. Plan to make it on a lazy Sunday, pour yourself a glass of that same wine you’re cooking with, and let your kitchen smell like Italy.
Instructions
Step-by-Step Instructions
1. Build the Foundation (Soffritto):
Heat 2 tablespoons olive oil and 1 tablespoon butter in your Dutch oven over medium-low heat. Add the diced onion, carrot, and celery. Cook slowly, stirring often, for 8-10 minutes until they are soft, sweet, and translucent but not browned. My Personal Tip: This step is where 80% of your flavor comes from. Don’t rush it! I made the mistake of cranking the heat once to “get it done” and ended up with bitter, burnt bits that ruined the whole batch. Low and slow wins the race.
2. Sweat the Aromatics:
Add the minced garlic and cook for just 1 minute until fragrant. Then, push the veggies to the side and add the tomato paste to the center of the pot. Cook the tomato paste alone for 2 minutes until it darkens slightly and smells rich. This caramelization is crucial for depth. I learned this from an Italian nonna on YouTube, and my sauce has never been the same since.
3. Brown the Meat:
Crank the heat to medium-high. Add the ground beef and pork. Break it up really well with your wooden spoon and cook until it loses its raw color and gets some nice browned bits (fond) stuck to the bottom of the pot—about 8-10 minutes. Season with a big pinch of salt and pepper. The Secret: Don’t overcrowd the pot. If your meat is steaming instead of browning, it’s too crowded. Do it in batches if needed.
4. Deglaze with Wine:
Pour in the red wine. Use the spoon to scrape up ALL that delicious brown fond from the bottom of the pot. Let it simmer until the wine is mostly evaporated, about 3 minutes. This step wipes the floor clean of flavor and cooks off the raw alcohol taste. I skipped this once because I was “out of wine” and regretted it. The sauce tasted thin and one-dimensional. Even a little bit of wine makes a huge difference.
5. Add Tomatoes & Simmer:
Add the crushed tomatoes, beef broth, thyme sprigs, and bay leaf. Stir to combine. Bring to a gentle simmer, then immediately reduce the heat to the lowest setting. Now, the Waiting Game: Partially cover the pot (leave a small gap) and let it bubble slowly, slowly, slowly for at least 2 1/2 hours, stirring occasionally. The sauce will reduce, darken, and thicken. If it gets too thick, add a splash more broth or water.
6. The Milk Magic (The Final Touches):
After 2 hours, stir in the milk or cream. Simmer for another 30 minutes. Taste and season generously with salt and pepper. Remove the thyme stems and bay leaf. If the sauce is still too thin for your liking, simmer uncovered for the final 15-30 minutes. It should be thick enough to coat the back of a spoon richly.
Nutritional Benefits / Advantages
Look, I’m not going to lie to you and call this “health food.” It’s a celebratory, hearty meal. But making it from scratch is a massive nutritional win over any jarred sauce or fast-food alternative.
You Control the Salt: Jarred sauces are sodium bombs. My version? You dictate the salt level. My doctor was surprised* when I told him I eat this rich meat sauce every week because my blood pressure is great. It’s all about controlling the input.
- Real Protein & Good Fats: Grass-fed beef and pork provide iron and complete protein. The olive oil and fat from the meat are healthy, satiating fats.
- Veggie Stealth Mode: That mirepoix (onion, carrot, celery) dissolves into sweet oblivion, meaning picky eaters (ahem, my nephew) get a dose of vegetables without even knowing. Fiber and micronutrients, check.
- No Mystery Ingredients: No preservatives, no added sugars (most jarred sauces are packed with them), no “natural flavors.” It’s just food. Simple, recognizable, honest food. Your gut will thank you.
Tips, Alternative Methods or Cooking Advice
- The Slow Cooker Shortcut: After step 4 (deglozing), transfer everything to a slow cooker. Cook on LOW for 6-8 hours. It’s fantastic, though you miss the beautiful reduction on the stovetop.
- Make it Vegetarian? Swap the meat for a mix of finely chopped mushrooms (shiitake or cremini for umami) and lentils. Sauté them separately first to develop color, then proceed.
- The “Too Acidic” Fix: If your sauce is sharp, a teaspoon of butter or a sprinkle of sugar can balance it. But the milk step usually prevents this.
- Batch & Freeze: This sauce is freezer royalty. Let it cool completely, portion it into freezer-safe bags or containers (lay flat!), and freeze for up to 3 months. Thaw overnight in the fridge. It actually tastes even better the next day as the flavors marry.
- Pasta Water is Gold: Before draining your pasta, save at least 1 cup of the starchy cooking water. When you combine the pasta and sauce in the pot, add splashes of this water to make it silky and cohesive.