I’ll never forget the first time I made a dump cake. I was skeptical—how could something so simple, with virtually no mixing or measuring precision, turn out delicious? But then I pulled my first Banana Split Dump Cake from the oven, and I was instantly converted. The aroma of caramelized pineapple, warm strawberries, and chocolate filled my kitchen, and when I took that first bite, I understood why dump cakes have such a devoted following. This wasn’t just easy; it was absolutely spectacular.
The genius of this Banana Split Dump Cake lies in its simplicity. You literally dump the ingredients into a pan—no mixing bowls, no electric mixers, no complicated techniques. Yet somehow, through the magic of baking, these simple layers transform into a bubbling, golden masterpiece that tastes like your favorite ice cream parlor treat. The combination of crushed pineapple, strawberry pie filling, fresh bananas, yellow cake mix, and chocolate creates layers of flavor and texture that are simply irresistible.
Why You’ll Absolutely Love This Banana Split Dump Cake
This Banana Split Dump Cake has become my go-to dessert for potlucks, family gatherings, and those nights when I need something sweet without spending hours in the kitchen. The beauty of this recipe is that it delivers maximum flavor with minimum effort, making it perfect for busy weeknights or last-minute entertaining.
Furthermore, this dump cake recipe is incredibly forgiving. Unlike traditional cakes that require precise measurements and specific techniques, dump cakes are nearly impossible to mess up. The ingredients work together beautifully no matter what, creating a dessert that looks and tastes like you spent hours preparing it. Even beginner bakers achieve perfect results with this Banana Split Dump Cake every single time.
Essential Ingredients for Banana Split Dump Cake
The magic of this Banana Split Dump Cake comes from the carefully chosen ingredients that layer together to create something truly special. Here’s exactly what you’ll need.
Main Ingredients:
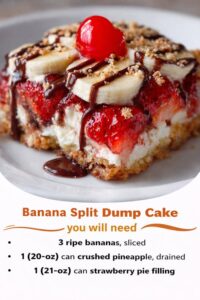
- 3 ripe bananas, sliced: Use bananas that are ripe but still firm enough to slice nicely. The bananas add natural sweetness and that classic banana split flavor. I prefer bananas with just a few brown spots—they’re sweet but won’t turn mushy during baking.
- 1 (20-oz) can crushed pineapple, drained: Make sure to drain this well. The pineapple adds tropical sweetness and moisture to your Banana Split Dump Cake. I save the juice for smoothies rather than letting it go to waste.
- 1 (21-oz) can strawberry pie filling: This is the star ingredient that gives the cake its beautiful red swirls and intense strawberry flavor. The pie filling is already sweetened and thickened, which helps create the perfect texture in your dump cake.
Additional Components:
- 1 box yellow cake mix (15.25 oz): Don’t add anything to the cake mix—just use it straight from the box. The dry mix creates a crispy, golden topping that contrasts beautifully with the fruity layers beneath.
- ½ cup unsalted butter, melted: The butter helps the cake mix turn golden and crispy. I always use unsalted butter so I can control the salt level in the recipe.
- 1 cup semi-sweet chocolate chips: These melt into pockets of chocolatey goodness throughout the Banana Split Dump Cake, just like the chocolate sauce on a traditional banana split.
- ½ cup chopped walnuts or pecans (optional): Nuts add a wonderful crunch and nutty flavor. I usually use walnuts, but pecans work beautifully too.
- Whipped cream or vanilla ice cream for serving: This is essential for serving. The cold, creamy topping against the warm cake is what makes this truly taste like a banana split.
- Maraschino cherries for garnish: These add that classic banana split look and a pop of color.
Step-by-Step Instructions for Banana Split Dump Cake
Let me walk you through the incredibly simple process of making this Banana Split Dump Cake. You’ll be amazed at how easy it is.
Step 1: Prepare Your Baking Dish
Preheat your oven to 350°F. This gives the oven time to reach the proper temperature while you assemble your Banana Split Dump Cake. Spray a 9×13-inch baking dish generously with non-stick cooking spray or grease it with butter. I prefer using a glass baking dish because it allows me to see the beautiful layers forming along the sides, but metal pans work perfectly fine too.
Step 2: Layer the Crushed Pineapple
Open your can of crushed pineapple and drain it thoroughly. I usually pour it into a fine-mesh strainer and press down gently with a spoon to remove excess liquid. Too much liquid can make your Banana Split Dump Cake soggy instead of having that perfect texture contrast between the crispy top and moist interior.
Spread the drained crushed pineapple evenly across the bottom of your prepared baking dish. Use a spoon or spatula to distribute it into an even layer that covers the entire bottom. This pineapple layer provides moisture and tropical sweetness that permeates the entire dump cake.
Step 3: Add the Strawberry Pie Filling
Open your can of strawberry pie filling and spoon it evenly over the pineapple layer. Don’t worry about being too precise—dump cakes are meant to be rustic and easy. Just make sure the strawberry filling is distributed relatively evenly so every serving of your Banana Split Dump Cake gets that delicious strawberry flavor.
The pie filling will naturally settle into the pineapple layer somewhat, and that’s perfectly fine. Those two fruit layers will mingle together during baking, creating a complex, fruity base that’s absolutely delicious.
Step 4: Arrange the Banana Slices
Peel your three ripe bananas and slice them into rounds about a quarter-inch thick. Arrange these banana slices evenly over the strawberry pie filling layer. I like to distribute them across the entire surface so every bite of Banana Split Dump Cake contains banana.
Try to use bananas that are ripe but still firm. Overripe bananas can become too mushy during baking, while underripe bananas won’t have enough sweetness. The perfect banana for this recipe has yellow skin with a few brown spots—that’s when the natural sugars are at their peak.
Step 5: Sprinkle the Cake Mix
Here’s where the “dump” in dump cake comes into play. Open your box of yellow cake mix and sprinkle it evenly over all the fruit layers. Don’t add eggs, oil, or water—just use the dry mix straight from the box. This is what creates that wonderful crispy, cake-like topping on your Banana Split Dump Cake.
Use a spoon or your hands to distribute the cake mix evenly across the entire surface. You want complete coverage so the topping bakes evenly. Some of the fruit may peek through, and that’s fine—it creates a beautiful rustic appearance.
Step 6: Drizzle with Melted Butter
Melt your half cup of butter in the microwave or on the stovetop. Once it’s completely melted, drizzle it evenly over the dry cake mix. The butter is crucial—it helps the cake mix transform into a golden, crispy topping during baking. Try to cover as much of the cake mix as possible with the butter.
I like to use a spoon and drizzle the butter back and forth across the pan in lines, then rotate the pan and drizzle perpendicular lines. This ensures even distribution across your Banana Split Dump Cake.
Step 7: Add Chocolate Chips and Nuts
Sprinkle the chocolate chips evenly over the buttered cake mix. They’ll melt during baking, creating pockets of chocolate throughout your dump cake. If you’re using nuts, sprinkle them over the top as well. The nuts will toast during baking, adding a wonderful crunch and nutty flavor to your Banana Split Dump Cake.
Step 8: Bake the Banana Split Dump Cake
Place your assembled Banana Split Dump Cake in the preheated 350°F oven. Bake for 45 to 55 minutes, until the top is golden brown and you can see the fruit bubbling around the edges. The exact baking time depends on your oven and the depth of your pan, so start checking around the 45-minute mark.
You’ll know your dump cake is done when the topping is golden and crispy, and you can see the fruit mixture bubbling enthusiastically around the edges and through any gaps in the topping. The aroma will be absolutely incredible—sweet, fruity, and completely irresistible.
Step 9: Cool and Serve
Remove your Banana Split Dump Cake from the oven and let it cool for about 15 to 20 minutes before serving. This cooling time allows the fruit filling to thicken slightly and makes it easier to serve neat portions. However, I often can’t wait and serve it warm and gooey—it’s delicious either way.
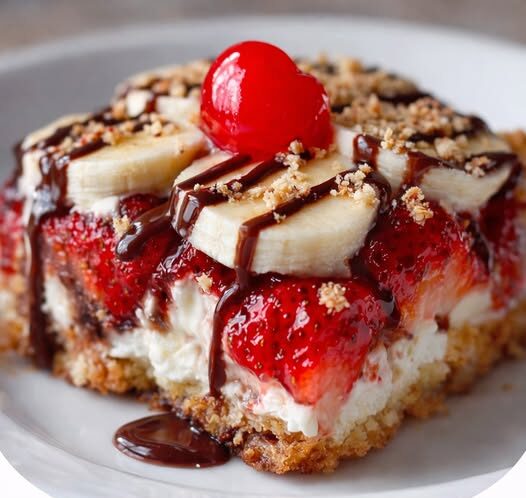
Scoop generous portions into bowls and top each serving with a dollop of whipped cream or a scoop of vanilla ice cream. Add a maraschino cherry on top for that classic banana split presentation. The contrast between the warm cake and cold ice cream is absolutely heavenly.
Perfect Serving Suggestions for Banana Split Dump Cake
This Banana Split Dump Cake is versatile and can be served in various delightful ways. For the most authentic banana split experience, serve it warm with vanilla ice cream, whipped cream, chocolate syrup drizzle, and a maraschino cherry on top.
I also love serving this dump cake for brunch alongside coffee. The fruit makes it feel almost breakfast-appropriate, though it’s definitely dessert. For parties, set up a dessert bar with bowls of the warm cake and various toppings—whipped cream, different ice cream flavors, chocolate sauce, caramel sauce, chopped nuts, and cherries. Let guests build their own banana split dump cake creations.
This dessert also travels well to potlucks and gatherings. I often bake it right before leaving, wrap the pan in towels to keep it warm, and bring the toppings separately. Everyone always asks for the recipe when they taste this incredible Banana Split Dump Cake.
Nutritional Information for Banana Split Dump Cake
Each serving of Banana Split Dump Cake (based on 12 servings) contains approximately:
- Calories: 385
- Total Fat: 16g
- Saturated Fat: 8g
- Cholesterol: 20mg
- Sodium: 320mg
- Total Carbohydrates: 59g
- Dietary Fiber: 2g
- Sugars: 42g
- Protein: 3g
The bananas contribute potassium (approximately 180mg per serving) and vitamin B6. The pineapple adds vitamin C and manganese. While this is definitely an indulgent dessert, the fruit does provide some nutritional benefits. As with all desserts, enjoy this Banana Split Dump Cake in moderation as part of a balanced diet.
Creative Variations for Banana Split Dump Cake
One of the best things about dump cakes is how easily you can customize them. Here are some delicious variations I’ve experimented with over the years.
For a Tropical Banana Split Dump Cake, replace the strawberry pie filling with cherry pie filling for a more traditional banana split flavor. Add shredded coconut on top along with the chocolate chips for extra tropical flair. You could also use coconut oil instead of butter for even more coconut flavor.
If you want a Double Chocolate Banana Split Dump Cake, use chocolate cake mix instead of yellow cake mix. Add both semi-sweet and white chocolate chips on top. The result is incredibly decadent and perfect for serious chocolate lovers.
For a Healthier Banana Split Dump Cake, use sugar-free pie filling and reduce the chocolate chips to a quarter cup. You can also substitute half the butter with unsweetened applesauce. While it won’t be quite as indulgent, it’s still delicious and has fewer calories and less sugar.
Try a Caramel Banana Split Dump Cake by drizzling caramel sauce over the banana layer before adding the cake mix. The caramel adds depth and richness that pairs beautifully with the fruit.
Storage and Make-Ahead Tips for Banana Split Dump Cake
This Banana Split Dump Cake stores beautifully, making it perfect for preparing ahead of time. Store leftover cake covered with plastic wrap or aluminum foil in the refrigerator for up to four days. The cake actually tastes even better the next day as the flavors meld together.
To reheat individual portions, microwave for 30 to 45 seconds until warm. For larger portions, reheat in a 300°F oven for about 15 minutes. The topping may lose some of its crispness during storage, but reheating helps restore some of that texture.
You can assemble this Banana Split Dump Cake up to 24 hours before baking. Layer all the ingredients in your baking dish as directed, cover tightly with plastic wrap, and refrigerate. When you’re ready to bake, remove from the refrigerator, let it sit at room temperature for 15 minutes, then bake as directed. You may need to add 5 to 10 minutes to the baking time since the ingredients will be cold.
I don’t recommend freezing this particular dump cake because the bananas and fruit filling don’t freeze and thaw well. They can become watery and mushy, affecting the overall texture.
My Personal Tips for Perfect Banana Split Dump Cake
After making this dessert countless times for family and friends, I’ve learned some tricks that ensure perfect results every time.
First, always drain the pineapple thoroughly. Excess liquid is the enemy of a good dump cake texture. I drain mine in a fine-mesh strainer and let it sit for at least five minutes, occasionally pressing gently with a spoon to extract more juice.
Second, distribute the dry cake mix evenly and completely. Any areas where fruit shows through will result in a less crispy topping. Take an extra minute to make sure the cake mix covers everything evenly across your Banana Split Dump Cake.
Third, don’t skip the butter or try to reduce it significantly. The butter is what transforms the dry cake mix into that golden, crispy topping. Without enough butter, the topping will be dry and dusty rather than deliciously crispy.
Fourth, use a glass baking dish if you have one. Being able to see the bubbling fruit around the edges helps you know when your Banana Split Dump Cake is perfectly done. Plus, it’s fun to watch the magic happen through the sides of the dish.
Fifth, let the cake cool for at least 15 minutes before serving. I know it’s tempting to dig in immediately, but this cooling time allows the fruit filling to thicken slightly and makes serving much easier. The cake will still be wonderfully warm after 15 minutes.
Finally, always serve this with something cold and creamy. The temperature and texture contrast between the warm, crispy cake and cold ice cream or whipped cream is what makes this truly spectacular. Don’t skip this step—it’s what makes your Banana Split Dump Cake taste like an actual banana split.
Frequently Asked Questions About Banana Split Dump Cake
Can I use fresh strawberries instead of pie filling? While you can use fresh strawberries, the pie filling works better because it’s already sweetened and thickened. Fresh strawberries would release too much liquid during baking, making your dump cake soggy.
What if I don’t have yellow cake mix? White cake mix works perfectly fine. Chocolate cake mix creates a completely different but equally delicious dessert. Just use whatever cake mix you prefer or have on hand.
Can I make this in a different size pan? The 9×13-inch pan is ideal for the ingredient quantities in this recipe. A smaller pan would be too deep and wouldn’t bake properly, while a larger pan would spread the layers too thin.
Do I really not mix anything? That’s right! The beauty of dump cakes is that you simply layer the ingredients and let the oven do all the work. No mixing required for this Banana Split Dump Cake.
Print
Banana Split Dump Cake: The Easiest Dessert You’ll Ever Make
Description
This Banana Split Dump Cake has become my go-to dessert for potlucks, family gatherings, and those nights when I need something sweet without spending hours in the kitchen. The beauty of this recipe is that it delivers maximum flavor with minimum effort, making it perfect for busy weeknights or last-minute entertaining.
Furthermore, this dump cake recipe is incredibly forgiving. Unlike traditional cakes that require precise measurements and specific techniques, dump cakes are nearly impossible to mess up. The ingredients work together beautifully no matter what, creating a dessert that looks and tastes like you spent hours preparing it. Even beginner bakers achieve perfect results with this Banana Split Dump Cake every single time.
Ingredients
Essential Ingredients for Banana Split Dump Cake
The magic of this Banana Split Dump Cake comes from the carefully chosen ingredients that layer together to create something truly special. Here’s exactly what you’ll need.
Main Ingredients:
- 3 ripe bananas, sliced: Use bananas that are ripe but still firm enough to slice nicely. The bananas add natural sweetness and that classic banana split flavor. I prefer bananas with just a few brown spots—they’re sweet but won’t turn mushy during baking.
- 1 (20-oz) can crushed pineapple, drained: Make sure to drain this well. The pineapple adds tropical sweetness and moisture to your Banana Split Dump Cake. I save the juice for smoothies rather than letting it go to waste.
- 1 (21-oz) can strawberry pie filling: This is the star ingredient that gives the cake its beautiful red swirls and intense strawberry flavor. The pie filling is already sweetened and thickened, which helps create the perfect texture in your dump cake.
Additional Components:
- 1 box yellow cake mix (15.25 oz): Don’t add anything to the cake mix—just use it straight from the box. The dry mix creates a crispy, golden topping that contrasts beautifully with the fruity layers beneath.
- ½ cup unsalted butter, melted: The butter helps the cake mix turn golden and crispy. I always use unsalted butter so I can control the salt level in the recipe.
- 1 cup semi-sweet chocolate chips: These melt into pockets of chocolatey goodness throughout the Banana Split Dump Cake, just like the chocolate sauce on a traditional banana split.
- ½ cup chopped walnuts or pecans (optional): Nuts add a wonderful crunch and nutty flavor. I usually use walnuts, but pecans work beautifully too.
- Whipped cream or vanilla ice cream for serving: This is essential for serving. The cold, creamy topping against the warm cake is what makes this truly taste like a banana split.
- Maraschino cherries for garnish: These add that classic banana split look and a pop of color.
Instructions
Step-by-Step Instructions for Banana Split Dump Cake
Let me walk you through the incredibly simple process of making this Banana Split Dump Cake. You’ll be amazed at how easy it is.
Step 1: Prepare Your Baking Dish
Preheat your oven to 350°F. This gives the oven time to reach the proper temperature while you assemble your Banana Split Dump Cake. Spray a 9×13-inch baking dish generously with non-stick cooking spray or grease it with butter. I prefer using a glass baking dish because it allows me to see the beautiful layers forming along the sides, but metal pans work perfectly fine too.
Step 2: Layer the Crushed Pineapple
Open your can of crushed pineapple and drain it thoroughly. I usually pour it into a fine-mesh strainer and press down gently with a spoon to remove excess liquid. Too much liquid can make your Banana Split Dump Cake soggy instead of having that perfect texture contrast between the crispy top and moist interior.
Spread the drained crushed pineapple evenly across the bottom of your prepared baking dish. Use a spoon or spatula to distribute it into an even layer that covers the entire bottom. This pineapple layer provides moisture and tropical sweetness that permeates the entire dump cake.
Step 3: Add the Strawberry Pie Filling
Open your can of strawberry pie filling and spoon it evenly over the pineapple layer. Don’t worry about being too precise—dump cakes are meant to be rustic and easy. Just make sure the strawberry filling is distributed relatively evenly so every serving of your Banana Split Dump Cake gets that delicious strawberry flavor.
The pie filling will naturally settle into the pineapple layer somewhat, and that’s perfectly fine. Those two fruit layers will mingle together during baking, creating a complex, fruity base that’s absolutely delicious.
Step 4: Arrange the Banana Slices
Peel your three ripe bananas and slice them into rounds about a quarter-inch thick. Arrange these banana slices evenly over the strawberry pie filling layer. I like to distribute them across the entire surface so every bite of Banana Split Dump Cake contains banana.
Try to use bananas that are ripe but still firm. Overripe bananas can become too mushy during baking, while underripe bananas won’t have enough sweetness. The perfect banana for this recipe has yellow skin with a few brown spots—that’s when the natural sugars are at their peak.
Step 5: Sprinkle the Cake Mix
Here’s where the “dump” in dump cake comes into play. Open your box of yellow cake mix and sprinkle it evenly over all the fruit layers. Don’t add eggs, oil, or water—just use the dry mix straight from the box. This is what creates that wonderful crispy, cake-like topping on your Banana Split Dump Cake.
Use a spoon or your hands to distribute the cake mix evenly across the entire surface. You want complete coverage so the topping bakes evenly. Some of the fruit may peek through, and that’s fine—it creates a beautiful rustic appearance.
Step 6: Drizzle with Melted Butter
Melt your half cup of butter in the microwave or on the stovetop. Once it’s completely melted, drizzle it evenly over the dry cake mix. The butter is crucial—it helps the cake mix transform into a golden, crispy topping during baking. Try to cover as much of the cake mix as possible with the butter.
I like to use a spoon and drizzle the butter back and forth across the pan in lines, then rotate the pan and drizzle perpendicular lines. This ensures even distribution across your Banana Split Dump Cake.
Step 7: Add Chocolate Chips and Nuts
Sprinkle the chocolate chips evenly over the buttered cake mix. They’ll melt during baking, creating pockets of chocolate throughout your dump cake. If you’re using nuts, sprinkle them over the top as well. The nuts will toast during baking, adding a wonderful crunch and nutty flavor to your Banana Split Dump Cake.
Step 8: Bake the Banana Split Dump Cake
Place your assembled Banana Split Dump Cake in the preheated 350°F oven. Bake for 45 to 55 minutes, until the top is golden brown and you can see the fruit bubbling around the edges. The exact baking time depends on your oven and the depth of your pan, so start checking around the 45-minute mark.
You’ll know your dump cake is done when the topping is golden and crispy, and you can see the fruit mixture bubbling enthusiastically around the edges and through any gaps in the topping. The aroma will be absolutely incredible—sweet, fruity, and completely irresistible.
Step 9: Cool and Serve
Remove your Banana Split Dump Cake from the oven and let it cool for about 15 to 20 minutes before serving. This cooling time allows the fruit filling to thicken slightly and makes it easier to serve neat portions. However, I often can’t wait and serve it warm and gooey—it’s delicious either way.
Scoop generous portions into bowls and top each serving with a dollop of whipped cream or a scoop of vanilla ice cream. Add a maraschino cherry on top for that classic banana split presentation. The contrast between the warm cake and cold ice cream is absolutely heavenly.