There’s something magical about the first cool breeze of autumn that makes me crave the comforting aroma of baked apples and cinnamon wafting through my kitchen. Last October, when my sister dropped by unexpectedly with a bushel of fresh-picked apples from her orchard trip, I knew I had to create something special. That afternoon, I whipped up these apple crumb bars, and they’ve since become my go-to recipe whenever I want to impress guests or simply treat myself to a cozy dessert.
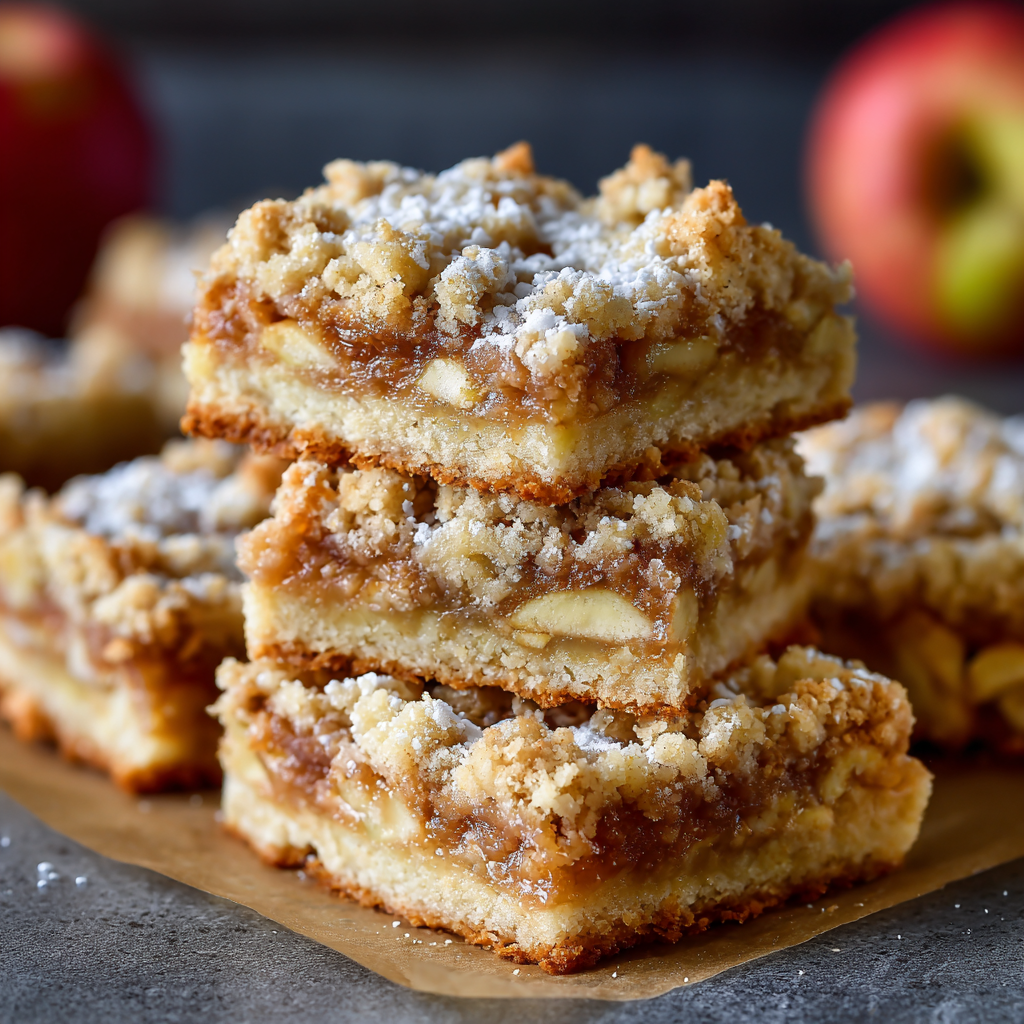
These apple crumb bars combine everything you love about apple pie but in a more convenient, handheld form. The buttery shortbread crust provides the perfect foundation, while the spiced apple filling delivers that classic fall flavor we all crave. Topped with a generous layer of crumbly streusel and dusted with powdered sugar, these bars are visually stunning and absolutely delicious.
Why You’ll Love This Apple Crumb Bars Recipe
This apple crumb bars recipe has quickly become a family favorite for several compelling reasons. First, it’s remarkably easier than making traditional apple pie—no rolling out dough or worrying about crimping edges. The bars cut cleanly into perfect squares, making them ideal for potlucks, bake sales, or afternoon tea gatherings.
The texture combination is absolutely divine. You get the crisp, buttery crust on the bottom, a tender and flavorful apple filling in the middle, and that irresistible crumbly topping that practically melts in your mouth. Each bite delivers layers of flavor and texture that keep you reaching for just one more piece.
Another reason to love these apple bars is their versatility. They’re equally at home on a holiday dessert table or packed in a lunchbox. I’ve served them warm with vanilla ice cream for an elegant dinner party dessert and also enjoyed them cold with my morning coffee.
Essential Ingredients for Perfect Apple Crumb Bars
Crust and Crumb Topping
- 3 cups all-purpose flour
- 1½ cups granulated sugar
- 1 teaspoon baking powder
- ½ teaspoon salt
- 1 teaspoon ground cinnamon
- 1 cup (2 sticks) cold unsalted butter, cut into small cubes
- 1 large egg, lightly beaten
- 1 teaspoon vanilla extract
Apple Filling
- 4 cups peeled and diced apples (about 4-5 medium apples)
- ⅓ cup granulated sugar
- 2 tablespoons all-purpose flour
- 1 teaspoon ground cinnamon
- ¼ teaspoon ground nutmeg
- 1 tablespoon lemon juice
- Powdered sugar for dusting (optional)
When selecting apples for these crumb bars, I prefer using a combination of tart and sweet varieties. Granny Smith apples provide excellent tartness and hold their shape well during baking, while Honeycrisp or Gala apples add natural sweetness. This balance creates a more complex and interesting apple filling that doesn’t taste one-dimensional.
Step-by-Step Instructions for Apple Crumb Bars
Preparing Your Kitchen for Apple Bar Success
Preheat your oven to 375°F (190°C). Line a 9×13-inch baking pan with parchment paper, leaving some overhang on the sides—this makes removing the bars much easier after baking. I learned this trick the hard way after struggling to cut bars neatly in the pan for years.
Making the Crust and Crumble for Your Apple Bars
In a large mixing bowl, whisk together the flour, sugar, baking powder, salt, and cinnamon. Add the cold butter cubes and use a pastry cutter or your fingertips to work the butter into the flour mixture. The texture should resemble coarse crumbs with some pea-sized butter pieces remaining—these create that wonderful flaky texture.
Add the beaten egg and vanilla extract, mixing just until the dough starts to come together. It will seem crumbly, which is exactly what you want. Divide the dough roughly in half, with one portion slightly larger than the other. The larger portion becomes your crust, while the smaller portion gets reserved for the crumb topping.
Press the larger portion of dough evenly into the bottom of your prepared pan. I like to use the bottom of a measuring cup to ensure an even layer. Place the pan in the refrigerator while you prepare the apple filling.
Creating the Perfect Apple Filling
In a large bowl, combine your diced apples with sugar, flour, cinnamon, nutmeg, and lemon juice. Toss everything together until the apples are evenly coated. The lemon juice not only adds brightness to the flavor but also prevents the apples from browning.
Let this mixture sit for about 5 minutes. You’ll notice some liquid forming at the bottom of the bowl—this is perfectly normal. The flour in the mixture will help thicken this liquid as the bars bake, creating a luscious apple filling rather than a watery mess.
Assembling and Baking Your Apple Crumb Bars
Remove the crust from the refrigerator and spread the apple filling evenly over the top. Crumble the remaining dough over the apples, creating that signature crumb topping. Don’t worry about covering every inch of the apples—some gaps are fine and actually create a more rustic, appealing look.
Bake for 45-50 minutes, until the top is golden brown and you can see the apple filling bubbling around the edges. The aroma filling your kitchen at this point will be absolutely heavenly—cinnamon, butter, and caramelized apples creating an irresistible fragrance.
Allow the bars to cool completely in the pan before attempting to cut them. This patience is crucial! I know it’s tempting to dive in immediately, but cooling allows the filling to set properly, ensuring clean cuts and intact bars. Once cooled, use the parchment paper overhang to lift the entire slab out of the pan, then cut into squares.
Dust with powdered sugar just before serving for that final touch of elegance.
Nutritional Information for Apple Crumb Bars
Per serving (based on 24 bars):
- Calories: 185
- Total Fat: 8g
- Saturated Fat: 5g
- Cholesterol: 30mg
- Sodium: 75mg
- Total Carbohydrates: 28g
- Dietary Fiber: 1g
- Sugars: 17g
- Protein: 2g
While these apple bars are certainly a treat, they do contain fruit and provide some dietary fiber. The portion size is reasonable, making them a satisfying dessert that doesn’t derail your healthy eating goals entirely.
Serving Suggestions and Presentation Tips for Apple Bars
These apple crumb bars are beautiful enough to serve as-is, but presentation can elevate them even further. For an elegant dessert, serve them slightly warm with a scoop of vanilla bean ice cream or a dollop of freshly whipped cream. The contrast between the warm bars and cold ice cream is simply divine.
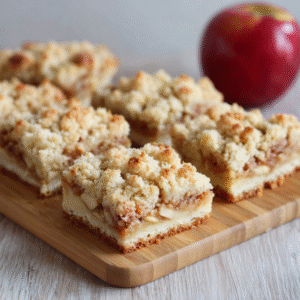
For a more casual gathering, arrange the bars on a rustic wooden board or cake stand. The powdered sugar dusting creates a lovely snowy effect that’s particularly appealing during the fall and winter months. I like to garnish the serving platter with a few fresh apple slices and a cinnamon stick for visual interest.
If you’re packing these apple bars for a potluck or gift, individual wrapping preserves freshness and makes them easy to grab. I place each bar in a clear cellophane bag tied with a ribbon—simple yet charming.
Perfect Pairings with Apple Crumb Bars
These bars pair wonderfully with hot beverages. My personal favorite is serving them alongside a cup of spiced chai tea or hot apple cider. The warming spices in these drinks complement the cinnamon and nutmeg in the bars beautifully.
For wine enthusiasts, consider pairing these apple bars with a late-harvest Riesling or a tawny port. The sweetness and fruit notes in these wines harmonize perfectly with the apple filling and buttery crust.
Coffee lovers will appreciate how well these bars go with a medium roast coffee. The coffee’s slight bitterness balances the sweetness of the bars, creating a perfect afternoon pick-me-up.
Variations and Substitutions for Your Apple Bar Recipe
Apple Crumb Bar Variations
One of my favorite variations involves adding ½ cup of chopped pecans or walnuts to the crumb topping. The nuts add wonderful texture and a subtle nutty flavor that complements the apples beautifully.
For a caramel apple version, drizzle warm caramel sauce over the bars before serving. You can also stir a tablespoon of caramel sauce into the apple filling before baking for an integrated caramel apple flavor.
Try incorporating ½ cup of dried cranberries into the apple filling for a tart contrast. This variation is especially popular during the holiday season and adds beautiful color to the bars.
Ingredient Substitutions for Apple Bars
If you need to make these bars dairy-free, substitute the butter with coconut oil or vegan butter. The texture will be slightly different but still delicious. For a gluten-free version, use a 1:1 gluten-free baking flour blend—I’ve tested this successfully with excellent results.
You can replace half the granulated sugar with brown sugar for a deeper, more molasses-like sweetness. This also adds a slightly chewier texture to the crumb topping.
If you don’t have nutmeg on hand, substitute with additional cinnamon or try a pinch of ground ginger for a different but equally delicious spice profile.
Storage and Make-Ahead Tips for Apple Crumb Bars
These bars store exceptionally well, making them perfect for advance preparation. Once completely cooled, store them in an airtight container at room temperature for up to 3 days. For longer storage, refrigerate them for up to a week. Before serving refrigerated bars, I recommend warming them briefly in a 300°F oven for about 10 minutes to restore their just-baked texture.
These apple bars also freeze beautifully. Wrap individual bars in plastic wrap, then place them in a freezer-safe container or bag. They’ll keep frozen for up to 3 months. Thaw overnight in the refrigerator or at room temperature for a few hours.
You can also prepare the crust ahead of time. Press it into the pan, cover tightly, and refrigerate for up to 2 days before assembling and baking. This makes day-of preparation much quicker when you’re entertaining.
Troubleshooting Common Apple Bar Issues
If your bars turn out too crumbly and fall apart when cutting, the dough may have been too dry. Next time, add an extra tablespoon of beaten egg or a teaspoon of cold water to help bind the ingredients.
Soggy bottom crusts usually result from an overly juicy apple filling. Make sure to include the flour in the apple mixture, and avoid extremely juicy apple varieties like Red Delicious. Also, ensure your oven is fully preheated before baking.
If the topping browns too quickly before the apples are fully cooked, tent the pan loosely with aluminum foil for the final 15 minutes of baking. This protects the topping while allowing the filling to finish cooking.
Why This Apple Crumb Bar Recipe Works Every Time
The secret to these consistently excellent bars lies in the careful balance of ingredients and techniques. Using cold butter ensures a flaky, tender crust rather than a dense, tough one. The egg adds structure and richness while helping bind everything together.
The combination of sugars in the apple filling creates the perfect level of sweetness without being cloying. The flour thickens the natural apple juices just enough to create a jammy consistency without turning gummy.
The dual-purpose dough for both crust and topping is genius—it simplifies the recipe while ensuring complementary flavors and textures throughout the bars.
My Personal Apple Bar Baking Tips
After making these apple crumb bars countless times, I’ve learned a few tricks that guarantee success. First, don’t skip chilling the crust before adding the filling—this prevents the layers from mixing together during baking and ensures a distinct bottom layer.
Second, dice your apples uniformly, about ¼-inch pieces. This ensures even cooking and makes eating the bars much more pleasant. Nobody wants to bite into a huge chunk of undercooked apple.
Finally, trust your nose as much as your timer. When your kitchen smells absolutely incredible and you can see golden brown crumbles with bubbling filling peeking through, your apple bars are done. Ovens vary, so use visual and aromatic cues in addition to the timer.
These apple crumb bars have brought joy to my table countless times, from casual weeknight desserts to holiday gatherings. The beauty of this recipe is its simplicity combined with impressive results. Whether you’re a novice baker or a seasoned pro, these bars will become a cherished part of your baking repertoire. The combination of tender apples, buttery crust, and sweet crumble creates a dessert that tastes like autumn itself—comforting, nostalgic, and absolutely delicious.