
There are moments in life when a single bite of dessert can transport you somewhere magical. For me, that happened on a lazy Sunday afternoon when my grandmother pulled a pan of golden, coconut-topped bars from her oven. The aroma of toasted coconut filled her kitchen, and I remember thinking, “This is what heaven must smell like.” Years later, I’ve perfected my own version of those Coconut Cream Dream Bars, and I’m thrilled to share this recipe with you today.
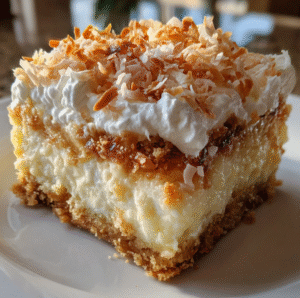
These coconut cream bars are the perfect marriage of textures and flavors—a buttery graham cracker crust, a luscious coconut cream filling, a layer of caramelized sweetness, fluffy whipped cream, and a generous topping of toasted coconut flakes. Whether you’re planning a family gathering, a potluck dinner, or simply craving something indulgent, this coconut dessert recipe will become your new favorite go-to treat.
What Makes These Coconut Cream Dream Bars So Special?
The beauty of this coconut bar recipe lies in its layers. Unlike a simple coconut cake or pie, these bars offer multiple textures in every bite. The crunchy graham cracker base provides stability, while the creamy coconut filling melts in your mouth. The middle caramel layer adds a sticky-sweet surprise, and the whipped cream topping keeps everything light and airy. Finally, the toasted coconut flakes on top create a golden crown that’s as beautiful as it is delicious.
What I love most about making coconut cream bars is how they look almost too pretty to eat. When you slice into them, you reveal those gorgeous layers—each one distinct and inviting. It’s the kind of dessert that makes people pause and reach for their phones to snap a picture before diving in.
The Story Behind My Coconut Dream Bars
I’ll be honest—my first attempt at making these coconut dessert bars was a bit of a disaster. I didn’t let the crust cool properly before adding the filling, and everything turned into a gooey mess. But failure is often the best teacher in the kitchen. After a few trials (and plenty of taste-testing), I learned the secrets to creating the perfect coconut cream dream bars every single time.
Now, these bars are my signature dessert at family gatherings. My cousin requests them for every birthday celebration, and my neighbor “accidentally” drops by whenever she knows I’m baking them. That’s the magic of a truly great recipe—it brings people together.
Ingredients for Coconut Cream Dream Bars
Before we dive into the cooking process, let’s gather everything you’ll need. This coconut bar recipe uses simple, readily available ingredients that you might already have in your pantry.
Graham Cracker Crust:
- 2 cups graham cracker crumbs (about 14-16 crackers)
- 1/2 cup unsalted butter, melted
- 1/4 cup granulated sugar
- 1/4 teaspoon salt
Coconut Cream Filling:
- 2 cups whole milk
- 1 cup coconut milk (full-fat for best results)
- 3/4 cup granulated sugar
- 1/3 cup cornstarch
- 4 large egg yolks
- 1 teaspoon vanilla extract
- 1 cup sweetened shredded coconut
- 2 tablespoons unsalted butter
Caramel Layer:
- 1 cup brown sugar
- 1/4 cup heavy cream
- 3 tablespoons butter
- 1 teaspoon vanilla extract
- Pinch of salt
Whipped Cream Topping:
- 2 cups heavy whipping cream
- 1/4 cup powdered sugar
- 1 teaspoon vanilla extract
Garnish:
- 1 1/2 cups sweetened coconut flakes, toasted
How to Make the Perfect Coconut Cream Dream Bars
Now comes the fun part—putting all these elements together to create your masterpiece. Don’t worry if this seems like a lot of steps; I’ll walk you through each one carefully.
Step 1: Prepare Your Graham Cracker Crust
Preheat your oven to 350°F (175°C). Line a 9×13-inch baking pan with parchment paper, leaving some overhang on the sides—this will make it much easier to lift the bars out later.
In a medium bowl, combine the graham cracker crumbs, melted butter, sugar, and salt. Mix thoroughly until the mixture resembles wet sand and holds together when squeezed. Press this mixture firmly and evenly into the bottom of your prepared pan. I like to use the bottom of a measuring cup to really pack it down.
Bake the crust for 10 minutes until it’s lightly golden and fragrant. Remove from the oven and let it cool completely while you prepare the coconut cream filling. This cooling step is crucial—don’t skip it, or your filling will melt into the warm crust.
Step 2: Create the Coconut Cream Filling
This is where your coconut dessert recipe truly comes to life. In a medium saucepan, whisk together the whole milk, coconut milk, sugar, and cornstarch until smooth. Make sure there are no lumps of cornstarch remaining.
Place the saucepan over medium heat and cook, whisking constantly, until the mixture begins to thicken and bubble. This usually takes about 8-10 minutes. Don’t walk away during this step—constant stirring prevents scorching and ensures a silky-smooth filling.
In a separate bowl, lightly beat the egg yolks. Once your milk mixture is hot and thick, remove it from the heat and slowly drizzle about half a cup into the egg yolks while whisking vigorously. This process, called tempering, prevents the eggs from scrambling.
Pour the tempered egg mixture back into the saucepan with the remaining milk mixture. Return to medium heat and cook for another 2-3 minutes, stirring constantly, until very thick. Remove from heat and stir in the vanilla extract, shredded coconut, and butter until the butter melts completely.
Pour this glorious coconut cream filling over your cooled crust and spread it evenly. Cover with plastic wrap, pressing it directly onto the surface of the filling to prevent a skin from forming. Refrigerate for at least 2 hours, or until completely set.
Step 3: Make the Caramel Layer for Your Coconut Bars
In a small saucepan, combine the brown sugar, heavy cream, and butter. Cook over medium heat, stirring frequently, until the mixture comes to a gentle boil. Let it boil for 2-3 minutes without stirring—this creates that deep, caramelized flavor we’re after.
Remove from heat and stir in the vanilla extract and a pinch of salt. The salt balances the sweetness and enhances all the flavors. Let the caramel cool for about 10 minutes until it thickens slightly but is still pourable.
Drizzle the caramel evenly over your chilled coconut cream layer. You can create a pattern if you like, or simply pour it all over and let it find its own way. Return the pan to the refrigerator and chill for another 30 minutes to let the caramel set.
Step 4: Add the Whipped Cream Topping
In a large bowl or the bowl of a stand mixer, combine the heavy whipping cream, powdered sugar, and vanilla extract. Beat on medium-high speed until stiff peaks form. Be careful not to overbeat, or you’ll end up with butter instead of whipped cream.
Spread the whipped cream evenly over the caramel layer, creating beautiful swirls and peaks with your spatula or the back of a spoon. This is your chance to get creative with the presentation.
Step 5: Toast and Add the Coconut Topping
To toast your coconut flakes, spread them in a single layer on a baking sheet and bake at 350°F for 5-7 minutes, stirring every couple of minutes, until they’re golden brown. Watch them carefully—coconut can go from perfectly toasted to burned in seconds.
Let the toasted coconut cool slightly, then generously sprinkle it over the whipped cream topping. Press down gently so it adheres to the cream.
Refrigerate your coconut cream dream bars for at least one more hour before slicing and serving. For the cleanest cuts, use a sharp knife dipped in hot water and wiped clean between each slice.
Nutritional Information for Coconut Cream Bars
While these coconut dessert bars are definitely an indulgence, it’s nice to know what you’re enjoying. Here’s the approximate nutritional breakdown per serving (based on 16 servings):
- Calories: 385
- Total Fat: 24g
- Saturated Fat: 16g
- Cholesterol: 95mg
- Sodium: 180mg
- Total Carbohydrates: 42g
- Dietary Fiber: 2g
- Sugars: 32g
- Protein: 4g
Remember, these are treats meant for special occasions, and that’s perfectly okay. Life is about balance, and sometimes that balance includes a delicious slice of coconut cream heaven.
Presentation Tips for Your Coconut Bar Recipe
The visual appeal of these coconut cream dream bars is half the fun. Here are my favorite ways to make them even more stunning:
Individual Servings: Cut the bars into squares and serve each one on a small dessert plate with a drizzle of extra caramel sauce and a few fresh berries for color contrast.
Garnish Options: Beyond toasted coconut, try adding a light dusting of edible gold dust for an elegant touch, or place a single mint leaf on top for a pop of green.
Serving Platter: Arrange the bars on a white serving platter to make the golden coconut topping really stand out. You can also add some tropical flowers around the edges for a vacation-worthy presentation.
Photography: If you’re sharing your creation on social media, photograph the bars with natural lighting from the side to showcase those beautiful layers.
Perfect Pairings for Coconut Cream Dream Bars
While these coconut dessert bars are absolutely divine on their own, pairing them with the right beverage or accompaniment can elevate the experience even further.
Beverage Pairings:
- Coffee: A strong, dark roast coffee cuts through the sweetness and complements the coconut flavor beautifully
- Tea: Try a light jasmine tea or a tropical fruit tea blend
- Dessert Wine: A sweet Moscato or late-harvest Riesling pairs wonderfully with the creamy texture
- Cocktails: Serve alongside piña coladas or coconut mojitos for a full tropical experience
Accompaniments:
- Fresh tropical fruits like mango, pineapple, or passion fruit
- A small scoop of vanilla bean ice cream
- A drizzle of dark chocolate sauce for chocolate lovers
- Fresh whipped cream with a hint of rum extract
Variations and Substitutions for Your Coconut Bars
One of the best things about this coconut bar recipe is its versatility. Here are some variations I’ve tried and loved:
Chocolate Coconut Dream Bars
Add 1/3 cup cocoa powder to the coconut cream filling and use chocolate graham crackers for the crust. Top with chocolate shavings instead of all coconut.
Lime Coconut Bars
Add the zest of two limes to the coconut cream filling and a tablespoon of lime juice. This creates a tropical key lime pie meets coconut bar situation that’s absolutely refreshing.
Pineapple Coconut Bars
Fold 1/2 cup of crushed, well-drained pineapple into the coconut cream filling for a piña colada-inspired treat.
Almond Joy Bars
Add 1/2 cup mini chocolate chips to the coconut cream filling and top with toasted almonds along with the coconut.
Dietary Substitutions:
- Gluten-Free: Use gluten-free graham crackers for the crust
- Reduced Sugar: Replace some of the sugar with a sugar substitute suitable for baking (note that this may affect texture slightly)
- Dairy-Free: Use coconut cream instead of dairy cream, and ensure all milk products are replaced with coconut alternatives
Storage and Make-Ahead Tips
These coconut cream dream bars actually taste even better the next day once all the flavors have had time to meld together. Here’s how to store them properly:
Refrigerator Storage: Cover the pan tightly with plastic wrap or store cut bars in an airtight container. They’ll keep for up to 5 days in the refrigerator.
Freezer Storage: You can freeze these coconut dessert bars for up to 2 months. Wrap them individually in plastic wrap, then place in a freezer-safe container. Thaw in the refrigerator overnight before serving.
Make-Ahead Strategy: You can prepare the crust and coconut cream layers up to 2 days in advance. Add the caramel, whipped cream, and toasted coconut on the day you plan to serve them for the freshest taste and best presentation.
Troubleshooting Your Coconut Bar Recipe
Even experienced bakers sometimes encounter challenges. Here are solutions to common problems:
Problem: The filling is too runny. Solution: Make sure you cooked the filling long enough for the cornstarch to fully activate. It should be very thick before you remove it from heat.
Problem: The crust is soggy. Solution: Ensure the crust cooled completely before adding the filling, and make sure it was packed firmly enough before baking.
Problem: The whipped cream is weeping. Solution: This usually happens when the bars aren’t kept cold enough. Store them in the refrigerator until just before serving.
Problem: The coconut topping is burning. Solution: Toast the coconut at a lower temperature and watch it closely, stirring every minute or two.
Why This Coconut Cream Dream Bar Recipe Works
The success of this coconut dessert recipe comes down to the careful balance of elements. The graham cracker crust provides a sturdy foundation that won’t get soggy. The coconut cream filling, enriched with both whole milk and coconut milk, delivers intense coconut flavor while maintaining a pudding-like consistency that slices beautifully.
The caramel layer is what sets these bars apart from a simple coconut cream pie—it adds depth and complexity that makes people ask, “What is that amazing flavor?” The whipped cream lightens everything up, preventing the bars from feeling too heavy, and the toasted coconut garnish provides that essential textural contrast.
My Personal Cooking Tip
After making these coconut cream dream bars countless times, here’s my most valuable piece of advice: patience is your friend. I know it’s tempting to slice into these beauties the moment you sprinkle on that toasted coconut, but giving them adequate chilling time between layers makes all the difference.
Each layer needs time to set properly so that when you cut into the finished bars, you get clean slices that showcase those gorgeous distinct layers. Trust the process, and you’ll be rewarded with bakery-quality coconut bars that will have everyone asking for the recipe.
Also, don’t skip the step of toasting the coconut. Raw coconut is nice, but toasted coconut brings a depth of flavor and an addictive crunch that transforms these bars from good to absolutely irresistible.
These Coconut Cream Dream Bars have become more than just a dessert in my home—they’re a tradition, a conversation starter, and a reason to gather around the table. I hope this recipe brings as much joy to your kitchen as it has to mine. Happy baking!