There’s something magical about a cake that looks like it’s been kissed by clouds. The first time I made this Coconut Cloud Cake, I was preparing for my daughter’s birthday party, and I wanted something that would make everyone’s eyes light up. When I sliced into that fluffy, coconut-covered masterpiece and saw the billowy cream filling nestled between layers of tender cake, I knew I’d discovered something special. The gasps around the table confirmed it—this wasn’t just any cake; it was an experience.
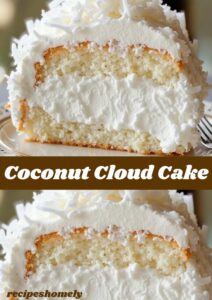
The Coconut Cloud Cake is a showstopper dessert that combines light, airy cake layers with a luscious cream cheese filling and a generous coating of sweetened coconut flakes. It’s the kind of recipe that looks incredibly impressive but is surprisingly approachable for home bakers. Whether you’re celebrating a special occasion or simply want to treat yourself to something extraordinary, this coconut cloud cake recipe will transport you to dessert heaven.
Why This Coconut Cloud Cake Recipe Stands Out
What makes this coconut cake truly special is its texture—it’s remarkably light and moist, almost ethereal. The combination of tender vanilla cake, rich cream filling, and the tropical sweetness of coconut creates a harmony of flavors that’s both comforting and elegant. Unlike dense pound cakes or overly sweet layer cakes, this coconut cloud cake strikes the perfect balance.
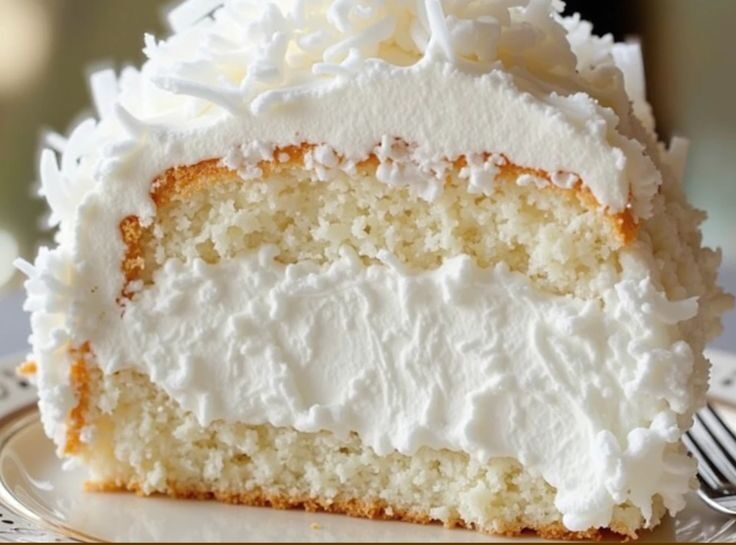
The visual appeal of this dessert cannot be overstated. Covered entirely in fluffy whipped cream and a blanket of shredded coconut, it resembles a pristine snow-covered landscape or, as the name suggests, a soft cloud. When you cut into it, you reveal the beautiful layers—the golden cake, the creamy white filling, and more coconut throughout. It’s a cake that photographs beautifully and tastes even better than it looks.
Essential Ingredients for Your Coconut Cloud Cake
Creating the perfect coconut cloud cake starts with gathering quality ingredients. Here’s what you’ll need:
Cake Layers:
- 2 cups all-purpose flour
- 1 ½ cups granulated sugar
- 1 tablespoon baking powder
- ½ teaspoon salt
- ½ cup unsalted butter, softened
- 1 cup whole milk
- 1 teaspoon vanilla extract
- ½ teaspoon coconut extract
- 3 large eggs
- ½ cup sweetened shredded coconut
Cream Filling:
- 8 oz cream cheese, softened
- 1 cup powdered sugar
- 1 teaspoon vanilla extract
- 2 cups heavy whipping cream
- ¼ cup powdered sugar (for whipping cream)
Topping and Coating:
- 2 cups heavy whipping cream
- ½ cup powdered sugar
- 1 teaspoon vanilla extract
- 3-4 cups sweetened shredded coconut
The coconut extract in the cake batter enhances the tropical flavor profile, while the combination of cream cheese and whipped cream creates that signature cloud-like filling. Using both sweetened coconut in the batter and for decoration ensures coconut flavor in every bite.
Step-by-Step Instructions for Making Coconut Cloud Cake
Preparing the Cake Layers
Begin by preheating your oven to 350°F (175°C). Grease and flour two 9-inch round cake pans, or line them with parchment paper for easy removal.
In a large mixing bowl, whisk together the flour, sugar, baking powder, and salt. This dry mixture forms the foundation of your coconut cake layers. In a separate bowl, cream the softened butter until light and fluffy, about 2-3 minutes using an electric mixer.
Add the eggs one at a time to the butter, beating well after each addition. Mix in the vanilla extract and coconut extract. The coconut extract is key to amplifying that tropical flavor in your cloud cake.
Gradually alternate adding the dry ingredients and milk to the butter mixture, beginning and ending with the dry ingredients. Mix on low speed just until combined—overmixing can result in a tough cake. Gently fold in the ½ cup of shredded coconut.
Divide the batter evenly between your prepared pans. Bake for 25-30 minutes, or until a toothpick inserted in the center comes out clean. The cakes should be lightly golden and spring back when touched. Allow the cake layers to cool in the pans for 10 minutes before transferring them to wire racks to cool completely.
Creating the Cream Filling
While your coconut cake layers cool, prepare the luxurious cream filling that gives this dessert its cloud-like quality. In a large bowl, beat the softened cream cheese with 1 cup of powdered sugar and vanilla extract until smooth and creamy, with no lumps remaining.
In a separate chilled bowl, whip the heavy cream with ¼ cup powdered sugar until stiff peaks form. This takes about 3-4 minutes with an electric mixer on high speed. The cream should hold its shape and look glossy.
Gently fold the whipped cream into the cream cheese mixture in three additions, being careful not to deflate the airiness. This technique creates that signature fluffy, cloud-like filling that makes this cake so special. The filling should be smooth, stable, and perfectly spreadable.
Assembling Your Coconut Cloud Cake
Once your cake layers are completely cool (this is crucial—warm cake will melt the filling), it’s time to assemble your masterpiece. Place one cake layer on your serving plate. If the top is domed, level it with a serrated knife for easier stacking.
Spread approximately half of the cream filling over the first layer, creating an even layer about ¾ inch thick. The filling should extend almost to the edges but not quite—it will spread slightly when you add the second layer.
Carefully place the second cake layer on top, pressing down gently to secure it. If you have a cake turntable, this makes the next steps much easier, but it’s not essential.
Frosting and Decorating with Coconut
For the final coating, prepare fresh whipped cream by beating 2 cups of heavy cream with ½ cup powdered sugar and vanilla extract until stiff peaks form. This will be your “cloud” coating.
Using an offset spatula, spread a thin crumb coat of whipped cream over the entire cake—top and sides. This initial layer traps any loose crumbs. Refrigerate for 15-20 minutes to set.
Apply a generous second layer of whipped cream, creating a smooth, even coating all around your coconut cloud cake. The frosting should be thick enough that you can’t see the cake through it.
Now comes the fun part—the coconut coating. Working over a large baking sheet or piece of parchment paper (to catch excess coconut), gently press handfuls of shredded coconut onto the sides of the cake. Take your time and cover every visible bit of frosting. Sprinkle more coconut generously over the top, creating that signature cloud-like appearance.
For an extra-impressive presentation, you can pipe additional whipped cream rosettes on top and sprinkle them with coconut. The visual effect is stunning—your cake truly looks like a fluffy white cloud.
Coconut Cloud Cake Nutritional Information
Understanding the nutritional content helps you enjoy this indulgent dessert mindfully. Per serving (based on 12 servings):
- Calories: 485
- Total Fat: 28g
- Saturated Fat: 19g
- Cholesterol: 105mg
- Sodium: 245mg
- Total Carbohydrates: 54g
- Dietary Fiber: 2g
- Sugars: 39g
- Protein: 6g
This coconut cake is definitely a treat to be savored on special occasions. The combination of cream cheese, heavy cream, and coconut makes it rich and satisfying, so a moderate slice goes a long way in delivering happiness.
Presentation Tips for Your Cloud Cake
The beauty of this coconut cloud cake lies in its pristine, snow-covered appearance. Here are some professional presentation techniques:
Plating: Serve slices on white or light-colored plates to maintain the cloud-like aesthetic. The contrast between the white exterior and the revealed golden cake layers creates visual drama.
Garnishes: While the cake is stunning on its own, you can add subtle touches like a few fresh mint leaves for a pop of color, or a light dusting of edible pearl dust for shimmer during evening celebrations.
Serving Style: Use a sharp knife dipped in hot water and wiped dry between cuts. This technique ensures clean slices that showcase the beautiful layers—the cake, the cream filling, and the coconut coating.
Table Setting: Display your coconut cloud cake on a cake stand or elevated platter. This elevates it literally and figuratively, making it the centerpiece of your dessert table. Surround the base with a few scattered coconut flakes or small white flowers for an elegant touch.
Perfect Pairings for Coconut Cloud Cake
This tropical-inspired cake pairs beautifully with various beverages and accompaniments:
Coffee and Tea: A strong espresso or cappuccino cuts through the sweetness beautifully. Alternatively, serve with Ceylon or Earl Grey tea—the bergamot notes complement coconut wonderfully.
Dessert Wines: A slightly chilled Moscato d’Asti or a late-harvest Riesling matches the sweetness level of this cloud cake while adding fruity notes that enhance the tropical coconut flavor.
Fresh Fruit: Serve alongside fresh mango slices, pineapple chunks, or passion fruit for a complete tropical experience. The acidity and freshness of fruit provide a perfect counterbalance to the rich cream.
Ice Cream: A scoop of vanilla bean or coconut ice cream alongside a slice creates an ultra-indulgent dessert experience, though the cake is certainly rich enough to stand alone.
Coconut Cloud Cake Variations and Substitutions
The beauty of this recipe lies in its versatility. Here are some ways to customize your coconut cloud cake:
Chocolate Coconut Cloud Cake: Replace ½ cup of flour with cocoa powder in the cake layers for a chocolate-coconut combination reminiscent of a Mounds bar. This variation is particularly popular with chocolate lovers.
Lime Coconut Cloud Cake: Add 2 tablespoons of fresh lime zest to the cake batter and 1 tablespoon to the cream filling. The citrus brightens the coconut flavor and adds a refreshing twist—think key lime pie meets coconut cake.
Toasted Coconut Version: Toast the coconut flakes before coating the cake. Spread them on a baking sheet and bake at 325°F, stirring frequently, until golden brown. Toasted coconut adds a deeper, nuttier flavor and beautiful color variation.
Lighter Option: Substitute half the heavy cream in the filling with Greek yogurt for a slightly tangy, less rich filling. You can also use light cream cheese, though the texture will be slightly different.
Nut Addition: Fold ½ cup of finely chopped macadamia nuts into the cake batter for added texture and a tropical flair that complements the coconut beautifully.
Pineapple Layer: Spread a thin layer of well-drained crushed pineapple between the cake layers for a piña colada-inspired version. Just ensure the pineapple is very well drained to prevent sogginess.
Gluten-Free Adaptation: Replace the all-purpose flour with a 1:1 gluten-free baking flour blend. The texture will be slightly different but still delicious.
Storage and Make-Ahead Tips
This coconut cloud cake requires refrigeration due to the cream cheese and whipped cream components. Store covered in the refrigerator for up to 3 days. The coconut coating may absorb some moisture over time, but the flavor remains excellent.
For make-ahead convenience, you can bake the cake layers up to 2 days in advance. Wrap them tightly in plastic wrap and store at room temperature. You can also prepare the cream filling a day ahead and refrigerate it, giving it a quick stir before using.
The fully assembled coconut cake is best enjoyed within 24 hours of assembly for optimal texture, though it remains delicious for several days. If you’re making it for an event, assembling it the morning of or the night before works perfectly.
Freezing the assembled cake isn’t recommended due to the whipped cream frosting, which can become watery upon thawing. However, you can freeze the unfrosted cake layers for up to 3 months, wrapped well in plastic wrap and aluminum foil.
Common Mistakes to Avoid
Warm Cake Assembly: Never assemble your coconut cloud cake while the layers are still warm. The heat will melt the cream filling, causing it to slide and creating a messy presentation. Patience is key—let those layers cool completely.
Overbeating the Cream: While you want stiff peaks in your whipped cream, overbeating will cause it to separate and become grainy. Stop beating as soon as stiff peaks form when you lift the beaters.
Skipping the Crumb Coat: That initial thin layer of frosting is essential. It seals in crumbs and creates a smooth foundation for your final coat of frosting and coconut.
Using Unsweetened Coconut Only: While you can use unsweetened coconut, the sweetened variety provides better flavor and a softer texture that adheres better to the frosting. If using unsweetened, you may want to increase the sugar in your recipe slightly.
My Personal Coconut Cloud Cake Tip
After making this coconut cloud cake dozens of times, here’s my secret: add a tablespoon of cream of coconut (like Coco López) to your whipped cream frosting. This intensifies the coconut flavor throughout the cake without changing the texture. It’s that little extra touch that makes people ask, “What makes this taste so incredible?” Also, refrigerate your mixing bowl and beaters for 15 minutes before whipping cream—cold equipment helps the cream whip faster and achieve better volume, creating an even fluffier cloud-like coating for your masterpiece.