Despite its name, Boston cream pie isn’t actually a pie at all—it’s a magnificent cake that has captured hearts (and stomachs) since it was created at Boston’s Parker House Hotel in 1856. I still remember the first time I successfully made one at home. Standing in my kitchen, looking at those beautiful layers of tender cake, creamy custard, and glossy chocolate glaze, I felt like a culinary rock star. Now I’m going to share all my secrets so you can experience that same triumphant feeling.
What Makes Boston Cream Pie So Special?
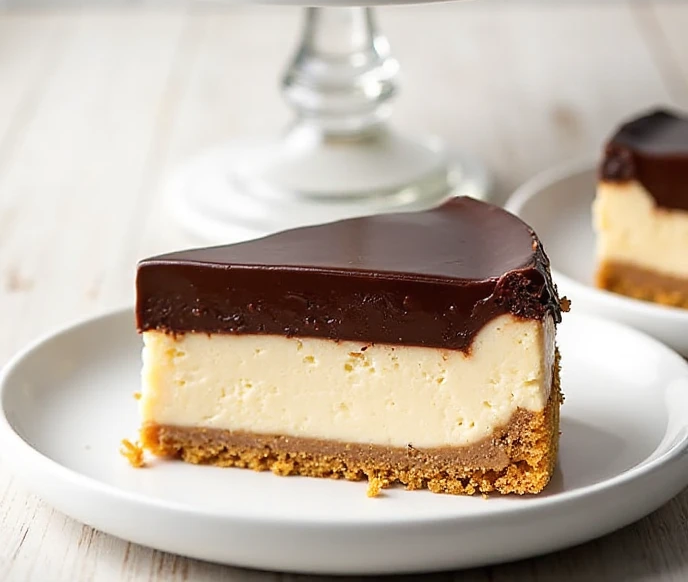
This Boston cream pie recipe is the ultimate trifecta of textures and flavors. You have tender, buttery sponge cake that’s light as air, silky vanilla pastry cream that’s rich without being heavy, and a luxurious chocolate ganache that adds just the right amount of decadence. Each component is delicious on its own, but together they create something truly magical.
What I love most about this dessert is how it manages to be simultaneously impressive and comforting. It looks like something from a fancy bakery, but it tastes like home—assuming your home has an amazing baker, of course!
Understanding the Components of Boston Cream Cake
Before we start baking, let me break down the three main components that make this Boston cream pie recipe work.
The cake layer is a classic yellow cake, sometimes called génoise or sponge cake. It needs to be sturdy enough to hold the custard without collapsing, but tender enough to cut easily with a fork.
The pastry cream (crème pâtissière) is a thick, custard-like filling flavored with vanilla. It’s cooked on the stovetop and needs to be completely cool before assembling your Boston cream cake.
The chocolate glaze is actually a simple ganache made from chocolate and cream. It should be pourable but not too thin, with a beautiful glossy finish that sets to a soft, fudgy texture.
Essential Ingredients for Boston Cream Pie
Let me walk you through everything you’ll need for this show-stopping dessert. The ingredients are straightforward, but using high-quality components makes a noticeable difference.
Cake Layers:
- 1 1/2 cups all-purpose flour
- 1 1/2 teaspoons baking powder
- 1/4 teaspoon salt
- 3/4 cup whole milk, at room temperature
- 6 tablespoons unsalted butter
- 1 1/2 teaspoons vanilla extract
- 3 large eggs, at room temperature
- 1 1/2 cups granulated sugar
Vanilla Pastry Cream:
- 2 cups whole milk
- 1/2 cup granulated sugar, divided
- 1/4 cup cornstarch
- 1/4 teaspoon salt
- 4 large egg yolks
- 2 tablespoons unsalted butter
- 1 tablespoon vanilla extract (use the good stuff)
Chocolate Ganache Glaze:
- 6 ounces semi-sweet or bittersweet chocolate, finely chopped
- 1/2 cup heavy cream
- 1 tablespoon light corn syrup (for extra shine)
- 1/2 teaspoon vanilla extract
Step-by-Step Instructions for Perfect Boston Cream Pie
Now let me guide you through creating this masterpiece. I’ve refined this process over many attempts, so I’ll share exactly what works best.
Making the Cake for Your Boston Cream Pie
Preheat your oven to 350°F (175°C). Grease two 9-inch round cake pans, line the bottoms with parchment paper, and grease the paper too. This double insurance prevents sticking.
In a medium bowl, whisk together the flour, baking powder, and salt. Set this aside.
In a small saucepan, heat the milk and butter together over medium heat until the butter melts and the mixture is steaming but not boiling. Remove from heat and stir in the vanilla. Keep this warm.
Here’s where technique becomes crucial. In a large bowl or stand mixer, beat the eggs on medium speed for 30 seconds to break them up. Gradually add the sugar while beating, then increase the speed to medium-high and beat for 5-7 minutes. The mixture should become thick, pale yellow, and tripled in volume. When you lift the beater, the batter should fall in thick ribbons that hold their shape briefly—this is called the “ribbon stage.”
Sift the flour mixture over the egg mixture in three additions, gently folding after each addition with a large spatula. Use a light hand—you want to maintain as much of that whipped-in air as possible.
Once the flour is mostly incorporated, take about 1 cup of the batter and stir it into the warm milk mixture. This tempers everything and prevents the hot milk from deflating your carefully whipped eggs. Pour this milk-batter mixture back into the main batter and gently fold until just combined.
Divide the batter evenly between your prepared pans. Bake for 20-25 minutes until the cakes are golden and spring back when lightly pressed, and a toothpick inserted in the center comes out clean.
Cool the cakes in the pans for 10 minutes, then turn them out onto wire racks to cool completely. These need to be completely cool before assembling your Boston cream pie.
Creating the Vanilla Pastry Cream Filling
While your cakes are baking and cooling, make the pastry cream—it needs several hours to chill completely.
In a medium saucepan, heat the milk and 1/4 cup of the sugar over medium heat until steaming and the sugar dissolves. Don’t let it boil.
In a separate bowl, whisk together the remaining 1/4 cup sugar, cornstarch, salt, and egg yolks until smooth and pale. The mixture should be thick.
Here’s the critical step: slowly pour about half of the hot milk into the yolk mixture while whisking constantly. This process, called tempering, gradually raises the temperature of the eggs without scrambling them. Pour this mixture back into the saucepan with the remaining milk.
Cook over medium heat, whisking constantly, until the mixture thickens dramatically and comes to a boil. Once it boils, continue cooking and whisking for about 2 more minutes—this fully activates the cornstarch and ensures your pastry cream will be thick enough to support the cake layers.
Remove from heat and whisk in the butter and vanilla until smooth. Transfer the pastry cream to a bowl and press plastic wrap directly onto the surface to prevent a skin from forming. Refrigerate until completely cold, at least 4 hours or overnight.
Making the Chocolate Ganache for Boston Cream Cake
Place your chopped chocolate in a heatproof bowl. In a small saucepan, heat the cream until it just begins to simmer—you’ll see tiny bubbles around the edges. Pour the hot cream over the chocolate and let it sit for 2 minutes without stirring.
After those 2 minutes, add the corn syrup and vanilla, then whisk gently from the center outward until the mixture is completely smooth and glossy. Let it cool for about 10 minutes until it thickens slightly but is still pourable.
Assembling Your Boston Cream Pie
Now for the fun part—putting it all together! Place one cake layer on your serving plate. If the top is very domed, you can carefully trim it to create a flat surface, but this usually isn’t necessary with this recipe.
Remove the pastry cream from the refrigerator and give it a good whisk to smooth it out. Spread it evenly over the first cake layer, leaving about a 1/4-inch border around the edge—the weight of the top layer will push the cream slightly toward the edges.
Place the second cake layer on top, pressing down gently to secure it. Make sure the layers are aligned nicely.
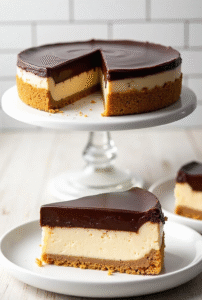
Pour the chocolate ganache over the top of the cake, starting in the center and using an offset spatula to spread it to the edges, allowing some to drip down the sides. This is the signature look of Boston cream pie—that glossy chocolate cascade is what makes it so visually stunning.
Refrigerate the assembled Boston cream cake for at least 1 hour before serving to let everything set properly.
Pro Tips for Boston Cream Pie Success
After making this recipe dozens of times, I’ve learned several tricks that guarantee perfect results.
First, make sure all your ingredients are at room temperature before you start. Room temperature eggs whip up much better, and room temperature milk incorporates more smoothly into the batter.
Second, when whipping the eggs and sugar, don’t shortcut the time. Those full 5-7 minutes are necessary to incorporate enough air to give the cake its characteristic light texture. If you stop too early, your cake will be dense.
Third, work quickly but gently when folding in the flour. The longer you work the batter, the more air you deflate and the more gluten you develop—both of which work against you.
Fourth, make sure your pastry cream is completely cold before assembling. If it’s even slightly warm, it will make the cake layers soggy and might cause the cake to slide.
Finally, for the neatest serving, use a sharp knife dipped in hot water and wiped dry between each slice. This prevents the chocolate topping from cracking and gives you professional-looking pieces.
Variations on Classic Boston Cream Pie
While the traditional version is perfect, there’s room for creativity with this Boston cream pie recipe.
For a chocolate lover’s version, add 1/4 cup of cocoa powder to the cake batter (reduce the flour by 1/4 cup) to create a chocolate-chocolate combination.
You can infuse the pastry cream with different flavors. Try adding 2 tablespoons of instant espresso powder for a mocha version, or steep the milk with orange zest for a subtle citrus note.
Some people like to add a layer of sliced strawberries or bananas over the pastry cream before adding the top layer. This adds freshness and another textural element.
For a boozy version perfect for adults, brush each cake layer with a mixture of 2 tablespoons rum or bourbon mixed with 2 tablespoons simple syrup before assembly.
You can also make individual Boston cream pies using cupcake tins. Bake the cake batter in muffin tins, slice each cupcake in half horizontally, fill with pastry cream, and top with ganache. These make adorable individual servings perfect for parties.
Nutritional Information for Boston Cream Pie
For those tracking nutrition, here’s what you’re working with per serving (this recipe serves 10-12):
- Calories: 420
- Protein: 7g
- Carbohydrates: 56g
- Fat: 19g
- Fiber: 1g
- Sugar: 38g
- Sodium: 190mg
This Boston cream cake is definitely a special occasion dessert, rich and indulgent in all the best ways. The good news is that the serving sizes can be modest since it’s so satisfying—a small slice goes a long way!
Storage and Make-Ahead Tips for Boston Cream Cake
One of the wonderful things about this Boston cream pie recipe is that you can break the work into stages.
The cake layers can be baked up to 2 days in advance. Wrap them tightly in plastic wrap and store at room temperature. They can also be frozen for up to 1 month—just thaw completely before assembling.
The pastry cream can be made up to 3 days ahead and kept refrigerated with plastic wrap pressed directly on the surface.
The ganache can be made ahead and stored in the refrigerator for up to 1 week. Gently rewarm it in the microwave in 10-second bursts, stirring between each, until it’s pourable again.
Once assembled, the Boston cream pie should be refrigerated and is best served within 2 days. The cake layers will gradually absorb moisture from the pastry cream, so while it’s still delicious after a few days, the texture is optimal in the first 48 hours.
Always store your Boston cream pie in the refrigerator due to the pastry cream filling. Remove it about 30 minutes before serving to take the chill off—it tastes best when not ice-cold.
Serving Suggestions for Boston Cream Pie
This dessert is special enough to stand alone, but here are some ways to make it even more impressive.
Serve each slice with a small dollop of whipped cream and fresh berries on the side. The tartness of the berries provides a nice contrast to the sweet cake.
For an extra-fancy presentation, dust the serving plates with cocoa powder before placing the slice, and add a small mint leaf for color.
Coffee is the perfect beverage pairing—the slight bitterness balances the sweetness beautifully. A cappuccino or latte is particularly nice.
For a dinner party, consider making individual servings using small glasses or jars. Layer crumbled cake, pastry cream, and chocolate ganache to create a deconstructed Boston cream pie parfait. It’s easier to serve and looks stunning.
The History and Heritage of Boston Cream Pie
I find the history of this dessert fascinating. Created in 1856 by French chef Sanzian at Boston’s Parker House Hotel (yes, the same place that gave us Parker House rolls), it was originally called “Parker House Chocolate Cream Pie.”
In the mid-19th century, cakes and pies were often baked in the same pans and the terms were used interchangeably. Even though this dessert is clearly a cake by modern standards, the “pie” name stuck, and it’s been called Boston cream pie ever since.
In 1996, Boston cream pie was declared the official dessert of Massachusetts, cementing its place in culinary history. It’s a true American classic that has stood the test of time because, simply put, it’s delicious.
Common Mistakes and How to Avoid Them
Let me share the pitfalls I’ve encountered so you can sidestep them entirely.
Mistake: Deflated, dense cake Solution: Make sure you beat the eggs and sugar for the full time specified, and fold (don’t stir!) the flour in gently. Also, work quickly once you start folding—every extra minute in the bowl means more deflation.
Mistake: Lumpy pastry cream Solution: Whisk constantly while cooking, especially once it starts to thicken. If you do get lumps, strain the hot pastry cream through a fine-mesh sieve into your storage bowl.
Mistake: Ganache is grainy instead of smooth Solution: Make sure your chocolate is finely chopped so it melts completely. Also, don’t use boiling cream—it should be hot but not violently boiling. If your ganache does seize up, try whisking in a tablespoon of warm water to bring it back together.
Mistake: Cake sliding apart Solution: This happens when the pastry cream is too warm or too thin. Make sure it’s completely chilled and thick before assembly. If your kitchen is very warm, you can even pop the assembled cake (before adding the chocolate topping) in the refrigerator for 20 minutes to set before adding the ganache.
Why This Boston Cream Pie Recipe Works
From a technical standpoint, this recipe succeeds because each component is perfectly balanced to complement the others.
The cake uses the génoise method of whipping whole eggs with sugar, which creates a sturdy but tender crumb that can support the filling without becoming soggy. The careful folding technique preserves the structure while keeping it light.
The pastry cream uses the right ratio of cornstarch to liquid to create a filling that’s thick enough to stay put but still creamy and luxurious, never stodgy or pudding-like.
The ganache ratio ensures a glaze that’s fluid enough to pour and spread smoothly but thick enough to create that beautiful glossy coating without running off the cake entirely.
Together, these three elements create a dessert that’s greater than the sum of its parts—each bite delivers cake, cream, and chocolate in perfect proportion.
My Final Thoughts on Boston Cream Pie
This Boston cream pie recipe holds a special place in my heart because it taught me that impressive desserts don’t have to be impossibly complicated. Yes, there are multiple components, but each one is straightforward. The magic comes from assembling them thoughtfully and with care.
The first time you slice into your homemade Boston cream cake and see those beautiful layers, you’ll understand why this dessert has remained beloved for over 150 years. It’s proof that some classic recipes become classics for very good reasons.
Whether you’re making this for a special celebration, a holiday dinner, or just because you want to treat yourself and your loved ones to something extraordinary, I promise this Boston cream pie will deliver. Take your time, follow the steps, and enjoy the process. The reward—that first bite of tender cake, silky cream, and rich chocolate—is absolutely worth it.
SEO Block:
- Focus keyphrase: Boston cream pie recipe
- SEO title: The Ultimate Boston Cream Pie Recipe – Easy Dessert Cake Guide
- Slug: boston-cream-pie-recipe-easy-dessert
- Keyphrase synonyms: Boston cream cake, Boston cream pie dessert, easy Boston cream pie
- Meta description: Master this classic Boston cream pie recipe with tender cake, vanilla pastry cream, and chocolate ganache glaze.