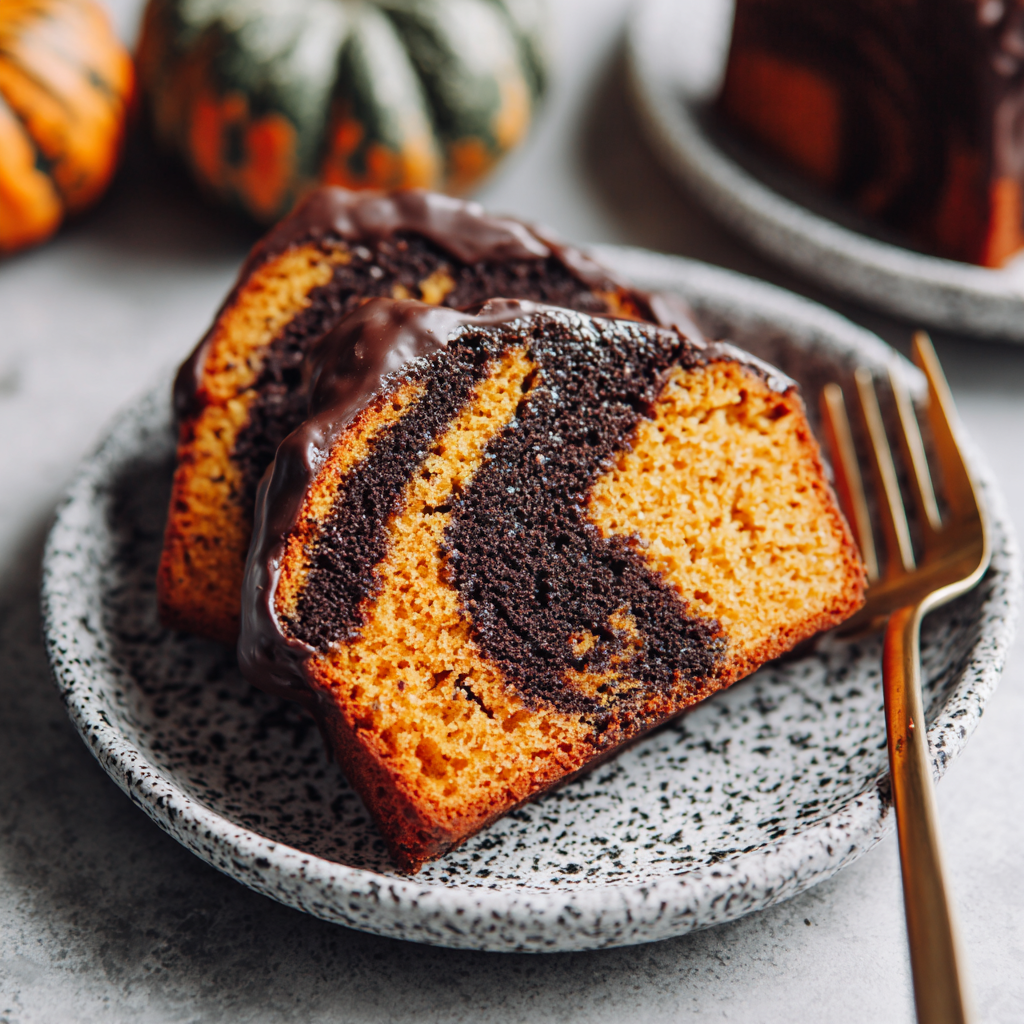
The first time I created this pumpkin marble cake, I was preparing for my annual fall dinner party, and I wanted something that would capture everyone’s attention while delivering exceptional flavor. As I sliced into that first loaf, revealing the gorgeous swirls of chocolate and pumpkin beneath the glossy chocolate glaze, I knew I’d discovered something truly special. The collective gasp from my guests confirmed it—this cake is as delicious as it is beautiful.
This pumpkin marble cake represents everything I love about autumn baking. The warm spices of traditional pumpkin cake meet the rich decadence of chocolate in a harmonious dance of flavors. Each slice reveals a unique pattern of swirls, making every piece a work of edible art that tastes even better than it looks.
Why This Pumpkin Marble Cake Will Become Your Favorite
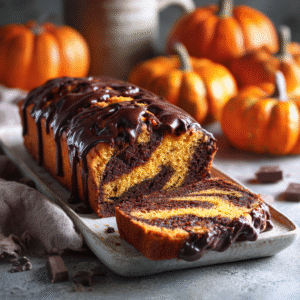
There are countless reasons why this pumpkin marble cake recipe has earned a permanent place in my fall baking rotation. First and foremost is the incredible visual impact—those dramatic chocolate and pumpkin swirls create an eye-catching pattern that makes this cake perfect for special occasions or holiday gatherings.
The flavor combination is nothing short of genius. The pumpkin portion offers warmth from cinnamon, nutmeg, and ginger, while the chocolate layers provide rich, slightly bitter notes that balance the pumpkin’s sweetness perfectly. Together, they create a complexity that keeps you coming back for another slice.
Texture-wise, this pumpkin marble cake is remarkably moist and tender. The pumpkin puree adds moisture that keeps the cake fresh for days, while the chocolate portions offer a slightly denser texture that provides wonderful contrast. The chocolate glaze on top adds another dimension, creating a beautiful finish that seals in moisture.
Essential Ingredients for Your Pumpkin Marble Cake
Pumpkin Batter
- 1 cup pumpkin puree (not pumpkin pie filling)
- ½ cup vegetable oil
- 2 large eggs
- 1 cup granulated sugar
- 1½ cups all-purpose flour
- 1 teaspoon baking powder
- ½ teaspoon baking soda
- ½ teaspoon salt
- 1½ teaspoons ground cinnamon
- ½ teaspoon ground ginger
- ¼ teaspoon ground nutmeg
- ¼ teaspoon ground cloves
Chocolate Batter
- ⅓ cup cocoa powder
- ⅓ cup hot water
- 2 tablespoons vegetable oil
- 2 large eggs
- ¾ cup granulated sugar
- 1 cup all-purpose flour
- ½ teaspoon baking powder
- ¼ teaspoon baking soda
- ¼ teaspoon salt
- 1 teaspoon vanilla extract
Chocolate Glaze
- 1 cup semi-sweet chocolate chips
- ½ cup heavy cream
- 1 tablespoon butter
- 1 teaspoon vanilla extract
Using pure pumpkin puree rather than pumpkin pie filling is crucial for this pumpkin marble cake. Pumpkin pie filling contains added sugars and spices that will throw off the balance of flavors. I prefer organic pumpkin puree for its superior flavor and smooth texture.
Complete Guide to Making Pumpkin Marble Cake
Preparing to Bake Your Marble Cake
Preheat your oven to 350°F (175°C). Grease and flour a 9×5-inch loaf pan thoroughly, or line it with parchment paper for easiest removal. I’ve found that using both parchment paper and a light coating of cooking spray provides the best insurance against sticking.
Position your oven rack in the center position—this ensures even heat distribution and prevents the top from browning too quickly while the center remains underbaked.
Creating the Perfect Pumpkin Cake Batter
In a large mixing bowl, whisk together the pumpkin puree, vegetable oil, eggs, and sugar until smooth and well combined. The mixture should be homogeneous with no streaks of oil visible on the surface.
In a separate bowl, whisk together the flour, baking powder, baking soda, salt, and all the warming spices—cinnamon, ginger, nutmeg, and cloves. These spices are what give the pumpkin portion its distinctive fall flavor, so don’t skimp on them.
Add the dry ingredients to the wet pumpkin mixture, stirring just until combined. Be careful not to overmix—a few small lumps are fine and will disappear during baking. Overmixing develops gluten, which can make your pumpkin marble cake tough rather than tender.
Preparing the Chocolate Cake Batter
In a small bowl, whisk the cocoa powder and hot water together until smooth. This process, called blooming the cocoa, intensifies the chocolate flavor and helps prevent lumps in your batter. Let this mixture cool slightly before proceeding.
In another large bowl, whisk together the eggs, sugar, vegetable oil, and vanilla extract. Add the cooled cocoa mixture and stir until well combined.
In a separate bowl, whisk together the flour, baking powder, baking soda, and salt. Add these dry ingredients to the chocolate mixture, stirring just until no dry flour remains visible. The chocolate batter for your marble cake should be smooth and slightly thicker than traditional cake batter.
Creating the Marble Effect in Your Pumpkin Cake
This is where the magic happens! Pour about one-third of the pumpkin batter into the bottom of your prepared loaf pan, spreading it evenly. Top with one-third of the chocolate batter, gently spreading it without pressing down too hard—you don’t want to push the pumpkin batter up the sides of the pan.
Repeat these layers two more times, ending with chocolate batter on top. You should have three distinct layers of each flavor, though they’ll blend beautifully during the swirling process.
Now for the most satisfying part—creating the swirls. Insert a butter knife or thin spatula into the batter, pushing it all the way to the bottom of the pan. Draw the knife through the batters in a figure-eight or zigzag pattern, pulling some of the bottom layers up and mixing the colors together. Make about 8-10 swirls through the entire length of the pan.
The key to perfect swirls in your pumpkin marble cake is restraint—less is more. Too much swirling muddles the colors together, creating a uniformly brown cake rather than distinct chocolate and pumpkin sections. You want to see clear ribbons of both colors in every slice.
Baking Your Pumpkin Marble Cake to Perfection
Bake for 60-70 minutes, until a toothpick inserted into the center comes out with just a few moist crumbs attached. The top should be golden brown and spring back lightly when touched.
If the top browns too quickly before the center is done, tent the pan loosely with aluminum foil for the final 20 minutes of baking. This protects the surface while allowing the interior to finish cooking.
Let the cake cool in the pan for 15 minute before running a knife around the edges and inverting it onto a wire rack. Allow the cake to cool completely before glazing—warm cake will cause the glaze to slide right off instead of creating that gorgeous glossy coating.
Preparing the Chocolate Glaze for Your Marble Cake
While your pumpkin marble cake cools, prepare the chocolate glaze. Place the chocolate chips in a heatproof bowl. In a small saucepan, heat the heavy cream until it just begins to simmer—you’ll see small bubbles forming around the edges, but it shouldn’t come to a rolling boil.
Pour the hot cream over the chocolate chips and let sit undisturbed for 2 minutes. This allows the cream’s heat to melt the chocolate gently. Add the butter and vanilla extract, then whisk everything together until smooth and glossy. The glaze should be pourable but thick enough to coat the back of a spoon.
If your glaze seems too thick, add a tablespoon of warm cream. If it’s too thin, let it sit at room temperature for 5-10 minutes to thicken slightly.
Glazing Your Pumpkin Marble Cake
Place your completely cooled cake on a serving platter or cake board. Pour the warm chocolate glaze over the top, letting it drip naturally down the sides. Use an offset spatula to encourage the glaze to flow evenly if needed, but resist the urge to smooth it completely—those drips are part of the cake’s charm.
Let the glaze set for at least 30 minutes before slicing. This allows it to firm up slightly, creating a beautiful shiny coating that won’t smear when you cut the cake.
Nutritional Information for Pumpkin Marble Cake
Per slice (based on 12 slices):
- Calories: 385
- Total Fat: 18g
- Saturated Fat: 5g
- Cholesterol: 75mg
- Sodium: 245mg
- Total Carbohydrates: 52g
- Dietary Fiber: 2g
- Sugars: 34g
- Protein: 5g
- Vitamin A: 45% DV
- Iron: 12% DV
While this pumpkin marble cake is definitely an indulgent treat, the pumpkin adds beneficial vitamin A and fiber. The moderate portion size makes it possible to enjoy this dessert as part of a balanced approach to eating.
Creative Variations for Your Pumpkin Marble Cake
Spiced Cream Cheese Marble Cake
Add 4 ounces of softened cream cheese to the pumpkin batter for an ultra-rich, tangy version. Beat the cream cheese with the sugar before adding the other wet ingredients. This creates a denser, more decadent pumpkin marble cake that’s particularly popular during the holidays.
Pumpkin Chocolate Chip Marble Cake
Fold ½ cup of mini chocolate chips into the pumpkin batter before layering. These surprise bursts of chocolate throughout the cake add textural interest and make each bite even more enjoyable. The mini chips distribute more evenly than regular-sized chips.
Maple-Glazed Pumpkin Marble Cake
Instead of chocolate glaze, make a maple glaze using 1 cup powdered sugar, 2 tablespoons maple syrup, and 1-2 tablespoons milk. This creates a lighter, autumn-appropriate topping that lets the cake’s marbled interior take center stage.
Individual Pumpkin Marble Cakes
Divide the batter among 12 muffin cups, alternating small spoonfuls of each flavor. Swirl with a toothpick and bake for 18-22 minutes. These individual servings are perfect for lunchboxes or portion control.
Serving Suggestions for Your Pumpkin Marble Cake
This pumpkin marble cake is stunning enough to serve plain, but a few accompaniments can elevate it further. Serve slices with a dollop of maple whipped cream—simply whip 1 cup heavy cream with 2 tablespoons maple syrup until soft peaks form.
For a truly decadent dessert, serve warm slices with vanilla ice cream. The contrast between the warm, spiced cake and cold, creamy ice cream creates a memorable dessert experience that guests will rave about.
At fall gatherings, slice the pumpkin marble cake and arrange pieces on a rustic wooden board alongside fresh apple slices, pecans, and cinnamon sticks for decoration. The presentation highlights the cake’s beautiful interior while creating an inviting, seasonal display.
Perfect Pairings with Pumpkin Marble Cake
Coffee is the ideal beverage companion for this pumpkin marble cake. A medium roast with nutty undertones complements both the chocolate and pumpkin flavors without overwhelming either. I particularly enjoy it with a cinnamon-spiced latte.
For tea drinkers, chai tea creates a harmonious pairing. The spices in chai—cinnamon, cardamom, ginger—echo the warming spices in the pumpkin portion while standing up to the chocolate’s richness.
Wine enthusiasts should consider a tawny port or late-harvest Zinfandel. These sweet wines have enough body and complexity to complement the cake without making the dessert seem overly sweet.
Storage Tips for Your Pumpkin Marble Cake
Store your pumpkin marble cake tightly wrapped in plastic wrap or in an airtight container at room temperature for up to 4 days. The pumpkin keeps the cake remarkably moist, and it actually improves slightly after a day as the flavors meld together.
For longer storage, refrigerate the cake for up to one week. Bring slices to room temperature or warm them briefly in the microwave (about 15 seconds per slice) before serving—this restores the tender texture and makes the chocolate glaze slightly soft again.
This cake freezes beautifully. Wrap the unglazed, cooled cake tightly in plastic wrap, then in aluminum foil. Freeze for up to 3 months. Thaw overnight in the refrigerator, then bring to room temperature and add the glaze before serving. Alternatively, you can freeze individual slices for convenient single servings.
Troubleshooting Common Pumpkin Marble Cake Issues
If your cake sinks in the middle, your oven temperature may be too high, causing the exterior to set before the interior is done. Use an oven thermometer to verify accuracy, and consider reducing the temperature by 25°F if this happens repeatedly.
Dry, crumbly cake usually results from overbaking or too much flour. Check your cake at the 60-minute mark, and remember that the toothpick should have a few moist crumbs—completely clean means overbaked. Also, measure flour by spooning it into your measuring cup rather than scooping, which packs it down and adds too much.
If you can barely see the marble pattern, you either didn’t create enough swirls or swirled too much. Aim for 8-10 deliberate swirls through the entire length of the pan—this creates definition without muddling the colors.
When the glaze slides off instead of coating the cake, your cake was still too warm. Patience is key—the cake must be completely cool, and the glaze should be warm but not hot.
Why This Pumpkin Marble Cake Recipe Works
The science behind this recipe ensures consistent success. Using oil rather than butter creates a more tender crumb and helps the cake stay moist longer. The combination of baking powder and baking soda provides optimal lift and a fine, even texture.
The spice blend in the pumpkin batter is carefully balanced to enhance the pumpkin’s natural sweetness without overwhelming it. Each spice contributes a different note—cinnamon provides warmth, ginger adds brightness, nutmeg offers earthiness, and cloves contribute depth.
Blooming the cocoa powder in hot water for the chocolate portion intensifies the chocolate flavor dramatically. This simple step transforms ordinary cocoa powder into something that tastes remarkably rich and complex.
The layering technique ensures beautiful swirls throughout the entire cake rather than just on top. By alternating the batters in multiple layers and then swirling, you create dimension and visual interest in every single slice.
My Expert Tips for Pumpkin Marble Cake Success
After making this pumpkin marble cake dozens of times, I’ve learned tricks that guarantee bakery-quality results. First, bring all ingredients to room temperature before beginning. This ensures even mixing and a uniform batter that creates better swirls.
Don’t skip weighing or properly measuring your flour. Too much flour is the number one cause of dry, dense cakes. Fluff your flour with a fork, spoon it into your measuring cup, and level it with a knife rather than scooping directly from the bag.
When swirling, use a knife rather than a toothpick—the larger implement creates more dramatic, visible swirls. Move slowly and deliberately, pushing the knife all the way to the pan bottom to pull up layers from the very bottom.
Test for doneness starting at 60 minutes, but don’t be alarmed if your cake needs the full 70 minutes or even slightly longer. Ovens vary significantly, and factors like altitude and pan material affect baking time. Trust visual and tactile cues as much as the timer.
This pumpkin marble cake embodies everything I love about fall baking—the gorgeous appearance, the complex flavors, and the way it brings people together. Whether you’re serving it at Thanksgiving, bringing it to a potluck, or simply enjoying a quiet slice with your afternoon coffee, this cake delivers both beauty and deliciousness in equal measure. The stunning swirls never fail to impress, while the moist, flavorful cake keeps everyone coming back for seconds.