
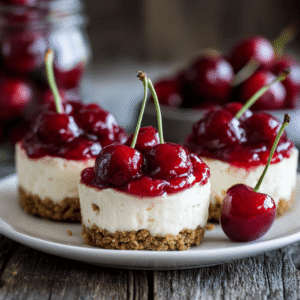
When summer heat makes turning on the oven unbearable, these easy no-bake mini cheesecakes become your dessert salvation. Furthermore, these individual treats deliver all the creamy, rich satisfaction of traditional cheesecake without requiring any baking skills or time. Moreover, each perfectly portioned mini cheesecake takes just 15 minutes to prepare and needs only basic ingredients you likely have in your kitchen right now.
These no-bake mini cheesecakes are beginner-friendly with a difficulty level of easy, requiring just 15 minutes of prep time and 4 hours of chilling. Additionally, this recipe serves 12 people, making it ideal for entertaining, potlucks, or simply treating your family to something special. The beauty of this dessert lies in its versatility – you can customize each mini cheesecake with different toppings to please every palate at your table.
What makes this recipe irresistible is the perfect balance of tangy cream cheese filling nestled on a buttery graham cracker crust, all without the fuss of water baths or worry about cracks. Consequently, you’ll achieve bakery-quality results every single time, making these mini cheesecakes your new go-to dessert for impressive yet effortless entertaining.
The Sweet History Behind America’s Favorite No-Bake Dessert
The story of no-bake mini cheesecakes connects ancient Greek traditions with modern American convenience. Interestingly, the earliest form of cheesecake dates back to ancient Greece around 2000 BC, where it was served to Olympic athletes for energy. However, the creamy dessert we know today emerged much later through centuries of culinary evolution.
Cheesecake made its way to America through European immigrants, particularly from Germany and Eastern Europe. Nevertheless, it was Arnold Reuben, the famous New York restaurateur, who popularized the New York-style cheesecake in the 1930s. His rich, dense version using cream cheese became the gold standard that Americans still crave today.
The no-bake variation gained popularity during the 1950s and 1960s when convenience cooking became a cultural phenomenon. Furthermore, American home cooks discovered they could achieve similar flavors and textures without the technical challenges of traditional baked cheesecake. This innovation was particularly welcome in hot climates where heating the oven was impractical.
Mini cheesecakes represent the latest evolution in this dessert’s journey, reflecting modern preferences for portion control and individual servings. Additionally, the mini format eliminates the anxiety of cutting perfect slices and makes serving at parties incredibly convenient. Today’s no-bake mini cheesecakes combine the best of traditional flavors with contemporary practicality, making them perfect for busy home cooks who refuse to compromise on taste.
The cultural significance of cheesecake in American cuisine cannot be overstated – it appears at celebrations from birthday parties to holiday gatherings, symbolizing indulgence and hospitality that brings people together around the table.
Essential Ingredients for Perfect No-Bake Mini Cheesecakes
Creating exceptional no-bake mini cheesecakes starts with selecting the right ingredients, each playing a crucial role in achieving the perfect texture and flavor. Moreover, using high-quality ingredients makes a noticeable difference in the final result.
Complete Ingredient List
For the Graham Cracker Crust:
- 1½ cups graham cracker crumbs (about 12 whole crackers)
- 6 tablespoons unsalted butter, melted
- 2 tablespoons granulated sugar
For the Cream Cheese Filling:
- 16 ounces (2 blocks) cream cheese, room temperature
- ¾ cup powdered sugar
- 1 cup heavy whipping cream, cold
- 2 tablespoons fresh lemon juice
- 1 teaspoon pure vanilla extract
Specifically, choose honey graham crackers for the best flavor, and crush them yourself for optimal texture rather than buying pre-made crumbs. The cream cheese must be at room temperature for smooth mixing – take it out of the refrigerator 2-3 hours before making your cheesecakes.
For dietary substitutions, you can replace graham crackers with crushed vanilla wafers, gingersnaps, or even chocolate cookies for different flavor profiles. Additionally, those avoiding gluten can use gluten-free graham crackers or almond flour mixed with melted butter and a touch of honey.
The heavy cream provides the light, fluffy texture that distinguishes no-bake cheesecakes from their dense baked counterparts. However, you can substitute it with whipped coconut cream for a dairy-free version, though the texture will be slightly different.
When shopping for cream cheese, choose full-fat versions like Philadelphia brand for the richest taste and smoothest texture. Furthermore, avoid light or fat-free varieties, as they don’t whip properly and can result in a grainy texture that compromises the entire dessert experience.
Equipment and Professional Preparation Tips
Success with no-bake mini cheesecakes depends on having the right equipment and following key preparation techniques that ensure professional results every time. Moreover, proper preparation prevents common mistakes that can ruin the texture or appearance of your desserts.
Essential equipment includes a 12-cup muffin tin or individual 4-ounce ramekins, cupcake liners (optional but recommended for easy removal), an electric mixer (hand or stand mixer), measuring cups and spoons, and a food processor for crushing graham crackers. Additionally, you’ll need a rubber spatula for folding ingredients and plastic wrap for covering during chilling.
The most critical preparation tip involves bringing cream cheese to room temperature properly. Furthermore, this process takes 2-3 hours at room temperature, but you can speed it up by cutting the cream cheese into cubes and letting them sit for 30-45 minutes. Never use the microwave to soften cream cheese, as it can create hot spots that result in lumpy filling.
For time-saving efficiency, crush your graham crackers the night before and store them in an airtight container. Moreover, this advance preparation prevents last-minute rushing and ensures even crumb size. Use a food processor for the most consistent results, pulsing until you achieve fine, uniform crumbs.
Temperature control is crucial throughout the process. Specifically, all ingredients should be at room temperature except the heavy cream, which whips better when cold. Additionally, chill your mixing bowl and beaters in the freezer for 15 minutes before whipping cream for maximum volume and stability.
Make-ahead strategies include preparing the crusts up to two days in advance and storing them covered in the refrigerator. Furthermore, the complete mini cheesecakes can be made up to three days ahead, making them perfect for stress-free entertaining. Common mistakes to avoid include overmixing the filling (which can cause separation), using cold cream cheese (resulting in lumps), and not chilling long enough for proper setting.
Step-by-Step Instructions for Flawless Mini Cheesecakes
Creating perfect no-bake mini cheesecakes follows a systematic approach that guarantees success when executed properly. Moreover, each step builds upon the previous one to create the ideal texture and flavor combination.
Step 1: Prepare the Crust Foundation (5 minutes) Line your muffin tin with paper liners or lightly grease each cup. Furthermore, combine graham cracker crumbs, melted butter, and sugar in a bowl, mixing until the texture resembles wet sand. Press approximately 2 tablespoons of mixture firmly into the bottom of each cup using the back of a spoon or small measuring cup. Additionally, ensure even compression to prevent crumbling later. Refrigerate the crusts while preparing the filling.
Step 2: Create the Cream Cheese Base (8 minutes) In a large mixing bowl, beat room-temperature cream cheese with an electric mixer on medium speed for 2-3 minutes until completely smooth and fluffy. Moreover, scrape down the sides frequently to ensure no lumps remain. Gradually add powdered sugar, beating for another 2 minutes until fully incorporated. Subsequently, mix in lemon juice and vanilla extract until evenly distributed.
Step 3: Whip the Cream Component (3-4 minutes) In a separate chilled bowl, whip heavy cream with clean beaters until soft peaks form. Furthermore, be careful not to overwhip, as this can cause the cream to become grainy. The peaks should hold their shape but still appear smooth and glossy.
Step 4: Fold and Combine (2 minutes) Gently fold one-third of the whipped cream into the cream cheese mixture using a rubber spatula. Additionally, use a folding motion rather than stirring to maintain the light, airy texture. Gradually fold in the remaining whipped cream in two more additions until just combined.
Step 5: Assemble and Chill (2 minutes active, 4 hours passive) Divide the filling evenly among the prepared crusts, filling each cup nearly to the top. Moreover, smooth the surfaces with the back of a spoon for professional presentation. Cover tightly with plastic wrap and refrigerate for at least 4 hours or overnight until completely set.
Visual cues for success include a filling that holds its shape when spooned and doesn’t appear watery or separated. Furthermore, properly set mini cheesecakes will have a firm but creamy texture when gently pressed with a finger.
Creative Serving Suggestions and Delicious Variations
No-bake mini cheesecakes offer endless possibilities for customization and presentation, making them perfect for any occasion or dietary preference. Moreover, these versatile desserts can be adapted to match seasonal ingredients and personal tastes.
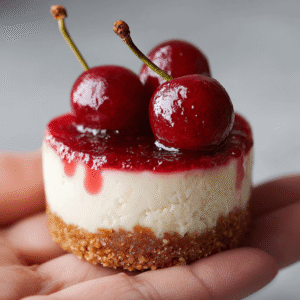
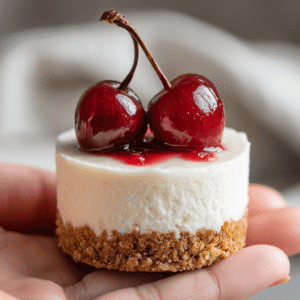
For elegant presentation, remove the paper liners just before serving and place each mini cheesecake on individual dessert plates. Furthermore, drizzle with berry coulis, chocolate sauce, or caramel for restaurant-quality plating. Fresh berries, mint leaves, or edible flowers create beautiful garnishes that add color and sophistication.
Seasonal variations keep this recipe exciting throughout the year. Additionally, summer versions can incorporate fresh strawberry puree into the filling or top with mixed berries. Fall adaptations might include pumpkin spice flavoring or candied pecans, while winter holidays call for peppermint extract and crushed candy canes.
Beverage pairings enhance the dining experience significantly. Furthermore, serve with coffee or espresso to balance the sweetness, or pair with dessert wines like Moscato or late-harvest Riesling. For non-alcoholic options, herbal teas or sparkling water with lemon provide refreshing contrast.
Dietary modifications accommodate various needs without sacrificing flavor. Moreover, dairy-free versions use cashew cream cheese and coconut whipped cream, while sugar-free adaptations substitute erythritol or stevia for powdered sugar. Gluten-free crusts can be made with almond flour or gluten-free graham crackers.
Theme variations include chocolate mini cheesecakes using chocolate wafer crusts and cocoa powder in the filling, or tropical versions with coconut extract and toasted coconut flakes. Additionally, citrus variations using lime or orange zest create bright, refreshing alternatives perfect for summer entertaining.
For special occasions, create dessert bars where guests can customize their own toppings from an array of sauces, fruits, nuts, and candy pieces. Furthermore, this interactive approach makes dessert service fun and memorable while accommodating different preferences simultaneously.
Proper Storage and Food Safety Guidelines
Maintaining the quality and safety of your no-bake mini cheesecakes requires following specific storage protocols that preserve both flavor and texture while preventing foodborne illness. Moreover, proper storage techniques extend the shelf life and maintain the dessert’s appealing appearance.
Refrigeration is absolutely essential for no-bake cheesecakes due to their dairy content. Furthermore, store covered mini cheesecakes in the refrigerator immediately after the initial chilling period. They maintain optimal quality for 3-4 days when properly stored in airtight containers or covered with plastic wrap.
For optimal freshness, place mini cheesecakes in a single layer in a covered container with parchment paper between layers if stacking is necessary. Additionally, avoid storing them near strong-smelling foods, as the cream cheese can absorb odors that affect taste.
Freezing options extend storage up to one month, though texture changes slightly upon thawing. Moreover, wrap individual mini cheesecakes tightly in plastic wrap, then place in freezer bags with air removed. Thaw overnight in the refrigerator before serving, never at room temperature.
Food safety considerations include never leaving dairy-based desserts at room temperature for more than 2 hours, or 1 hour when ambient temperature exceeds 90°F. Furthermore, use clean utensils when serving to prevent cross-contamination, and discard any mini cheesecakes that show signs of spoilage such as off odors or mold.
Temperature control during transport requires insulated coolers with ice packs for outdoor events or potlucks. Additionally, minimize exposure to temperature fluctuations by keeping desserts covered and in the coolest available location.
Signs of spoilage include sour smells, visible mold, or separation of the filling. Moreover, when in doubt about freshness, it’s safer to discard questionable desserts rather than risk illness. Proper labeling with preparation dates helps track freshness and ensures food safety compliance.
Conclusion: Your New Favorite Make-Ahead Dessert
These easy no-bake mini cheesecakes represent the perfect solution for busy home cooks who want to create impressive desserts without stress or complicated techniques. Moreover, the combination of convenience, versatility, and exceptional taste makes this recipe an invaluable addition to your dessert repertoire.
The beauty of this recipe lies in its foolproof nature and endless customization possibilities. Furthermore, whether you’re hosting a dinner party, attending a potluck, or simply treating your family to something special, these mini cheesecakes deliver consistent, delicious results that will have everyone asking for the recipe.
Have you tried making no-bake desserts before, and what’s your favorite flavor combination for mini cheesecakes? Additionally, we’d love to hear about your creative topping ideas and any variations you’ve discovered. Share your experiences in the comments below and inspire other home cooks to try this delightful recipe.
Don’t forget to save this recipe and share it with friends who appreciate easy, elegant desserts that never fail to impress!
Recipe Card
Easy No-Bake Mini Cheesecakes
- Prep Time: 15 minutes
- Chill Time: 4 hours
- Total Time: 4 hours 15 minutes
- Servings: 12 mini cheesecakes
- Difficulty: Easy
Ingredients
For the Crust:
- 1½ cups graham cracker crumbs
- 6 tablespoons unsalted butter, melted
- 2 tablespoons granulated sugar
For the Filling:
- 16 oz cream cheese, room temperature
- ¾ cup powdered sugar
- 1 cup heavy whipping cream, cold
- 2 tablespoons fresh lemon juice
- 1 teaspoon vanilla extract
Instructions
- Line 12-cup muffin tin with paper liners
- Mix crust ingredients, press into cups, refrigerate
- Beat cream cheese until smooth, add sugar, lemon juice, vanilla
- Whip cream to soft peaks separately
- Fold whipped cream into cream cheese mixture
- Fill cups with mixture, refrigerate 4+ hours
- Garnish as desired before serving
Nutrition (per serving)
- Calories: 285
- Fat: 24g
- Carbohydrates: 16g
- Protein: 4g
- Sugar: 14g
Recipe Notes
- Cream cheese must be room temperature for smooth texture
- Can be made 3 days ahead
- Store covered in refrigerator
- Customize with various toppings and flavor extracts
Internal Linking Opportunities:
- Link to “Essential Baking Equipment Guide”
- Link to “Cream Cheese Dessert Collection”
- Link to “Make-Ahead Dessert Recipes”
- Link to “Food Safety Guidelines for Home Cooks”