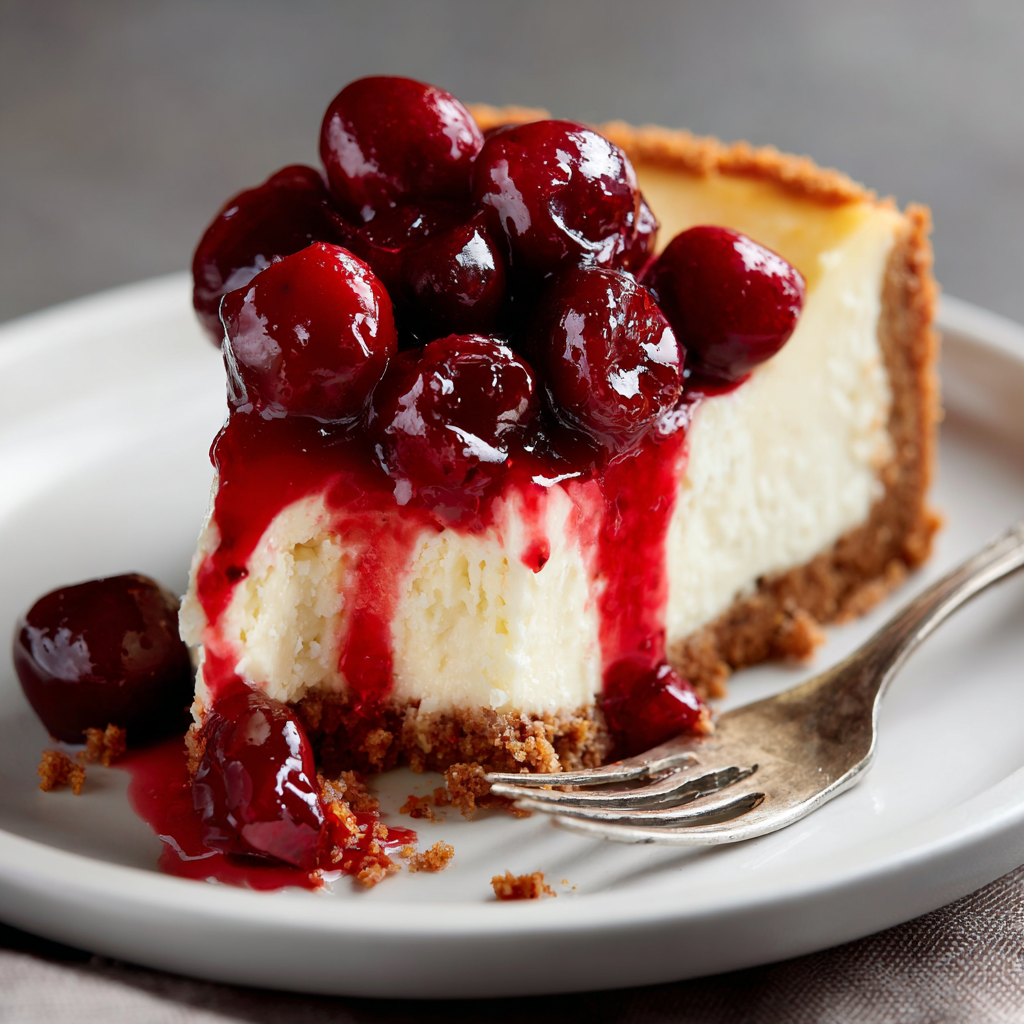
There’s something magical about the moment you cut into a perfect homemade cheesecake recipe. The knife glides through that silky, creamy surface, revealing layers of pure indulgence that have been the cornerstone of American dessert tables for generations. If you’ve ever wondered how to create that restaurant-quality cheesecake recipe that makes guests close their eyes in pure bliss, you’re about to discover the secrets that professional bakers have guarded for decades.
As someone who has spent countless hours perfecting this recipe, I can tell you that making cheesecake isn’t just about following instructions – it’s about understanding the soul of this beloved dessert. Today, I’m sharing with you a foolproof method that will transform your kitchen into a five-star bakery, complete with a luscious cherry sauce that elevates this classic to extraordinary heights.
Why This Homemade Cheesecake Recipe Will Change Your Dessert Game Forever
Let me paint you a picture. It’s 1952, and my grandmother is standing in her modest Brooklyn kitchen, carefully folding cream cheese with wooden spoon, creating what would become our family’s most requested homemade cheesecake recipe. She didn’t have fancy stand mixers or springform pans – just pure technique and an understanding of how ingredients work together in perfect harmony.
This cheesecake recipe combines that old-world wisdom with modern techniques, giving you the best of both worlds. What makes this particular homemade cheesecake recipe special isn’t just the incredibly smooth texture or the way it practically melts on your tongue – it’s the foolproof method that ensures success every single time.
The secret lies in three crucial elements: temperature control, proper mixing technique, and the water bath method that creates an environment so gentle, your cheesecake will emerge from the oven without a single crack. These aren’t just cooking tips – they’re the difference between a good cheesecake and an unforgettable one.
The Art and Science Behind the Perfect Homemade Cheesecake Recipe
Understanding why each step matters will transform you from someone who follows recipes to someone who truly understands baking. When we beat cream cheese for five full minutes in this homemade cheesecake recipe, we’re not just mixing – we’re creating a foundation so smooth that every bite will be pure velvet. This extended beating time breaks down every single lump, creating a base that will support all our other ingredients without compromising texture.
The room temperature requirement isn’t just a suggestion – it’s absolutely critical. Cold cream cheese will never achieve that perfect smoothness, no matter how long you beat it. Cold eggs will create temperature shock, potentially leading to a grainy texture that no amount of skill can fix later. This is why professional bakers always plan ahead, removing ingredients from refrigeration at least two hours before beginning.
Essential Ingredients for This Homemade Cheesecake Recipe Success
For the Graham Cracker Crust:
- 1 1/2 cups graham cracker crumbs (from 12 whole crackers)
- 6 tablespoons unsalted butter, melted
- 1 tablespoon granulated sugar
For the Cheesecake Filling:
- 2 1/4 pounds cream cheese, room temperature (4 1/2 packages, 8-oz each)
- 1 1/4 cups granulated sugar
- 6 large eggs, room temperature
- 1/4 cup sour cream
- 1/2 tablespoon vanilla extract
Each ingredient plays a specific role in creating cheesecake perfection. The cream cheese provides that signature tangy richness, while the eggs act as both binding agent and create that custard-like texture we crave. Sour cream adds a subtle tang that prevents the dessert from becoming cloyingly sweet, and vanilla rounds out all the flavors with its warm, aromatic notes.
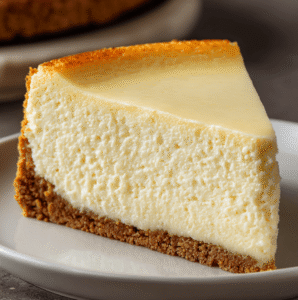
Creating the Foundation: Perfect Graham Cracker Crust for Your Easy Cheesecake Recipe
The crust is more than just a base – it’s the textural contrast that makes each bite interesting. When crushing your graham crackers, aim for crumbs that are fine but not powdery. You want some small pieces that will add gentle texture without being chunky enough to break apart when sliced.
Step-by-Step Crust Preparation for This Classic Cheesecake Recipe:
Start by preheating your oven to 350°F. In a medium bowl, combine your graham cracker crumbs with melted butter and sugar. The mixture should hold together when pressed but not be soggy. If it seems too dry, add butter one teaspoon at a time until you achieve the right consistency.
Press this mixture firmly into your 9-inch springform pan, working it up the sides about one inch. Use the bottom of a measuring cup to create an even, compact surface. This pre-baking step at 350°F for eight minutes creates a barrier that prevents the crust from becoming soggy when you add the filling.
Here’s a professional tip that many home bakers overlook: let that crust cool completely before adding your filling. Hot crust will start cooking your cream cheese mixture on contact, creating an uneven texture that’s impossible to correct.
Mastering the Best Cheesecake Recipe Filling Technique
The filling is where magic happens, but it’s also where most mistakes occur. Using a stand mixer fitted with the paddle attachment, begin by beating your room-temperature cream cheese with sugar at medium-high speed. This isn’t the time to be gentle – you want to beat this mixture for a full five minutes until it’s completely smooth and slightly lightened in color.
The Critical Egg Addition Process for New York Style Cheesecake:
This step separates amateur bakers from professionals. Add eggs one at a time, allowing each to fully incorporate before adding the next. Rushing this process creates a mixture that never fully comes together, resulting in a dense, heavy cheesecake that lacks that signature light texture.
Between each egg addition, stop the mixer and scrape down both the bowl and paddle attachment. Those streaks of unmixed cream cheese hiding on the sides will create lumps in your final product. After all eggs are incorporated, reduce speed to low and gently fold in sour cream and vanilla. Overmixing at this stage incorporates too much air, which can cause cracking during baking.
The Water Bath: Your Secret Weapon Against Cracks in Cream Cheese Cake Recipe
The water bath method, or bain-marie, is what transforms ordinary cheesecake into something extraordinary. This technique creates gentle, even heat that cooks your cheesecake slowly and uniformly, preventing the rapid temperature changes that cause cracking.
Proper Water Bath Setup for Cheesecake from Scratch:
Wrap your springform pan with two layers of extra-wide heavy-duty foil, ensuring there are no tears or holes. This waterproofing is crucial – any water leakage will create a soggy crust that ruins the entire dessert.
Place your wrapped pan in a large roasting pan and pour boiling water until it reaches about halfway up the sides of the springform pan. The water should be genuinely hot when you put it in the oven – lukewarm water won’t provide the gentle steam environment your cheesecake needs.
Perfect Baking Technique for Professional Water Bath Cheesecake Results
Temperature control during baking is absolutely critical. Start at 450°F for exactly 15 minutes – this initial high heat sets the edges while keeping the center soft. Then, without opening the oven door, reduce temperature to 225°F and continue baking for 60-75 minutes.
How do you know when it’s done? The center should have a slight wobble when you gently tap the pan, about the size of a quarter. It will seem underdone, but remember that cheesecake continues cooking from residual heat even after leaving the oven.
The Cooling Process That Prevents Cracks:
Here’s where patience pays dividends. Leave your cheesecake in the water bath for 45 minutes after removing from the oven. This gradual cooling prevents the thermal shock that creates those unsightly cracks across the surface.
Transfer to a wire rack and allow to cool completely before refrigerating overnight. Yes, overnight – cheesecake needs this full setting time to develop proper texture and flavor.
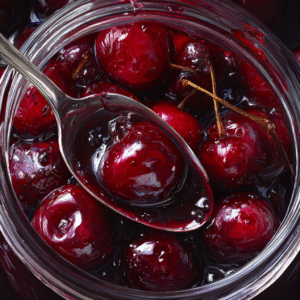
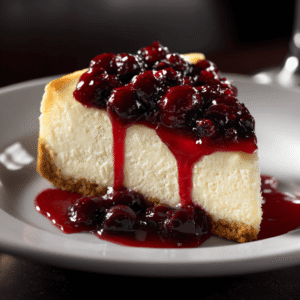
Creating the Perfect Cherry Sauce for Your Graham Cracker Crust Cheesecake
While your cheesecake chills, prepare a cherry sauce that will complement rather than overpower this delicate dessert. Fresh cherries work beautifully when in season, but high-quality frozen cherries produce excellent results year-round.
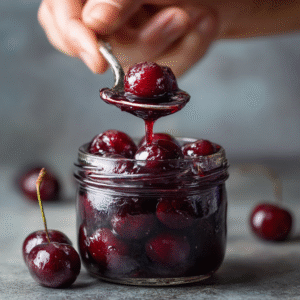
Simple Cherry Cheesecake Recipe Sauce:
- 2 cups fresh or frozen cherries, pitted
- 1/3 cup granulated sugar
- 2 tablespoons water
- 1 tablespoon lemon juice
- 1 teaspoon cornstarch mixed with 1 tablespoon water
Combine cherries, sugar, and water in a medium saucepan over medium heat. Cook until cherries release their juices and sugar dissolves, about 5-7 minutes. Stir in lemon juice and the cornstarch mixture, cooking until sauce thickens slightly. The tartness of cherries provides perfect balance to rich cheesecake.
Serving and Storage Tips for Your Best Cheesecake Recipe
Proper slicing technique ensures beautiful presentation. Use a sharp knife dipped in warm water, wiping clean between each cut. This prevents the filling from sticking to the blade and creating ragged edges.
Serve slices slightly chilled but not ice-cold – about 30 minutes out of refrigeration allows flavors to fully develop. Top with your homemade cherry sauce just before serving to prevent the crust from becoming soggy.
Troubleshooting Common Easy Cheesecake Recipe Challenges
Preventing Cracks:
Cracks usually result from temperature shock or overbaking. The water bath method and proper cooling technique eliminate most cracking issues.
Fixing Dense Texture:
This typically occurs from overmixing after adding eggs or using cold ingredients. Always bring ingredients to room temperature and mix gently after eggs are incorporated.
Avoiding Soggy Crust:
Pre-baking the crust and ensuring it’s completely cool before adding filling prevents sogginess.
Why This Classic Cheesecake Recipe Creates Lifelong Memories
There’s something deeply satisfying about creating a dessert that brings people together. This cheesecake recipe isn’t just about following steps – it’s about creating moments that become treasured memories. Whether it’s a birthday celebration, holiday gathering, or simply treating yourself to something special, this cheesecake delivers every single time.
The beauty lies in its versatility. Master this basic technique, and you can create endless variations: chocolate swirls, berry toppings, or seasonal flavors that keep your family and friends coming back for more.
Making This Homemade Cheesecake Recipe Your Own
Once you’ve mastered this classic version, consider these variations that add personal touches:
Seasonal Adaptations:
Replace cherry sauce with fresh strawberry compote in summer, spiced apple topping in fall, or rich chocolate ganache for winter celebrations.
Flavor Infusions:
Add lemon zest to the filling for a bright citrus note, or incorporate a tablespoon of your favorite liqueur for adult gatherings.
Presentation Ideas:
Create individual cheesecakes using muffin tins for portion control, or make a stunning trifle by layering crumbled cheesecake with fruit and whipped cream.
Important Notes for Homemade Cheesecake Recipe Success
Temperature is Everything: Always use room temperature ingredients. This cannot be emphasized enough – cold cream cheese and eggs will never create the smooth, professional texture you’re seeking.
Don’t Rush the Process: Cheesecake is a dessert that rewards patience. From the initial mixing to the overnight chilling, each step needs its full time to achieve perfection.
Water Bath Safety: When handling the water bath, move slowly and deliberately. Hot water and heavy pans require extra caution to prevent accidents.
Storage Guidelines: This cheesecake keeps beautifully in the refrigerator for up to 5 days when properly covered. For longer storage, wrap individual slices in plastic wrap and freeze for up to 3 months.
Serving Size: This recipe generously serves 12 people, making it perfect for gatherings, holidays, or special occasions.
Frequently Asked Questions About This Easy Cheesecake Recipe
Q: Can I make this cheesecake without a water bath?
A: While possible, the water bath is crucial for preventing cracks and ensuring even cooking. Without it, your cheesecake may crack and have an uneven texture.
Q: Why is my homemade cheesecake recipe cracking on top?
A: Cracking usually occurs due to rapid temperature changes, overbaking, or overmixing. Follow the water bath method and gradual cooling process to prevent this.
Q: Can I substitute the sour cream in this classic cheesecake recipe?
A: You can substitute with Greek yogurt or heavy cream, but sour cream provides the perfect tangy balance that makes this recipe special.
Q: How do I know when my cheesecake from scratch is done?
A: The center should have a slight wobble about the size of a quarter when you gently tap the pan. It will continue cooking as it cools.
Q: Can I make this New York style cheesecake ahead of time?
A: Absolutely! This cheesecake actually improves with time. Make it 1-2 days ahead for the best flavor and texture development.
Q: What’s the best way to remove my water bath cheesecake from the pan?
A: Run a thin knife around the edges while still slightly warm, then cool completely before removing the springform sides. This prevents cracking from contraction.
Q: Can I freeze leftover cherry cheesecake?
A: Yes! Wrap individual slices in plastic wrap and aluminum foil. Thaw in the refrigerator overnight before serving.
Q: Why did my graham cracker crust get soggy?
A: This usually happens if the crust wasn’t pre-baked or wasn’t completely cooled before adding the filling. Always follow the pre-baking step.
Conclusion: Your Journey to Cream Cheese Cake Recipe Mastery
Creating the perfect homemade cheesecake recipe is more than following instructions – it’s about understanding ingredients, respecting technique, and having patience with the process. This foolproof method gives you the foundation for countless memorable desserts that will become part of your family’s treasured traditions.
Remember, even professional bakers started somewhere. Your first attempt at this best cheesecake recipe might not look exactly picture-perfect, and that’s completely normal. Each time you make this classic cheesecake recipe, you’ll develop better instincts and understanding, building the confidence that separates good home bakers from truly great ones.
The beauty of mastering this easy cheesecake recipe lies not just in the final dessert, but in the joy of creating something special with your own hands. There’s nothing quite like the pride you’ll feel when you present a homemade cheesecake that rivals anything from the finest bakery. Your friends and family will immediately taste the difference that comes from made-with-love desserts.
This water bath cheesecake technique opens doors to endless possibilities. Once you’ve conquered this cherry cheesecake recipe, you can confidently explore chocolate variations, seasonal fruit toppings, or unique flavor combinations that reflect your personal style and preferences.
Take your time, trust the process, and most importantly, enjoy every moment of this baking journey. The kitchen awaits, and your path to cheesecake mastery begins the moment you decide to try this time-tested recipe. Whether it’s for a special celebration or simply because you deserve something wonderful, this graham cracker crust cheesecake will deliver memories that last a lifetime.
Your perfect New York style cheesecake adventure starts now – and I can’t wait for you to experience the magic of creating this timeless American classic in your own kitchen.