no-bake coconut dessert Have you ever craved something sweet and tropical but dreaded the thought of turning on your oven? What if I told you there’s a dessert so simple, so incredibly delicious, that it requires zero baking yet delivers restaurant-quality results every single time?
Welcome to the magical world of no-bake coconut desserts, where convenience meets extraordinary flavor, and where every bite transports you straight to paradise. This isn’t just another recipe—it’s your ticket to stress-free entertaining and guilt-free indulgence.
Why No-Bake Coconut Desserts Are Taking America by Storm
The Perfect Solution for Modern Home Cooks
In today’s busy world, we’re constantly searching for recipes that deliver maximum impact with minimum effort. No-bake coconut desserts have become the secret weapon of smart home cooks across America, and for good reason.
These delightful treats solve multiple problems at once: they’re energy-efficient (no oven required), weather-friendly (perfect for hot summer days), and incredibly forgiving for beginners. Plus, they’re ready in a fraction of the time traditional baked goods require.
Health Benefits That Make Sense
no-bake coconut dessert :Coconut isn’t just delicious—it’s nutritionally impressive. Rich in healthy fats, fiber, and essential minerals, coconut provides sustained energy without the sugar crash associated with many traditional desserts. When you choose quality ingredients for your no-bake coconut creation, you’re treating your family to something that tastes indulgent but offers genuine nutritional value.
Essential Ingredients: Your Shopping List for Success
Core Coconut Base Ingredients
- 210g coconut flakes (unsweetened preferred for better control)
- 4 tablespoons sugar (adjust to your family’s taste preferences)
- 400ml whole milk (the creamier, the better your final texture)
Premium Chocolate Coating
- 150g milk chocolate (choose quality brands for superior taste)
- 70g dark chocolate (adds sophisticated depth and reduces overall sweetness)
- 30ml vegetable oil (creates that glossy, professional finish)
Complementary Beverage Components
- 70ml filtered water
- 1 tablespoon premium cocoa powder
- Fresh cinnamon (ground, for warmth and complexity)
- 1 teaspoon powdered sugar
- 200ml whole milk
- 50ml heavy cream
Pro tip: Always use the highest quality ingredients you can afford. The difference in taste is remarkable, especially with chocolate and coconut.
Step-by-Step Mastery: Creating Your No-Bake Masterpiece
Phase 1: Building the Coconut Foundation
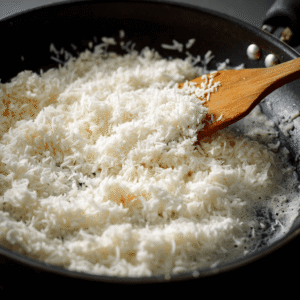
no-bake coconut dessert:Start by gently warming your milk in a heavy-bottomed saucepan over medium-low heat. Patience here is crucial—rushing this step leads to uneven texture later.
As the milk reaches a gentle simmer, gradually incorporate your coconut flakes, stirring continuously with a wooden spoon. Watch as the coconut begins absorbing the milk, creating an incredibly aromatic mixture that will fill your kitchen with tropical scents.
Add sugar incrementally, tasting as you progress. Remember, sweetness preferences vary dramatically between individuals, so trust your palate over rigid measurements.
Continue cooking for 8-12 minutes, stirring constantly to prevent sticking. The mixture should thicken to a consistency similar to thick oatmeal—it should hold together when cooled but not be so thick it becomes difficult to shape.
Phase 2: Shaping Your Tropical Treasures
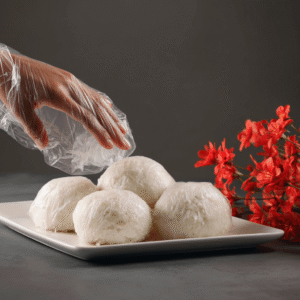
Once your coconut mixture has cooled enough to handle safely, it’s time for the creative phase. Using slightly dampened hands (this prevents annoying sticking), form uniform balls approximately the size of ping-pong balls.
Consistency in size matters for both appearance and even chocolate coating later. Place each formed ball on a parchment-lined baking sheet, ensuring they don’t touch each other.
Refrigerate for minimum 45 minutes—this chilling time is non-negotiable. Properly chilled coconut balls maintain their shape during the chocolate coating process and result in cleaner, more professional-looking finished products.
Phase 3: Chocolate Coating Excellence
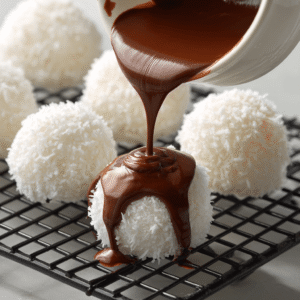
no-bake coconut dessert: While your coconut spheres chill, prepare your premium chocolate coating. Using a double boiler method (or microwave in careful 20-second intervals), melt both chocolates together with the vegetable oil.
Temperature control is critical here. Your chocolate should be warm enough to flow smoothly but not so hot that it melts your coconut base upon contact. Test the temperature by dipping a spoon—it should coat evenly without being runny.
Stir until completely smooth, creating a glossy mixture that looks professionally prepared.
Phase 4: The Transformation Magic
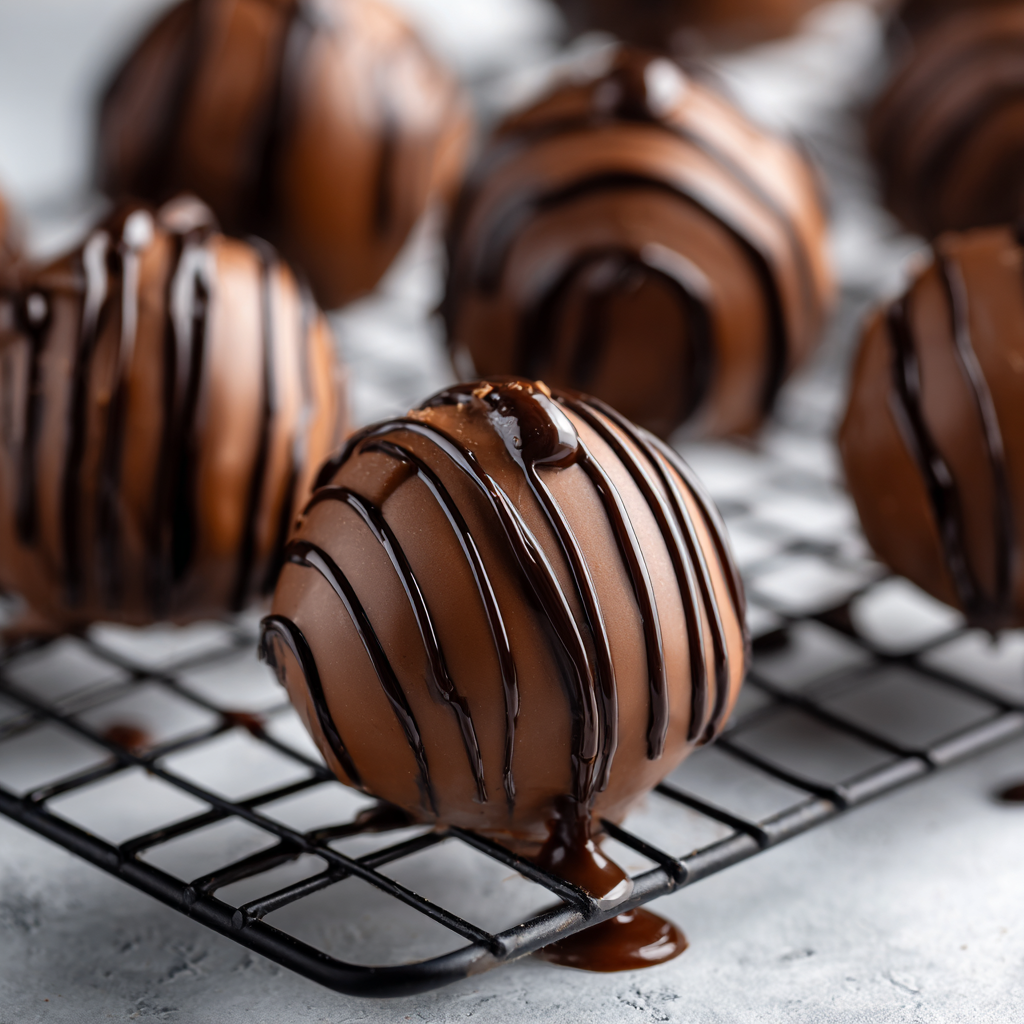
Working efficiently but carefully, dip each chilled coconut ball into your chocolate mixture. Use a fork for lifting, allowing excess chocolate to drip back into the bowl—this prevents thick, uneven coatings.
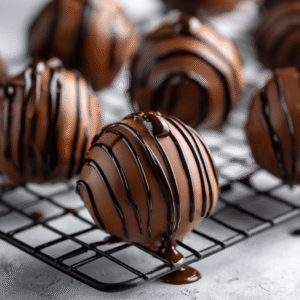
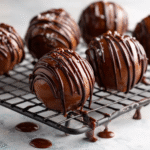
Place coated balls on a wire cooling rack positioned over parchment paper to catch drips. This setup ensures even air circulation around each piece, resulting in perfectly set chocolate shells.
Allow 20-30 minutes for complete setting at room temperature, or refrigerate for faster results.
Creating the Perfect Companion Beverage
In a small saucepan, whisk together water and cocoa powder until completely smooth—no lumps allowed. Add your fresh cinnamon (freshly ground makes a noticeable difference).
Gradually incorporate milk and cream, heating gently while whisking continuously. The goal is a steaming, aromatic beverage that complements rather than competes with your coconut dessert.
Dissolve powdered sugar completely, tasting and adjusting sweetness as needed. Serve immediately while warm for optimal flavor pairing.
Advanced Tips for Professional-Quality Results
Texture Optimization Secrets
Coconut flake selection matters enormously. Unsweetened flakes provide better control over final sweetness, while larger flakes create more interesting texture contrast. Avoid pre-sweetened coconut, which can make your dessert cloying.
Milk temperature precision affects final texture significantly. Too hot, and your coconut may become mushy. Too cool, and proper binding won’t occur. Aim for gentle simmering—active bubbling isn’t necessary.
Storage and Serving Mastery
Proper storage extends freshness dramatically. Store finished coconut balls in airtight containers with parchment paper between layers. Refrigerated, they maintain quality for up to 10 days.
Serving temperature matters. Remove from refrigeration 15 minutes before serving to allow flavors to fully develop and chocolate coating to reach optimal texture.
Creative Variations Worth Exploring
Flavor enhancement opportunities are endless. Consider adding vanilla extract to your coconut base, or incorporating rum extract for sophisticated adult versions.
Coating alternatives include chopped toasted nuts, additional coconut flakes, or contrasting chocolate drizzles. Each variation creates unique textural experiences while maintaining the recipe’s fundamental appeal.
Troubleshooting Common Challenges
When Coconut Mixture Won’t Hold Together
Insufficient cooking time is usually the culprit. Return mixture to gentle heat, continuing to stir until proper consistency develops. Add liquid sparingly if mixture becomes too thick.
Chocolate Coating Problems
Temperature issues cause most chocolate coating failures. Too hot melts coconut balls; too cool creates thick, uneven coatings. Reheat gently and test temperature frequently.
Oil separation indicates overheating. Start fresh with new chocolate rather than attempting to repair separated mixture.
Nutritional Benefits and Dietary Considerations
Coconut’s Impressive Nutritional Profile
Medium-chain fatty acids in coconut provide sustained energy without typical sugar crashes. High fiber content supports digestive health, while natural minerals including potassium and magnesium offer genuine nutritional value.
Customization for Dietary Needs
Sugar reduction is easily accomplished by decreasing added sugar and relying more on coconut’s natural sweetness. Dairy-free versions work beautifully with coconut milk substitutions.
Portion control becomes natural with this recipe—the rich, satisfying nature of coconut means smaller portions provide genuine satisfaction.
Why This Recipe Builds Loyal Website Visitors
Reliable Results Every Time
Consistent success keeps home cooks returning. This recipe’s forgiving nature means even beginning cooks achieve impressive results, building confidence and encouraging experimentation.
Seasonal Versatility
Year-round appeal makes this content valuable regardless of season. Summer cooks appreciate the no-heat preparation, while winter audiences enjoy the tropical escape flavors provide.
Social Media Worthy Results
Visually impressive outcomes encourage social sharing, driving organic traffic growth. The professional appearance of finished products makes home cooks proud to showcase their results.
Frequently Asked Questions
Q: Can I make these coconut desserts ahead of time for parties? A: Absolutely! These actually improve with time as flavors meld. Make them up to 3 days ahead and store properly refrigerated.
Q: What’s the best coconut flake type to use? A: Unsweetened medium flakes work best. Avoid fine coconut powder or heavily sweetened varieties for optimal texture and flavor control.
Q: Can I freeze these coconut balls? A: Yes, they freeze beautifully for up to 2 months. Thaw gradually in refrigerator before serving for best texture.
Q: Why does my chocolate coating crack? A: Usually caused by temperature shock. Ensure coconut balls aren’t too cold and chocolate isn’t too hot when coating.
Q: Can I substitute the milk with non-dairy alternatives? A: Coconut milk works excellently and enhances the coconut flavor. Avoid thin alternatives like almond milk that won’t provide proper binding.
Q: How do I know when the coconut mixture is ready? A: It should hold together when pressed but not be so thick it’s difficult to stir. The mixture will firm up significantly when chilled.This no-bake coconut dessert recipe represents everything wonderful about accessible home cooking—simplicity, reliability, and the genuine satisfaction of creating something beautiful with your own hands. Whether you’re entertaining guests or treating your family to something special,these coconut treasures deliver consistent results that will have everyone asking for your secret recipe.
No-Bake Coconut Dessert: The Ultimate Easy Recipe That Will Transform Your Kitchen Adventures
Description
In today’s busy world, we’re constantly searching for recipes that deliver maximum impact with minimum effort. No-bake coconut desserts have become the secret weapon of smart home cooks across America, and for good reason.
These delightful treats solve multiple problems at once: they’re energy-efficient (no oven required), weather-friendly (perfect for hot summer days), and incredibly forgiving for beginners. Plus, they’re ready in a fraction of the time traditional baked goods require.
Ingredients
Essential Ingredients: Your Shopping List for Success
Core Coconut Base Ingredients
- 210g coconut flakes (unsweetened preferred for better control)
- 4 tablespoons sugar (adjust to your family’s taste preferences)
- 400ml whole milk (the creamier, the better your final texture)
Premium Chocolate Coating
- 150g milk chocolate (choose quality brands for superior taste)
- 70g dark chocolate (adds sophisticated depth and reduces overall sweetness)
- 30ml vegetable oil (creates that glossy, professional finish)
Complementary Beverage Components
- 70ml filtered water
- 1 tablespoon premium cocoa powder
- Fresh cinnamon (ground, for warmth and complexity)
- 1 teaspoon powdered sugar
- 200ml whole milk
- 50ml heavy cream
Pro tip: Always use the highest quality ingredients you can afford. The difference in taste is remarkable, especially with chocolate and coconut.
Instructions
no-bake coconut dessert:Start by gently warming your milk in a heavy-bottomed saucepan over medium-low heat. Patience here is crucial—rushing this step leads to uneven texture later.
As the milk reaches a gentle simmer, gradually incorporate your coconut flakes, stirring continuously with a wooden spoon. Watch as the coconut begins absorbing the milk, creating an incredibly aromatic mixture that will fill your kitchen with tropical scents.
Add sugar incrementally, tasting as you progress. Remember, sweetness preferences vary dramatically between individuals, so trust your palate over rigid measurements.
[video width="1136" height="1080" mp4="https://recipeshomely.com/wp-content/uploads/2025/09/social_u8465889216_httpss.mj_.runo-QLuszLjk_Melted_milk_chocolate_be_4a664e2c-f649-4f8d-9a72-39630258c701_0.mp4"][/video]Continue cooking for 8-12 minutes, stirring constantly to prevent sticking. The mixture should thicken to a consistency similar to thick oatmeal—it should hold together when cooled but not be so thick it becomes difficult to shape.
Once your coconut mixture has cooled enough to handle safely, it’s time for the creative phase. Using slightly dampened hands (this prevents annoying sticking), form uniform balls approximately the size of ping-pong balls.
Consistency in size matters for both appearance and even chocolate coating later. Place each formed ball on a parchment-lined baking sheet, ensuring they don’t touch each other.
Refrigerate for minimum 45 minutes—this chilling time is non-negotiable. Properly chilled coconut balls maintain their shape during the chocolate coating process and result in cleaner, more professional-looking finished products.
no-bake coconut dessert: While your coconut spheres chill, prepare your premium chocolate coating. Using a double boiler method (or microwave in careful 20-second intervals), melt both chocolates together with the vegetable oil.
Temperature control is critical here. Your chocolate should be warm enough to flow smoothly but not so hot that it melts your coconut base upon contact. Test the temperature by dipping a spoon—it should coat evenly without being runny.
Stir until completely smooth, creating a glossy mixture that looks professionally prepared.
Working efficiently but carefully, dip each chilled coconut ball into your chocolate mixture. Use a fork for lifting, allowing excess chocolate to drip back into the bowl—this prevents thick, uneven coatings.
Place coated balls on a wire cooling rack positioned over parchment paper to catch drips. This setup ensures even air circulation around each piece, resulting in perfectly set chocolate shells.
Allow 20-30 minutes for complete setting at room temperature, or refrigerate for faster results.
In a small saucepan, whisk together water and cocoa powder until completely smooth—no lumps allowed. Add your fresh cinnamon (freshly ground makes a noticeable difference).
Gradually incorporate milk and cream, heating gently while whisking continuously. The goal is a steaming, aromatic beverage that complements rather than competes with your coconut dessert.
Dissolve powdered sugar completely, tasting and adjusting sweetness as needed. Serve immediately while warm for optimal flavor pairing.