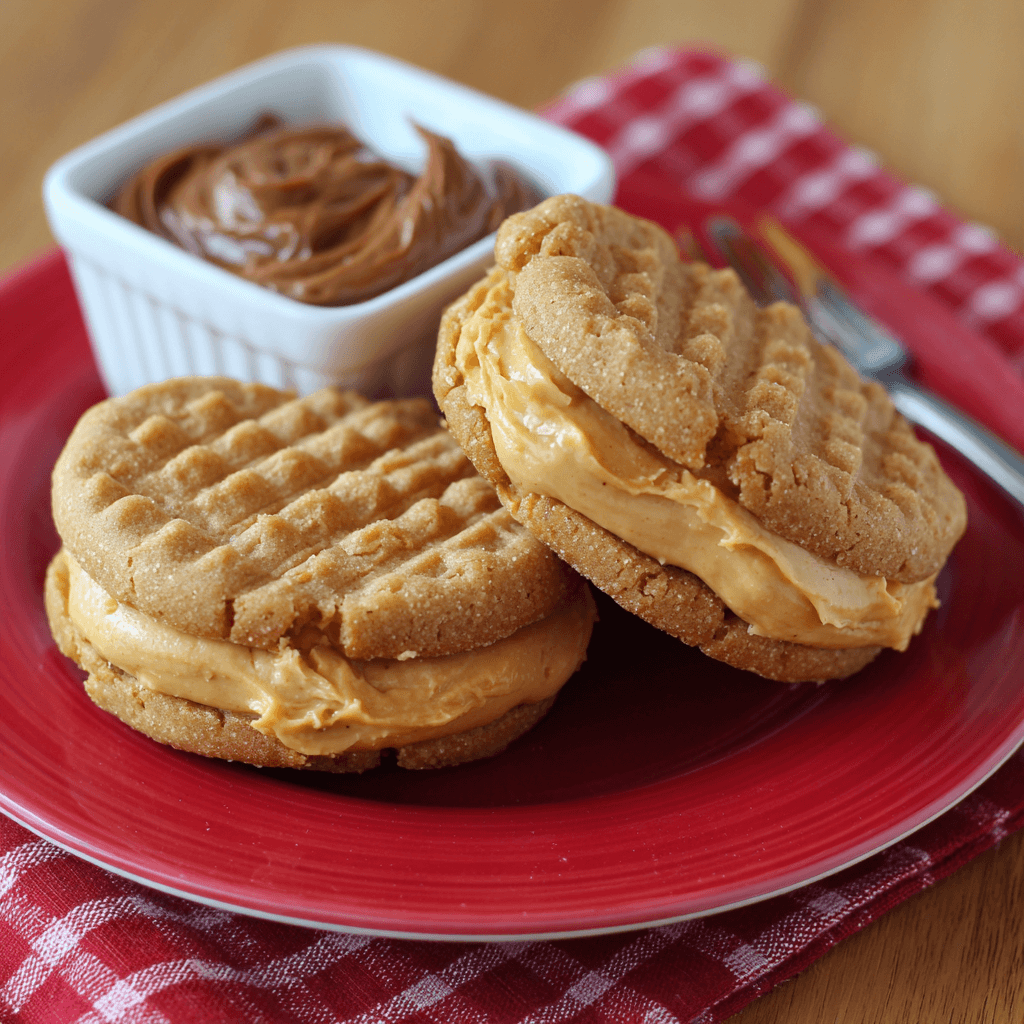
Remember the joy of biting into a Nutter Butter cookie as a child? That perfect combination of crunchy peanut-shaped cookies sandwiched together with creamy peanut butter filling created moments of pure happiness. Now, imagine recreating that nostalgic magic in your own kitchen, but even better—fresher, more flavorful, and made with love.
The Nostalgic Appeal of Homemade
There’s something deeply satisfying about recreating beloved childhood treats in your own kitchen. This homemade Nutter Butter copycat recipe doesn’t just replicate the store-bought version—it elevates it. Using real peanut butter, premium ingredients, and that special touch that only comes from homemade baking, these cookies deliver all the nostalgia with none of the preservatives.
The beauty of making these at home lies in the control you have over every ingredient. You can adjust the sweetness, choose natural peanut butter, or even experiment with different nut varieties. Plus, the aroma that fills your kitchen while these are baking is worth the effort alone.
Understanding the Original Magic
The genius of Nutter Butter cookies lies in their textural contrast and flavor balance. The outer cookies provide a satisfying crunch with deep peanut flavor, while the cream filling adds richness and helps bind everything together. The distinctive peanut shape isn’t just for looks—those ridges and curves create perfect spots for the filling to nestle, ensuring every bite delivers the ideal cookie-to-cream ratio.
What makes this copycat recipe special is how we’ve analyzed and improved upon the original formula. By using real butter instead of oils, genuine peanut butter throughout, and controlling the salt and sugar balance, we create a cookie that tastes like the idealized version of your childhood memory.
Premium Ingredients for Superior Results
Success in recreating these beloved cookies starts with choosing the right ingredients. Each component plays a crucial role in achieving that perfect texture and authentic flavor profile.
For the Peanut Butter Cookies:
- 2 cups all-purpose flour
- 1 teaspoon baking soda
- 1/2 teaspoon salt
- 1/2 cup unsalted butter, softened
- 1/2 cup creamy peanut butter
- 1/2 cup granulated sugar
- 1/2 cup packed brown sugar
- 1 large egg
- 1 teaspoon vanilla extract
- 2 tablespoons milk
Peanut Butter Cream Filling:
- 1/2 cup creamy peanut butter
- 3 tablespoons unsalted butter, softened
- 1 cup powdered sugar
- 2 tablespoons heavy cream
- 1/4 teaspoon vanilla extract
- Pinch of salt
Optional Enhancements:
- 1 tablespoon honey for extra richness
- 1/2 teaspoon cinnamon for warmth
- Chopped roasted peanuts for texture
The Art of Cookie Creation
Preparing Your Workspace
Before diving into the mixing process, set yourself up for success. Preheat your oven to 350°F and line your baking sheets with parchment paper. Having everything organized and at the proper temperature ensures smooth sailing throughout the baking process.
Room temperature ingredients mix more easily and create better texture, so pull your butter and egg from the refrigerator about an hour before baking. This small step makes a significant difference in your final results.
Creating the Perfect Dough
In a medium bowl, whisk together flour, baking soda, and salt. This dry ingredient mixture forms the foundation of your cookies, and proper mixing ensures even distribution of the leavening agents.
In a large bowl, cream together the softened butter and peanut butter until light and fluffy—about 3-4 minutes with an electric mixer. This creaming process incorporates air, creating lighter cookies. Gradually add both sugars, beating until well combined. The mixture should be noticeably lighter in color and texture.
Beat in the egg and vanilla extract until fully incorporated, then add the milk. The liquid helps create the right dough consistency for easy handling and rolling.
The Folding Technique
Here’s where technique becomes crucial. Add the dry ingredients to the wet mixture in two additions, mixing just until combined after each addition. Overmixing develops gluten, which can make cookies tough rather than tender.
The finished dough should hold together well but not be sticky. If it seems too soft, chill it for 15-20 minutes. If it’s too dry, add milk one teaspoon at a time until it reaches the proper consistency.
Shaping Your Cookies
The iconic peanut shape is what makes these cookies special, but don’t stress about perfection. Roll portions of dough into oval shapes, then use a knife to create gentle indentations that mimic a peanut’s natural segmentation. The slight imperfections actually make them look more authentic and charming.
Place cookies about 2 inches apart on your prepared baking sheets. They’ll spread slightly during baking, so adequate spacing prevents them from merging together.
Baking to Golden Perfection
Bake for 10-12 minutes, until the edges are lightly golden but the centers still appear slightly soft. The cookies will continue cooking on the hot pan after removal, so don’t overbake. This technique ensures a tender interior with just the right amount of crunch.
Cool on the baking sheet for 5 minutes before transferring to a wire rack. This brief cooling period allows them to set up properly without breaking.
Mastering the Cream Filling
The filling is where you can really make these cookies shine. Unlike store-bought versions that often taste artificially sweet, homemade filling allows you to balance flavors perfectly.
Beat together peanut butter and softened butter until completely smooth. The combination creates richness while maintaining that characteristic peanut butter flavor. Gradually add powdered sugar, beating until light and fluffy.
Add cream, vanilla, and a pinch of salt. The cream provides smoothness, vanilla rounds out the flavor, and salt enhances all the other tastes. Beat until the mixture is spreadable but holds its shape.
For extra indulgence, try adding a tablespoon of honey or maple syrup to the filling. These natural sweeteners add complexity and complement the peanut flavor beautifully.
Assembly Techniques for Professional Results
Assembly is where your cookies transform from good to extraordinary. Match similar-sized cookies for the most attractive presentation. Using a piping bag or small spoon, apply filling to the flat side of one cookie, leaving a small border around the edges.
Gently press the second cookie on top, applying just enough pressure to spread the filling to the edges without squeezing it out. The slight overflow actually looks appealing and mimics the commercial version.
For consistent results, weigh your filling portions or use a small cookie scoop. This ensures each sandwich cookie has the same satisfying filling-to-cookie ratio.
Storage and Freshness Tips
Proper storage keeps your homemade Nutter Butters fresh and delicious for days. Store assembled cookies in an airtight container at room temperature for up to one week. The filling actually improves the cookies’ texture over time, softening them slightly while maintaining structural integrity.
For longer storage, freeze assembled cookies in airtight containers for up to three months. They thaw beautifully at room temperature and taste remarkably fresh.
If you prefer to prepare components ahead, bake cookies and store them separately from the filling. Assemble just before serving for the crunchiest texture, or assemble and store for softer, more integrated flavors.
Customization and Creative Variations
This base recipe welcomes creative experimentation. Try these delicious variations to keep things interesting:
Chocolate Drizzle Version: Melt dark chocolate and drizzle over assembled cookies for extra indulgence. The chocolate complements the peanut butter beautifully and adds visual appeal.
Crunchy Style: Add finely chopped roasted peanuts to both the cookie dough and filling for extra texture and nutty flavor.
Seasonal Spice: Incorporate warming spices like cinnamon, nutmeg, or even a tiny pinch of cayenne for complex flavor profiles.
Different Nut Butters: Experiment with almond butter, cashew butter, or sunflower seed butter for unique twists on the classic formula.
Troubleshooting Common Issues
Even experienced bakers sometimes encounter challenges. If your cookies spread too much during baking, your butter might be too warm, or your dough needs chilling. Conversely, cookies that don’t spread enough often indicate butter that’s too cold or dough that’s been overmixed.
If your filling is too soft, add more powdered sugar. If it’s too stiff, incorporate cream one teaspoon at a time until you achieve the perfect consistency.
Cookies that are too hard often indicate overbaking, while cookies that fall apart suggest underbaking or insufficient binding ingredients.
The Science of Perfect Texture
Understanding the science behind these cookies helps you achieve consistent results. The combination of butter and peanut butter creates rich flavor while providing necessary fats for tenderness. Brown sugar adds moisture and chewiness, while granulated sugar contributes to spread and crispness.
Baking soda provides lift and contributes to the golden color, while the small amount of milk adds moisture and helps bind ingredients together. Each component serves a specific purpose in creating that perfect texture balance.
Making It a Family Activity
Baking these cookies becomes even more special when shared with family. Children love helping shape the peanut forms and spreading filling between cookies. It’s an excellent opportunity to teach basic baking skills while creating lasting memories.
Consider setting up an assembly line where different family members handle different steps. One person can roll dough, another can shape cookies, and someone else can manage the filling process. The collaborative effort makes the final result even more satisfying.
Gift-Giving Potential
These homemade Nutter Butters make exceptional gifts. Package them in decorative tins, clear bags with ribbons, or mason jars for thoughtful presents that show you care enough to make something special.
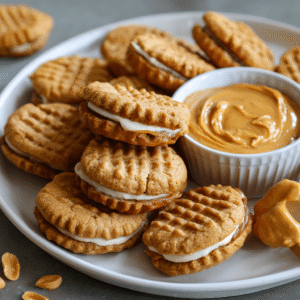
For special occasions, consider creating different sizes—mini versions for parties or extra-large ones for dramatic effect. The versatility makes them suitable for everything from lunch box treats to elegant dessert platters.
Your homemade Nutter Butters represent more than just cookies—they’re a connection to cherished memories, elevated by your personal touch and attention to quality. Every batch brings the satisfaction of creating something delicious from scratch, proving that sometimes the best versions of our favorite treats are the ones we make ourselves.
The next time you crave that perfect combination of peanut butter cookie crunch and creamy filling, skip the store and head to your kitchen. These homemade versions deliver all the nostalgia with none of the compromise, creating new memories while honoring the classics that shaped our sweet tooth preferences.