Summer and strawberry shortcake go together like sunshine and warm weather – it’s a combination that just feels right. But let’s be honest: traditional strawberry shortcake can be a bit fussy to make and even trickier to serve when you’re feeding a crowd. That’s where these easy strawberry shortcake bars come to the rescue, transforming the beloved classic into a convenient, portable format that’s perfect for summer gatherings.
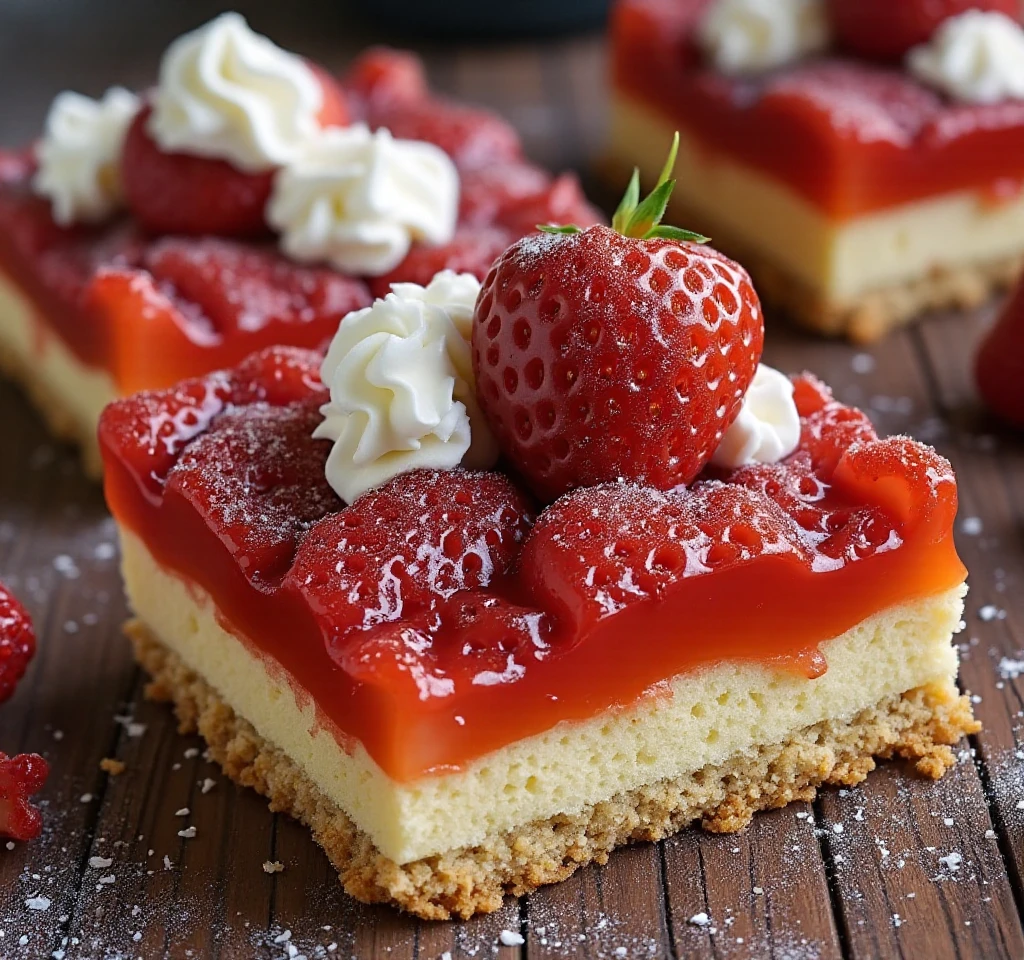
These bars capture everything you love about traditional strawberry shortcake – the buttery, tender base, the sweet-tart strawberries, and the billowy whipped cream – but package it all in a way that’s easier to make, serve, and transport. Whether you’re planning a backyard barbecue, heading to a potluck, or simply want to enjoy this summer favorite without the hassle, these bars are about to become your new go-to recipe.
Why Bars Beat Traditional Shortcake Every Time
Traditional strawberry shortcake has its charm, but it also has its challenges. Individual biscuits can be inconsistent in size and texture, assembling each serving takes time, and the whole thing can get messy quickly – especially when you’re trying to serve a crowd outdoors.
Strawberry shortcake bars solve all these problems while actually enhancing some of the best aspects of the original. The bar format means every piece is perfectly portioned, the shortbread base provides a sturdier foundation than traditional biscuits, and the longer contact time between the strawberries and base creates deeper, more integrated flavors.
Plus, these bars are incredibly practical for summer entertaining. They travel well, can be made ahead of time, and are easy to serve without special equipment or fussy plating. You can cut them into neat squares, arrange them on a platter, and watch them disappear as guests help themselves.
The Perfect Base: Understanding Shortbread Success
The foundation of great strawberry shortcake bars is an exceptional shortbread base. Unlike regular cookie dough, shortbread requires a specific technique to achieve that perfect tender, buttery texture that melts in your mouth while still being sturdy enough to support the toppings.
The key to perfect shortbread lies in the butter temperature and mixing method. Cold butter is essential – it creates the flaky, tender texture that makes shortbread so special. When cold butter is cut into flour, it creates small pockets that become light, airy spaces when baked.
The mixing method is equally important. Overworking shortbread dough develops the gluten in the flour, which creates a tough, chewy texture instead of the tender crumb we’re after. The goal is to mix just until the dough comes together, no more.
Selecting and Preparing Perfect Strawberries
Since strawberries are the star of this show, choosing the right ones makes all the difference. Look for berries that are bright red all the way through, with fresh green tops and a sweet, fragrant aroma. Avoid berries with white or green shoulders, as these were picked before they were fully ripe and won’t have developed their full sweetness.
Size matters too, but not in the way you might think. While large strawberries look impressive, medium-sized berries often have better flavor concentration and are easier to work with in this recipe. They slice more uniformly and distribute more evenly throughout the bars.
The preparation technique is crucial for the best results. Slicing strawberries and macerating them with sugar draws out their natural juices, which serve multiple purposes in this recipe. The juices add moisture and flavor to the shortbread base, while the sugar helps preserve the berries’ color and prevents them from becoming mushy.
Essential Ingredients for Success
For the Shortbread Base:
- 2 cups all-purpose flour
- 1/2 cup powdered sugar
- 1/2 teaspoon salt
- 1 cup cold unsalted butter, cubed
- 1 large egg yolk
- 2 tablespoons heavy cream
- 1 teaspoon vanilla extract
For the Strawberry Layer:
- 2 pounds fresh strawberries, hulled and sliced 1/4-inch thick
- 1/3 cup granulated sugar
- 1 tablespoon cornstarch
- 1 tablespoon fresh lemon juice
- 1 teaspoon vanilla extract
For the Whipped Cream Topping:
- 2 cups heavy whipping cream, cold
- 3 tablespoons powdered sugar
- 1 teaspoon vanilla extract
- Pinch of salt
For Garnish:
- Additional fresh strawberries
- Fresh mint leaves
- Powdered sugar for dusting
Step-by-Step Instructions for Perfect Results
Creating the Perfect Shortbread Base
Begin by preheating your oven to 350°F and lining a 9×13-inch baking pan with parchment paper, leaving some overhang for easy removal later. This step is crucial – it prevents sticking and makes cleanup much easier.
In a large bowl, whisk together the flour, powdered sugar, and salt. The powdered sugar is important here – it creates a more tender texture than granulated sugar and helps prevent the shortbread from becoming too sweet.
Add the cold, cubed butter to the flour mixture. Using a pastry cutter or your fingertips, work the butter into the flour until the mixture resembles coarse crumbs with some pea-sized pieces of butter remaining. These butter pieces are what create the flaky texture we’re after.
In a small bowl, whisk together the egg yolk, heavy cream, and vanilla. Drizzle this mixture over the flour and butter mixture, then use a fork to gently combine until the dough just comes together. Don’t overmix – the dough should look slightly shaggy, not smooth.
Press the dough evenly into the prepared pan, using your fingers or the bottom of a measuring cup to create a level surface. The dough should reach all corners and be compact but not compressed too firmly.
Bake for 20-25 minutes, or until the edges are lightly golden and the center is set. The shortbread should not be deeply browned – you want it cooked through but still tender. Let it cool completely in the pan while you prepare the strawberries.
Preparing the Strawberry Layer
While the shortbread base cools, prepare your strawberries for maximum flavor impact. In a large bowl, combine the sliced strawberries with granulated sugar, cornstarch, lemon juice, and vanilla extract.
The cornstarch is a secret ingredient that many recipes skip, but it’s crucial for the perfect texture. It helps thicken the strawberry juices slightly, preventing them from making the shortbread soggy while still allowing enough moisture to penetrate and flavor the base.
Toss the strawberries gently to coat evenly with the sugar mixture, then let them sit for at least 30 minutes, stirring occasionally. This maceration process draws out the natural juices and allows the flavors to meld together beautifully.
You’ll know the strawberries are ready when they’ve released a significant amount of juice and the sugar has mostly dissolved. The berries should still hold their shape but be noticeably juicier than when you started.
Creating the Perfect Whipped Cream
For the best whipped cream, all your equipment should be cold. Place your mixing bowl and beaters in the freezer for 15 minutes before whipping – this helps the cream whip faster and hold its shape better.
Pour the cold heavy cream into the chilled bowl and begin whipping on medium speed. Gradually increase to high speed as the cream begins to thicken. Watch carefully – you want to stop at soft peaks, not stiff peaks.
When the cream forms peaks that hold their shape but still look soft and billowy, add the powdered sugar, vanilla, and salt. Whip for just a few more seconds until combined. Overwhipped cream can become grainy and eventually turn into butter, so err on the side of caution.
The finished whipped cream should be smooth, light, and hold its shape when spread but not be stiff or dry-looking.
Assembly for Maximum Impact
Once your shortbread base is completely cool, it’s time to assemble your bars. Using a slotted spoon, arrange the macerated strawberries evenly over the shortbread base, leaving most of the accumulated juices in the bowl.
Don’t worry about perfect placement – a natural, slightly rustic look is part of the charm. The strawberries should cover most of the surface but don’t need to be in a perfect single layer.
Drizzle about half of the reserved strawberry juices over the arranged berries. This adds extra flavor and helps bind everything together without making the base soggy.
Using an offset spatula or large spoon, spread the whipped cream evenly over the strawberries. You want a generous layer that covers all the fruit but doesn’t completely hide it. Some strawberries peeking through the cream creates a beautiful, appetizing appearance.
Chilling and Setting for Perfect Texture
Refrigerate the assembled bars for at least 2 hours before cutting. This chilling time allows all the flavors to meld together and helps the whipped cream set slightly, making the bars much easier to cut cleanly.
For the cleanest cuts, use a sharp knife dipped in warm water and wiped clean between each slice. This prevents the cream from sticking to the blade and dragging across the surface.
Cut into squares or rectangles, depending on your preference. These bars are rich, so smaller portions are often perfect – you can always go back for seconds!
Variations and Customization Ideas
The beauty of this recipe lies in its versatility. Once you master the basic technique, you can customize it in countless ways:
Berry Variations: Replace strawberries with raspberries, blackberries, or a mix of berries. Adjust the sugar quantity based on the sweetness of your chosen fruit.
Flavor Additions: Add lemon zest to the shortbread base, or try almond extract instead of vanilla for a different flavor profile.
Texture Changes: Add chopped toasted nuts to the shortbread base for extra crunch, or fold mini chocolate chips into the whipped cream for a twist.
Seasonal Adaptations: In fall, try sliced apples with cinnamon in the shortbread base, or use pears with a touch of ginger.
Boozy Version: Add a tablespoon of Grand Marnier or strawberry liqueur to the whipped cream for an adult version.
Storage and Make-Ahead Strategies
These bars are perfect for make-ahead entertaining, but timing is important for the best results. The shortbread base can be made up to 2 days ahead and stored covered at room temperature. The strawberries can be macerated and stored in the refrigerator for up to 24 hours.
However, the whipped cream should be made fresh on the day you plan to serve, and the bars should be assembled no more than 4 hours before serving. This prevents the cream from deflating and the shortbread from becoming too soft.
For longer storage, you can freeze the baked shortbread base for up to 1 month. Wrap it tightly in plastic wrap and aluminum foil, then thaw at room temperature before assembling.
Professional Presentation Tips
Presentation can elevate these bars from homemade to bakery-quality. Here are some professional touches that make a big difference:
Clean Edges: Use the parchment paper overhang to lift the entire slab out of the pan before cutting. This creates cleaner edges and makes cutting easier.
Garnish Thoughtfully: A few fresh strawberry slices, a sprig of mint, or a light dusting of powdered sugar can make each bar look special.
Serving Style: Arrange cut bars on a white platter or wooden board for a beautiful presentation. The contrast makes the colors pop.
Temperature Matters: Serve these bars slightly chilled but not ice-cold. About 15 minutes out of the refrigerator is perfect for the best flavor and texture.
Troubleshooting Common Issues
Soggy Bottom: If your shortbread base becomes soggy, it’s usually because the strawberries were too juicy or the bars weren’t chilled long enough. Make sure to drain excess juice from the strawberries and allow proper chilling time.
Tough Shortbread: This happens when the dough is overworked or the butter isn’t cold enough. Keep butter cold and mix just until the dough comes together.
Deflated Whipped Cream: Overwhipped cream or cream that’s not cold enough can cause this. Make sure your cream and equipment are well-chilled, and stop whipping at soft peaks.
Uneven Cutting: Warm, sticky knife blades cause ragged cuts. Keep your knife clean and use warm water between cuts for the neatest slices.
The Science Behind the Perfect Bar
Understanding the science behind this recipe helps you achieve consistent results. The butter in shortbread creates tenderness through fat coating the flour proteins, preventing tough gluten development. The cold temperature keeps the butter in discrete pieces, creating the characteristic flaky texture.
The maceration process with strawberries breaks down cell walls through osmosis, releasing juices while the sugar acts as a preservative. The cornstarch provides just enough thickening to prevent excess moisture without creating a gummy texture.
The whipped cream works through fat globule stabilization – the mechanical action of whipping creates a foam structure that traps air, while the fat content provides richness and stability.
Nutritional Benefits and Considerations
While these bars are definitely an indulgent treat, they do offer some nutritional benefits. Strawberries are packed with vitamin C, antioxidants, and fiber. The dairy provides calcium and protein, while the moderate portion size keeps the indulgence reasonable.
For those watching calories, you can lighten the recipe by using half whipped cream and half whipped topping, though the texture will be slightly different. The fruit content is high relative to other desserts, making these bars a more balanced treat.
Perfect Occasions for Strawberry Shortcake Bars
These bars are incredibly versatile and work well for many occasions:
- Summer Picnics: They travel well and don’t require special serving equipment
- Potluck Dinners: Easy to transport and serve, plus they feed a crowd
- Birthday Parties: Especially popular with kids who love the individual portions
- Brunch Gatherings: The not-too-sweet profile works well for morning events
- Outdoor Barbecues: A refreshing end to a hearty meal
Conclusion: Your New Summer Tradition
Easy strawberry shortcake bars represent everything wonderful about adapting classic recipes for modern life. They maintain all the beloved flavors and textures of traditional strawberry shortcake while offering the convenience and practicality that today’s busy lifestyles demand.
The recipe is forgiving enough for beginners but delivers professional-quality results that will impress even the most discerning guests. The combination of buttery shortbread, sweet-tart strawberries, and billowy whipped cream creates a dessert that’s both nostalgic and fresh, familiar and exciting.
Most importantly, these bars deliver on the promise of summer – they’re light, refreshing, and celebratory, perfect for those warm evenings when you want something special but don’t want to spend hours in the kitchen. They’re the kind of dessert that creates memories and becomes a requested favorite at every gathering.
So this summer, when strawberries are at their peak and you’re looking for the perfect dessert to share, give these easy strawberry shortcake bars a try. They might just become your new favorite way to celebrate the season’s sweetest moments.