There’s something undeniably special about the perfect lemon dessert. That delicate balance of sweet and tart, wrapped in a buttery package, has the power to brighten even the gloomiest of days. After years of testing and refining, I’m thrilled to share what I consider the ultimate lemon thumbprint cookies—a recipe that combines a tender, zesty cookie base with a luscious homemade lemon curd center that’s simply irresistible.
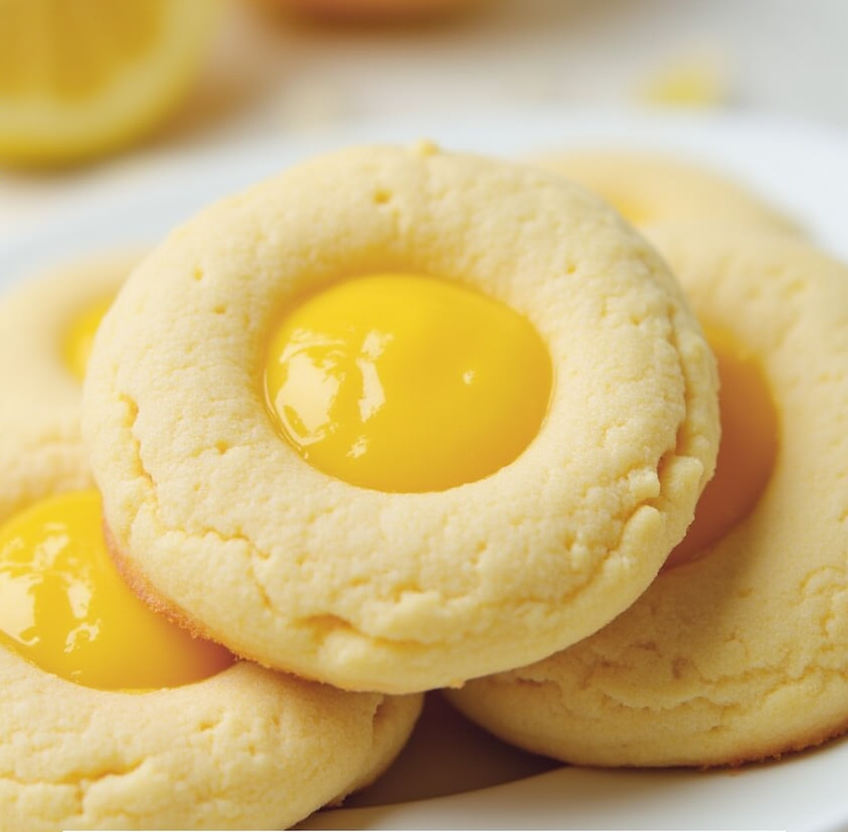
These sunny little treats have become my signature contribution to everything from afternoon tea parties to holiday cookie exchanges. The bright yellow centers create a beautiful visual contrast against the pale cookie base, making them as gorgeous as they are delicious. But don’t let their elegant appearance fool you—this recipe is approachable for bakers of all skill levels.
What Makes These Lemon Thumbprint Cookies Special
Unlike store-bought lemon cookies that often rely on artificial flavoring, these thumbprints get their remarkable flavor from fresh lemon zest and juice in both the cookie dough and the homemade curd. The result is a true lemon lover’s dream with authentic citrus flavor in every bite.
The texture contrast is equally impressive—a slightly crisp exterior gives way to a tender, melt-in-your-mouth cookie base, while the smooth, silky lemon curd center provides the perfect counterpoint. The powdered sugar coating adds just the right amount of sweetness to balance the tartness of the lemon.
What truly sets these cookies apart is the homemade lemon curd. While you could use store-bought in a pinch, taking the extra time to make your own results in a fresher, more vibrant flavor that simply can’t be matched. Plus, there’s something deeply satisfying about creating both components from scratch.
Ingredients You’ll Need
For the Lemon Curd:
- 1/2 cup (100g) granulated sugar
- Zest from one lemon
- 3 large egg yolks
- 1/4 teaspoon salt
- 1/4 cup (60ml) freshly squeezed lemon juice
- 1/4 cup (55g) unsalted butter
For the Lemon Cookies:
- 3/4 cup (150g) granulated sugar
- 1 tablespoon fresh lemon zest
- 1/2 cup (115g) unsalted butter, softened
- 2 large eggs
- 2 tablespoons freshly squeezed lemon juice
- 1 teaspoon pure vanilla extract
- 2 cups + 3 tablespoons (275g) all-purpose flour
- 1/2 teaspoon baking powder
- 1/4 teaspoon salt
- Powdered sugar for rolling
Essential Equipment
- Fine grater or microplane (for zesting lemons)
- Citrus juicer
- Medium saucepan
- Heat-resistant mixing bowls
- Fine mesh sieve
- Plastic wrap
- Cookie sheets
- Parchment paper
- 2-tablespoon cookie scoop
- 1/2-tablespoon measuring spoon
- Wire cooling rack
Creating the Perfect Lemon Curd
The star of these cookies is undoubtedly the homemade lemon curd. While it might sound intimidating if you’ve never made it before, the process is surprisingly straightforward and the results are incomparably better than anything you’ll find in a jar.
- Infuse the sugar: Combine the sugar and lemon zest in a bowl, then use your fingertips to rub the zest into the sugar. This technique releases the essential oils from the zest, resulting in a more aromatic and flavorful curd. It’s a small step that makes a tremendous difference.
- Prepare the base: Add the egg yolks and salt to your lemon-sugar mixture, then whisk until the mixture becomes slightly fluffy and lightens in color. This aerates the mixture slightly and helps create a smoother texture.
- Heat the lemon juice: In a separate saucepan, heat the lemon juice until it just begins to simmer. Fresh juice is absolutely essential here—the bottled stuff simply won’t provide the same bright, vibrant flavor.
- Temper the eggs: Slowly pour the hot lemon juice into the egg mixture while whisking continuously. This gradual combination prevents the eggs from scrambling and ensures a silky-smooth curd. This step requires some patience, but it’s crucial for the perfect texture.
- Cook until thickened: Return the mixture to the saucepan and cook over low heat, stirring constantly with a spatula or wooden spoon. You’ll know it’s ready when the curd coats the back of your spoon and a finger drawn through it leaves a clear path.
- Add butter and strain: Remove from heat and stir in the butter until fully melted and incorporated. Then strain the curd through a fine mesh sieve to remove any bits of cooked egg and zest, resulting in a perfectly smooth consistency.
- Chill properly: Cover with plastic wrap pressed directly onto the surface of the curd to prevent a skin from forming, then let it cool to room temperature before refrigerating.
This lemon curd can be made up to three days in advance and kept refrigerated until you’re ready to assemble your cookies. In fact, making it ahead allows the flavors to develop even further.
Crafting the Perfect Lemon Cookie Base
The cookie portion of this recipe is equally important—it needs to be sturdy enough to hold the curd while remaining tender and flavorful.
- Maximize lemon flavor: Following the same technique used for the curd, combine sugar and lemon zest, rubbing them together to release those fragrant oils. This infuses the cookie dough with intense lemon flavor right from the start.
- Mix wet ingredients thoroughly: Add the softened butter, eggs, lemon juice, and vanilla extract to your lemon sugar. Whisk until completely combined and slightly fluffy. The mixture might look slightly curdled due to the acidic lemon juice—this is perfectly normal.
- Add dry ingredients carefully: In a separate bowl, whisk together the flour, baking powder, and salt, then add this to your wet ingredients. Mix just until combined—overmixing can develop the gluten in the flour and result in tough cookies.
- Chill the dough: This step is non-negotiable! The dough will be quite soft, and chilling it for at least an hour (or overnight) makes it easier to handle and helps the cookies maintain their shape during baking.
Assembling and Baking Your Thumbprint Cookies
The assembly process is where these cookies get their distinctive look. Taking your time during this step ensures beautiful results.
- Prepare for baking: Preheat your oven to 350°F (180°C) and line two baking sheets with parchment paper. Working with chilled dough is essential here, so keep the dough in the refrigerator until you’re ready to shape it.
- Shape with precision: Use a 2-tablespoon cookie scoop to portion the dough evenly. Roll each portion in powdered sugar, which not only adds sweetness but creates a beautiful crackled effect as the cookies bake. Form into smooth balls with your hands.
- Create perfect wells: Place the dough balls on your prepared baking sheets, spacing them about 2 inches apart. Use a 1/2-tablespoon measuring spoon to press a well into the center of each cookie. The spoon’s rounded shape creates the perfect indentation for holding the lemon curd.
- Fill with care: Fill each well with a generous teaspoon of your prepared lemon curd. Don’t overfill, as the curd will bubble and spread slightly during baking.
- Bake in batches: Keep the second batch of prepared cookies in the refrigerator while the first batch bakes. Cold dough going into a hot oven helps maintain the cookies’ shape.
- Watch closely while baking: Bake for 9-12 minutes, until the edges are set and just beginning to turn golden. The cookies should spread slightly and develop characteristic cracks around the edges, while the lemon curd will puff up just a bit.
- Cool properly: Allow the cookies to cool on the baking sheet for 5-10 minutes before transferring to a wire rack to cool completely. This gives them time to firm up enough to move without breaking.
Expert Tips for Lemon Thumbprint Cookie Success
After making these cookies countless times, I’ve discovered several tricks that help ensure perfect results every time:
- Use room temperature ingredients for the cookie dough—especially the butter and eggs. This creates a smoother, more uniform dough.
- Don’t skip the chilling time. Even if you’re in a hurry, at least 30 minutes in the freezer (instead of an hour in the refrigerator) will help your cookies hold their shape.
- If your lemon curd seems too runny after cooking, it will continue to thicken as it cools. However, if it’s still not thick enough after cooling, you can return it to low heat for a few more minutes of cooking.
- For the brightest yellow curd, use fresh lemons with vibrant yellow skins. Meyer lemons create a slightly sweeter, more floral curd if you can find them.
- Make the indentations deeper than you think you need. They tend to rise and shallow out during baking, so a deeper initial well ensures you’ll have enough space for a generous amount of curd.
- If your cookies spread too much during baking, your dough may have been too warm. Try chilling the shaped cookies for 15 minutes before baking the next batch.
Variations to Try
Once you’ve mastered the basic recipe, consider these delicious variations:
- Lemon-Raspberry Thumbprints: Before adding the lemon curd, place a small dot of raspberry jam in the bottom of each well. The berry flavor complements the lemon beautifully.
- Lemon-Blueberry Cookies: Fold 1/2 cup dried blueberries into the cookie dough before chilling for a fruity twist.
- Lemon-Lavender Variation: Add 1 teaspoon of culinary-grade dried lavender to the sugar when you’re rubbing in the lemon zest. The floral notes pair wonderfully with the citrus.
- Lemon-Thyme Cookies: Add 1 teaspoon of fresh thyme leaves to the cookie dough for a subtle herbal note that elevates these cookies to something truly special.
- Lemon-Ginger Thumbprints: Add 1/2 teaspoon of ground ginger to the dry ingredients for a warmly spiced variation.
Storage and Make-Ahead Tips
These lemon thumbprint cookies taste best within the first two days, but proper storage can extend their life and freshness:
- Store in an airtight container at room temperature for up to 3 days. Place wax paper between layers to prevent sticking.
- For longer storage, refrigerate for up to a week. The coolness may firm up the cookies slightly, so let them come to room temperature before serving for the best texture.
- Make ahead options: The lemon curd can be made up to 3 days ahead and stored in the refrigerator. The cookie dough can be mixed and chilled for up to 2 days before baking, or frozen in a log for up to 3 months. Simply thaw in the refrigerator overnight before shaping and baking.
- Freeze baked cookies for up to 3 months in a single layer, then transfer to a container with parchment between layers. Thaw at room temperature before serving.
Perfect Occasions for Lemon Thumbprint Cookies
These bright, cheerful cookies are perfect for so many occasions:
- Spring and summer gatherings, when their sunny appearance matches the season
- Baby and bridal showers, where their elegant appearance impresses guests
- Afternoon tea parties, paired with Earl Grey or herbal teas
- Mother’s Day celebrations, as a sweet homemade gift
- Easter dessert tables, alongside other spring-themed treats
- Holiday cookie exchanges, where they stand out among the typically spiced seasonal offerings
Troubleshooting Common Issues
Even experienced bakers occasionally run into problems. Here are solutions to common issues with these cookies:
- Curd too runny? It may need more cooking time, or it might just need more time to set as it cools. Remember that hot curd continues to thicken as it cools.
- Cookies spreading too much? Your dough may be too warm or your butter too soft. Try chilling the shaped cookies before baking.
- Wells disappearing during baking? Make the indentations deeper and chill the shaped cookies before baking to help maintain their shape.
- Curd bubbling over? You may have filled the wells too full. Use less curd in the remaining cookies, or make your wells deeper.
Why These Cookies Will Become Your New Favorite
There’s something undeniably cheerful about these lemon thumbprint cookies. Perhaps it’s their sunny centers, or maybe it’s the way they manage to be both sophisticated and comforting at the same time. Whatever the reason, they’ve become my most requested recipe for good reason.
The combination of buttery cookie and bright, tangy curd creates a perfect balance that appeals to almost everyone. They’re special enough for celebrations but simple enough for everyday baking. The hands-on process of rubbing zest into sugar, carefully shaping each cookie, and filling them with homemade curd makes the experience of creating them almost as enjoyable as eating them.
So the next time you’re looking for a cookie recipe that’s sure to impress, give these lemon thumbprints a try. I’m confident they’ll earn a permanent spot in your baking repertoire, just as they have in mine. The bright flavor of fresh lemons, captured in both the tender cookie and the silky curd center, creates a little bite of sunshine that’s welcome in any season.
Whether you’re an experienced baker or trying thumbprint cookies for the first time, this recipe offers the perfect balance of approachable technique and impressive results. The only problem you might encounter is how quickly they disappear once you set them out to share!