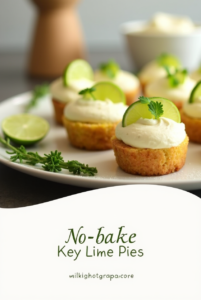
When summer temperatures soar, the last thing anyone wants to do is turn on the oven. That’s where these delightful No-Bake Mini Key Lime Pies come to the rescue! As someone who has been testing and perfecting dessert recipes for years, I can confidently say these little treats deliver all the tangy, creamy goodness of traditional key lime pie without the hassle of baking.
Why You’ll Love These Mini Key Lime Pies
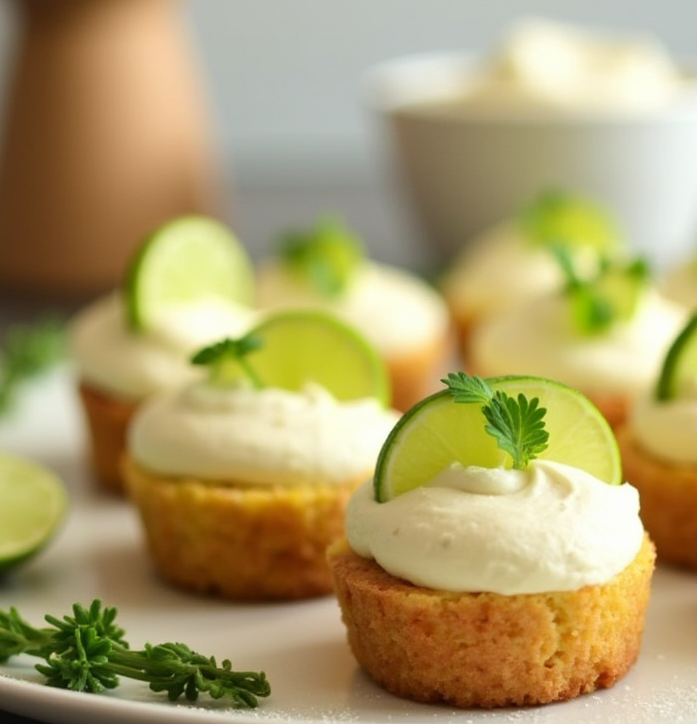
There’s something magical about the combination of tart key lime and creamy cheesecake filling that makes these mini desserts absolutely irresistible. The contrast between the crunchy biscuit base and the smooth, zesty filling creates a perfect harmony of textures and flavors that dance on your palate.
What makes these particularly special is their individual serving size. Not only are they adorable, but they’re also practical for entertaining or for grabbing a quick sweet treat without committing to cutting a slice from a full pie. Plus, the no-bake aspect means you can whip these up even on the hottest summer days without heating up your kitchen.
The Secret to Perfect Mini Key Lime Pies
After numerous attempts to perfect this recipe, I’ve discovered a few secrets that make all the difference. First, using genuine key lime juice rather than regular lime juice provides that distinctive tangy flavor that true key lime pie enthusiasts crave. If you can’t find fresh key limes, bottled key lime juice works wonderfully too.
Second, the ratio of cream cheese to lime juice is crucial. Too much lime juice can prevent proper setting, while too little won’t give you that signature tangy punch. The measurements provided here have been carefully calibrated for the perfect balance.
Finally, allowing proper chilling time is non-negotiable. These little beauties need at least 4 hours (preferably overnight) in the refrigerator to set properly and develop their flavors fully.
Ingredients You’ll Need
For the Base:
- 75g Digestive Biscuit Crumb (about 5 full-sized digestive biscuits)
- 30g Butter, melted
For the Cheesecake Filling:
- 339g Cream Cheese (full-fat works best)
- 112g Caster Sugar
- 60ml Key Lime Juice (freshly squeezed if possible)
- 1/2 tbsp Grated Lime Zest
- 1/2 tsp Vanilla Extract
- 1 Large Egg
For the Topping:
- Whipped Cream (made from 120ml Heavy Cream + 7g Icing Sugar)
- Lime Slices for garnish
- Additional Grated Lime Zest for sprinkling
Equipment Needed
- 6-8 small glass jars or ramekins
- Food processor or ziplock bag and rolling pin (for crushing biscuits)
- Electric mixer
- Mixing bowls
- Measuring cups and spoons
- Piping bag (optional, for the whipped cream)
Step-by-Step Instructions
Preparing the Base
- Crush the digestive biscuits until you have fine crumbs. You can use a food processor for speed or place the biscuits in a sealed bag and crush with a rolling pin for a more rustic texture.
- Melt the butter in a microwave or small saucepan until completely liquid. Be careful not to burn it!
- Combine the biscuit crumbs and melted butter in a bowl, mixing thoroughly until all crumbs are moistened.
- Divide the mixture evenly between your serving glasses or ramekins, pressing down firmly with the back of a spoon to create a compact base.
- Refrigerate the bases while you prepare the filling, allowing them to firm up.
Creating the Filling
- Ensure your cream cheese is at room temperature before beginning. This is crucial for achieving a smooth, lump-free filling.
- In a large bowl, beat the cream cheese until smooth and creamy. This usually takes about 2 minutes with an electric mixer.
- Gradually add the caster sugar while continuing to beat, until well incorporated and the mixture is light and fluffy.
- Mix in the key lime juice, lime zest, and vanilla extract until just combined. Don’t overmix at this stage, as this can affect the texture.
- Gently fold in the egg until fully incorporated. The mixture should be smooth and have a light, pourable consistency.
- Divide the filling evenly among your prepared bases, leaving a small gap at the top for the whipped cream topping.
- Refrigerate for at least 4 hours, or ideally overnight. The filling needs time to set properly.
Adding the Finishing Touches
- Just before serving, prepare the whipped cream by beating the heavy cream with icing sugar until soft peaks form.
- Top each mini pie with a generous dollop of whipped cream. For an extra-special presentation, use a piping bag fitted with a star nozzle.
- Garnish with a small slice of lime and a light sprinkle of freshly grated lime zest.
Tips for Success
- Temperature matters: Ensure your cream cheese is at room temperature before beginning to avoid lumps in your filling.
- Don’t rush the setting process: These mini pies need adequate time in the refrigerator to set properly.
- Fresh is best: While bottled key lime juice works well, freshly squeezed juice and zest will give you the brightest, most authentic flavor.
- Make ahead: These mini pies can be prepared up to 2 days in advance – just add the whipped cream and garnishes right before serving.
- Storage: Keep refrigerated and consume within 3 days for optimal freshness and flavor.
Common Questions About No-Bake Mini Key Lime Pies
Can I use regular limes instead of key limes?
Yes, you can substitute regular limes if key limes aren’t available. The flavor will be slightly different but still delicious. Regular limes are less sweet and slightly more bitter than key limes, so you might want to add an extra 5-10g of sugar to compensate.
My filling isn’t setting properly. What went wrong?
The most common reason for a filling that won’t set is using cold cream cheese, which can create lumps and affect the texture. Always ensure your cream cheese is at room temperature before starting. Additionally, make sure you’re measuring the lime juice accurately – too much liquid can prevent proper setting.
Can I make these dairy-free?
Yes! You can substitute dairy-free cream cheese and coconut cream (chilled and whipped) for the topping. The texture will be slightly different, but they’ll still be delicious.
Can I freeze these mini pies?
These pies freeze surprisingly well without the whipped cream topping. Freeze them in their containers, tightly covered with plastic wrap, for up to a month. Thaw overnight in the refrigerator and add fresh whipped cream before serving.
Perfect Occasions for Serving No-Bake Mini Key Lime Pies
These adorable individual desserts are perfect for so many occasions:
- Summer barbecues and garden parties – they’re refreshing and can be made ahead
- Dinner party finales – individual servings make for elegant presentation
- Baby showers and bridal showers – they’re easy to serve and don’t require cutting
- Family gatherings – they appeal to both adults and children
- Weeknight treats – make a batch on Sunday for desserts throughout the week
Why This Recipe Works
Having experimented with countless key lime pie variations over the years, I can tell you that this recipe strikes the perfect balance between ease of preparation and spectacular results. The individual portions set more reliably than a full-sized no-bake pie, and the ratio of tangy filling to crunchy base is spot-on.
The touch of vanilla extract adds depth to the lime flavor without overpowering it, while the simple whipped cream topping provides a neutral counterpoint to the tangy filling. It’s a carefully calibrated combination that delivers consistent results every time.
Final Thoughts
There’s something deeply satisfying about creating a dessert that looks impressive but requires minimal effort. These No-Bake Mini Key Lime Pies deliver on both fronts – they’re incredibly simple to make but look and taste like something from a high-end patisserie.
Whether you’re an experienced home baker or just starting out, this recipe is foolproof and guaranteed to impress. The bright, zesty flavor is perfect for summer, but honestly, these little treats are welcome at my table any time of year.
So gather your ingredients, clear some space in your refrigerator, and prepare to discover your new favorite dessert. Your friends and family will be begging for the recipe – and you’ll have to decide whether to share your new secret or keep it to yourself!
Note: While this recipe includes an egg in the filling, it’s important to use fresh, high-quality eggs. If you’re concerned about consuming raw egg, there are pasteurized egg products available that can be substituted.